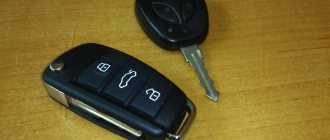
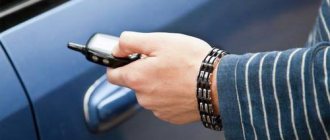
Lada Largus cars use special key fobs that perform the function of a key at the same time. The key fob has a built-in microcircuit that is responsible for the functioning of the standard alarm system, locking and unlocking car door locks.
The design of the key is, in principle, very similar to the Kalina and Granta models, but the shape itself is slightly different. The keychain can be disassembled in exactly the same way.
- It is necessary to unscrew the screw securing the two parts of the housing
- Using a thin screwdriver, separate these two parts
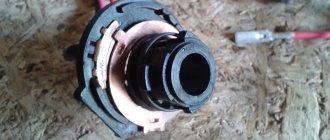
After this we will have access directly to the battery itself. From the factory, the key fob is equipped with a special CR2016 battery with a voltage of 3 Volts. Use a screwdriver to pry up the battery and remove it to replace it:
Carefully, using tweezers, without touching the battery with your hands, place the new one in place of the old one. The price of a couple of such batteries in stores is about 200 rubles for high-quality products from famous manufacturers.
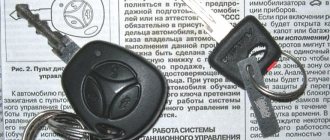
The remote control key for Lada Priora, Kalina, Granta, UAZ Patriot, Niva is programmed on the car without any devices. To do this, you need to have a so-called training key in your hands - which has a red pip on the head of the key. Used in cars with APS-6 unit.
The remote control key looks like this:
IMPORTANT ANNOUNCEMENT.
We work and consult ONLY in Nizhny Novgorod. If you are from another region, do not write or call us - we will not answer. We do not treat keys or cars from other cities: contact specialists in your region.
How to disassemble a Lada key
For Lada Vesta/XRAY: open the key body by unsnapping the latches around the perimeter using a thin slotted screwdriver.
For Lada Largus: unscrew the fastening screw (Phillips screwdriver), and then open the key body, unclicking the latches around the perimeter using a thin slotted screwdriver.
For Lada Priora/Kalina/Granta: unscrew the fastening screw (Phillips screwdriver), and then open the key body, unclicking the latches around the perimeter using a thin slotted screwdriver.
The process is also shown in the video:
Let us remind you that if after replacing the battery the standard alarm still does not work, read these instructions. By the way, do you know how to make a flip key for a Lada yourself?
- The remote control is equipped with a 3V CR2032 lithium battery.
- The supply voltage is normal if the LED indicator briefly flashes when you press the remote control buttons.
- The voltage is below normal if, when you press the remote control buttons, the LED indicator lights up with two short flashes or does not light up at all.
You will need flat and Phillips blade screwdrivers.
1. Remove the screw securing the remote control housing cover...
2. ...disconnect the cover from the housing...
3. ...and, overcoming the resistance of the latch, remove the battery.
4. Install a new battery for the Lada Priora and assemble the remote control in the reverse order of removal. When installing the element, pay attention to the polarity of the element connection.
The remote control key for Lada Priora, Kalina, Granta, UAZ Patriot, Niva is programmed on the car without any devices. To do this, you need to have in your hands a so-called training key - which has a red pip on the head of the key. Used in cars with APS-6 unit.
general information
The main task of the immobilizer is to prevent possible unauthorized attempts to start the engine. Typically, Ladas (in particular Prioras, Kalinas and Grants) are equipped with standard APS-6 anti-theft devices. On Luxury vehicles, standard immobilizers are activated by the manufacturer before the car goes on sale, but on vehicles of other configurations this must be done independently. Below we will provide instructions for learning the key and activating the immobilizer, and now we will take a closer look at its kit.
The kit consists of two working keys (black) and one master key (red), its task is to train the system. Using the control lamp, signals are sent about the current state of the programming process, and if it starts flashing quickly (five times within a second), then the learning process is proceeding correctly.
Stopping blinking is a sign of incorrect actions or breakdown. It may also indicate that the allotted time for training has been exceeded or that the key used was trained by another immobilizer.
Activating the immobilizer requires the following actions:
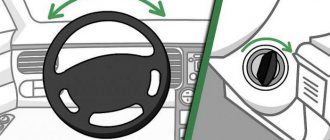
- The doors are closed, the ignition is turned on with the red key and they wait for six seconds;
- The key is pulled out, and the car icon on the panel begins to blink rapidly (five times per second);
- Then, as quickly as possible (after a maximum of five seconds), the ignition is turned on with the black key;
- Normally, three and then two squeaks will be heard, after which the ignition is turned off and the key is removed;
- No later than five seconds later, the ignition is turned on with the red key;
- When you hear three and then two squeaks, the ignition turns off, but the key is not removed from the lock;
- After one squeak, the ignition is turned on again (again spending no more than five seconds on this) for two, maximum three seconds;
- Then the ignition is turned off, but the key is not removed;
- There are three beeps, the machine goes out, but you don’t need to remove the key right away; you need to take it out after ten seconds;
- Check the activation of the immobilizer by turning on the ignition with any of the keys. Successful activation of the device will be indicated by a non-lit machine icon.
Crib:
- The doors are closed and the ignition is turned on for six seconds with a red key, which is then removed from the lock;
- Next, the ignition is turned on with the black key, after three, and then two squeaks, the key is removed;
- Turn the ignition back on using the red key, after three and then two squeaks, turn it off and hear another squeak;
- The ignition is turned on for a few moments, after which it is immediately turned off; In the future, the ignition should not be turned on for at least ten seconds.
When performing subsequent code synchronization, turn on the ignition with a black key, then wait about six seconds. A warning light flashing once a second will indicate an error, then turn off the ignition and wait ten seconds. Then it is turned on again, the motor starts, and the lamp stops flashing.
Many Lada cars (for example, Priors, Kalinas, Vestas, Grants, etc.) use ignition keys with a factory alarm, controlled by a remote control using a central lock. And if such keys stop functioning normally, then you need to immediately change the battery.
You can calculate whether the battery is really dead like this. In Largus, Vesta and XRAY, a dead battery will affect both the clarity of operation and the operating range of the remote control unit; these indicators will significantly decrease. On Kalinas, Grants and Priors, a faulty battery will indicate itself through two short-term flashes on the indicator when you press one of the remote control keys. In addition, a complete absence of flashes will be a signal for the need to replace the battery.
First of all, you will need to disassemble the key; to carry out this manipulation you must:
- On Vesta and XRAY, the case opens quite simply, but first you will have to unclip the latches located along its perimeter using a slotted screwdriver;
- On Lada Largus, Grants, Priors and Kalinas, you need to remove the mounting screw using a Phillips screwdriver, then open the case by snapping the latches in the manner described above.
Inside the case you will see a battery shaped like a tablet; to remove it you will need to slightly pry the battery with a screwdriver. After installing a new battery, the case is closed using the same steps as opening it, performed in reverse order. It is better to close the case from the top, this will greatly simplify the process.
Purpose:
The remote control is designed for remote control of locking and unlocking of car doors, turning on and off super-locking doors, turning on and off the alarm system, raising the windows, controlling the locking of the tailgate (trunk lid), and also as a coded electronic key for the APS-6 immobilizer
The remote control is mounted on the blade of the ignition switch key type 1118-3704010 and is designed to operate:
- with electrical package control unit 1118-6512010
- with driver's door module 1118-3763080, 2170-3763080-00/10
2) via transponder channel:
- with immobilizer control unit APS-6 2123-3840010-ХХ;
- with immobilizer control unit APS-6.1 1118-3840010-ХХ;
- with electrical package controller-2170-3763040.
Advantages and disadvantages
Advantages of miniature CR2032 batteries:
- constant voltage, which ensures uninterrupted operation of the element throughout its entire service life;
- increased energy intensity;
- the capacity of a miniature battery practically does not depend on the load current; accordingly, when exposed to a higher current, their service life will be longer compared to alkaline batteries of the same capacity;
- compactness, thanks to which power supplies can be used even in the smallest devices;
- light weight;
- long storage life of at least 10 years, some manufacturers claim that their products can be stored for up to 15 years;
- Due to the absence of water in the electrolyte solution, the power sources are “immune” from the effects of temperature changes, as well as elevated temperatures.
The only disadvantage of devices like CR2032 is their high price.
Training procedure:
Carrying out the training procedure leads to the following consequences:
- the engine control controller activates the anti-theft function if it has not been activated;
- the system changes its password to a new one chosen at random;
- a new system password is written into the training key;
- all remote controls that were previously trained are erased from memory;
- The codes of those remote control units that were trained in this training procedure are stored in memory.
The training procedure is applied in the following cases:
- activating the anti-theft function in the controller (for example, in a new car or replacing a faulty controller);
- erasing old and training new remote controls if lost;
- changing the system password if the owner admits that his system password may have been read (for example, when selling a car from one owner to another)
- remote control training when replacing a faulty immobilizer with a new one.
Only new remote control units or those that were previously trained using the training key used in this training procedure can be trained. It is impossible to learn a remote control key from another car into your car.
Please note: Due to the importance of the training key, it is not recommended to use it for everyday use and should be kept in a safe place.
Before starting the training procedure, fill the car with at least 10 liters of gasoline so as not to get confused by the squeaks.
Recommendations for selecting a 2032 battery
In order for the device to work for a long time, when choosing, you must focus on several criteria simultaneously.
Criterias of choice
General selection options:
- Battery type. Depending on the equipment where CR2032 batteries will be used, their type may be different. Starline pager batteries typically use lithium batteries. Older models may use alkaline batteries.
- Device format. In our case it is CR2032.
- Rated voltage parameter. This value is measured in volts and can range from 1.5 to 12 volts. To obtain a voltage of more than three volts, you can connect several power sources into one circuit.
- The size of the charging capacity is measured in Ah.
- The discharge current parameter is measured in amperes. This is the value that determines the moment at which the battery reaches the capacity declared by the manufacturer. In some cases, instead of current, manufacturers indicate a resistance parameter.
- The highest discharge current, measured in amperes. This is a parameter at which the consumer can discharge the power source safely and over a long period of time. In this case, the device should not overheat, its structure should not be destroyed, and the electrolyte solution should not leak out. Manufacturers may specify the minimum load resistance parameter instead of current.
- The magnitude of the discharge pulse current is measured in amperes. This parameter indicates at what current a short-term discharge of the power source is allowed. It should be no more than a few seconds.
- The internal resistance parameter for power supplies is rarely indicated. Using this value, the consumer can calculate the efficiency of the battery at a specified current. The result is an indicator of useful action. In practice, the lower the resistance value of the power supply, the more efficiently it will operate on a powerful load.
Greyhound Channel provided a review of high-quality power supplies purchased in China.
Which company should you prefer?
Manufacturers that have proven themselves on the positive side among buyers:
- Duracell. Power supplies of this brand perform their functions in the temperature range from -20 to +54 degrees. With a constant load of 6.5 kOhm at a temperature of 21 degrees, the product will discharge in 450 hours. If the load is 15 kOhm, then the operating time of the power supplies will be 1100 hours.
- Energizer. The nominal capacity declared by the manufacturer is 240 mAh. Studies have shown that with a 15 kOhm load on the device, the power supply will discharge in an average of 1150 hours.
- G.P. At operating temperatures from -30 to +65 degrees, the nominal capacity parameter is 210 mAh. If the power supply operates at a temperature of 23 degrees, then under load conditions of 15 kOhm it will be able to operate for no more than 1100 hours.
- Maxel. Just like other products. are supplied to the market in a protected, hermetically sealed case. If the device is discharged at a temperature of 21 degrees Celsius under a load of 15 kOhm, it will take 1000 hours.
- Panasonic. It can also work no more than one thousand hours under load conditions of 15 kOhm, only the temperature will be not 21, but 20 degrees. According to the manufacturer, power supplies can operate successfully in winter at temperatures of at least -30 degrees. The maximum operating air temperature should be no more than 60 degrees.
- Renata. Products of this brand are characterized by higher resistance to low and high temperatures. The operating range is from -40 to +85 degrees. Operating at 23 degrees Celsius and under load conditions of 15 kOhm, the power supply can operate for no more than 1200 hours.
Of the manufacturers reviewed, Panasonic and Maxel showed the least effective performance, while Renata batteries can last the longest.
Where to buy and how much does it cost?
You can purchase CR2032 format power supplies:
- in shops;
- in supermarkets;
- in markets;
- from online sellers.
The average cost of one battery is about 500-100 rubles apiece. You can find cheaper analogues, but their service life will be shorter.
Key programming instructions for Lada Kalina, Priora, Granta, etc.
- Close all doors. Turn on the ignition with the training key and wait in the on state for at least 6 seconds.
- Turn off the ignition. The indicator light in the warning lamp unit should flash quickly (at a frequency of 5 times per second) while the learning procedure is being carried out correctly. If the lamp stops flashing quickly, it indicates an incorrect operation, an out-of-time interval, or a malfunction. Remove the training key from the ignition switch.
- While the warning lamp is flashing (about 6 seconds), insert the remote control and turn on the ignition. The immobilizer buzzer should emit three beeps. If the buzzer does not sound and the indicator has stopped flashing, this means: - the time interval of 6 seconds has been exceeded and it is necessary to repeat the learning procedure, starting from step 1; -immobilizer is faulty
- Wait 6 seconds for the buzzer to emit two more beeps and turn off the ignition.
- If it is necessary to train the second remote control, then you should perform steps 3...4 again, using the second learning remote control to turn on the ignition. If not, continue from step 6.
- After turning off the ignition for no more than 6 seconds, while the indicator is flashing, remove the remote control, insert the learning key and turn on the ignition. The buzzer should beep three times. Wait 6 seconds until the buzzer beeps two more times.
- Turn off the ignition without removing the training key, wait 6 seconds until the buzzer sounds a single sound signal. The indicator should flash twice as fast. If the sound signal does not sound and the flashing indicator stops, you should return to step 1 and repeat the learning procedure. If a repeated failure occurs when performing step 7, this means that the ECM was previously trained with a different key, in which case the controller should be replaced.
- After the buzzer gives a single sound signal, no later than 3 seconds, turn on the ignition for 2...3 seconds and then turn it off (after turning on the ignition, the buzzer will sound three times and the indicator will stop flashing). The hazard warning lights should flash and the car horn should beep.
- Remove the learning key. Wait with the ignition off for at least 10 seconds. Insert the working key and turn on the ignition. Wait 6 seconds, if the indicator does not flash, test start the engine, the engine should start. If the indicator flashes, turn off the ignition and wait at least 10 seconds. Turn on the ignition. The warning light should not flash and the engine should start. If, after turning on the ignition, after 6 seconds the indicator lights up with a constant light, then the learning procedure must be repeated, starting from step 1.
general information
The main task of the immobilizer is to prevent possible unauthorized attempts to start the engine. Typically, Ladas (in particular Prioras, Kalinas and Grants) are equipped with standard APS-6 anti-theft devices. On Luxury vehicles, standard immobilizers are activated by the manufacturer before the car goes on sale, but on vehicles of other configurations this must be done independently. Below we will provide instructions for learning the key and activating the immobilizer, and now we will take a closer look at its kit.
The kit consists of two working keys (black) and one master key (red), its task is to train the system. Using the control lamp, signals are sent about the current state of the programming process, and if it starts flashing quickly (five times within a second), then the learning process is proceeding correctly.
Stopping blinking is a sign of incorrect actions or breakdown. It may also indicate that the allotted time for training has been exceeded or that the key used was trained by another immobilizer.
The process of activating the standard immobilizer
Activating the immobilizer requires the following actions:
- The doors are closed, the ignition is turned on with the red key and they wait for six seconds;
- The key is pulled out, and the car icon on the panel begins to blink rapidly (five times per second);
- Then, as quickly as possible (after a maximum of five seconds), the ignition is turned on with the black key;
- Normally, three and then two squeaks will be heard, after which the ignition is turned off and the key is removed;
- No later than five seconds later, the ignition is turned on with the red key;
- When you hear three and then two squeaks, the ignition turns off, but the key is not removed from the lock;
- After one squeak, the ignition is turned on again (again spending no more than five seconds on this) for two, maximum three seconds;
- Then the ignition is turned off, but the key is not removed;
- There are three beeps, the machine goes out, but you don’t need to remove the key right away; you need to take it out after ten seconds;
- Check the activation of the immobilizer by turning on the ignition with any of the keys. Successful activation of the device will be indicated by a non-lit machine icon.
Crib:
- The doors are closed and the ignition is turned on for six seconds with a red key, which is then removed from the lock;
- Next, the ignition is turned on with the black key, after three, and then two squeaks, the key is removed;
- Turn the ignition back on using the red key, after three and then two squeaks, turn it off and hear another squeak;
- The ignition is turned on for a few moments, after which it is immediately turned off; In the future, the ignition should not be turned on for at least ten seconds.
When performing subsequent code synchronization, turn on the ignition with a black key, then wait about six seconds. A warning light flashing once a second will indicate an error, then turn off the ignition and wait ten seconds. Then it is turned on again, the motor starts, and the lamp stops flashing. If it lights up three seconds after turning on the ignition and continues to burn, this will indicate that the anti-theft function is not working, and therefore the key learning process will need to be repeated.
Battery replacement process
Many Lada cars (for example, Priors, Kalinas, Vestas, Grants, etc.) use ignition keys with a factory alarm, controlled by a remote control using a central lock. And if such keys stop functioning normally, then you need to immediately change the battery.
You can calculate whether the battery is really dead like this. In Largus, Vesta and XRAY, a dead battery will affect both the clarity of operation and the operating range of the remote control unit; these indicators will significantly decrease. On Kalinas, Grants and Priors, a faulty battery will indicate itself through two short-term flashes on the indicator when you press one of the remote control keys. In addition, a complete absence of flashes will be a signal for the need to replace the battery.
First of all, you will need to disassemble the key; to carry out this manipulation you must:
- On Vesta and XRAY, the case opens quite simply, but first you will have to unclip the latches located along its perimeter using a slotted screwdriver;
- On Lada Largus, Grants, Priors and Kalinas, you need to remove the mounting screw using a Phillips screwdriver, then open the case by snapping the latches in the manner described above.
Inside the case you will see a battery shaped like a tablet; to remove it you will need to slightly pry the battery with a screwdriver. After installing a new battery, the case is closed using the same steps as opening it, performed in reverse order. It is better to close the case from the top, this will greatly simplify the process.
Replacing the remote control battery
The remote control is equipped with a CR2032 lithium battery, the initial supply voltage of which is 3 V. If the remote control supply voltage is within normal limits, then each time you press any button on the remote control, the indicator lights up with a short flash. If, when you press any button on the remote control, the indicator lights up with two short flashes or does not light up at all, then you should replace the battery with a new one.
To do this, you need to unscrew the screw from the side of the case opposite the control buttons, separate the halves of the case, remove the board from the case, replace the battery with a new one, observing the polarity; insert the board into the case; snap the housing halves together and tighten the screw.
Description and characteristics of the 2032 battery
Description of the properties and characteristics of CR2032 lithium devices:
- In terms of size, the battery belongs to disk devices;
- the type of electrolyte that is poured inside the battery is manganese-lithium;
- the voltage supplied by the device is three volts;
- the temperature range for storing and using miniature batteries is from -40 to +60 degrees;
- According to the IEC standard, these devices are classified as CR2032;
- The battery dimensions are 2 cm in diameter and 0.32 cm in thickness.
Resynchronization of remote control codes
In cases where the remote control buttons are pressed outside the range of the radio channel, the “floating” code counter in the remote control goes out of synchronization with the counter in the system control unit. If the number of button presses outside the signal reception area of the system exceeds 1000, the system stops responding to remote control commands. In this case, the remote control training procedure should be repeated.
Updated August 01, 2013
Due to the increasing number of cases of lost training (master) keys for car owners of Kalina, Priora, Grant, Niva-Chevrolet, we are introducing a new type of service: registration of working keys in these cars, without a master key!
Usually in such cases, it is necessary to change a set of blocks: ECU (electronic engine control unit), APS unit, glass control unit, ignition switch complete with door cylinders and new keys, etc.
Now in our company you can register a working key with buttons without a training key, and for an additional fee you can receive a new training (red) key for your car. For this procedure, you need to come by car and leave it while the work is being carried out. The work includes dismantling the necessary units (ECU, APS, etc.) from the car, programmatically changing data, installing units on the car and registering keys. We emphasize that a key registered in this way will cost more than registering a remote control yourself if you have a training key, but naturally cheaper than buying and replacing a set of blocks with new ones.
Video
Max Kryukov in the video showed how to diagnose the condition of CR2032 batteries at home.
We're sorry, but the requests coming from your IP address appear to be automated. For this reason, we are forced to temporarily block access to the site.
To continue, please enter the characters from the image in the input field and click "Submit".
Cookies are disabled in your browser
. We will not be able to remember you and correctly identify you in the future. To enable cookies, follow the tips on this page.
Why did it happen so?
Perhaps the automatic requests do not belong to you, but to another user accessing the network from the same IP address as you. You need to enter the characters into the form once, after which we will remember you and be able to distinguish you from other users exiting from this IP. In this case, the page with the captcha will not bother you for quite a long time.
You may have add-ons installed in your browser that can make automatic search requests. In this case, we recommend that you disable them.
It is also possible that your computer is infected with a virus program that is using it to collect information. Maybe you should check your system for viruses.
If you have any problems or would like our support team, please use the feedback form.
Modern technology often runs on its own batteries. Such elements are considered to be accumulators and batteries. A correctly selected battery for the alarm system key fob is the key to its correct and coordinated operation. In the security industry, the 2032 battery is most often used as a battery. It is this that extends the battery life of the key fob, is inexpensive, and is compact. This energy device has a large list of positive qualities that users can learn about now.
Powering the security system key fobs, using a 2032 battery
ATTENTION! A completely simple way to reduce fuel consumption has been found! Don't believe me? An auto mechanic with 15 years of experience also didn’t believe it until he tried it. And now he saves 35,000 rubles a year on gasoline! Read more"
Modern alarm systems have the ability to work productively with two, three or more key fobs. A key fob is a kind of control panel that a motorist can use at any time. So that it does not often discharge and does not stop working at the most inopportune moment, car enthusiasts use 2032 type batteries. Small 3-volt or 12-volt samples show high efficiency, have a low level of self-discharge, and operate in a wide temperature range. The performance indicators of 23 ae batteries are still leading the market, and products of this type are becoming in great demand.
What is a 2032 battery?
The voltage of a small 2032 battery is 12 volts. This is enough to serve a car enthusiast for 2-3 years. 377 batteries are called tablets, because they have exactly this appearance. Important parameters that determine the importance of this battery are:
- The product is made of lithium alloy;
- weight is 3 grams;
- low level of self-discharge;
- high levels of resistance to different temperature conditions;
- long time of productive work;
- capacity 225 miles ampere;
- has a diameter of 20 millimeters;
- thickness is 3.2 millimeters.
The 2032 battery is a compact, round device that is designed for installation in car alarm key fobs, pagers, and other household devices. The 12-volt, compact battery is capable of working productively under any conditions, this is its main advantage.