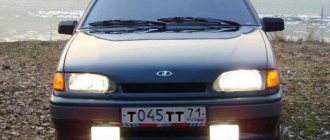
Good day, ladies and gentlemen. This time the Priora pleased me that its left fog light stopped working. Seeing such garbage, I immediately thought that my PTF light had burned out and went to look for it. Having stopped on the way to the store, I was very surprised by the prices for lamps in PTF on a Priora, and I was also surprised how much the prices for it differ more than for other cars of our AvtoVAZ, and I was also surprised how much the base of a light bulb increases its price (I remember on the top ten there was an H1 base and the price of light bulbs started at 50 rubles)
After that I headed to the garage to replace it.
Arriving at the garage, I thought I’d change it in five minutes, like I did on the 10-tank, but never mind, it turns out that on a Prior with an SE bumper, in order to replace the lamp, you need to remove the bumper itself, otherwise you’ll never get close to the fog light, and even more so to the light bulb itself.
After removing the bumper, I was in for a small shock, which I found in it, namely a huge dragonfly, which made me go crazy for several minutes.
Replacing the bulb in the fog lamp. General leadership
Using the example of Kio Rio 3
1). We install the car on the overpass and provide convenient access to the lower part of the front bumper.
2). Access to the rear part of the fog lamp is blocked by the front part of the fender liner, so use a Phillips screwdriver to unscrew the two fastening screws.
3). We bend the fender liner.
4). We put our hand into the opened hatch and disconnect the block with the power supply wire. To do this, squeeze the side clamps.
5). We take out the light bulb.
6). We replace the old light bulb with a new one and install it in place, doing all the steps in the reverse order.
Replacing the light bulb in the fog lamp on a Lada Priora
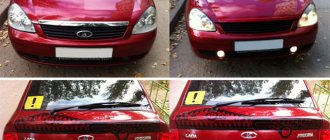
1). Using a screwdriver, remove the decorative bumper trim.
2). We unscrew the screws securing the lighting fixture, and then remove it.
3). We turn the body counterclockwise, thus releasing the necessary insides.
4). We disconnect the wiring housing, unclip the holder, remove the lamp and install a new one.
5). We assemble in the reverse order of removal.
Replacing a light bulb in a fog light on a Lada Vesta
1). We gain access to the hatch cover on the fender liner by turning the front wheel as far as possible into the arch.
2). Remove the fender liner/locker hatch by turning it clockwise.
3). Remove the fog lamp by turning it counterclockwise.
4). Disconnect the block with wires from the lamp.
5). We install the new lamp in the reverse order.
The design of the electrical system of the VAZ 2170
A single-wire circuit is the basis for the electrical equipment of the Lada Priora VAZ 2170 model. The negative terminals of consumers and sources of electricity are connected to the ground. The car body acts as a second wire. A multi-wire circuit is typical for the electrical circuits of the engine control system. Through the electronic control unit they are connected to the ground of the machine.
The combined ignition switch is designed for switching the main circuits of the VAZ 2170. It consists of a mechanical anti-theft device with a lock and a contact part. With the help of external lighting, the fog light and external lighting switches are combined into a control unit. The following elements are located on the dashboard console trim:
- Hazard switch;
- Rear window heating switch;
- Switch for operating modes of the electric heater fan.
The steering column switch unit consists of a windshield washer, a windshield wiper, turn indicators and headlight switches. High-power electrical consumers are switched on using electromagnetic relays.
If you do not know how to change a low beam lamp on a VAZ 2170, you should familiarize yourself with the step-by-step instructions and, above all, the points that should be taken into account when working.
Things to remember:
- Any repair of the Lada Priora that concerns the electrical equipment of the car should be carried out only after you disconnect the battery. It can only be connected when the ignition is turned off.
- Do not check the serviceability of the circuits for a spark when checking the circuits of electrical equipment, otherwise the elements of the electrical equipment of the car.
- Do not use fuses that are not designed for use in the vehicle or are rated for too high a current. Also, wire cannot be used instead of fuses.
- When replacing fuses, it is strictly forbidden to use screwdrivers, since a short circuit may occur in the electrical circuits.
- It is strongly recommended not to disconnect the battery while the engine is running, to prevent the voltage regulator from becoming damaged and to prevent damage to electronic equipment.
- The low and high beam lamps in the Lada Priora are halogen, so you cannot touch them, since grease stains cause a certain degree of darkening of the windows.
- It is better to replace LED low beam lamps while wearing clean gloves. Wipe the surface of the lamp with a clean cloth treated with alcohol if you accidentally touch it.
- Over time, the lamp may darken, therefore, the light output will decrease. That is why the low beam lamp must be replaced regularly. Don't wait until it burns out.
How to replace low beam lamps on a Lada Priora?
It is best to carry out this procedure with the battery removed.
- Remove the protective rubber cover from the headlight housing.
- Disconnect the wire block from the lamp.
- Unclench the ends of the spring clamp and remove them from engagement with the hooks of the reflector, then move the clamp away from the pump.
- Remove the high beam lamp from the headlight housing. It is worth remembering that they are halogen and it is not recommended to touch them, since marks on the surface will lead to darkening.
- Find out in advance which low-beam lamps are better and install the chosen one in the reverse order. To do this, remove the lamp socket.
- Remove the lamp from the socket and install a new one.
Just like replacing the low and high beam headlights on the car model in question, polishing the headlights can also be done independently.
Replacing the low beam lamp - video instructions
- What kind of light bulbs are there in Priora?
- How to change headlight bulbs
- How to change the bulbs in a taillight
- Video on the topic
Replacing the light bulb in the fog lamp on a Niva Chevrolet
1). We dismantle the front bumper mudguard (we will show you how to perform the work on a car manufactured after 2009).
2). Using a Torx T-20 wrench, unscrew the two screws at the bottom of the bumper.
3). Using the same tool, unscrew the four screws inside the wheel arch.
4). Using a 10mm socket, unscrew the two nuts securing the shield.
5). Remove the mudguard.
6). We press out the two clamps of the wire block.
7). Disconnect the wire block from the lamp.
 . Turning counterclockwise, remove the lamp and replace it with a new H11 lamp.
On a car manufactured before 2009, the design of the fog lamp is slightly different.
1). Remove the rubber protective cap.
2). We disconnect the negative (black) wire from the socket contact, and also disconnect the positive wire block and the lamp wire tip.
3). Squeeze and disconnect the antennae of the lamp holder.
4). We take out the lamp and replace it with a new H3 lamp.
Replacing the light bulb in the fog lamp on a VAZ 2114 2115
Reviews
Delivery of goods is carried out throughout Russia and the CIS:
1. Russian Post (from 350 rubles and above)
Delivery to all regions of the Russian Federation and CIS countries
2. Transport Companies (from 350 rubles and above)
Delivery throughout Russia and the Republic of Kazakhstan
- TK Energy (nrg-tk.ru)
- TC Business Lines (dellin.ru)
- TC SDEK (www.cdek.ru)
- TK PEK (pecom.ru)
- TK KIT (tk-kit.ru)
3. Pickup
The order can be picked up at the office at Tolyatti, 40 Let Pobedy 38, TD “Malachite”, 1st floor.
The waiting time for sending an order in our online store is approximately 2-7 working days, large orders 7-14 working days. days; color of bumpers, mirrors, body parts, spoilers, etc. 7-14 work. days; production of exhaust systems Stinger, STT, Dk-pro 7-14 slaves. days; sewing covers, upholstery, steering wheels, gear knobs, eva mats, etc. 7-14 work. days.
During this period, we will send you a tracking number by email. email to track the parcel en route.
Payment can be made in the following ways:
1. Payment to a Sberbank card
You can pay using the SBERBANK-Online application and other Bank applications.
After placing an order, making payment, do not indicate comments , we ourselves will understand by the amount of the order and the name of the sender. After receiving the funds, the status of your order will be changed to paid until 17.00 of the current day, or from 9.00 of the next Moscow time.
2. By bank card
Automatic acceptance of payments using MIR Bank cards, VISA International, Mastercard.
You can also pay with credit cards with a grace period.
To select payment for goods using a bank card, on the corresponding page you must click the “Pay for order by bank card” button.
2. Payment to QIWI wallet 89272115207
3. Payment on Yandex.Money 410013993950891
5. Payment to a bank account for legal entities and individual entrepreneurs (commission 6%)
Send your organization's details to [email protected] for invoicing. After paying the bill, be sure to send a payment order.
4. Cash on delivery of Russian Post (commission from 4%)
IMPORTANT! When sending by cash on delivery, RUSSIAN POST will take a commission for providing the cash on delivery service of 150-300 rubles, and the delivery cost also increases due to the evaluation of the goods.
Cash on delivery delivery is possible only within Russia.
ATTENTION! When choosing cash on delivery, the delivery cost is paid in advance before shipment, for the product itself upon receipt.
The amount of the order by cash on delivery should not exceed 5000 rubles; also, painted parts, goods made to order, covers, upholstery, door inserts, EVA mats, steering wheels, etc. are not sent by cash on delivery. (minimum 50% prepayment).
Be sure to save the payment receipt or a screenshot of the transfer.
The best guarantee of order fulfillment and quality is the feedback from our customers.
Reviews of our work can be found in our VKontakte group https://vk.com/topic-136384247_36675422?offset=180
We guarantee product quality, integrity and timely fulfillment of all requirements for the shipment of goods.
Replacing a light bulb in a fog light on a Renault Logan
1). Remove the protective shield on the bumper.
2). Disconnect the wires from the light bulb and pull it out.
3). We install a new lamp and connect it.
Replacing the light bulb in the fog light on a Skoda Octavia
Replacing the light bulb in the fog lamp on a Hyundai Solaris
1). We remove or turn out the wheel and use a screwdriver to unscrew the clips securing the fender liner.
2). In the same way, remove the clips securing the lower front fender liner to the front bumper and bend the fender liner back.
3). Next, carefully turn the lamp counterclockwise and pull it out of the fog lamp.
4). We disconnect the power plug, take a new lamp, connect the plug to it and install it in the fog lamp. Turn it clockwise, check for functionality and screw the fender liner back on.
5). At this point, the process of replacing the lamp in the car's fog light can be considered complete.
What kind of base is in the Priora fogs ~ AUTOINTERLINE.RU
Societies › Lada Priora Club › Blog › Who installed xenon in fog lights
I'm thinking about installing xenon foglights on my Priorka. In this regard, several questions arose:
1. Who did it, tell me how (links to blog posts are welcome)
2. How much does this business cost?
3. What you need to buy
4. What tasks may arise during operation
5. How difficult is it to do all this and can a new person do it?
Thanks in advance for your help!
Comments 25
you buy h21 xenon in the store. costs about 2 thousand, not bad. take off the bumper. look for a place for the blocks, attach it. insert xenon into the fog lights. connect the wires and enjoy
Is it possible to install it so that the bumper does not need to be removed?
4. What obstacles may arise during operation?
Only one so far, the light bulb is burned out, I can’t buy a new one, I drive like one-eyed)
Replacing the light bulb in the fog light of LADA PRIORA
Hi all! This video will talk about replacing the light bulb in the fog light on a LADA PRIORA
How it was filmed...
Test of LED lamps h21 in PTF. Choose which is brighter LED or Halogen
Buy Led lamps CL6 H8,H9,h21...
There are no problems. You buy fog lights, auto lights are better, Bosch often sweat, they cost me 1700. You buy a set of xenon lights with an H11 base, our set costs 1700-2000. You buy wiring for connecting fog lights for 500 rubles, if you don’t know anything about electrics, then go to an electrician so that he can connect the wiring and remove the button. Install the fog lights yourself, remove the bumper, unscrew the plugs and screw the fog lights in their place. The ignition units can be screwed to the lower headlight mounting brackets. When connecting fogs, do not forget to connect the ground and do not confuse the polarity.
I think the base would be h21, maybe I don’t understand it naturally, but I had one on the Boche.
I think the base would be h21, maybe I don’t understand it naturally, but I had one on the Boche.
listen exactly, confused, N 11, N7 - in my head
There are no problems. You buy fog lights, auto lights are better, Bosch often sweat, they cost me 1700. You buy a set of xenon lights with an H11 base, our set costs 1700-2000. You buy wiring for connecting fog lights for 500 rubles, if you don’t know anything about electrics, then go to an electrician so that he can connect the wiring and remove the button. Install the fog lights yourself, remove the bumper, unscrew the plugs and screw the fog lights in their place. The ignition units can be screwed to the lower headlight mounting brackets. When connecting fogs, do not forget to connect the ground and do not confuse the polarity.
Thanks for the instructions)
I had a problem, the lamps did not fit into the socket, but Ratfil solved the problem. Now on bumps one lamp turns off, my fault is that the block is not fixed, otherwise everything is trivial there))))
There is nothing complicated, the main thing is that the arms grow from a suitable place))
Replacing a light bulb in a fog light on a Mazda 6
Replacing the fog light bulb on a Kia Sid
1). We crawl our hand under the bumper and remove the protective cover with our hands. Unscrew the light bulb counterclockwise.
2). Remove the wire from the lamp.
3). We remove the wires with the latch.
4). Unfasten the lamp itself.
5). We replace it with a new one.
Replacing a light bulb in a fog lamp on a Renault Duster
1). To get to the plastic protection, remove or turn the right wheel to the left.
2). Carefully pry up the clip with a screwdriver and remove the protection.
3). Unscrew the top plastic nut securing the mudguard and pull it out of the fender liner.
4). Using a Torx T-20 wrench, unscrew the two screws securing the protection to the bottom of the bumper.
5). Another one on the wheel arch.
6). We bend the protection and see the fog light in front of us.
7). We press and remove the block going to the lamp.
. Take the lamp and turn it half a turn counterclockwise.
9). We install a new lamp and perform the installation in the reverse order.
Relays and fuses
The PTF relay from Priora must be secured with an eyelet under any fastening nut so that the wires do not “dangle” and are not pulled under the hood too much. The relay has four contacts, which are labeled: 85, 86, 30 and 87.
- The 86th contact is connected to the negative side of the battery;
- The 30th contact is connected to the “plus” of the battery;
- The 87th contact is connected to the “plus” of the fog lamp;
- Pin 85 is connected to the button with a blue wire through the PTF fuse on the Priora.
vote
Article rating
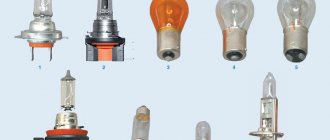
Types of lamps for PTF
If PTFs are installed by an automaker, then they use standard halogen lamps. Many motorists are not satisfied with them, which forces them to find replacement options. There are currently three types of lamps on the market that can be used for fog lights:
- halogen;
- LED;
- gas-discharge or xenon.
Before choosing the final replacement option, you should find out which bulbs are in the foglights
.
The main difficulty for most drivers is to correctly decide which lamps are best to install in fog lights - each of them has certain advantages and disadvantages.
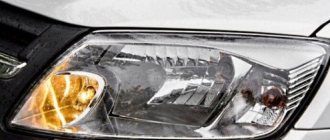
Halogen
The most common type for fog lights, which has an affordable cost as its main advantage. Such elements ensure acceptable PTF efficiency in foggy conditions, and when properly configured, do not cause blinding oncoming drivers. Among the disadvantages of halogen lighting is a short working life, and replacing a bulb in a fog lamp is not always an easy task. In addition, the headlight becomes very hot, which, if it cools suddenly, can cause the glass to crack. If the power of standard lamps for the driver is insufficient, when replacing lamps in fog lights
for more powerful ones, there is a high risk of the control unit overheating and the headlights automatically turning off.
See:
LED
A more acceptable option for most. They feature a wide range of colors, brightness and low power consumption. LED lamp
The fog lamp heats up very little due to its unique operating principle. This allows you to avoid melting of the internal parts of the headlight during prolonged operation of the PTF. They almost never cause blindness to oncoming drivers. What are the second lamps for in Skoda fog lights? The disadvantages include a higher cost, as well as the need for careful selection of the lamp itself - they are not suitable for every headlight
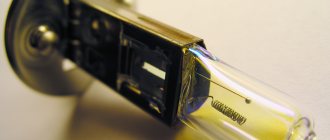
Gas discharge
Xenon allows you to make fog lights as bright and effective as possible. The service life of high-quality xenon is about three years, but xenon can be used for foglights only in accordance with strict rules, violation of which will not result in a fine, but in deprivation of rights for up to one year. So, for xenon, you can only use special headlights marked “D”, and an automatic corrector is required. Self-installation of xenon in fog lights is more complex than other types of lamps, but if installed correctly, the result will please you for several years in a row. The disadvantages of gas-discharge lamps, in addition to their high cost, include the need to replace both lamps if only one burns out.
How to replace a lamp yourself
Replacing a fog lamp lamp in itself is not a complicated operation, but if the lamp
changes to a similar one to the burnt one, practically no problems arise. Before starting work, for example, on a VAZ family car, it is advisable to drive the car into a pit, use a lift or raise the front part with a jack. This way it will be much more convenient to work, and less time will be spent.
Before changing the light bulb in the fog light, you should buy a similar one - in this case, it is better to give preference to well-known brands with a good reputation. For VAZs, the process of replacing a light bulb is as follows:
See:
- the fog lamp power supply is found, the rubber protection moves away from the headlight;
- after this the block is carefully disconnected;
- the spring clips on the headlight reflector are unlocked;
- the light bulb is removed along with the wire;
- a new lamp ;
- The headlight is reassembled and checked.
It is enough to perform this manipulation once, so that the next time it takes only a few minutes to replace the light bulb in the fog light. The replacement process on other models depends on the design features of the foglights. On some cars, the PTFs are located in a block with the headlights - here you will have to disassemble the optics a little. An example of a replacement on a domestic Kalina in the video:
Preparatory work
Installing fog lights on a VAZ 2170 does not require much experience. A standard set of tools, a knife, electrical tape and medium-sized screws will suffice. Before installing fog lights on a Priora, you need to do some simple preparatory work:
- Disconnect the negative terminal of the battery. This is done in order to avoid a short circuit during the PTF connection process.
- Remove the oil pan shield, otherwise it will interfere with further work on installing fog lights. This operation is very easy to perform; you just need to unscrew a few fastening bots.
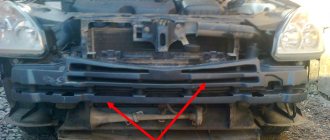
Finally it’s the turn of the bumper. It can be removed using a 10mm socket wrench and a shaped screwdriver. To begin with, unscrew the screws that perform the function of fastening the protective covers and bumper. There are six of them in total, three on each side. Next, unscrew the mounting bolts connecting the bumper and the body transverse bar located on top of it. Only after this can you remove the headlight housings by unscrewing the four bolts on each.
Once the light covers are removed, the three lower fasteners will be exposed. And only when they are unscrewed can you remove the bumper and install the fog lights.
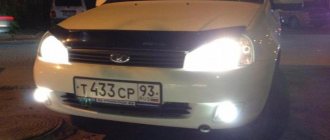
If the standard fog lights are not satisfactory
You can often meet motorists who are categorically dissatisfied with the light of their standard fog lights. This is especially true for those who often travel long distances. Indeed, often in conditions of heavy fog, installed PTFs do not cope with their main task. As a rule, such headlights have conventional lamps. It is not advisable to replace them with similar ones, but with higher power; it is much more reasonable to replace them with LEDs or xenon.
It is worth noting that LED lamps in fog lights can be installed without any restrictions and conditions, as is required for xenon. To independently replace a halogen lamp with an LED one, you do not need special knowledge or equipment. But there is one rule that should not be neglected: you can purchase diode dumps for fog lights only if they belong to a trusted brand. Inexpensive Chinese samples do not meet quality requirements and do not last long.
Before purchasing LED lamps, you should remove the halogen lamps and look at the base to find a similar one - this will allow you to minimize the work of fitting the lamps into a standard fog lamp. An important parameter of a fog lamp is its brightness value. This parameter is measured in Lumens (Lm), and for fog lights the brightness must be at least 1000 Lm, otherwise the effect, compared to halogen lamps, will become invisible.
Diode bulbs in fog lights almost never cause any complaints when passing a technical inspection; they do not require the purchase of expensive lensed headlights. As with xenon, they have a wide range of possible colors, which will allow you to do without installing additional light filters.