Low beam lamp
In the case where the low beam provides insufficient illumination, the low beam lamps of the VAZ 2110 need to be replaced as soon as possible. It goes without saying that driving a car with non-working lighting, especially in the dark, is unsafe, and the legislation provides for this. Replacing low beam lamps on a VAZ 2110 can be easily done independently. In addition, you can leave the solution to this issue to specialists. This question is individual, and the decision must be made depending on the availability of skills. Although there is nothing complicated about this replacement.
How it all works
Replacing the low beam lamp in a VAZ 2110
First of all, if the question arises of replacing the lamp responsible for the low beam, you should understand the reasons that could cause the malfunction. It was as a result of this that the light bulb stopped burning. The VAZ 2110 is equipped with a headlight unit, inside of which there are direction indicators and also low and high beam lamps. The electrical wiring provides two special plugs for connecting both one and the other type of headlights.
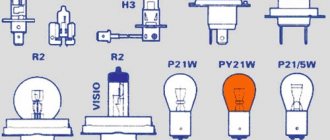
Note. There are differences between the two sets of headlights. In one version, the headlight unit contains two single-filament lamps for operation of both high and low beam lighting, and the second option involves one double-filament lamp.
To understand the operating principle of the VAZ 2110 electrical circuit, you need to understand which elements take part in it:
- It is impossible to imagine normal operation without an external light switch (it is located in the cabin on the front panel);
- Equally important is the headlight switch located on the steering column;
- And there’s nothing to say about the low and high beam relay;
- In addition, four fuses are important, which are located in the mounting block and are responsible for normal operation;
- And, of course, the high beam warning light.
Xenon light
Over the past 10 years, which is how long they have been in operation, these lamps have managed to win the hearts of the majority of owners of foreign and domestic cars. There is a wide range of light bulbs on the market. Xenon products are significantly brighter than traditional halogen light. Disadvantages include difficulties during the installation process and the need to purchase and install an ignition unit. The price of the kit starts from one and a half thousand rubles, excluding installation.
Fuses are important components
Replacing the low beam lamp on a VAZ 2110 and fuses
Turning on the headlights must be accompanied by illumination of all four filaments of the exterior lighting lamps. When one or more of the lamps do not light, you need to check the integrity of the fuses located in the fuse box. This can be done from inside the car. Each of the fuses performs a protective function, having its own purpose:
- One is responsible for the low beam of the left headlight;
- The other is for the high beam of the left headlight;
- The third is for the low beam in the right headlight;
- The fourth is for the high beam of the right lamp and warning lamp;
Causes of malfunctions, possible options
Quite often, the culprits are two relays that control the headlights. In this case, it is enough to clean the contacts for the relay to work properly again.
Another possible breakdown is in the network. It is necessary to check the contacts of the wires that go to the headlights, instrument lights and fog lights.
If this does not help, remove the headlight dimmer and the exterior lighting control, then check their contacts.
Easy lamp replacement
Replace low beam bulbs on a VAZ 2110
If the check shows that the fuses are intact and their contacts are not oxidized, you need to get out of the car and check the integrity of the lamps:
- open the hood;
- remove the rear casing;
- disconnect the wire block;
- remove the spring (which secures the light bulb);
- remove the light bulb holder by turning it;
- replace the light bulb with a new one.
Checking and adjusting relays
Replacing the low beam bulb on a VAZ 2110 is easy
If the lamps are intact, you should check the two relays, which are marked accordingly on the equipment diagram. The cause of their malfunction may be oxidation of the contacts or their burnout, which can be eliminated by regular cleaning. If, however, the relay is completely out of order, then it is necessary to replace it.
Replacement and adjustment of other elements responsible for low beam
Replacing low beam bulbs on a VAZ 2110
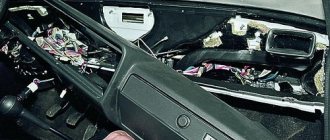
After checking and making sure that all of the listed devices are in working order, you will need to check the reliability of the connection in the blocks included in the electrical circuit of the head lighting. In addition, you should check the fastening of the headlight wires. One such fastener is located on the left side, next to the battery on the same mount as the air intake. The second one is on the right, in the same place where the adsorber is located.
Note. If the above measures do not help, you should first remove the switch that regulates the headlights. After this, remove the switch responsible for the external lighting. Then check the status of their contacts.
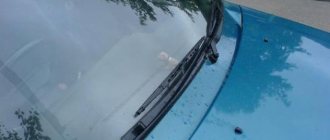
In addition to those malfunctions that may be associated with the headlight electrical circuit, the headlight lens may fog up. This may be a consequence of water getting under the headlight during washing or after rain, which is a consequence of insufficient tightness of the lens glass. Knowing what reasons affect the performance of the low beam lamp, you can easily fix it.
Replacing the low beam lamp by removing the headlight unit
Replacing low beam bulbs on a VAZ 2110
If the cause of the malfunction of the lamp lighting is determined and there is a need for replacement, then to remove it you need to dismantle the headlight unit. The main difficulty will be the decorative trim (eyelash). To be able to get to it, you need to remove the headlight mounting nut. In particular, for the VAZ 2110 you need to loosen the front bumper and remove the headlight.
Note. The work should be done indoors, otherwise the plastic becomes brittle in the cold.
Further actions should be carried out in the following order:
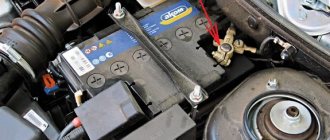
- Disconnect the negative cable from the battery;
- Disconnect the two electrical connectors of the headlight unit;
- If there is a fender liner, you need to unscrew it from the bumper side (usually it is fixed with 2-3 self-tapping screws);
Replacing the low beam bulb on a VAZ 2110
- Using a 10 mm wrench, you need to unscrew the two bolts that hold the headlight on top;
- Next, you should unscrew the bolts that hold the decorative radiator grille (usually two bolts);
- Then, lifting the grille, release two latches on the right side;
- Remove the grille.
Replacing the low beam bulb in a VAZ 2110
After removing the grille, you can continue the process of removing the headlight:
- Unscrew the lower headlight mounting block;
- Unscrew or slightly loosen the bolts of the upper headlight mounting;
- Carefully, use a screwdriver or your fingers to pull the edge of the decorative trim (eyelash) away from the headlight;
- In the resulting gap you can see a plastic latch (with its help, the edge of the eyelash is attached to the edge of the wing). You should very carefully remove the tongue from the place where it engages with the wing. This can be easily done with your fingers.
- Then, slide the cover towards the center and remove it.
Note. It is recommended to lubricate the eyelash with silicone lubricant before removing it. Lubricate along the entire arc of the attachment to the bumper.
- Next, you need to use a screwdriver to unscrew the nut that attaches the headlight to the bracket;
- Then take out the headlight unit;
- Next, use a screwdriver to pry the hydraulic corrector cylinder retainer, then turn it and remove it from the housing.
Replacing the low beam bulb on a VAZ 2110 diagram
Note. If there is a need to replace the headlight glass, then you need to unfasten the six fastening latches and remove the glass, after first removing the sealant layer.
To continue the process, you should do the following:
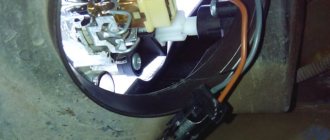
- Turn the turn signal bulb socket counterclockwise and pull it out together with the bulb;
- Carefully press the lamp inward and turn it counterclockwise, gradually removing it from the socket;
- Turn the headlight cover counterclockwise, then remove it;
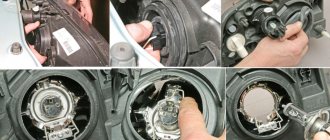
- Disconnect the electrical wire from the low beam lamp;
- Lightly squeeze the spring clamp and remove its antennae from the grooves;
- Pull the spring clip upward and then remove the low beam lamp.
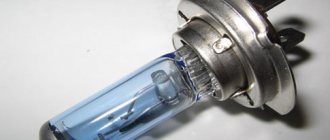
Note. When working with halogen lamps, under no circumstances should you leave any greasy marks. It follows from this that it is better to work with gloves, but if contact still occurs with your fingers, then the lamp must be degreased with alcohol.
After this, you need to screw a new working lamp into place.
Replacing high beam lamps and parking lights
If there is a need to replace the main beam lamps of the headlights and dimensions, then to remove them you need to unscrew the second headlight cover. Then do the following:
- Disconnect the electrical wire from the high beam lamp;
- Remove the spring clamp antennae from the grooves;
- Remove the high beam headlight bulb;
- Disconnect the electrical wire from the side light lamp and remove the socket with the lamp;
- Remove the faulty lamp from the socket and replace it with a new one.
Assembling and installing the headlight unit must be done opposite to the dismantling process.
Note. The direction of the headlight beam can be adjusted by turning the screws. These screws rotate the optical element in the horizontal and vertical planes.
Adjusting headlights 2110 (step by step instructions)
- We find a flat area and install a screen in front of the car (five meters from the car).
- We sit the assistant in the front seat or put a load on him - its approximate weight should be 75 kilograms.
- We draw two lines on the screen. One of them should be at 600 millimeters, and the other 75 millimeters below the first.
- Next, we draw three more lines on the screen, one of which should be axial and located strictly in the center between the headlights. The other two should be in the center of the headlights, and the distance to the center line from them should be 554 millimeters.
- Move the hydraulic corrector handle to the minimum load position.
- Cover one headlight with cardboard.
- Turn on the low beam.
- Then we adjust the light beams for the open headlight.
- We do the same for the other headlight.
Philips X-treme Vision bulbs
These products provide 30% more light than standard halogen models. In addition, these Philips light bulbs are many times superior to standard ones in terms of quality and resistance to wear. Often these are the products that are installed on cars during assembly, which is an indicator of quality. For VAZ-2110 cars, this lamp has the best price-quality ratio, motorists note.
This is a modified . The lamp illuminates the road surface much better by as much as 60%. The technical specifications of the product have a higher light output.
This is the most powerful component in this series.
This product is 20% brighter than the standard lamp in the optics system of VAZ-2110 cars.
The low beam with this lamp is as close as possible to natural daylight. At a price higher than all other solutions, the technical specifications from this brand are also several times higher. The product has excellent build quality and a long service life.
Rear lights arrangement
Regardless of the type, all rear lights have a fundamentally identical design. However, some differences can be identified between collapsible and non-collapsible lanterns. Thus, collapsible lanterns consist of a body, a reflector and a removable transparent lens. The flashlight body contains sockets for screwing in or installing lamps on a bayonet mount; they are replaced when the lens is removed.
In non-separable lanterns, all these parts are combined into a single structure, which is usually called simply the lantern body. In such flashlights, the cartridges are removable and are installed on the rear wall. This makes it somewhat difficult to replace lamps, but this solution is highly reliable.
Special mention should be made about the reflector and diffuser. Typically the reflector is made of a highly reflective material (specular) and is shaped to not simply return the light emitted from the back of the lamp, but to form it into a beam. This ensures high lamp efficiency, allowing the use of lower power lamps with high brightness of the flashlight.
Diffusers today are made of transparent plastic, painted in the required color. Typically, the inner part of the diffuser is corrugated, which ensures the diffusion of the light beam for better perception when looking at the flashlight from the side. Also, the diffuser is often provided with a reflective segment (reflector).
It is important to note that according to modern Russian standards, the color of brake lights and side lights is set by the color of the lens (that is, it is made of plastic painted in red), and the color of the direction indicators is set by the color of the lamp (that is, the lens is transparent, and the cylinder lamps should be painted orange). Many modern automakers have gone even further and make the lens completely transparent, and the color of all signals is provided by the color of the lamp cylinders. Thanks to this solution, it was possible to reduce the size of the rear lights due to the unnecessaryness of a separate segment for the reverse signal
In many taillights, two lamps are installed in the white segment at once - orange, for the turn signal, and white, for the reverse signal.
Thanks to this solution, it was possible to reduce the size of the rear lights due to the needlessness of a separate segment for the reverse signal. In many taillights, two lamps are installed in the white segment at once - orange, for the turn signal, and white, for the reverse signal.
Some lights also use only one bulb for the side light and brake light. When the headlights are turned on, this lamp glows with reduced brightness, and when the brake pedal is pressed, its brightness increases - motorists driving behind perceive this as a brake light coming on.
In general, the tail light is a fairly simple and reliable unit, however, it can sometimes fail, in which case you need to think about repairing or replacing it.
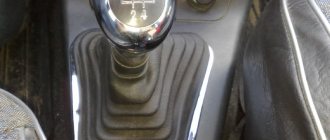
Operating principle of reversing lights
The operating diagram of this device is very simple and consists of the following elements. Two light bulbs connected in parallel into one circuit, which is closed using the ignition switch and a special “frog” installed on the car’s gearbox. When reverse gear is engaged, a pair of “frog” contacts will close and form a chain of light bulbs. So they light up and turn off after the speed is turned off.
It is worth noting that the lamps do not turn on until the ignition is turned on. This is necessary so that leaving the car in reverse does not drain the battery. It turns out that the reverse lamp will only work when the ignition system is turned on.
To protect the electrical circuit of the flashlight, it is equipped with a fuse. It provides protection against short circuits and is a disposable device that must be replaced after tripping.
Common optical problems and how to fix them
Problems with automotive optics can be divided into mechanical and electrical problems.
During operation, automotive optics are subject to mechanical stress. It can be damaged by small and large stones, sand, branches of bushes, etc. The easiest way to eliminate damage is to replace the headlight or flashlight. To do this, you need to know how to remove the headlight on a VAZ 2112. But you can restore the optics with your own hands.
The following mechanical problems are possible:
- cracks and scratches on the glass surface;
- damage to fasteners;
- violation of tightness.
Scratches and cracks can be eliminated by grinding and polishing. Destroyed fasteners are replaced with new ones. If the seal is broken, the optics sweat, so it needs to be restored, as visibility deteriorates and the contacts oxidize. For serious mechanical damage in the form of chips, tools are selected depending on the degree of damage.
Before repairing, you should study the material used to make the optics. Depending on this, you can use cold or conventional welding.
When it comes to electrical problems, the most common cause is burnt out light bulbs. In this case, they need to be replaced.
If the reason is not the light bulbs, then the following malfunctions are possible:
- fuse is blown;
- The switching relay does not work;
- contacts are oxidized or burnt;
- switch is faulty;
- The integrity of the wiring is broken; ground is missing.
If the brake lights of the VAZ 2112 do not light up, the turn signals do not work, or the light has completely disappeared, you need to sequentially check all the elements that are part of the lighting system, including the fuse box and power supplies.
Reasons for failure of dashboard lights
The dashboard lighting simultaneously performs several important functions:
- check. The indicators light up when individual units fail or malfunction;
- decorative. In a dark interior, beautiful instrument panel lighting illuminates and enlivens the front area of the cabin.
- informative. Notifies the driver in real time about the status of important vehicle systems;
The main reason for the failure of light bulbs in the instrument panel is harsh operating conditions - heat, vibration, power surges. This significantly reduces the life of the lamps and causes a lot of problems:
- depletion of filaments in halogen devices, depletion of current-carrying paths in LED lamps;
- problems with the fuse box or contact plate;
- somewhere shorted to ground.
- broken wires or the appearance of an oxide film on the contacts;
Before attempting to replace the lamps, it is necessary to accurately determine the cause of the malfunction, otherwise the expected result will not be achieved. It is important to know the condition of the fuses and the condition of the wires. The insulation on them often wears out and begins to short to ground. Inspect the wiring and replace any problematic connections. Also, the contacts must be clean. The terminals oxidize, reducing their ability to conduct current. This applies not only to Ladas; such a danger is a common “disease” of most cars.
As a conclusion
Changing the lamps on the headlights of a VAZ 2107 is not a difficult task. The main thing is to act carefully, because not so often a living person looks into them. Some parts may become “bitten” and will not want to be removed the first time. With a lot of force, there is a chance of breaking them. For example, when replacing dimensions, they often jam in the reflectors. There have been cases in my practice where they were “torn out” with a piece of that same reflector, and this was a replacement for the entire headlight.
So, you need to be careful, the “Seven”, although a strong machine, can tolerate and forgive you a lot, but some of its elements require a certain “tenderness”. A car is like a girl - the way you drive it is the way you will live with it - a popular automotive saying.
Good luck to everyone on the roads!
We turn on the brake lights forcibly
Relay K1 is successfully replaced with a pad with jumpers. In Fig. 1 just shows its diagram. If there is no such platform, you can temporarily close contacts 4-5. First, check everything mentioned above.
Have an observer watch what happens to the lamps. Press the pedal with one touch and release it. If the lamps do not turn on, check that the fuse is working properly. It's burned out, which means you're looking for a short circuit.
How to and how not to check the “0 Volt” potential
Let’s agree right away that we only work with a voltmeter. Voltage “+12” is caused by connecting one probe to ground. The presence of potential “zero” is checked differently: any of the probes is connected to a terminal with positive voltage, and then the second probe is connected to the wire being tested.
Consider the error: one probe is connected to ground, the second to the terminal being tested, and vol. Here they conclude that there is a “mass” potential, but this is wrong! If the contact with ground is broken, the device will also show “0”. That is, the number “0” does not contain information.
Other tuning ideas
As mentioned above, all lamps in lanterns can be replaced with LED ones. And not just remove incandescent lamps and install LED ones, but use LED modules or strip. Otherwise, the appearance of LED lights will not differ from ordinary ones. Installation of LED modules may look like this:
LED modules in side/fog lights
And using an LED strip you can do this:
Options for tuning taillights with LED strip
You can simply tint the lights, completely changing the appearance of the car, and it is easier to apply the tint to the outside of the glass. This will allow you not to disassemble the light devices or even remove them from the car.
Tinted rear lights VAZ 2112
And finally, a short video demonstrating the capabilities of LED modules that can be used to tune the rear light fixtures of a VAZ 2112.
This concludes the conversation about the rear lights of the VAZ 2112. Now we can easily remove these lighting devices, if necessary, repair them, modify them, or simply replace a burnt-out light bulb in the lanterns.