Designation of Lada Granta tidy icons
The following is a description and explanation of the icons on the standard Granta tidy.
| Number in order | What does it mean |
| 2 | Fault light in the internal combustion engine system. |
| 3/9 | Left and right turn signal. |
| 4 | Indication of drop in engine oil pressure. |
| 5 | ABS system fault indicator. |
| 6 | Lights up when the immobilizer is turned on. |
| 7 | The cooling system is overheating. |
| 8 | The brake system is in disrepair. You should add fluid to the RB and check the condition of the pads. |
| 10 | Battery charging indicator; if the lamp is on, the system is not charging. |
| 12 | Stability control is activated. |
| 13 | Prohibition of upshifting is used extremely rarely. |
| 14 | The high beam is activated and works normally. |
| 15/17 | Turn on the rear/front fog lights. |
| 16 | The head optics are switched to short-range mode. |
| 20 | One or more doors are unlocked. |
| 21 | The fuel level in the tank has dropped below normal. |
| 22 | The tire pressure has dropped and there may be a puncture. |
| 23 | There is a malfunction in the EUR system. |
| 24 | Requirement to fasten your seat belt. |
| 25 | Fault light in the electrics of the power plant. |
| 26 | The airbag is disconnected or its wiring is damaged. |
Exclamation mark on Granta's dashboard is on
The symbol is presented in the only indicator indicating a malfunction in the motor electrics. The lamp lights up when the ignition is turned on and goes out after the engine starts.
When an element blinks continuously or is constantly on, this indicates a breakdown. It is recommended to immediately go to a service station and have the defect repaired.
Steering wheel icon on the Granta dashboard
The pointer is responsible for indicating the operation of the power steering module. If the signal is constantly on, there is a problem with the power steering device. The steering may become “wobbly”.
The engine icon on the Grants panel came on
A yellow “check” on the dashboard indicates a malfunction in the motor. If the light comes on, immediately slow down and head to the nearest service center to find the problem and repair it.
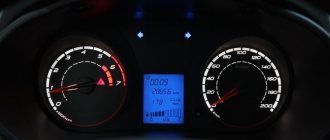
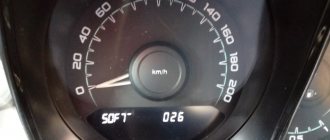
Where is the engine temperature on the Grants panel
On the newest versions of the tidy, the indicator is displayed on the BC display. The first generation panels were not equipped with such a meter and only had an engine overheating lamp.
The easiest way to display the internal combustion engine temperature on the dashboard is to install a separate meter on a spare socket in the console. Due to the fact that the designs of non-standard devices can vary significantly, they should be installed according to the manufacturer's instructions.
The oil is burning on the Granta tidy and beeping: reasons
The car's oiler can only indicate problems inside the crankcase compartment. There is a drop in lubricant pressure here, which can cause a leak or pump failure.
Immobilizer icon on the Grants panel
All devices have this symbol. The light indicates that the device is turned on. In this position, it will not be possible to start the engine and start moving. To disable the option, you will need to enter the combination on the key fob.
Car with a key on the grant panel
With a similar indicator, the car indicates the normal operation of the standard immobilizer. More details about the module are provided above.
Battery light on panel
If a similar indicator appears on the dashboard, you will need to immediately check the condition of the generator set and its wiring. It is recommended to perform a battery diagnostic.
The airbag icon is on on the dashboard
The light indicates that the activator module is faulty or disabled. In the event of a collision, the device will not operate.
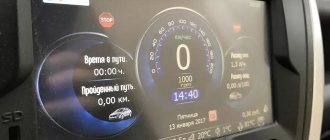
What instrument combinations do we offer?
produces LCD VISION instrument cluster for Lada Vesta. It is a modern IPS display with a resolution of 1280x480 px. A Touchpad keyboard is used for control.
The TuneAuto device is available with the following types of visor coverings:
- dark gray color, matte texture;
- black color, glossy texture.
This model is suitable for Lada Vesta cars with any body type. You can buy the Tune Auto LED dashboard for installation on Lada cars produced after 2015 - 4x4, Cross, Sport, etc. Installation is carried out in standard places and does not cause the slightest difficulty. The package includes detailed installation instructions.
The VISION LCD instrument panel is a certified product that is covered by a 1-year warranty. Place an order on our official website - we will deliver the goods for free and, if necessary, help you figure out the settings.
Errors on the panel
The complete list of Granta faults amounts to several thousand items, which is difficult to describe. For this reason, the following are the most common errors encountered during diagnosis.
| Number | Decoding |
| P0030-36 | Lambda probe malfunctions. |
| P0101/02 | Problems with the mass air flow sensor. |
| P0115-0118 | The DTOZH is out of order or transmits incorrect information. |
| P0122/23 | TPS does not work correctly. |
| P0130-140 | Oxygen sensors are not functioning correctly. |
| P0200-204 | The injector control circuits are faulty. |
| P0217 | Overheating of the power plant. |
| P0300-304 | Multiple misfires detected. |
| P0325 | The knock sensor is not working correctly. |
| P0422 | The catalytic converter is faulty - efficiency is below the established standard. |
| P0441-459 | The canister purge valve is not functioning correctly. |
| P0480/81 | Fan relay 1 and 2 open circuit. |
| P0501 | The vehicle speed sensor is faulty. |
| P0522/23 | Oil pressure sensor malfunction. |
| P062/63 | Incorrect on-board voltage. |
| P0627 | Open circuit of the fuel pump relay. |
| Р069194/ | Short circuit of the fan relay circuit. |
| Р1171/72 | Open circuit of the octane corrector. |
| R1501/02 | Fuel pump relay control - short circuit. |
| P1600 | Communication with the immobilizer is lost. |
| P1612 | CPU reset error. |
| P1689 | There is a problem with error storage memory. |
| R2301/04/07/10 | The ignition coils are closed sequentially for all cylinders. |
Possible faults
If everything is clear with the description, then let’s move on to the malfunctions. Like any other electronic component, the Lada Granta instrument panel is also susceptible to various malfunctions.
What kind of breakdowns can occur in the operation of the control panel:
- The tidy is broken. If the shield fails, there can be quite a lot of symptoms. For example, only some or all of the devices will refuse to work. If this is the case, then the problem in this case may lie either in the power supply of the device or in its board. It is better to entrust repair problems to specialists.
- The tidy is glitchy. For example, all doors are closed and the unlocked door indicator is on, or the optics are not turned on, but the corresponding light on the dashboard is flashing. As a rule, in this case the problem lies precisely in the board (of course, if the sensors are working). If the problem is in the board, then flashing the dashboard firmware can solve it, but this option does not always help. It is possible that the electrical equipment lights are on on the dashboard due to a faulty sensor, so it would be a good idea to check its functionality.
- All devices work, but there is no backlight. If all the backlight bulbs do not work at once, then most likely the problem lies in a blown fuse or a damaged wire or connector. Checking the wiring is done using a multimeter.
- Only part of the light bulbs or one of them does not work. In this case, the malfunction consists of a burnt-out lamp; to eliminate it, the instrument panel in the Lada Granta is dismantled, after which the burnt-out lamps in it are replaced.
- The equipment indicator on the dashboard does not turn on. For example, you turn on the high beams, but the corresponding light does not light up. This may be due either to a failure of the indicator itself (the lamp is changed in the same way), or to a breakdown of the sensor. It is quite possible that there is poor contact between the light bulb and the wiring.
- Speedometer failure. The cause of the malfunction may lie in the board or speed sensor installed on the device. The situation is similar with sensors - fuel level, engine temperature. If they do not work or show incorrect values, then the problem should be looked for in the controllers themselves, wiring or board. It is possible that the devices are not working simply due to poor contact.
Lada Kalina front harness connections
Diagram 1. Connections of the front wiring harness of the car: 1,2,3,4- blocks of the front wiring harness to the instrument panel wiring harness; 5 — left headlight; 6 — reverse gear lock solenoid; 7 — reverse light switch; 8-starter; 9 - battery; 10-generator; 11 – blocks of the wiring harness of the battery, starter and front wiring harness; 12- right headlight; 13-electric washer motor; 14 – air temperature sensor; 15 beep; 16 - rear window washer motor
Electrical diagram of the tailgate and license plate Lada Kalina, numbering of contacts in the mounting block
Electrical diagram of the tailgate and license plate Lada Kalina: 1 - tailgate wiper motor; 2 — additional stop signal; 3, 4 — to the rear wiring harness; 5 — gear motor for locking the luggage compartment lock drive; 6 — luggage compartment lock; 7 — rear window heating element; 8 - to the license plate; 9 — from the lighting lamps to the tailgate harness; 10.11 — license plate light.
The figure on the right shows the numbering of contacts in the mounting block
Controls, instrument panel, interior equipment
Dashboard
- Lighting control module
- Light switch
- Horn switch
- Instrument cluster
- Ignition switch
- Wiper switch
- Control panel for interior ventilation and heating system
- Heated rear window switch
- Glove compartment lid
- Compartment for installing radio equipment
- Hazard switch
- Front ashtray cover
- Parking brake lever
- Gear shift lever
- Accelerator pedal
- Brake pedal
- Clutch pedal
- Fuse box cover
- Hood lock drive lever
The rear window heater only works when the key in the ignition switch is set to position I. To turn on the heating, press the switch button, to turn off the heating, press the switch button again. If the key in the ignition switch is turned to position 0 while the heater is on, the heating function is disabled. When the engine is restarted, the heating function is restored without additional pressing the switch button. The control light indicator located on the switch button will glow yellow during the entire time the heater is operating.
Attention: - To avoid discharging the battery, do not operate the rear window defroster for a longer period of time than necessary. — When cleaning the inner surface of the rear window, do not use sharp objects, as well as cleaning products containing abrasive materials, because
they can damage the conductors printed on the glass. — Installation of radio equipment should be carried out only on a certified PSSS with a mandatory mark in the service book.
Attention: - Arbitrary installation of electrical consumers can lead to overload of electrical wiring and fire. — To turn on the hazard warning light, press the switch key, to turn it off, press the switch key again
When the hazard warning lights are turned on, all direction indicators work and the hazard warning light in the instrument cluster lights up flashing red. The hazard warning lights indicate that the vehicle currently poses a danger to other road users. The hazard warning lights operate in any position of the key in the ignition switch. — To use the ashtray, pull the top tab towards you. A spring stop, designed to extinguish cigarettes, holds the ashtray open. To clean the ashtray, remove it from its slot by pressing the spring stop. — By moving the lever up, the brake pads of the rear wheels are activated. To return the lever to its original position, press the button at the end of the handle. — The gear shift diagram is marked on the lever handle.
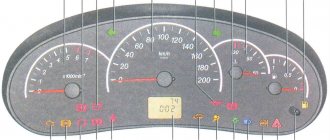
Instrument cluster
Instrument cluster
1. Tachometer.
Shows engine speed. The red scale zone indicates a dangerous operating mode for the engine. Do not exceed the maximum permitted engine speed (threshold - 6000 rpm).
Attention: Operating the engine in dangerous mode is prohibited. 2
Left turn signal indicator
2. Left turn signal indicator.
Lights up with a green blinking light when the left turn indicators are turned on.
3. Speedometer.
Shows the speed of the vehicle.
4. Right turn signal indicator.
Lights up with a green blinking light when the right turn indicators are turned on.
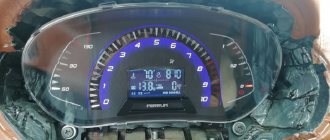
Standard instrument panel - article number and price
The original car tidy exists in three types.
- the first is an option for a pre-restyling car;
- the second panel is for a restyled car;
- and the third is the “Lux” option for the restyled one, which has become faintly similar to all previous torpedoes.
Each of them contains standard elements such as a tachometer, so their functionality does not decrease. . Who wants to do tuning of the instrument panel, this option is for them.
Priora first generation
The instrument cluster for the first generation Lada Priora received catalog number 2170-3801010. Cost – about 6,000 rubles. Everything is standard with it - from left to right there are four arc scales with red arrows: odometer, speedometer, coolant temperature, fuel level. Below the speedometer there is a small on-board computer display, and above the arches are all the indicators, including the direction indicators.
Priora 2
For the Priora “Lux” variation there are two more “subtypes” - with or without a CAN bus. Different subtypes were made so that the panel could be connected to any car. Catalog number – 2170-3801010-50 without tire, 2170-3801010-60 with tire. It is distinctive in that it contains an elongated display with a screen that can highlight the navigator.
The catalog number of the combination for the “Norma” assembly is 21720-03801010-20. Cost – 6,500 rubles. Like the “Lux” version, it received a brighter speedometer and odometer, and the coolant temperature along with the fuel level indicator is hidden at the bottom of the speedometer and odometer. The base will not create a route on the display, but will show all the information in color.
Dismantling instructions
To dismantle the device, you must follow the instructions:
- First remove the cover of the fuse box located to the left of the steering wheel.
- Unscrew the three bolts securing the plastic lining of the control panel.
- Dismantle the lining itself, and then unscrew four more bolts of the tidy. Pull it towards you.
- Next, squeeze the connector with the wires and disconnect it from the control panel.
- Dismantle the unit and repair or replace it. Assembly is carried out in reverse order.
1. Remove the cover from the unit.
2. Remove the tidy trim.
3. Unscrew the bolts and remove the shield.