LAND ROVER is not a car, but a state of mind.
This article will describe not only how compression is checked, but also what indirect signs precede its drop.
Signs of poor compression.
1) The engine starts poorly, as if in pursuit. First, one cylinder seizes, then with each revolution the other cylinders begin to seize.
2) The engine emits blue smoke.
Worn oil seals. Smoke appears when the gas is released to idle when the car is braking with the engine. If you rev the engine at the same time, a bluish cloud will appear behind the car. If you perform throttle changes with the engine, then when you release the gas there is no smoke, but when you press the gas, smoke appears.
Ring wear. The car starts to smoke when driving fast, especially when driving uphill. The oil filler neck, if you unscrew it and put it on the neck at XX, will jump up and down. But this is not the worst thing if, as the speed increases, the cap tends to come off the oil filler neck. This means your engine has a strong breakthrough of gases through the rings into the crankcase. (in this case, try cleaning the gas ventilation filter or the crankcase gas outlet control valve.)
3) Dips during acceleration. when you pull away from a traffic light.
4) The car accelerates frankly stupidly. (provided that the ignition system is in order)
5) The engine is covered in oil drips. as noted earlier. In this case, try cleaning the filter of the exhaust gas recirculation system. Gas or crankcase gas outlet control valve. This often helps.
6) The exhaust pipe is wet and fringed with soot.
7) If you pull out the dipstick, exhaust gases blow from the hole.
 High oil and CO consumption does not drop to normal. But if, when checking, you disconnect the gas recirculation pipe from the intake pipe, then the CO returns to normal. I personally noticed that on a gasoline engine with severe wear of the piston group, the oil becomes black as wax (as if it were a diesel engine) literally after 200.500 kilometers.
9) When warming up, the shaking and shuddering of the engine disappears. (when heated, all mating parts select gaps, so compression improves)
Checking compression using a compression gauge.
Warm up the engine to operating temperature.
Put the car on the handbrake.
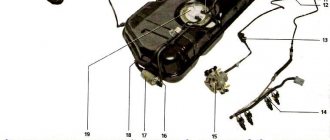
Remove the air filter.
The starter should spin the engine at approximately 150 rpm.
If the machine is equipped with distributors, remove the main explosive wire from the distributor cap and ground it.
If the car does not have a distributor! Unscrew all the spark plugs and securely fasten them to the ground. It is better to connect them at the threaded part with a copper wire and connect the wire to ground.
For diesel engines, disconnect the + wire going to the glow plug relay.
Disconnect the wires from the injectors.
For gasoline engines, when testing, you need to open the throttle completely, that is, press on the gas. Since a closed damper greatly distorts the true compression of the engine! There will be a compression drop of around 20%.
A motor equipped with compensators must check each cylinder twice.
Highly accelerated gasoline engines have a compression of at least 9 kg per cm. The difference in cylinders is no more than 15%.
Diesel engine compression is not lower than 20 kg per cm. The difference between the cylinders is no more than 5 kg per cm.
On a 412 engine with a compression ratio of 7 kg per cm.
Normal compression 8.4 kgf. sq.cm.
The difference in compression between cylinders should be no more than 17%
Compression is not enough.
Pour 15 grams of oil into the cylinder, let it sit for 23 minutes, crank the starter so that excess oil flies out through the open spark plug hole, and then measure the compression again. If compression does not appear. There are possible reasons.
Exhaust valve burnt out. (most likely), although it often occurs from the lack of clearance in the valve mechanism. The valve guides are loose. As well as poor performance of compensators or camshaft wear.
With good compression, the compression meter gives 9 kg on the first pump, 11.5 on the second, 12 kg on the third, and goes no further.
with poor performance of compensators and a worn camshaft, on the first pumping 7.5 kg, on the second pumping 8.5 kg, on the third 9.5 kg, on the fourth 10.5 kg. It turns out that the compression is built up from the fifth to the seventh time and still does not reach the norm.
The head gasket was blown. The spark plug is wet, or interspersed with moisture, the antifreeze is cloudy and floating gas bubbles are visible in the expansion barrel. It’s not uncommon for antifreeze to smell like gasoline. Constant overheating of the motor. It's steaming out of the muffler.
The piston burned out. Oil won't help here. Well, fuel and oil consumption is very high per 100 kilometers, reaching up to 2 liters, and the oil also smells like gasoline. Cause. High speeds, bad gasoline, incorrect ignition, diesel injector cutoff does not work or this injector is stuck, gasoline injector is stuck.
Occurrence of rings. There is no compression when it is cold, but there is compression when it is hot, although the starter gives the same speed.
Bad oil (its flash point is lower than normal). The car has been sitting for over a year. The oil hasn't been changed for a very long time. It is recommended to change every two years.
Decarbonization of the rings occurs if 50 grams of kerosene or valve cleaner are poured through the spark plug holes. Turn the engine a couple of times to get the excess out. And let the engine stand for 10 hours. After this, give the engine a good run.
Damaged spark plug. Gases escape through damaged seals.
Bent connecting rod. If before this the engine gasket was blown or the engine drank some water in a deep puddle. When the head is removed, it is clearly visible that the pistons have different heights, the protrusions of the edges above the head (normally no more than 0.2 mm).
Signs of warping of the head seating surfaces. Typically after overheating.
The pre-chamber falls out of the diesel block head (fix it with a core along the edge of the compact but do not core where the steel rim of the block gasket passes).
The valve and camshaft seals became wooden.
The bottom of the piston is brown.
The oil smells burnt.
The head moved more than 02mm.
After grinding the head and letting it rest, it leads again.
The cylinder head bolts are unscrewed with different forces (one is 14 kg and the other is 5 kg and must be tightened to 12 kg.)
Cracks in cylinder head and head.
Occurrence of rings and their breakage.
The engine has too much compression.
Too much carbon deposits on the walls and piston.
The engine has no compression.
Starting the engine with the pushrod or starter takes too long. Gasoline washed away all the oil from the walls, so the piston was no longer sealed.
Dead battery.
The engine oil is above the top mark.
The oil smells like gasoline.
As well as a strong leakage of diesel fuel through a damaged seal of the fuel injection pump or diesel fuel pump. The oil has become too liquid and the pump cannot supply oil at the required pressure to the oil system.
The presence of pressure in the engine cylinders is one of the main parameters of the operation of the power unit. Without it, the functionality of the motor will be impaired, which will cause serious problems. There may be several reasons when there is no compression in one cylinder. To find out, you first need to make a diagnosis.
Does compression always indicate engine health?
Does compression always indicate engine health?
Before we consider the signs and reasons why there is no compression in one or more cylinders, we will analyze whether this parameter affects the performance of the power unit. If the pressure in the lubrication system of a 406 or other engine is below normal, in practice this indicates wear of the internal combustion engine components. But it is not always the case. When mating the piston rings with the plane of the cylinders, it is the lubricating fluid that collects on the walls of the engine that plays an important role. Thanks to engine oil, the interface of the components is sealed.
When not all of the air-fuel mixture burns in the power unit, this leads to an increase in fuel consumption. If spark plugs fail, fuel will wash motor fluid from the walls of the engine, because gasoline is a good solvent. And if there is no lubricant in the system, there will be nothing to seal the combustion chamber with. Accordingly, because of this, air under pressure will begin to enter the crankcase of the power unit. This leads to the fact that in a 4-6- and 8-cylinder internal combustion engine, compression will drop sharply and disappear.
If its level is normal or higher than necessary, this will cause increased consumption of motor fluid. Due to increased compression, the rings wear out faster. And the gaps formed as a result of wear will begin to be sealed with lubricant, which is in abundance. This problem requires prompt repair. But in fact, compression does not show such a malfunction.
You will learn how to correctly perform the diagnostic procedure from the video published by the AssistanceTV channel.
Heating system modifications
Every owner of a Lada Kalina is faced with the need to modify the stove. The upgrade usually involves installing a new 6-hole thermostat, a coolant filter element, and a different heater valve. Many, given the mediocre performance of the pump, install an additional water pump.
This method is suitable for Lada Kalina with an electronic gas pedal. Previously, the throttle valve, which was heated by a common cooling system, was controlled by a cable drive. After installing the electronics, the hose that went for heating was looped into the cooling system.
To upgrade, you will need a tee, an additional hose and clamps. The second air duct is mounted as close as possible to the thermostat - the tee is installed in the coolant supply pipe to the radiator. The other end of the air duct is connected to the outlet of excess steam near the expansion tank fitting.
A regular medical dropper is inserted into the channel of the steam outlet tube, which is immersed in antifreeze to the bottom of the expansion tank. As the liquid cools, obeying the law of physics about communicating vessels, it will begin to be drawn into the steam outlet, preventing the possible formation of air plugs - airing. Thanks to this simple method, the stove will begin to heat much more efficiently, which means the interior will be warmer.
You can also change the clamps to more reliable ones - self-tightening ones, and ordinary rubber hoses - to silicone ones. To reduce heat losses, it is worth taping all the joints of the air ducts, but to do this you will have to dismantle the panel again. The most convenient way to do this is when troubleshooting a problem.
To get to the heater damper, you will have to disassemble part of the front panel - unscrew the center console. This is where the stove control unit is located. You will need to remove the ashtray and two plugs under the hazard warning button. There are two self-tapping screws that need to be unscrewed.
Often the cause of damper malfunction is wear and breakage of the mounting of its drive. If it is not possible to replace the part, use epoxy glue and seal the broken mount. It may be broken due to the drive cable being too tight. In this case, you will have to develop it manually - usually this is enough to avoid similar problems in the future.
It is better to start adjusting the damper position by adjusting the stove tap. The bracket holding the cable sheath should be removed from its body. After this, you can remove the cable from the crane. Turn the tap lever to the maximum open position and remove the old cable. In fact, the heater tap may not be closed at all in the future.
If this method does not suit you, use another, more time-consuming method:
- The length of the cable sheath must be adjusted so that in the extreme right position of the switch on the control unit the valve is opened to the “maximum”.
- Using a latch bracket, the cable is fixed in this position, after which you can begin adjusting the damper.
- Remove the bracket that secures the cable sheath to the stove body and feel for the yellow lever, which is located on the right. You need to pull it all the way towards you.
- The cable sheath should be adjusted so that the lever on the control unit in the extreme right position fully opens the damper.
- After this, the cable can be secured with a bracket.
The same cable controls the position of both the damper and the heater valve lever. Damper malfunction is the most common problem in the heating system not only of the Lada Kalina, but also of other VAZ models. Therefore, it is recommended that this part be adjusted before the onset of cold weather.
Good afternoon The day before yesterday it snowed all day, I got into the car and started it. The blowing power position was set to mode 2. After driving 5 km everything started to fog up and I realized that the heater motor was not working. But at the same time, the blowing directions all work and warm air flows by gravity at speed.
In the evening, having driven into a warm garage, the stove began to make noise for a couple of seconds, even blow a little and die out. Please tell me what the problem is, who knows? The official dealer beats the price and says there is no guarantee.
- The stove does not heat well, the lower hose is a little warm VAZ Kalina – 4 answers
- The right side of the Lada Kalina windshield fogs up - 4 answers
- Insufficient circulation through the VAZ Kalina heater radiator - 4 answers
- The Lada Kalina heater does not heat well - 4 answers
- The heater blows very weakly on the passenger in Kalina - 3 answers
If the voltage reaches the motor, then the brushes on the motor are worn out or stuck.
It's unlikely that it's the speed controller, but rather a problem with the motor. Remove the glove compartment and look, maybe the connector has just come off.
Brushes inside the motor
Signs of a drop or loss of pressure
Let's look at the symptoms that can be used to determine weak and low compression in all, two or the first cylinder. If your blood pressure is low or absent, the signs are:
- Difficulty starting the power unit. In order to start it, the driver needs to turn the starter longer. And as a result of a complete loss of pressure, the engine cannot be started at all.
- The engine began to function less stable. Due to the drop in compression, its speed at idle and when driving in gear will be unstable.
- Increased fuel consumption. At first glance, identifying this symptom is problematic, but if you monitor this parameter, you can calculate it.
- Problems appear in the functioning of the cylinders. When going uphill, there is a knocking sound from the hydraulic compensators (“fingers”). This is especially obvious when driving at low speeds.
- In a diesel engine, the problem manifests itself as popping noises.
- The pressure in the cooling system lines may increase. As a result, antifreeze will begin to squeeze out from under the sealing elements.
- If there is poor compression in one or more cylinders and this is due to damage to the cylinder head gasket, then the tightness of the system as a whole is compromised. By opening the hood, you can diagnose this problem by the presence of exhaust gases that exit through the gap that appears. Such a malfunction leads to stuck piston rings, which ultimately increases fuel and oil consumption. In some vehicles, this symptom is complemented by an increase in the power of the power unit and the appearance of abundant smoke from the muffler.
Increased pressure
A paradoxical situation with increased compression occurs when motor lubricant enters the piston rings from above, from the side of the combustion chamber. It seals the interface and when measured the pressure surge reaches 14-15 bar.
Cause. in worn valve seals, which provide a lot of lubricant to the Niva’s combustion chamber. The exhaust fumes are desperate, the oil consumption is high, but the pistons and rings have nothing to do with it. The fault is detected when the valve cover is opened and the tappets are removed from the valves. Unsuitable caps are “oaky” to the touch or covered with cracks. Oil seals can be changed without disassembling the power unit.
How long will the engine last?
Low pressure is a problem that car enthusiasts often face. If the drop is insignificant, then the engine can be operated for a long time. But keep in mind that too little compression or its complete absence may be due to the strong heating of the unit.
Long-term operation of a car with an overheated internal combustion engine will eventually lead to its complete failure.
Detailed instructions for measuring pressure in engine cylinders are given below and filmed by the Made in Garage channel.
Basic mistakes
The table below summarizes the main error codes for Kalina category “P” without taking into account the letter prefix.
| Number | Decoding |
| 0030, 0031, 0032 | The heating of the lambda probe installed upstream of the converter is faulty (burnout of the spiral or short circuit) |
| 0036, 0037, 0038 | The heating of the lambda probe installed after the converter is faulty (burnout of the spiral or short circuit) |
| 0101 | Operating parameters of the engine air supply sensor are outside the tolerance range |
| 0102 | The signal level from the engine air supply sensor drops below the permissible level |
| 0103 | Increase in signal level from the air supply sensor to the engine above the permissible level |
| 0112 | The signal level from the air temperature sensor at the engine inlet drops below the permissible level |
| 0113 | Increase in signal level from the air temperature sensor at the engine inlet above the permissible level |
| 0115 or 0116 | Incorrect data from the engine temperature sensor |
| 0117 | The signal level from the engine temperature sensor drops below the permissible level |
| 0118 | Increase in signal level from the engine temperature sensor above the permissible level |
| 0122 | The signal level from the throttle angle sensor drops below the permissible level |
| 0123 | Increase in signal level from the throttle angle sensor above the permissible level |
| 0130, 0131 and 0133, 0134 | Missing or low signal from the first lambda probe |
| 0132 | Crankshaft Position Sensor Error |
| 0135 | Incorrect operation of the heating system of the first lambda probe |
| 0136 | Short circuit of the second lambda probe |
| 0137, 0138 | Missing or low signal from the second lambda probe |
| 0140, 0141 | Incorrect operation of the second lambda probe heating system |
| 0171, 0172 | Excessively lean or rich mixture |
| 0201-0204 | Gap in the injector control wiring (from 1 to 4 cylinders) |
| 0217 | Engine temperature goes beyond the upper limit |
| 0230 | Broken fuel pump drive relay |
| 0261, 0262 | Breakdown to "minus" or "plus" of the wiring for controlling the injector of the first cylinder |
| 0264, 0265 | Likewise for the second cylinder |
| 0267, 0268 | Same for the third cylinder |
| 0270, 0271 | Same for the fourth cylinder |
| 0300 | Numerous misfires on all cylinders |
| 0301-0304 | Problems with ignition in a specific cylinder (from 1 to 4 cylinders) |
| 0326-0328 | Failure of the knock sensor |
| 0335-0338 | Damage to the signal circuit from the crankshaft sensor |
| 0340 | Camshaft position sensor does not work (only for 16 valves) |
| 0342, 0343 and 0346 | Phase sensor (only for 16 valves) |
| 0351-0354 | Coil failure (16 valves only) |
| 0363 | Restriction of fuel supply due to ignition misfires |
| 0422 | Low efficiency of the neutralizer |
| 0441, 0444 and 0445 | Absorber malfunctions |
| 0480, 0481 | Radiator fans do not work |
| 0500 | Speed sensor faulty |
| 0506, 0507 | Failure of the idle control system |
| 0511 | No signal from IAC |
| 0560, 0562 and 0563 | Problems with voltage in the on-board network |
| 0601 | ECM memory error |
| 0615-0617 | Problems with the starter relay |
| 0627-0629 | You need to check the fuel pump relay |
| 0645-0647 | Problems with power supply through the relay to the compressor clutch |
| 0650 | Malfunction warning lamp does not work |
| 0654 | Failure of the tachometer circuit |
| 0685-0687 | Closing the main relay circuits |
| 0691, 0692 | Fan relay shorted |
| 1102, 1115 | Drop in resistance of the lambda probe heating coil |
| 1123, 1124 | Violation of mixture parameters at idle |
| 1127, 1128 | The same, but at medium load |
| 1135 | Short circuit of the first lambda probe heater circuit |
| 1136, 1137 | Violation of mixture parameters at low load |
| 1171, 1172 | Incorrect operating parameters of the CO sensor |
| 1335, 1336 | Throttle Position Error |
| 1386 | Errors in the data transmission circuit from the knock sensor |
| 1410, 1425 and 1426 | Absorber purge failure |
| 1500, 1501 and 1502 | Open or short circuit in the fuel pump relay circuit |
| 1509, 1513 and 1514 | Damage to the idle speed control circuit |
| 1606, 1616 | Rough Road Sensor Errors |
| 1620-1622 | Errors in ECU memory blocks |
| 2070, 2071 | Malfunction of the valve for changing the length of the intake channels |
| 2100, 2101 | Open circuit of the electric throttle valve |
| 2102, 2103 | Electric throttle actuator short circuit |
| 2122, 2123, 2127 and 2128 | Damage to the gas pedal position sensor |
| 2187, 2188 | Violation of the mixture composition at idle |
| 2135, 2138 | Asynchronous operation of throttle position sensors |
| 2176, 2178 | It is necessary to set the throttle valve to zero position |
| 2187, 2188 | Violation of the mixture composition at idle |
| 2301, 2304, 2307 and 2310 | Closing the control circuits of the ignition coils |
| 2500, 2501 | Exit of the operating parameters of the generator excitation circuit beyond the tolerance range |
| 0720 | Automatic transmission output shaft sensor faulty |
| 0717 | Failure of the automatic transmission turbine speed sensor |
| 0706, 0705 | Contacts in the automatic transmission selector are faulty |
| 0962, 0963 | Failure of the pressure regulation solenoid in the automatic transmission |
| 0973, 0974 | Failure of the gear shift solenoid in the automatic transmission |
| 0731-0734 | Transmission errors in automatic transmission |
| 0744, 1744 | Automatic transmission clutch malfunctions |
| 0711-0713 | Failure of the automatic transmission oil temperature sensor |
| 0863 | Automatic transmission unit communication error via CAN bus |
| 1735-1738 | Gear selection lock |
| 062F | Resetting the memory of the automatic transmission control unit |
| 230 | No signal from fuel pump relay |
| 263, 266, 269 and 272 | Failure of the control unit (driver) of the injector nozzles |
| 650 | Burnout of the check indicator or its wiring |
New Lada: Lada Kalina does not start, the starter turns: reasons, photos, videos
The video filmed by the channel “In Sandro’s Garage” demonstrates all the functionality of the additional State computer.
Causes of compression loss
Now let's try to find out why the pressure in one or more cylinders is lost. The causes are divided into mechanical and non-mechanical. Let's look at them separately.
Non-mechanical damage
First, let's look at the non-mechanical reasons why compression in a car engine has disappeared. These include errors made during the repair of the power unit. If you yourself or at a service station set the valve timing incorrectly, the valves will be able to close, but not at the moment when required. During the compression stroke of the cylinder they will be slightly open. As a result, some air will begin to leave the system. And the displacement will not be enough for the valves to come into contact with the pistons, which will lead to their damage.
Sometimes the problem is associated with coking, as well as stuck piston rings. Such a malfunction will cause the valves to begin to stick into the grooves. Gases will pass through them easily due to the lack of a seal. With such a malfunction, the oil scraper rings function correctly, and the engine fluid cannot fill the gaps that appear in the system, since the lubricant will be washed off the walls by the remnants of the air-fuel mixture, which has not been burned.
Mechanical damage, wear
Damaged exhaust valve
If a 4- or 8-cylinder engine is running without compression, the reasons may be mechanical. Low pressure in the engine suddenly formed due to the fact that:
- The exhaust valve has been damaged. Cracks appear on it due to natural wear and tear of the power unit. In addition, it may not fit well enough.
- The valve seats themselves were destroyed. Weak compression is due to the presence of mechanical damage on them.
- Worn or burned out cylinder head gasket. This usually occurs as a result of natural depreciation. Less commonly, the reason is that contamination gets on the plane of the sealing element. Gasket burnout can occur during long-term operation of a vehicle with an overheated engine. This, in turn, will lead to the formation of cracks in the cylinder head, and the head or block itself may become deformed.
- Mechanical faults also include cylinder scuffing. This occurs as a result of overheating.
- Wear or damage to the cylinder-piston group.
- Breakage or complete destruction of the inter-ring bridges of the piston elements.
- Intake valve failure.
- Formation of cracks and other defects directly on the pistons or cylinders.
- The appearance of carbon deposits on rings and seals, which contributes to a drop in compression.
- Damage and further breakage of the timing belt or chain. The timing belt is a consumable item, so it must be replaced periodically. Due to a break, the valves of the power unit may bend.
Lada Kalina: jerks and dips when moving. The engine does not develop full power
There are times when you seem to be driving normally and then your car starts to jerk when starting from a stop, or when you start to shift to a higher gear it starts to stall. Or if there are no jerks or dips, but your horse does not seem to develop full power. what to do then? How to diagnose and find the cause yourself. The table below will help with this.
The engine does not develop full power, the car does not have sufficient throttle response Jerks and dips when driving the car List of possible faults Diagnostics Elimination methods
| The air filter may be clogged | You need to open and inspect the air filter | Removing or blowing out the filter |
| Increased resistance to gas movement in the exhaust system | We inspect the exhaust system itself for bruises and damaged pipelines, check the condition of the catalytic manifold | We replace damaged elements of the exhaust gas system (the pipelines themselves) |
| possible leakage of foreign air into the intake tract | We inspect the joints, check the fit of the hoses, fittings, and the tightness of the clamps. Diagnostics - turn off the vacuum brake booster for a short time, plugging the receiver fitting. (Caution! The force on the brake pedal will increase significantly!) | We replace gaskets, parts with deformed flanges, and replace a faulty vacuum booster |
| Incomplete throttle opening | Determined visually with the engine stopped | Adjust the throttle valve actuator |
| Disturbed valve timing | Checking the alignment of the marks on the crankshaft and camshaft pulleys | We establish the correct relative position of the shafts (by marks) |
| Low compression in the engine cylinders (less than 11 bar): wear or damage to valves, their guides and seats, stuck or broken piston rings | Checking the compression | We replace faulty parts |
| The gaps between the electrodes of the spark plugs do not correspond to the norm | Check clearances | Bend the side electrode, set the required gap or replace the spark plugs |
| Heavy carbon deposits on the spark plug electrodes; ingress of carbon particles into the gap between the electrodes | Diagnosed only by examination | Check or replace spark plugs if necessary |
| The insulation of high-voltage devices and circuits is damaged | Using an ohmmeter, check for open or breakdown (short to ground) of the ignition coil windings and high-voltage wires | We replace a damaged ignition coil and high-voltage wires |
| There is not enough fuel in the tank | By level indicator and fuel reserve indicator | Add fuel |
| The fuel filter is clogged, the water that has entered the power system is frozen, the fuel lines are deformed | Check the pressure in the fuel system (at least 3.6 bar) | Replace the fuel filter. In winter, place the car in a warm garage and blow out the fuel lines. Replace defective hoses and tubes |
| The fuel pump does not create the required pressure in the system | Check the pressure in the fuel rail, make sure the fuel module strainer is clean | Clean the fuel module strainer. If we find something, then we replace the faulty fuel pump, pressure regulator |
| Poor contact in the fuel pump power circuit (including ground wires) or its relay is faulty | Checked with an ohmmeter | Clean the contacts, crimp the wire ends, replace the faulty relay, wires |
| Faulty injectors or their circuits | The Check indicator is on. Check the injector windings and their circuits with an ohmmeter (no open or short circuit) | Replace faulty injectors, ensure contact in electrical circuits |
| Crankshaft position sensor not installed correctly | Check the gap between the sensor and the teeth of the crankshaft drive disk (0.5-1.5 mm) | Clean the sensor rod of any metal particles. Replace damaged sensor |
| The phase sensor or its circuits are faulty | The Check indicator is on. Check the sensor with a tester | Restore contact in the electrical circuits, replace the faulty phase sensor |
| The mass air flow sensor or its circuits are faulty | You can evaluate the performance of the mass air flow sensor using diagnostic equipment at a service station | Restore contact in electrical circuits, replace the faulty sensor |
| One or both oxygen concentration sensors are faulty | The Check indicator is on. You can evaluate the performance of oxygen concentration sensors and the reliability of the connections of their electrical circuits using diagnostic equipment at a service station | Restore damaged electrical circuits Replace faulty sensor |
| The controller or its circuits are faulty | The Check indicator may light up. To test the controller, replace it with a known good one. | Replace the faulty controller |
| The clearances in the valve drive are not adjusted | Check valve clearances | Adjust the clearances in the valve drive |
| Severe wear on the camshaft cams | Inspection after partial disassembly of the engine | Replace worn camshaft |
| Loose or broken valve springs | Inspection during engine disassembly | Repair the engine |
| The throttle position sensor or its circuit is faulty | The Check indicator is on. Check the throttle position sensor | Restore contact in electrical circuits, replace the faulty sensor |
| The coolant temperature sensor (engine management system) or its circuit is faulty | Check the sensor resistance at different temperatures with a tester | Restore contact in electrical circuits, replace the faulty sensor |
New Lada: Where is the immobilizer unit located?
Checking the compression level
A sharp drop in pressure will ultimately lead to serious problems with the engine. If there is no compression in one cylinder, and the reasons are unknown, then diagnostics must be performed.
Rules for measuring quantities
Let's consider the nuances that should be taken into account when checking:
- Before diagnostics, the power unit must be spun up to maximum speed using a starter device. To do this, it is necessary to provide all conditions, reducing the likelihood of energy loss to a minimum.
- It is necessary to open the engine hood and disconnect all high-voltage wires from the spark plugs. The devices themselves are unscrewed and dismantled. This prevents rotational resistance from developing.
- When diagnosing, the power unit should be warmed up; the test is performed on a warm engine.
- Before the process, the fuel supply is turned off to prevent the engine fluid from being washed off from the walls of the engine.
- It is necessary to fully charge the battery in order to spin the engine crankshaft as much as possible.
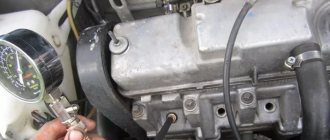
Detailed steps for checking compression
So, the first thing you need to do is warm up Kalina to operating temperature, and then relieve the pressure of the fuel system. To do this, remove the pump fuse and start the engine so that all the fuel is consumed - the engine should stall. You can read more about this at the very beginning of the material on replacing the fuel filter.
Then you need to complete the following steps. First, disconnect the wire block from the ignition module.
Now we remove the high-voltage wires from all four spark plugs:
Then we unscrew all the spark plugs and remove them from the cylinder head.
Next, everything is quite simple. We connect the compression gauge fitting to the first cylinder - in the place for the spark plug. Next you will need an assistant. One person must sit in the passenger compartment and, with the gas pedal fully depressed, start the car (turn the starter).
At this time, you observe the readings of the device. It is necessary to check, that is, turn the starter, until the compression meter readings stop increasing. This usually happens in 4 compression cycles.
Indicators of at least 10 Bar are considered acceptable. We do the same procedure with the remaining cylinders. Only after each check, be sure to reset the device readings.
After checking the compression on my car, the device showed almost 14 Bar in each cylinder, which is an excellent result. No deviations were detected in all four cylinders, which means everything is fine with the engine of my Kalina! I wish the same for everyone.
Using a compression gauge
To perform the test, you will need an appropriate device. A compression gauge is a simple pressure gauge equipped with extensions, as well as adapters designed to connect to different spark plugs. The types of such devices differ depending on the type of power unit - gasoline or diesel . This is due to the fact that the latter has a higher compression level.
- Open the hood of the car, disconnect the wires from the spark plugs and unscrew them with a wrench. Remove devices.
- Prepare the device for diagnostics. Connect an extension cord and adapters of appropriate sizes to it, install them in the spark plug sockets.
- After installation, sit in the driver's seat and turn the starter device. On a diesel car, when diagnosing compression, it is necessary to remove the injectors.
- Perform a check on each engine cylinder. The obtained indicators must be compared with those indicated by the vehicle manufacturer. They are usually noted in the service manual.
Oil check
Diagnostics can be performed using motor fluid. But for this you will still need a compression gauge:
- Open the hood and disconnect the high voltage wires from the spark plugs.
- Unscrew them from their seats. Pour 30-50 grams of motor oil into the sockets where they are installed.
- Carry out a pressure diagnostic with the device. If the operating parameter has increased, and there is no difference in performance between the cylinders, then repair the seals or rings. They could have coked up. You can replace them yourself. In the case of rings, you will have to remove and disassemble the block head.
Level up on your own
Now we’ll tell you what to do to increase blood pressure. In garage conditions, it can be increased due to the formation of soot and deposits on the cylinders. All other faults can be resolved by dismantling the cylinder head and replacing damaged components. When removing the cylinder head, it will need to be bored, so it is better to entrust this process to specialists. How to increase the compression level:
- Prepare kerosene and alcohol. It is necessary to mix 25 g of each substance in a one to one ratio. One cylinder of the power unit will require 50 g of the resulting mixture. If you need to increase the pressure in several at once, then multiply 50 g by the number of elements.
- Start the vehicle engine. Let it warm up to operating temperature.
- Pour about 50 g of a mixture of kerosene and alcohol into the cylinders whose compression needs to be increased. The car should sit like this for about ten hours.
- After the time has passed, add about 20-30 grams of motor fluid and start the power unit. He needs to work for 20 minutes. With minor deposits on the engine walls, carbon deposits will be removed.
The heater does not heat at idle, there is a murmur under the panel
In cold weather, owners of viburnum often begin to have problems with the operation of the stove at idle speed.
For example, when you warm up the car, the engine temperature is already rising, and cold air is still blowing from the heater; when the gas is turned on, the heater begins to blow warm or hot air with the characteristic murmur of water under the instrument panel. These symptoms indicate that there is air in the engine cooling system.
Air enters the system mainly due to leaky connections of the pipes, as well as incorrect operation of the expansion tank plug.
First of all, you need to understand why an air lock forms, for this:
- We check for coolant leaks in the connections of the pipes, if there are any, we tighten the clamps or replace them.
- We check the coolant level in the expansion tank; for viburnums, it is advisable to keep the level at or slightly above the maximum.
- We check the correct operation of the expansion tank plug; if the air inlet plug does not work or with noticeable difficulty, then it is better to replace it; below I will explain in more detail about the plug.
- It is also advisable to check whether the interior heater radiator is leaking; this can be done from inside the cabin by removing the right lower side of the panel under your feet and feeling the floors and the heater block itself.
There are 2 main ways:
- Works on all families of Viburnum cars: stand with your face on a good slope, unscrew the cap of the expansion tank and warm up the car until the fan operates. After the radiators and engine have completely warmed up, a trickle of coolant will flow through the return into the expansion tank, if it doesn’t work you need to gas it. We constantly monitor the structure of the incoming liquid; if it foams and there are clearly bubbles in it, then we continue further until coolant flows without air. This procedure takes about 20-30 minutes.
- We remove the plug using the pipes going to the throttle assembly; those with an electronic gas pedal are not suitable. In this option, we leave the switched off car to stand for a certain time so that the air rises to the highest point, namely to the throttle assembly. After this, we unscrew one of the pipes and, holding one of the holes (on the throttle or the hose itself), blow into the expansion tank until coolant flows out without air, after that we plug the hole and carry out the same operation on the other. After two operations, we quickly connect everything back so that no air gets in.
After removing the plug, be sure to increase the fluid level to the maximum.
When the liquid in the cooling system is heated, it expands and pressure in the system increases.
In order to prevent the system from rupturing, the cap of the expansion tank must release excess air when the pressure rises to 1.3 atmospheres. When cooling, the liquid and air compress and a vacuum appears in the system.
To prevent air from being sucked in from under the pipes, the cover must freely allow air into the expansion tank.
Often these covers are of poor quality or simply oxidize and stop normally letting air in and out from outside, which causes air to be sucked in at weak points and, accordingly, the system is re-aired. It also happens that the cover valves freeze when the engine cools down.
To troubleshoot the lid, try sucking air out of it from the back side; if air does not flow in or it comes in with obvious force, then it’s time to change the cover.
The presence of freezing is checked in the following way: leave the heated car until it cools completely, then unscrew the lid and look at the valves; if they are completely covered in ice, then the problem is condensation.
In case of freezing, you can try treating the lid with silicone grease or VD-shkoy.
There is also another option for dealing with bad caps - unscrewing them in winter to allow free air access in both directions through the threads. But keep in mind that in this case the maximum boiling point of the coolant will decrease.
Video “What is the difference between compression and compression ratio?”
The main differences between these concepts are shown in the video (the material was filmed and published on Avto-Blogger channels).
Compression is the amount of maximum pressure in the cylinder created when the engine is idling with the starter (for example, when the spark plug is turned off). Engine compression should not be confused with the compression ratio, because these are different concepts.
Compression is a force exerted on a gaseous body, leading to a decrease in the volume it occupies, as well as an increase in pressure and temperature. In the broadest sense of the word, compression is the amount of pressure that is created in the cylinder at the end of the compression stroke.
When diagnosing malfunctions associated with interruptions in engine operation, the first step is to measure the compression. This will give you the right direction for further troubleshooting. You can improve the ignition and fuel supply as much as you like, but if the cylinder is not sealed enough, then it will not work normally. Timely compression measurements can detect cylinder depressurization in the early stages, thus saving money on repairs and time in troubleshooting.
Diesel engines are especially demanding on compression, since in them the fuel ignites without the use of a spark plug. In such an engine, a portion of fuel is injected through a nozzle into air heated from compression in the cylinder (to a temperature exceeding the ignition temperature of the fuel). As a result, if there is no decent compression, then there will be no conditions for ignition of diesel fuel. During the injection of the fuel mixture, it is atomized, and then combustion centers appear around individual droplets of the fuel mixture; as the fuel mixture is injected, it burns in the form of a torch. Since diesel engines are not subject to the phenomenon of detonation characteristic of engines with forced ignition, they can use higher compression ratios (up to 26), which, in combination with long combustion, ensuring constant operating pressure, has a beneficial effect on the efficiency of this type of engine , which can exceed 50%.
Is the stove heating poorly? try it!!!
Hello everyone, today I would like to talk about the possible reasons why the stove does not heat well and the Lada Kalina car blows cold air. I counted 7 main reasons, and that is why the title of the article contains “7 reasons”.
Cold, frost, Kalina
Out of spite, the stove blows by
The problem is completely resolvable
After all, the main thing is to find the reason.
This is what we will be doing in the near future.
So, let's start with the most harmless and easily eliminated reasons.
The first is the expansion tank cap; if necessary, replace it with a new one.
The third is the coolant level. If necessary, add fluid to the normal level.
The fourth is a dirty cabin filter, which reduces the flow. It also needs to be replaced.
Fifth is the heater radiator, of course on Kalina changing it is an unpleasant feeling, but where to go.
The sixth is depressurization of the cooling system; you need to find the damaged pipe and replace it with a new one.
Seventh, this is a faulty thermostat; if the engine does not warm up to the required temperature and takes a long time to warm up, then most likely it is this. Accordingly, the stove does not work well; the thermostat or thermoelement should be replaced.
Recently in our VK group I saw one post that talked about solving a problem with the stove. And the problem was this: even at an engine temperature of 80-90 degrees at full speed, the stove did not warm up the interior well.
Moreover, everything is fine with all the equipment of Kalina’s heating system, and the thermostat is working, and there is no air lock, but it heats - well, not as it should! Read about the solution to this problem below, but for now a few words about observing your car.
I remember the first winter, the stove fried really well, and on the highway I almost never turned on second gear, since even in first it was hot in the cabin, and at fairly low temperatures - down to -25 degrees.
In subsequent winters I did not experience any sensation of heat, although I never froze. But there is one BUT - now the first speed of the heater was not enough for a comfortable temperature.
But until recently I didn’t bother about this, it’s warm at speed 2, and it’s normal!
New Lada: Programming the remote control key for any VAZ, instructions, tips.
And when I read one article, I realized that the problem is not isolated and most likely my Kalina also has such a problem.
The essence of the modification is to ensure that the damper moves as far forward as possible (in the direction of travel of the car) when turning the lever to the extreme “hot” position. If you doubt that you have this problem, you can do as I did.
As a result, in normal mode, without any manipulations with the damper, the temperature on the device showed 47 degrees (the car was not yet warmed up).
Then I immediately lower my hand under the panel and press the lever harder until it stops, thereby opening the damper to the maximum.
It feels like you may not even feel that the damper has moved, since there is enough movement of a millimeter for there to be a drop in temperature.
As you can see, in my case it also turns out that the stove did not heat well, compared to how it heats now. Well, in order to slightly modernize that same ill-fated knot, you will need a small spring (try it on on the spot) and pliers to change the length if necessary.
I think that the meaning of the modernization is clear; it is necessary to hook one end of it to the damper lever, and the other end to the protrusion on the body. It is located there, as if specifically for this modification
A lot of Lada Kalina car owners are not happy with the performance of its stove. Moreover, there are a lot of different symptoms that require an individual solution. For some, the stove on Kalina simply does not work well, for others it blows cold air or blows in the wrong direction as you point it.
Why does Kalina's stove blow cold air?
Here is one of the real cases, on Kalina the stove was blowing cold air at idle, it was warm only at high speeds. Replacing the thermostat did nothing. It turned out that antifreeze was leaking a little, the level was constantly minimal, I had to add more.
First, the location of the leak was determined, it turned out that it was the pump gasket, this problem was eliminated without removing it, just tightened the connections a little. Then antifreeze was added and Tashkent came to the car.
Another common reason why cold air blows from Kalina’s stove is that the gasket above the head burns out, part of the exhaust gets into the cooling system, and as a result the stove becomes airy.
Many people do not monitor the level of antifreeze, but in vain, part of it naturally disappears during the summer season, the minimum level directly affects the stove, some managed to return it to normal operation only by restoring the level.
The thing is that in the control unit of the heater levers, there is an unpleasant defect associated with large gaps in the mechanism, as a result of which the heater begins to blow, for example, all the time at the feet, while bypassing the glass or, vice versa.
The air intake damper does not fit tightly; warm air mixes disproportionately with cold air.
1. If your windows heat up poorly or take a long time, you can install additional “flaps”, which are on sale specifically for Kalina. This is what they look like: More heat begins to reach the glass from the stove, and they thaw much faster.2. An old-fashioned method known to many VAZ owners, including Kalina, installing cardboard on the radiator significantly helps in the operation of the stove, the car warms up faster and cools less when driving.3.
Replace the cabin filter in a timely manner. A clogged filter in the Lada Kalina creates an additional load on the stove; it makes the windows difficult to warm up in severe frost.4. Be sure to first check the coolant level in the expansion tank; a simple top-up can revive the operation of the stove. 5.
Doesn't heat well, the stove is on Kalina. Airlock
You have checked all the main systems, the dampers are functioning, the thermostat is working, the coolant level is normal, but the stove on your Kalina is not heating well. In this case, most likely there is an air lock in the cooling system, which prevents it from working normally.
How to remove an air lock from the system? On a hot engine, you need to open the expansion tank cap; when you open it, you should hear a characteristic “splash”; if after this the coolant level rises significantly, you need to repeat this 15 times, with an interval of 2-3 minutes.
If you do not hear a “zilch”, then the valve on the plug is most likely faulty.
Kalina stove control
Cold stove on viburnum.
The stove on Kalina is considered one of the best and warmest, this is confirmed by many owners, but until they encounter a defect, which we wrote about above, or they catch an airlock that will ruin the whole impression.
It is very easy to control the operation of the stove on the Lada Kalina, both on the old version and on the new one.
How to measure compression correctly
To measure compression, you need to install a compression gauge instead of a spark plug (ignition or glow plug). This device is a pressure gauge connected by a hose to a fitting and a check valve. As the engine crankshaft rotates, air is forced into the hose until the pressure in the hose equals the maximum pressure in the cylinder. Its value will be recorded by a pressure gauge.
When measuring compression, important rules must be followed. Firstly, the engine must be “warm”. The fuel supply must be turned off. You can, for example, turn off the fuel pump, injectors, or use other methods to prevent large amounts of fuel from entering the cylinders. Secondly, you need to turn out all the candles. Selective removal of spark plugs, practiced at some service stations, is unacceptable, as it increases the rotational resistance and arbitrarily reduces the speed when the engine is cranked with the starter. Thirdly, the battery must be fully charged and the starter must be in working order.
Compression is measured with both the throttle valve open and closed. Moreover, each method gives its own results and allows you to identify its own defects. So, when the valve is closed, little air will obviously enter the cylinders, so the compression will be low and will be about 0.6-0.8 MPa. Air leaks in this case are comparable to its entry into the cylinder. As a result, compression becomes especially sensitive to leaks - even with small leaks, its value drops several times.
When measuring compression with the throttle open, the picture will be different. A large amount of incoming air and an increase in pressure in the cylinder, of course, contribute to an increase in leaks. However, they are obviously less than the air supply. As a result, the compression does not drop so significantly (to approximately 0.8-0.9). Therefore, measuring compression with an open valve is better suited for determining more “severe” engine defects, such as piston failures, ring coking, valve burnouts, and cylinder surface scuffing.
In both measurement methods, it is advisable to take into account the dynamics of pressure growth - this will help to establish the true nature of the malfunction with greater probability. So, if on the first stroke the pressure measured by a compression meter is low (0.3-0.4), and during subsequent strokes it increases sharply, this indirectly indicates wear of the piston rings. In this case, pouring a small amount of oil into the cylinder will immediately increase not only the pressure on the first stroke, but also the compression.
The most common device for checking compression is the compression meter mentioned above. Unlike simple domestic designs, foreign companies produce entire sets with a set of adapters (adapters) that allow measurements to be taken on cars of any make and model.
Modern engine testers quickly and efficiently measure compression. These devices actually record not the pressure, but the amplitude of the pulsation of the electric current consumed by the starter during cranking. After all, the higher the pressure in the cylinder, the greater the expenditure of starter power to rotate the crankshaft. This makes it possible to simultaneously measure compression in all cylinders in just a few revolutions, without resorting to turning out spark plugs, which is especially important for multi-cylinder engines.
Analysis of test results
Based on the measurement results obtained, conclusions can be drawn in accordance with recommendations developed over many years of practice:
- from 13 to 14 Bar - excellent compression, observed on new run-in engines;
- from 12 to 13 Bar - good indicators, the power unit is in normal condition;
- 11-12 Bar - acceptable indicators, the condition of the piston group is within normal limits, but is approaching wear;
- a pressure of 10 bar or lower indicates that it is time to repair the engine.
When carrying out the analysis, it is necessary to take into account an important point - the uniformity of readings in all cylinders.
If over time the pressure gradually and equally decreases in each of them, then there is a natural process of wear of the piston rings, piston walls and cylinders. If 1 or 2 measurements differ sharply from the others, then regarding repairs you need to be guided by the worst indicators.
Finding the reasons for low compression
If a decrease in compression is detected in one of the cylinders, the next step is to identify the causes of this malfunction. In general, there are two reasons for a decrease in compression - leaks can occur either through the compression rings or through the valves and their seats. To check who exactly is at fault, you need to pour a little engine oil into the “weak” cylinder (through the spark plug channel) and repeat the compression measurement. The secret is that the added motor oil will reduce the gap in the piston-cylinder pair (when a working cylinder-piston group (CPG) operates, this gap is sealed with rings) and compression will increase. Of course, in an engine with direct injection, it is worth paying attention to the fact that there is a recess in the piston and some of the oil will settle in it (that is, you need to pour enough oil to fill this recess to the brim and overfill it a little). If after adding oil to the cylinder the compression remains the same, then it is necessary to repair the valves (grinding, etc.).
If the compression has increased (when measured with oil), then the rings in this cylinder are to blame. Then there are two ways - either disassembling the engine, or decoking and flushing the oil system. Of course, you should try decoking first. And if it doesn’t help then repair. However, if decarbonization helped in the future, it is worth intensifying monitoring of this cylinder and planning to replace the rings.
We carry out decarbonization
Since coking of the rings is one of the most common causes of loss of compression in the cylinder, let’s look at how to eliminate everything.
New Lada: Adjusting the handbrake cable on viburnum
So, let's assume that a pressure drop is noted in one of the cylinders. Pouring oil into it and re-measuring it showed an increase in compression. The verdict is that the rings are stuck or broken.
To carry out decoking, you will need a special washing liquid (for example, “LAVR”).
You can also use the old proven method - make such a liquid yourself by mixing kerosene with acetone (in a 1:1 ratio).
And then we proceed like this:
- Warm up the engine;
- Unscrew all spark plugs;
- We install the pistons in a row (using a key for turning the crankshaft and 4 rods of equal length);
- Using a syringe, pour liquid into all cylinders (the instructions for the product indicate the required amount. Usually this is 50-70 grams for each cylinder);
- Cover the spark plug holes with a rag and leave the engine to cool for 10-12 hours. It is also advisable to periodically “move” the pistons, slightly turning the crankshaft in different directions;
- We purge the cylinders (turn the crankshaft with the starter to remove any remaining product);
- Replace the spark plugs;
- Start the engine ();
- After starting, we give it time to idle for 5-7 minutes. At first, engine operation will be accompanied by strong smoke and interruptions, but gradually everything will return to normal;
- We go out onto the highway and give the engine the maximum possible load to remove carbon deposits from the cylinders.
All reasons for low compression
If you experience loss of compression or sag in one of the cylinders, you should look for the exact cause as follows.
From above, valves are responsible for the tightness of the combustion chamber, but a decrease in compression can be not only due to leaks in the valve disc/valve seat pair. Tar deposits on valves can reduce the intake port area (additional intake resistance), or even prevent the valve from closing completely. The appearance of deposits on the valve and disruption of its contact with the seat lead to deterioration of heat dissipation (heat from the valve is dissipated through the seat to which it is adjacent) and, subsequently, to burnout of the valve. But the valve can also burn out due to a decrease in the thermal gap: in this case, when the engine warms up, the valve will no longer fit normally to the seat. The resulting annular gap between the valve disc and its seat reduces compression. Hot gases burst through this gap and burn the thin edge of the plate, which further reduces compression. The engine loses power and the valve disc burns out.
Incorrectly set valve timing can cause a decrease in compression due to untimely opening/closing of the valves. This problem affects all cylinders equally, i.e. no compression differences between the cylinders will be detected.
Some modern engines regulate the supply of air to the cylinders not with the throttle valve that is familiar to us, but with the height/phases of lift of the intake valves (Valvetronic for BMW, MultiAir for Fiat, etc.). Theoretically, if there is a malfunction in the valve lift adjustment system, compression can also decrease, because The lift of the valves during measurement may not be complete. The effect of this fault on all cylinders will be the same if the fault is permanent. However, if the malfunction is of a floating nature, the compression measurement will show new data each time, and in this case it is reckless to judge the malfunction of a particular cylinder by compression. The cause may be either a malfunction of the exhaust valve timing control solenoid valve or a sensor failure.
From below, the elements of the cylinder-piston group are responsible for the tightness of the combustion chamber. A decrease in compression is caused by wear and, as a consequence, an increase in gaps in the CPG, which is also accompanied by an increased passage of gases into the crankcase. The same consequences are caused by a change in geometry (deformation of the piston or cylinder) due to engine overheating, stuck rings, scuffs on the cylinder bore, or a broken compression ring. A burnt-out piston first of all manifests itself as extraneous noise when the engine is running, and only then by a decrease in compression in the cylinder.
Separately, we highlight the burnout of the cylinder head gasket. This malfunction can be further checked by creating pressure in the cylinder with the valves closed (for example, with a compressor), and observing the appearance of bubbles in the expansion tank of the cooling system, or by hearing noise in an adjacent cylinder.
Compression - what is it and what should it be?
Compression is a measure of the maximum pressure in the combustion chamber that the piston can create when it reaches TDC during the compression stroke. Measuring this indicator gives an idea of the tightness of the chamber, which in turn depends on the condition of a number of elements - the piston and compression rings, valves with seats, head gasket, and the installed thermal gap in the timing belt.
Since the compression measurement technology itself is simple, and the data obtained as a result of its implementation makes it possible to estimate the remaining life of the power plant and identify a number of malfunctions, this diagnostic operation is quite common.
Although car power plants have a common design principle, they are structurally different, which also affects compression indicators.
Each engine has its own specific maximum pressure values in the combustion chambers, which must be indicated in the technical specifications. documentation for the car.
For example, for a VAZ-2106 a compression of 11 kgf/cm2 is considered normal, but for a VAZ-2110 this figure is already 13 kgf/cm2.
Note that when measuring, it is not necessary that the device should show values that correspond to the norm. As engine components wear, compression readings will drop.
Moreover, if they drop below a certain value, this will be a signal of extreme wear of the power plant’s CPG, and the need for major repairs.
Some variation in readings between cylinders is also allowed. However, it should not exceed 1 kgf/cm. sq.
That is, if measurements on a VAZ-2115 showed that the compression in the cylinders was 12 kgf in the 1st, 11 kgf in the 2nd, 12 kgf in the 3rd, 12 kgf in the 4th, then the power plant of the car will be considered to be in working order.
Read more about compression and compression ratio of a diesel engine.
Motor repair or replacement with a contract one?
In general, any malfunctions that lead to a decrease in compression in the engine cylinders can be eliminated. If the problem lies in the valves/cylinder head, then repair and restoration will cost 300-600 rubles. A liner for one cylinder will cost 80-120 rubles. If the pistons are damaged, they must be replaced. The price of the issue varies greatly depending on the engine and piston manufacturer. For example, for TFSI engines that suffer from oil burns, a Kolbenschmidt piston costs about 200 rubles, and the original costs 650 rubles apiece (these pistons come complete with all rings).
To these amounts should be added the costs of removing and installing the motor, disassembling and reassembling it. As a result, it turns out that the overhaul of the 2-liter TFSI/TSI engine, which is popular in terms of CPG problems, will cost about 3,600 rubles. This is if you change all four pistons. A contract engine costs from 2,500 to 3,000 rubles (plus replacement work, as well as consumables - 1,000 rubles). In this case – and we are talking about TFSI/TSI engines – many people go for a major overhaul, during which they install modernized pistons, with which the problem of “oil leakage” disappears.
Also, owners of cars whose engines chronically suffer from CPG wear: the appearance of scuffing on the cylinder walls also undergo major repairs with the block liner. This applies to many gasoline engines from BMW, Mercedes (and the Audi/VW engines mentioned above), as well as the widespread G4KD/4B11 engine (Kia, Hyundai, Mitsubishi), which is practically not offered in disassembly shops. Here it is advisable to solve the problem once and for all.
If the compression problem is associated with cylinder head wear, then you can also safely consider the option of restoring it. The work will cost, as we mentioned, 300-600 rubles, plus about 200-400 rubles for its removal and installation with replacement of the gasket.
In a large number of other cases, if a decrease in compression was caused by an accident, maintenance errors or huge mileage, you can safely consider the option of replacing the engine with a contract one. Motors that are not in great demand will cost 1000–2000 rubles, plus about 600–1000 rubles for removal and installation with oil change and necessary consumables.
Why does the heater in a Lada Kalina car blow cold air?
Breakdowns are common not only to old, but also to new cars.
Some owners of Lada cars notice that the heater blows cold air; Kalina may also be susceptible to this problem. This can happen for many reasons. Regardless of this, it is better not to delay repairs. Here, as in the human body, one small violation can trigger a chain reaction. You can deal with such a breakdown yourself or in a service station.
It is easier to prevent a technical malfunction than to spend time and money fixing it later. In order to avoid having to repair the stove on your Lada (it doesn’t matter whether it’s Kalina or Vesta), you need to carefully monitor the technical condition of the car:
- every morning at Kalina’s parking lot, you need to check for dark spots indicating an antifreeze leak;
- inspect the system hoses for leaks;
- if any are found, then it is necessary to immediately change the tank cap;
- daily inspection of the stove radiator;
- If the stove blows cold air, then the reason should be sought in increased coolant consumption.
Daily checks of the vehicle’s “health” will help avoid many problems.
If the radiator valve is loose or the coolant reservoir is leaking, the problem will spread at an alarming rate within a short time.
The first result will be a breakdown of the vehicle's computer. Such a malfunction is not covered under warranty, so repairing the heater and replacing the computer will fall entirely on the shoulders of the car enthusiast. A small rearrangement of the on-board computer will help reduce the risk of such troubles for Kalina:
- carefully dismantle the cladding;
- unscrew 2 screws;
- gently squeeze the computer towards you;
- place it on a shelf in the glove compartment area;
- There is no need to disconnect the wiring harnesses;
- fix the computer in a new place;
- re-grounding is not carried out.
If everything is done correctly, then in the future the Lada Kalina will not be left without an on-board computer, even in the event of an unexpected problem. The main thing is for the driver to make sure that the fastenings are secure after rearrangement.
In most cases, repairing a heater takes little time. If the Lada Kalina requires one, then if you have the necessary tools, you can do everything yourself.
In order to solve the problem with the stove on Kalina, you need to perform the following sequence of actions:
- drain all coolant;
- remove the air filter (the heater damper cannot be removed);
- the brake and gas pedal are dismantled for more convenient replacement of the radiator;
- in some cases there is a need to dismantle the steering structure assembly;
- the battery is removed together with the stand;
- remove the air duct;
- carefully unscrew the hose from the radiator;
- The interior heating hose is dismantled.
To save time in the future, it is necessary to fix the position of the parts in space. This will allow you to avoid delaying the repair of the Kalina heater. In some cases, the above algorithm does not work fully. The culprit here is the individual characteristics of the vehicle. In this case, there is no need to rush or start using brute force.
Experienced drivers recommend removing more parts and components of the vehicle, which will ultimately make it possible to replace the radiator and grille.
Regardless of the complexity of the repair, you must ensure that the coolant has been properly drained and then refilled. Any drips and leaks can negatively affect the technical condition of the iron horse.
During repairs, the car owner may notice wear and tear on some parts of the car. In this case, they should be replaced.
Firstly, this will eliminate the risk of repeated repairs. It is impossible to predict exactly when the car will start to feel unwell. Secondly, high-quality operation of the vehicle saves time and money that the driver would have spent on visiting a service station.