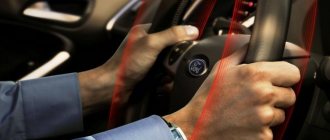
Not every owner of classic cars, for example, VAZ-2107, is satisfied with the design solution of the steering wheel. Many car owners note that the old-style steering wheel is not comfortable due to its large size, and the inability to adjust the steering wheel prevents the driver from taking a comfortable position and even sitting in the driver’s seat. This problem can be eliminated only after the factory element is removed and a steering wheel with a more acceptable design is installed in its place. Therefore, many are interested: how, according to the rules, can you remove the steering wheel on a VAZ-2107 and can you do it yourself? We will deal with these questions in this article. It is also worth noting that you need to remove the steering wheel not only to resolve design issues, but also if the sound signal starts to disappear.
How to remove the steering wheel on a VAZ 2107? Domestic designer
Sometimes car enthusiasts may wonder how to remove the steering wheel on a VAZ 2107. Despite the apparent simplicity of this design element, not everyone manages to do this without incident. Experienced drivers know many examples when, as a result of this work, the column mounting ears broke off. Also, some drivers managed to break their noses. So, without knowing how to do this work, you can not only get additional repairs, but also cause physical harm to yourself. Therefore, before starting work, you should definitely study all the nuances. This will allow you to avoid a number of difficulties, as well as perform this repair with minimal time. How to remove the steering wheel on a VAZ 2107? This question is usually asked by people who decide to repair components associated with this structural element. Also sometimes this is done for tuning purposes. In any case, this work should be done as precisely as possible according to the instructions.
How to easily and safely replace the steering wheel?
The operation of replacing the steering wheel is not particularly difficult, but safety precautions must be observed. The basic steps on how to remove the steering wheel have been described above, but in some cases the following tips may be needed:
Method #1. If the steering wheel sits firmly on the shaft and cannot be removed, then it is necessary to loosen the steering wheel nut as much as possible, but leave it one turn (to protect the teeth, nose and other parts of the face). Then sit in a chair and sharply and evenly hit the steering wheel with your palms from below, upward along the steering axis. After several such impacts, the steering wheel should fly off the shaft.
The main thing is to remember to leave the nut on one turn!
Method #2. To remove the steering wheel, you can use an old Zhiguli jack. The base of the jack needs to be rested against the steering shaft through a wooden spacer, wrap a rope around the steering wheel and throw it over the top of the jack. A piece of cloth (rag) should be placed at the point where the rope comes into contact with the steering wheel so as not to scratch the steering wheel. Next, gradually pull with a jack and remove the steering wheel. Do not forget to completely unscrew the steering wheel fastening nut, since in this case the steering wheel itself will gently “come off” from the shaft.
Steering wheel features
First, let's look at the main features of this structural element. This will allow you to understand why people try to replace the original steering wheel with a tuned one. We will also consider the technological filling of the part.
Steering wheel size for VAZ 2107 – 400 mm
.
This is quite a lot; on many modern cars the steering wheel is somewhat smaller. There are also cars that are equipped with old-style steering wheels, its diameter is 480 mm
.
Drivers often joke about such cars “the steering wheel is like a KamAZ.” For many beginners, such a wheel is simply intimidating, because the steering wheel, whether old or new, looks quite impressive. Girls especially feel uncomfortable. This wheel weighs 2.34 kg.
But, in fact, there is nothing to worry about thanks to the large leverage that is formed due to the size. Turning the steering wheel is quite easy. It turns out to be a kind of amplifier. This is especially noticeable if you have to turn the wheels while standing still. But there is also a drawback. Due to the same significant leverage, sharp maneuvers, especially at high speed, are more difficult to do. Therefore, fans of high-speed and extreme driving are required to change the steering wheel to a smaller one.
There is also a pressure sensor that allows you to turn on the sound signal. It is connected after installation. Incorrect positioning of the steering wheel during installation not only affects convenience, but also interferes with the normal connection of the sound signal.
Sound signal VAZ-2106.07 high tone LETZ S309 — Leave a review
Article: C309, additional articles: 21030-3721010-00, 2103-3721010
Order code: 003074
Designation - C309 Name - sound signal
Applicability: KamAZ vehicles. Design features: set of horn signals.
Specifications:
— rated voltage, V: 12; — current consumption, A: 7.5; — sound pressure level at a distance of 2 m, no more: 105. 118; — fundamental sound frequency, Hz: 480. 510; — 1-wire circuit; — weight, kg: 0.39.
The main manufacturer is JSC LETZ
Information used: Avtokomplektatsiya LLC
Video review Sound signal VAZ-2106.07 high tone LETZ Product video review Sound signal VAZ-2106.07 high tone LETZ in the online store AvtoAll.ru F29oTopIz-g
- Buy analogues
- Passenger cars / VAZ / VAZ-21031 drawing
» href=»/catalog/vaz-3/legkovye_avtomobili-30/vaz_2103-106/signaly-162/#part12322″>High tone signal Electrical equipment / Signals
- » href=»/catalog/vaz-3/legkovye_avtomobili-30/vaz_2107-8/signaly-214/#part26248″>High tone signal Electrical equipment / Signals
- » href=»/catalog/vaz-3/legkovye_avtomobili-30/vaz_2109-9/signaly-199/#part34314″>High tone signal Electrical equipment / Signals
- » href=»/catalog/vaz-3/legkovye_avtomobili-30/vaz_2120__nadejda_-245/signaly-169/#part57427″>High tone signal Electrical equipment / Signals
- » href=»/catalog/vaz-3/legkovye_avtomobili-30/vaz_2114-647/signaly-150/#part1670888″>High tone signal Electrical equipment / Signals
- » href=»/catalog/uaz-5/legkovye_avtomobili-30/uaz_patriot-438/fonar_osvesheniya_nomernogo_znaka__vyklyuchateli_signala_tormojeniya__signaly_zvukovye__predohraniteli_lektricheskih_cepeiy-152/#part1365602″>Low sound signal tones C308 Electrical equipment / License plate light, brake light switches, sound signals, electrical circuit fuses
- » href=»/catalog/vaz-3/legkovye_avtomobili-30/vaz_2106-7/signaly-173/#part21930″>High tone signal Electrical equipment / Signals
- » href=»/catalog/vaz-3/legkovye_avtomobili-30/vaz_2108-18/signaly-204/#part30377″>High tone signal Electrical equipment / Signals
- » href=»/catalog/vaz-3/legkovye_avtomobili-30/vaz_21099-79/signaly-199/#part38253″>High tone signal Electrical equipment / Signals
- » href=»/catalog/vaz-3/legkovye_avtomobili-30/vaz_2115-601/signaly-150/#part1670888″>High tone signal Electrical equipment / Signals
- » href=»/catalog/vaz-3/legkovye_avtomobili-30/vaz_2113-648/signaly-150/#part1670888″>High tone signal Electrical equipment / Signals
- » href=»/catalog/mtz-25/traktora_i_kombaiyny-39/mtz_1522-659/lektrooborudovanie_po_dizelyu-132/#part1841847″>Signal Electrical equipment / Electrical equipment for diesel
- » href=»/catalog/mtz-25/traktora_i_kombaiyny-39/mtz_2103-978/lektrooborudovanie_dvigatelya-111/#part2496292″>Installation of sound signals Electrical equipment / Engine electrical equipment
- » href=»/catalog/mtz-25/traktora_i_kombaiyny-39/mtz_1523-483/lektrooborudovanie_po_dizelyu-133/#part1595214″>Signal Electrical equipment / Electrical equipment for diesel
- » href=»/catalog/mtz-25/traktora_i_kombaiyny-39/mtz_2522-957/lektrooborudovanie_dvigatelya_2822dc_2822_1_-167/#part2469814″>Low-tone horn sound signal Electrical equipment / Engine electrical equipment (2822DC/ 2822.1)
- There are no reviews for this product yet.
By giving sound signals using a car horn, safety on the road increases and the number of accidents is minimized, because most of them can be prevented by giving a warning signal in time. In addition to the safety function, the original horn provides the car with its own unique personality.
Today, the next article in the series “Crystal VAZs or typical breakdowns of domestic cars” is dedicated to the “classics”: VAZ-2101, 2103, 2104, 2104, 2105, 2106 and 2107. These cars have been driving along our roads for decades and, despite Despite all the shortcomings that we will talk about, their popularity is still high.
Doing it right
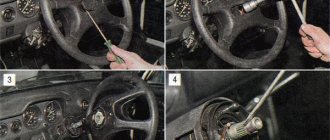
To begin with, it is worth noting that there are two types of steering wheels - one new, the other old. They differ only in the decorative overlay on the horn button. We will not consider removing them separately, since apart from this element everything happens identically. To work, you will need a 24mm socket and a wrench, as well as a slotted screwdriver. It would be a good idea to use common sense, then the repair will be done without injury.
The removal process is quite simple. Just a few steps required
:
- Disconnect the battery. You will need to turn off the power to the sound signal. Lack of power will avoid short circuit;
- Turn the steering wheel so that the wheels point straight ahead;
- On an old-style wheel, you should pry off the lining latches; they are located on the spokes. On new steering wheels, the pad is smaller and is attached by a simple insert into the body. Pry it with a slotted screwdriver and carefully remove it;
- Next, disconnect the wiring from the button that powers it;
- We take the head and unscrew the nut, it is located in the center of the steering wheel. We hold the steering wheel with our hand from turning, usually there are no problems with this action. Do not completely unscrew the nut;
- Take the part with both hands and pull it hard towards you. This is usually enough to rip the steering wheel off its splines. If this does not work, then you can carefully tap the wheel using a mallet. Sometimes the splines get stuck;
- Unscrew the nut completely and remove the steering wheel.
When assembling, pay attention to the correct position of the wheel. This will greatly simplify driving in the future.
When is replacement required?
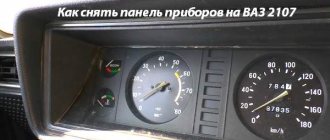
How to remove the dashboard on a VAZ 2107
There are three ways to solve the problem of faulty steering racks.
| Way | When is it relevant? |
| Adjust the rack | If diagnostics show that the unit does not require repair or replacement |
| Repair | If diagnostics allows for partial replacement of elements. Replacement is provided using a repair kit |
| Replacing the unit | If the test shows a complete failure of the node. Installation can be carried out with new rods or old ones, depending on their condition. |
Let us add that if the old steering racks on your VAZ 2114 have covered more than 100 thousand kilometers, their malfunction is unlikely to be corrected with the help of a repair kit. The best option in this case is a complete replacement of the unit.
Steering wheel tuning
Let's look at several options for modifying the steering wheel on this model. Most often, a sports steering wheel is installed. It is smaller in size. Usually it is 300-350 mm
. With such a steering wheel it is more convenient to perform high-speed maneuvers. Also, according to some car enthusiasts, it looks more attractive. You can find similar steering wheels on sale that fit the model and do not require modifications.
Also sometimes the steering wheel is illuminated. LED strips are used for this. With the right approach it turns out beautifully. In any case, in order to complete the work on modifying this structural element, you need to know how to remove the steering wheel on a VAZ 2107. This is the only way to tune the interior without any problems. This skill will also help eliminate any problems associated with the steering wheel.
↑ Installing a steering gear on a car
Having secured seal 2 to the front panel, install the steering gear housing onto the side member without fully tightening the nuts of the housing mounting bolts.
↑ Installation diagram of the steering mechanism on the VAZ-2107
1 — steering gear housing mounting bolts; 2 — coupling bolt of the lower end of the intermediate shaft; 3 — bracket mounting bolts; 4 — steering shaft bracket; 27.5 mm - the distance from the center of the bipod hole to the supporting surface of the steering gear housing with the bipod in the middle position.
Use a special device to orient the crankcase so that the angle “a” does not exceed 32°, and the gap between the shaft and the brake pedal is at least 5 mm. Then fully tighten the crankcase mounting bolt nuts.
How to remove the steering wheel on a VAZ-2104-2107
Many car owners of the wonderful classic VAZ-2107, especially those who like to upgrade their cars, do not like the design of the steering wheel due to its large size.
Due to the fact that the steering column on this car is not height adjustable, the large diameter of the steering wheel makes it difficult to sit comfortably in the seat. Surely tall drivers have encountered this problem.
Therefore, replacing the “original” steering wheel, which is more similar to the steering wheel of a steamship, with a smaller steering wheel with a “sporty” design helps solve this problem.
To replace this vehicle control, you must remove the factory one, and you may also need to remove the steering wheel if the sound signal does not work.
To remove the steering wheel you will need the following tool:
- flat screwdriver;
- 24mm head with wrench and extension.
This must be done in the following sequence:
- We disconnect the negative terminal of the battery just in case.
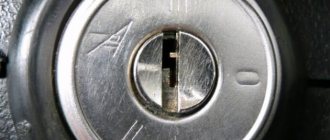
- Carefully, using a screwdriver (preferably the screwdriver slot is small), pry up the “Lada” badge in the middle of the steering wheel, which is a plug, and pull it out. As a result, we see a 24 nut inside.
- We put the steering wheel in a position so that the wheels “look” straight.
- We take the head of the required size, insert it into the extension, and then put it on the nut. We insert the crank into the extension, rest our knees on the steering wheel so that it does not turn when unscrewing the nut, and with a sharp movement of the crank counterclockwise we try to twist the nut. I don’t recommend unscrewing the nut completely, because... The steering wheel sits firmly on the shaft and, if removed abruptly, can hit you in the chest painfully.
- Then we take the steering wheel in both hands and rock it, from side to side, pulling it up. Moreover, it is desirable that the range of movements be frequent. When our steering wheel hits the nut, unscrew it completely and completely remove the steering wheel from the shaft.
Removing the steering column from a car
To replace the driveshaft, you need to remove the steering column from the car.
Begin:
- de-energize the battery;
- after that, the cover plate of the signal switch is removed (to do this, pry it off with a screwdriver);
- remove the cover from the steering wheel;
- Now we are faced with two self-tapping screws, which should be unscrewed with a curly screwdriver;
- after this the lid is completely removed;
- now you need to use the same figured screwdriver to unscrew the three screws that secure the contact of the sound signal;
- disconnect the wire and remove the contact;
- now you will need to take the key for 24;
- use it to unscrew the nut that secures the steering wheel (this should not be done completely, leaving the nut mounted on the shaft);
- remove the steering wheel by pulling it towards you.
Note. The steering wheel should be removed not by jerking, but by rocking the left and right sides and at the same time pulling the part towards you. The nut is not completely removed due to the fact that the steering wheel can come out of the shaft abruptly, thus injuring the face. After removing the steering wheel from the splines, the nut is completely unscrewed.
Advice. If you cannot remove the steering wheel alone, you need to use the help of an assistant who will pull the steering wheel up while the repairman strikes the shaft through a drift.
- dismantle the steering column switch assembly;
- We also remove the ignition switch;
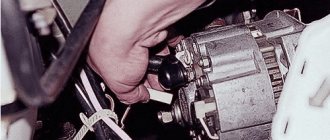
- take a 13mm wrench and unscrew the bolt securing the elastic coupling (located under the pedals);
- Unscrew the bolts securing the steering shaft at the front.
Note. These fasteners are fixed with bolts with shear heads, which eliminates the possibility of standard unscrewing. To do this, you need to strike with a chisel in a tangential direction.
- now unscrew the nuts securing the steering at the rear, using a 13mm wrench;
- dismantle .
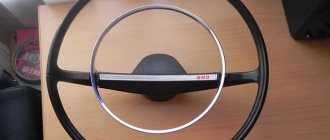
VAZ 2107 steering wheel
The steering wheel is connected to the steering gearbox through an intermediate shaft. The entire steering design is designed to transfer the rotational force of the steering wheel shaft into a similar rotational force of the bipod shaft. When the steering gear lever turns and the steering linkage is applied, the front wheels rotate.
A car steering wheel is a frame with a hub, rim and spokes. On the VAZ 2107, the steering wheel has 4 spokes, and the rim itself is made of special rubber. The steering wheel size on this car is 400 mm. This diameter is quite large by today's standards, but turning the steering wheel is not difficult. There is a pressure element on the steering wheel that allows you to turn on the sound signal.
Is it possible to install from another car?
The steering wheel on the VAZ 2107 differs from the steering wheel of the same “penny” or “six” in its more attractive appearance and comfortable grip. If for some reason the standard steering wheel does not suit you, there are options for replacing it with a part from other cars:
- "Kalina", "Priora", VAZ 2115;
- products from Chinese manufacturers;
- steering wheels from the “sport” category of such well-known brands as Sparco, Momo, etc.
Wheels designed for tuning and sports are universal. They can be installed on different cars using a special adapter that is designed for a specific model.
It is not recommended to install products from unknown Chinese manufacturers on classic rear-wheel drive Zhiguli cars. This is explained by the fact that such cars are not equipped with a rack, but with a steering gear with a worm mechanism. The absence of hydraulic or electric power steering means that sometimes quite a lot of force must be applied to the steering wheel. When installing a low-quality product, there is a possibility that at some point you will be left with the steering wheel in your hands, which will lead to undesirable consequences. Therefore, when choosing a steering wheel, attention should be paid not only to aesthetics, convenience and ergonomics. The steering wheel must also meet safety requirements. You can be confident in the quality of parts from the Togliatti Automobile Plant and well-known European brands, since all products of these manufacturers are tested.
Sports
The sports steering wheel was initially used only in rallies, i.e. for its intended purpose. However, some owners of “Sevens” install such a steering wheel in order to modify their car, to make it different from the standard. Installing a sports steering wheel has the following advantages:
- space is saved due to the smaller size of the product;
- the small size of the steering wheel improves the ability to maneuver at higher speeds;
- attractive appearance.
Of the minuses it is worth noting:
- high probability of buying a low-quality part;
- automatic turn off of turn signals will not function;
- the need to purchase a special adapter;
- there is a possibility of being refused a technical inspection.
Not everyone likes the classic VAZ steering wheel because of its size. However, it is worth considering that installing a sports steering wheel is not a cheap pleasure.
Wood
There are owners of Zhiguli and other “classics” who strive to give the salon a special style and comfort. Therefore, instead of a standard steering wheel, they install a wooden product. This steering wheel is similar in spokes and size to a sports steering wheel, but the rim itself is made of wood. The detail in the interior of the cabin looks quite attractive.
Which part to choose for replacement?
The manufacturer installed a steering wheel with a diameter of 400 mm and four spokes on this car. It is held in place by a safety compound shaft mounted on a bearing. This type of steering wheel has a comfortable design adapted to the grip of your hands. Most often, in case of malfunctions, car enthusiasts install an option designed specifically for the “seven”. But even here it is worth noting that there were two types of steering wheels - old and new. If you have a car that was made a long time ago, then after dismantling it makes sense to change the mount and install an option suitable for the VAZ-2107 that came off the assembly line recently.
If your goal is to modify a car, then suitable models may be those that were installed on:
- Priora;
- Kalina;
- VAZ-2115.
It is acceptable to install sports modifications from well-known manufacturers - Sparco, Momo and others. They have a high price, but you will pay this money for a high-quality spare part that is easy to use.
You should not install only options from China that are sold under unknown brands. And it’s not just that their quality is not the best, but for the most part they have a design problem. Most Chinese models have a worm gear steering gear, rather than an electric or hydraulic booster. This design is not suitable for rear wheel drive cars as you will have to use too much effort to steer. In addition, most of these spare parts are not tested, which casts doubt on their compliance with safety requirements.
How to remove the steering wheel of a VAZ 2107
The need to remove the steering wheel may arise for various reasons. It’s worth going into more detail on when and how to do this.
When to shoot
The VAZ 2107 steering wheel is a fairly reliable part that does not have to be removed very often. There are practically no parts that can fail. The most common reasons for its dismantling are:
- Signal button problems. The problem manifests itself in the inability to use the sound signal, which occurs due to a broken contact;
- appearance. As the car is used, the surface of the steering wheel wears out. To hide signs of wear, car owners use braids, but not everyone likes them. This product additionally increases the diameter of the steering wheel;
- tuning If the goal is to replace the steering wheel with a more modern and stylish one, then dismantling it cannot be done;
- repair. Removing the part may also be necessary when carrying out certain types of work on the dashboard, dashboard or horn contacts.
Removing the steering wheel
To remove the steering wheel on the “seven” you will need the following tools:
- knob;
- head 24;
- flat screwdriver.
The procedure is carried out in the following order:
- Place the car on a level surface so that the front wheels are level.
- Remove the negative terminal from the battery.
- We sit in the driver's seat and use a screwdriver to pry up the soft insert located in the center of the steering wheel.
Video: how to remove the steering wheel on the “seven”
If the steering wheel is dismantled for the purpose of repair and will be installed back, then before removal it is necessary to mark the steering wheel hub and the shaft itself, which will facilitate installation.
Replacing the steering wheel cover and slip ring
Sometimes it is necessary to replace steering wheel parts (slip ring, springs or cover), for example, if they are damaged or malfunctioning. For repairs, you only need a Phillips screwdriver. The process consists of the following step-by-step actions:
- Unscrew the screws securing the cover on the back of the steering wheel.
Installing the steering wheel
Before reinstalling the steering wheel, it is necessary to lubricate the splines, for example, with Litol-24 grease. Assembly is performed in the following order:
- We put the steering wheel on the slots, aligning the previously applied marks. If you are installing a new steering wheel, set it as level as possible.
If it is necessary to install a sports steering wheel, then the part is first connected to the adapter with bolts, after which it is mounted on the splines in the same way as described above.
The steering wheel on a VAZ 2107 does not have to be removed very often. However, if such a need arises, dismantling the part is within the capabilities of each owner of this car. Removal requires a minimum set of tools, following step-by-step instructions and a little time.
Sound signal circuit and its repair
Sound signal device
The sound signal on the VAZ 2107 comes in the following versions:
- Two separate signals: type S-304 (low tone) and S-305 (high tone). Mounting - on the bracket, to the left of the radiator.
- The only non-separable signal of type 20.3721-01, one tone, with a built-in relay. Mounting is on a bracket outside the radiator, immediately behind the decorative grille.
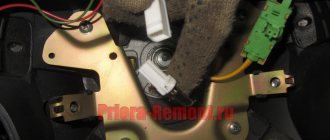
The operation diagram of the sound signal is as follows: two wires are connected to the sound signal itself. The red wire is “plus”. This part of the circuit is constantly energized. The gray-black wire is “ground, minus”; in the normal state it is de-energized, and current begins to flow through it when shorted. The photo clearly shows the color of the wires and two separate signals with brackets.
The “negative” part of the chain is long. When you press the central steering wheel button, the spring contacts close. They are located in the switch housing under the steering wheel.
The slip ring is attached to the back of the steering wheel. Its task is to ensure good contact through friction and provide a signal whenever the steering wheel is turned. Therefore, the ring must be lubricated with conductive graphite lubricant to avoid wear.
Then, the current is transmitted through the wire as part of the engine compartment harness to the switch and relay mounting block. The location of the horn relay (switch) is third on the right (if you are sitting behind the wheel).
Horn relay functions:
- The length of wires and current losses in them are reduced.
- With the help of a relay, a button with a small current can control a circuit with a large load.
Sometimes the circuit does not provide a relay; instead, a jumper that is connected “directly” works. In the case of a single signal 20.3721-01, this is justified, since it has a built-in relay. If there are two “snails”, it is advisable to install a relay to improve operation.
After the relay, the current passes through fuse F7. The new mounting blocks have a 20 A flag-type fuse, yellow. Older units have 16 A fuses. Their lifespan is often insufficient, since this fuse also serves in the cooling fan circuit.
Further, after leaving the mounting block as part of the wiring harness of the engine compartment, the “negative” wire goes directly to the sound signal.
Checking operation and repairing in case of sound signal malfunctions
There are three malfunctions: it doesn’t sound when needed; works when not needed, or sounds intermittently, hoarsely, quietly. Unlike the high-voltage ignition system, which is little affected by the quality of the connection, the horn system is low-voltage. This means that the film of oxides and rust significantly impedes the passage of current. But signals are a powerful current consumer. The current in the circuit is at least 4-5 A.
The quality of all contacts must be perfect, otherwise repairs will be needed constantly. Remember that the car body itself is a “negative” contact, and in the direction of current movement, all oxides settle on the “plus”. Pay special attention to stripping the terminals of the red, “positive” wire.
The “negative” part of the chain is longer. Therefore, most often this is where malfunctions occur. Therefore, it is immediately necessary to check the serviceability of the signal and look for an open circuit. To do this, you need to attach the gray-black “negative” wire from the sound signal to a cleaned place on the case, i.e., “short to ground,” and the “positive” wire directly to the battery. Then turn on the ignition. If there is sound, it means there is a break somewhere in the negative circuit. If there is no sound and the positive terminals are cleaned, then the signal itself is faulty.
Common faults:
- fuse blown (replace)
- The contacts have oxidized, or the relay has burned out (needs replacement).
- if there is a jumper, the contacts have oxidized and weakened; clean or change;
- the paddle on the switch under the steering wheel is broken, the slip ring on the steering wheel has worn out (this happens when the car wears out significantly, and also among those who like to honk constantly).
Here repair is hardly possible; the steering wheel needs to be replaced, since the slip ring is rarely found on sale.
Figures 5 and 6 show the replacement of a fuse and relay (using the example of another fuse) on a new mounting block for VAZ 2107 injection engines. Installation is carried out using plastic tweezers included in the delivery kit.
In conclusion, we will give some advice. When the radiator cooling fan is running (in the VAZ 2107 this is noticeable both by ear and by instruments), it is not advisable to use the signal! The VAZ 2107 circuit provides for the presence of a common fuse, which is not designed for such a load. Therefore, it is better to install a 25 A fuse.
Instructions for removing the steering wheel
Removing the VAZ classic steering wheel is necessary in the following situations:
- to repair the horn button or steering mechanism;
- to align the transverse bar after the camber procedure - toe-in of the front wheels;
- in order to replace the standard steering wheel with another, more comfortable or sporty one.
Thin and uncomfortable steering wheel of VAZ 2101-02
Help. On classic models, the manufacturer installed 3 types of steering wheels - a “two-spoke” one with a thin bar (VAZ 2101-02), the same with a thickened cross member (VAZ 2103, 06) and a “four-spoke” one with a massive central part (VAZ 2104.05, 07).
The steering wheel on the six is prettier, but just as uncomfortable
All of the listed elements can be removed equally easily, although there are minor differences in the disassembly technology, which is carried out using this set of tools:
- 2 types of screwdrivers - flat and Phillips;
- 24 mm nut head, extension spacer and knob;
- rags.
The most comfortable steering wheel was installed on the fourth, fifth and seventh VAZ models.
Also, reserve a little thick grease like “Solidol” for applying to the splined part of the shaft.
Disassembly procedure
Removing the steering wheel on any classic VAZ model is performed in the following sequence:
- Place the car in a garage or on a level area so that the front wheels are as level as possible. Secure the car with the parking brake.
- Disconnect the battery from the on-board network by removing the negative terminal. During the disassembly process, you will probably touch the horn several times, which will buzz when there is tension.
- Sit in the driver's seat. In VAZ 2101-02 models, carefully remove the thin steering lining by prying it off with a flat screwdriver. The soft insert is pulled out from the VAZ 2104-07 steering wheel in the same way. Only on the “four”, “five” and “seven” this trim is located in the center (the AvtoVAZ logo is stamped on it). In the third and sixth models, the decorative trim is held in place by 2 screws, the heads of which are recessed into holes on the back side of the strip.
- Insert a 24 mm socket with a knob into the opened hole. While holding the steering wheel, loosen and unscrew the nut. Don't screw it all the way.
- Grab the steering wheel with both hands and pull it towards you with a sharp movement. If the part does not jump off the splines, tap it on the back side with your palms and in this way knock off the steering wheel.
- Unscrew the nut completely and remove the steering wheel.
Note. The nut holding the steering wheel must not be completely unscrewed for safety reasons. When you pull on a loose steering wheel, you can injure your head if it suddenly comes off. The nut will prevent the element from completely flying off the shaft.
If you unscrew the VAZ 2104 trim from the back, it will come off entirely
You can get to the nut of the “four-spoke” steering wheel of the VAZ 2107 in another way, by unscrewing 2 screws on the back of the wheel. Then the entire signal button made of plastic, equipped with springs, will be removed. After dismantling, take a rag and carefully wipe the shaft splines to remove old grease that has hardened in places. Now you can begin repairing or installing a new steering wheel.
Advice. If you remove a part for repairs and plan to put it back, then before dismantling it is recommended to mark the end of the shaft and the steering wheel hub with a marker. This will help you immediately place the element in the correct position during assembly.
On the six, to remove the trim you need to unscrew 2 screws on the other side of the steering wheel
Photo of removing the steering wheel
Disassembly process on video
What steering wheel should I put on a VAZ classic?
It must be admitted that the steering wheels installed on the first modifications of Zhiguli leave much to be desired in terms of convenience and aesthetics. Of the entire line of classic models, only the “four”, “five” and “seven” had a nice steering wheel with a comfortable grip for the hands. Accordingly, the owners of “kopecks” and “sixes” sought to purchase and install the same one for themselves.
Nice factory steering wheel Lada Kalina
At the moment, there are other options for replacing the steering wheel on the “classic”:
- steering wheels from front-wheel drive VAZs of later years of production - VAZ 2115, Kalina, Priora.
- various steering wheels made in China;
- tuning sports steering wheels from famous brands - Sparco, Momo and so on.
This is what the sports steering wheel looks like on a VAZ 2106
Note. Tuning and sports steering wheels available for sale are universal. That is, they are installed on different cars using an adapter designed for a particular car model.
It is strictly not recommended to install cheap products from unknown Chinese brands on rear-wheel drive Zhigulis. The fact is that in the first VAZs the front wheels are turned by a worm mechanism, and not by a rack, as on new cars. Since there is no power steering there either, situations often occur that require the driver to put more pressure on the steering wheel. By installing a low-quality product, you run the risk of ending up with a steering wheel in your hands and a broken car - at best.
Adapter for mounting a sports steering wheel
Hence the conclusion: in addition to convenience and ergonomics, the steering wheel must meet safety requirements. These include factory parts from AvtoVAZ, properly tested, and steering wheels from well-known European brands.
Advice. Do not rush to buy products of a smaller diameter, in which the steering wheel itself is not moved forward relative to the central part. Firstly, such steering wheels are not comfortable for everyone, and secondly, out of habit, you will begin to touch the steering column switches with your hands when turning. If someone you know already has a small steering wheel on their car, test it and make sure that it will be convenient for you.
Sports steering wheel Sparco forward
Installation instructions
First of all, before assembly, lubricate the shaft splines with grease, then proceed in the reverse order:
- Place the steering wheel onto the splines, aligning the previously made marks. If the task is to level the position of the bar or install a new product, try to install it as evenly as possible.
- Place the nut inside the head, slide it onto the threads using the extension and tighten.
- Hold the steering wheel and tighten the nut with a wrench.
- Connect the battery and try driving the car 50-100 m on a road free of traffic. This way you will make sure that the steering wheel position is set correctly. Otherwise, unscrew the nut again and move the element 1 tooth to the right or left.
- Reinstall the top trim.
The position of the steering wheel can be fixed using a ruler.
When installing a sports steering wheel, use an adapter for VAZ 2101-07 cars, which is a cylinder with holes for bolts (included) and a splined part in the center. It is installed simply: screw the steering wheel to the adapter, and then put it on the shaft, as described above.
Reassembly video
Installation of a sports steering wheel without an adapter on a VAZ 2104-07
If you are not too concerned about the steering column trim in the cabin, then a tuning product from the Sparco brand, equipped with a quick-release device, can be put in “four” without using an adapter. The essence of the method is to use as the last part the central part of the standard steering wheel with a wide platform and slots, and simply cut off the rest. To work you will need:
- electric drill with a 6.5 mm drill bit;
- long M6 bolts – 6 pcs.;
- hammer and core;
- grinder with a circle on iron;
- hex wrench to suit the size of the bolts;
- caliper, ruler.
The flange of the quick-release mechanism fits well on the central part of the standard steering wheel.
First of all, you need to cut out the central part of the standard steering wheel with a grinder and carefully process the edges. Then the order is as follows:
- Having taken the dimensions from the quick-release mechanism, where there are 6 holes for fastening, mark the cut part for them. The central holes of both parts must match.
- Trim the ends of the cut element so that they do not interfere with the tight fit of the new steering wheel.
- Drill holes, having previously marked them with a core.
- Bolt the resulting part to the sports steering wheel mechanism.
Holes are drilled on the old steering wheel for a new flange.
As a result, the splined part of the old steering wheel will serve as a mount for the new one. Then install and configure it as usual.
Sparco sports steering wheel with the core from the factory steering wheel
↑ Steering gear parts
1 — steering gear housing; 2 - shaft seal; 3 - intermediate shaft; 4 - upper shaft; 5 — fixing plate of the front part of the bracket; 6 — bracket for fastening the steering shaft; 7 - upper part of the facing casing; 8 — bearing sleeve; 9 — bearing; 10 — steering wheel; 11 — lower part of the facing casing; 12—bracket fastening parts.
- Unscrew the bracket mounting bolts 6 and remove the steering shaft with the bracket.
- Unscrew the nuts securing the ball pins of the side and middle links to the bipod, and then use a puller A.47035 to press the ball pins out of the holes in the bipod.
- Remove the steering gear housing by first unscrewing the bolts securing it to the body side member.
- Unscrew the screws securing the steering shaft seal and remove it.
Removing the steering wheel on a VAZ-2107
The design of the VAZ-2107 car is equipped with such a mandatory control as a steering wheel. The appearance of the steering wheel on the “seven” is pleasant, but its large size spoils the whole picture. The size of the steering wheel can only be compared to the steering wheel of a steamship, which is not always comfortable to operate. It's another matter when the car has a small and neat steering wheel, which is a pleasure to drive. Many car owners already on the second day after purchasing a VAZ-2107 car change the standard steamship steering wheel to more convenient models, both sports and regular format. But the need to remove the steering wheel on the “seven” arises not only to replace it, but also to carry out repairs, since the structural elements of the unit tend to wear out. In the material we will pay attention to how to remove the steering wheel on a VAZ-2107, and the features of its repair.
Device
As you know, the cardan or intermediate steering shaft, as it is also called, consists of two parts. These are components that are connected to each other by a special universal joint.
The steering cardan is connected to the drive gear using a special fastener, indicated by the number 9, but this is from the bottom side. But on the top side the cardan rotates in the bracket pipe on ball bearings (there are two of them). As for the main shaft mounts, they are connected to the welded bracket in four places. The front part of the cardan is attached through two plates with special shear heads. And the rear part of the cardan is connected using welded bolts and nuts that have spring washers or, often, self-locking nuts, but without washers.
Note. It is important to know that depending on the year of manufacture, the steering rack comes in two types. In one case, it is not necessary to disassemble the entire steering rack, but this is mainly for the VAZ 2108 and similar models. As for the steering wheel on the VAZ 2110, to replace the cardan it will need to be disassembled.
To disassemble the rack you need to do the following:
- the protective corrugation is removed;
- the nut located in the middle is unscrewed;
- the rail is disassembled into two parts.
Features of dismantling
VAZ-2107 cars are equipped with two versions of steering wheels, which have minor differences. The main difference is the appearance and fastening of the front decorative part, which performs the additional function of turning on the sound signal. Let's look at both options for removing the steering wheel on a VAZ-2107, and let's start with the new model steering wheel.
- Disassembling the VAZ-2107 steering wheel begins with the fact that it is initially necessary to remove the minus terminal from the battery. This is done to prevent the creation of an unintentional short circuit.
- Using a screwdriver, you need to pry off the “Lada” badge, located in the center of the product, behind which there is a central nut at “24”.
- It is advisable to align the wheels so that they are straight. This is necessary so that during assembly it fits into the same slots, and the steering wheel also stands straight.
- Using a wrench with a 24mm head, remove the nut. To unscrew the nut, you must rotate the knob to the left. To unscrew the nut, you need to rest your feet on the steering wheel, protecting the product from turning, or ask a friend for help.
- Once the nut is loosened, it is not recommended to unscrew it completely. Now you need to carefully knock the steering wheel off its seat (the spline joint may stick). As soon as the product moves from the shaft, you can unscrew the nut completely and dismantle the steering wheel.
After removing the product, it can be replaced or repaired. If you need to replace the shaft bearing, you will have to remove the decorative trims and bracket to gain access. If it is necessary to remove the old-style steering wheel, this is done according to the following scheme:
- On the back of the steering wheel, unscrew the 2 screws in the holes using a screwdriver.
- Remove the decorative panel together with the fasteners and the horn contact plate.
- Next, unscrew the nut a little, knock the steering wheel off the splines, unscrew the nut completely and remove the part.
Once the repair work is completed, the product must be installed in place. Be sure to set the steering wheel in the correct position. This is done for the purpose of driving convenience and so that during a trip part of the steering wheel does not block the view of the instrument panel.
There are marks on the steering shaft and contact plate that need to be aligned. After the product is put on the slots, you can begin to tighten the nut in a clockwise direction. Installation of decorative elements occurs in the reverse order of removal.
Repairing the horn switch on the steering wheel
If the sound alarm does not work, then after dismantling the steering wheel it is necessary to inspect the contacts. Often, for repairs, it is enough to clean and lubricate the contacts and then install the parts in place.
You can look for the cause of the malfunction of the signal without removing the main mechanism, but you will have to struggle with unscrewing the bolts that secure the decorative trim of the steering wheel. Most often, the reason for the signal not working is in the contacts located in the steering column, so it may not be necessary to completely disassemble the steering wheel.
This material will help you understand the question of how to remove the steering wheel for repair work. If you plan to replace the steering wheel, then it is imperative to select a new product so that it matches the splines of the car shaft. When replacing a standard product with a new one, a problem may arise only in connecting the signal, since not on all models the contacts will coincide with the steering column. To install a new steering wheel, you will need to disassemble it and connect the horn.
Signs of breakdown of the gearbox and other elements of the steering system
The steering gearbox on a VAZ 2106 very rarely fails alone. As a rule, a gearbox failure is preceded by the failure of several elements of the steering system, after which the gearbox itself breaks down. That is why it is better to consider the problems of this system as a whole. We list the most well-known signs of a breakdown of the control system on the “six”:
- when turning the steering wheel, a characteristic grinding or loud creaking sound is heard from under the steering column;
- the driver observes a constant leak of lubricant from the gearbox;
- turning the steering wheel began to require more effort than before.
Now let’s look at what exactly can cause the above symptoms and how to eliminate them.
Steering system noise
Here are the main causes of noise behind the steering column:
- The clearance on the bearings installed in the steering wheel hubs has increased. Solution: adjust the gap, and in case of significant wear of the bearings, replace them completely;
- The fastening nuts on the steering rod pins have become loose. It is these nuts that usually cause loud squeaking and grinding noises. Solution: tighten the nuts;
- The gap between the bushings and the pendulum arm of the steering system has increased. Solution: replacing the bushings (and sometimes you have to change the bushing brackets if they are very worn);
- The worm bearings in the gearbox are worn out. A grinding noise when turning wheels can also occur due to them. Solution: replace the bearings. And if the bearings are not worn out, it is necessary to adjust their clearances;
- loosening the fastening nuts on the swing arms. Solution: tighten the nuts after placing the car wheels straight.
Leakage of lubricant from the gearbox
A lubricant leak indicates a violation of the seal of the device.
Oil leaks are clearly visible on the steering gear housing
Here's how it happens:
- The seals on the bipod shaft or on the worm shaft are completely worn out. Solution: replace the seals (sets of these seals can be purchased at any spare parts store);
- The bolts holding the steering system housing cover have become loose. Solution: tighten the bolts, and they must be tightened crosswise. That is, first the right bolt is tightened, then the left, then the top bolt, then the bottom, etc. Only such a tightening pattern can guarantee the tightness of the crankcase cover;
- damage to the sealing gasket under the crankcase cover. If the above tightening pattern does not lead to anything, it means that the seal under the crankcase cover has worn out. Therefore, the cover will have to be removed and the sealing gasket replaced.
The steering wheel turns hard
If the driver feels that it has become very difficult to turn the steering wheel, this can happen for the following reasons:
- Incorrect alignment of the steering wheels. The solution is obvious: install the car on a stand and set the correct toe and camber angles;
- one or more parts of the steering system are deformed. Steering rods are usually deformed. And this happens due to external mechanical influences (flying stones, regular driving on uneven roads). Deformed rods will have to be removed and replaced with new ones;
- the gap between the worm and the roller in the steering gear has increased (or vice versa, decreased). Over time, any mechanical connection can become loose. And worm joints are no exception. To eliminate the problem, the roller gap is adjusted using a special bolt, then the gap size is checked using a feeler gauge. The resulting figure is checked against the figure specified in the operating instructions for the machine;
- The nut on the swing arm is too tight. The peculiarity of this nut is that over time it does not weaken, like other fasteners, but rather tightens. This occurs due to the specific operating conditions of the pendulum arm. The solution is obvious: the nut should be slightly loosened.