November 27, 2015 Lada.Online 126 869 56
In top trim levels with a package of Multimedia or Multimedia Lime options, the manufacturer installs a multimedia system (MMC or OMMN) with number 8450007950 on the Lada Vesta. This device has a 7" color display with TouchScreen, FM/AM with RDS function, USB, SD card , AUX, Bluetooth, Hands free. Let's take a closer look at the capabilities of MMS.
So, to turn on MMS you need to press the volume control. To turn off, press and hold the knob for about 2 seconds. If the radio is frozen, or there is some kind of malfunction or malfunction, a reboot will help. To do this, press the Reset button in the upper right corner using a blunt thin object and hold it for 2-3 seconds. Before doing this, it is recommended to remove the SD card.
MMS screen
The display on the Vesta radio, like on previous Lada cars, is resistive. That is, you should press the screen with a thin object (stylus) or a fingernail, this is a minus. But unlike a capacitive screen, a resistive screen can work without failure in more severe conditions (frost or heat). The display itself is quite bright and pressure sensitive.
I would like to make the screen angle more perpendicular, which would better protect the display from the sun.
Replacing standard multimedia with TEYES CC3
Since purchasing the car, I have been using the standard multimedia and noticed its extremely poor sound. It was decided to improve the sound, but within reasonable limits, without using subwoofers, amplifiers, capacitors and other audio fetishes. The automotive Internet space is daily updated with a mass of enthusiastic reviews from Lada Vesta owners who installed a miracle of Chinese engineering called TEYES. But I had no particular desire to install it, since I planned to change the standard multimedia to something more branded from the Pioneer, Sony or Kenwood camp, where the sound quality of the standard GU would be head and shoulders above that of TEYES. But there were several requirements and nuances that put an end to the initial preference. Firstly, in the Lada Vesta the frame of the standard PG is of a non-standard shape, in order to complicate the installation of something better for the car owner than the standard one.
Standard GU frame
Secondly, the internal space behind the control unit is quite cramped and few double-din devices will fit there without modifications, that is, without sawing off and breaking off “unnecessary” partitions, which I basically did not want to do. Thirdly, I wanted, as in a standard GU, to display the engine operating parameters on the GU. Fourthly, I wanted to have a navigator (preferably Yandex) in the GU, since using a navigator on a 5.5-inch smartphone screen is extremely inconvenient. None of the devices from the brands listed above met all of these criteria. In general, having sorted out my priorities, weighed all the pros and cons, I came to the conclusion that there is nothing more to put besides TEYES, not counting the nonames from the same heaven.
The decision has been made, I go to the famous Chinese online flea market and see that the price of the top-end TEYES CC3 with 6 gigabytes of RAM and 128 gigabytes of internal memory is about 28 and a half thousand wooden ones (as of 10/28/2022), whereas previously it cost around 32 things. The model with 64 gigs of memory and 4 gigs of RAM cost about 2,000 rubles. cheaper, which in my opinion was not worth the savings. As a result, in addition to the top-end TEYES CC3, a canbus was also purchased for communication with the car’s CAN bus, which allows displaying instrument readings and other CAN bus data on the GU screen, as well as a module kit with tire pressure measurement sensors from the same manufacturer.
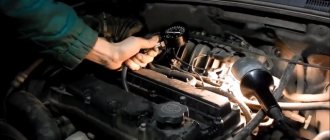
Installing all this equipment on the car took a whole day, despite the fact that everything is installed connector to connector. I don’t see the point in describing in detail the process of installing the GI, since there are a lot of similar instructions on the Internet. I will just note a few points. I spent a lot of time studying online reviews and instructions for connecting Vesta’s active antenna to the GU. Most reviews advised connecting the blue wire coming from the compact unit on the antenna wire to the ACC terminal from the block.
Amplifier block on the antenna wire of the GU
But in my case, everything turned out to be much simpler; I didn’t have to connect anything separately, since the power to the antenna comes from the main block and to supply power to the antenna, you just need to activate the antenna amplifier in the settings of the control unit. It is possible that in previous versions of TEYES there was no power wire for the active antenna and therefore it was necessary to use separate power from the ACC block or use the blue wire from the antenna unit when installing a non-standard active antenna. I mounted the 4G and 5G (Wi-Fi) antennas on the side passenger pillar, and magnetized the GPS antenna to the roof near the same pillar, although many advise installing the GPS antenna inside the dashboard, since the plastic of the dashboard does not jam the satellite signal as much as the roof of a car . But I have no complaints about the performance of the GPS antenna; it picks up satellites normally.
4G and 5G antennas
Reception of satellites when installing a GPS antenna under the roof
This GU has three USB outputs: one single connector on the rear panel for connecting a standard USB socket and one connector for connecting a double USB cable. The problem arose with the single connector responsible for the operation of the standard USB, which is at the bottom of the dashboard. The root of this problem turned out to be a low-quality GU connector, in which the standard plug coming from the USB/AUX socket simply dangled like a dog's tail. I had to cut out this connector with the plug and connect the 4 wires going to USB with separate male-female terminals.
Standard USB male connector
I didn’t connect the wires going to AUX, since I don’t use it. The second USB output was connected to the tire pressure monitoring unit (TPMS), and the third output was placed as a spare in the glove compartment. But in order for everything to be Feng Shui and the USB cable not dangling in the glove compartment, I had to buy a special adapter - a USB socket and plug it in in the least noticeable place in the glove compartment that would not interfere with other things.
Hole cutout in the back of the glove compartment
The back of the installed USB socket
Location of the USB socket inside the glove compartment
I struggled with setting up canbus the longest, about two days. Canbus stubbornly refused to display can-bus data on the screen of a special application. But after two days, suddenly everything worked: data from the instrument panel, climate control, dynamic lines of the reversing camera. True, all this worked for about 10 days and stopped working again. I contacted Teyes technical support, where they advised me to reset the settings and update the firmware of the GU and the canbus itself, but nothing helped. Today I had to remove the control unit again to get to the canbus unit, pull it out of the connector and reinsert it and voila... everything worked again! Apparently the contact in the canbus block is unreliable.
Canbus readings on the GU screen
And most importantly – the sound! It can be called excellent compared to the stock GU. I didn’t expect that Teyes would be able to extract relatively good sound from standard cheap speakers. I can imagine what the sound will be like after replacing the standard speakers with more solid ones with additional vibration and noise insulation of the doors. Despite the fact that low and high frequencies are also lacking, the sound itself has become much more expressive. The quality of the screen compared to the standard MMS is heaven and earth, there’s nothing even to compare. The standard MMC has only two advantages compared to Teyes: the absence of red moire on the screen when the reverse camera is activated in absolute darkness, while it appears on the Teyes screen and the ability to turn on the MMC even in the absence of control power, which is especially useful in light of the malfunction voiced in the previous review about a temporary lack of power to the radio after starting the engine, if there is a need to immediately drive out of somewhere in reverse, but because of this you cannot use the camera.
In general, having realized that achieving more or less acceptable sound is possible only after replacing the speakers, I had to buy them too. I purchased a set of two-component acoustics Ural AS-A1625K for the front, and Ural AS-M130 for the rear doors. But I will install these acoustics only in the summer of next year, since before installing the acoustics it will be necessary to apply additional vibration and sound insulation, for high-quality application of which you need either a well-heated box or summer heat. Since I don’t have a warm box, I’ll wait for the heat.
Speaker sets Ural
I'll share a little life hack. As an accessory to the radio, the Teyes company offers an OBD adapter of its own brand, compatible with this radio, the cost of which is several times higher than similar adapters and in order to exclude the use of third-party OBD adapters with bluetooth communication on its GU, the possibility of connecting to any other bluetooth has been cut out in the GU firmware devices other than phones, that is, there is no search for bluetooth devices in the GU settings, there is simply a function to turn the bluetooth module on and off. I just happened to have a standard Chinese ELM327 adapter and managed to connect it to the Teyes GU using the Car Scanner program from the playmarket. This program itself activates Bluetooth on the device and searches for Bluetooth devices. True, instead of the names of Bluetooth devices, the program displays a set of letters, numbers and symbols (possibly a device ID), but if there are no other devices nearby except the connected OBD adapter, then you press the single line of the detected Bluetooth device and the program connects to it and functions normally, showing no restrictions Teyes. Using this program, you can also display instrument panel readings on the screen, but as for me, the proprietary application from Teyes (Vesta Info) is significantly superior to it in this.
Dashboard readings using Car Scanner
The overall impression of using TEYES GU is very positive. The GU never froze, no brakes or lags were noticed. This is a real Android with its inherent functionality. And using a navigator on such a large and juicy screen is a whole different story. Also, I really liked the proprietary voice control from Teyes, in which it is not necessary to say “Hello Teyes” before any command, but you can give commands immediately: increase (decrease) volume, main screen, turn on Bluetooth (radio, YouTube, music, video etc.), tire pressure, call so-and-so, pick up (hang up) the phone, etc. commands and even complete the review! )
Staff GU
GU from TEYES
Tire pressure and temperature monitoring program
Dynamic lines of the reversing camera
Multifunctional steering wheel
Lada Vesta is the first car to have buttons on the steering wheel that make it possible to control the MMC.
Possibilities:
- Pick up the handset when there is an incoming call while the phone is connected. In other modes – scrolling through the list (sorting through folders or tracks to play);
- Analogous to pressing the MODE button on the front panel of the MMC;
- Analogous to pressing the MUTE button on the front panel;
- Stop talking when there is an incoming call when the phone is connected. In other modes – scrolling through the list (sorting through folders or tracks to play);
- Volume down button;
- Volume up button.
Car acoustics
The sound on Lada comes from six speakers located throughout the car's interior. Lada engineers were able to achieve such a pleasant sound through the correct placement of the acoustic speakers, as well as the distribution of frequencies played by the multimedia system.
So, the audio preparation of the Lada Vesta is at the level. You can customize the sound to suit yourself with several preset equalizer settings or manually.
Radio menu
It consists of two parts, on the first screen there are:
- Button to switch to “Radio” mode;
- Button to switch to “Audio” mode;
- Button to switch to “Phone” mode;
- Button to switch to “Navigation” mode;
On the second:
- Button to switch to “Photos” mode;
- Button to switch to “Video” mode;
- Button to switch to playback mode of audio files from external media via the AUX connector.
How to watch
The question of whether it is possible to watch videos through Android Auto is not even discussed. With the right choice of applications, this is easy to do. Another thing is that installation and configuration approaches may differ.
From phone
The easiest way is to watch videos on Android Auto from your phone. You don't need an Internet connection to do this, because all the content is already recorded on your mobile device. In this case, the algorithm of actions is as follows:
Connect your smartphone to the head unit in your car. First make sure that Android Auto is supported on your smartphone (Android version above 5.0) and works on the machine's GU.
Install an application on your phone that is a video player for Android Auto. You can use VLC for Android as an example.
- Enter the program and find the file that is downloaded on your phone.
- Launch it to view it on the car's head unit display.
Now you know how to watch videos through Android Auto and thereby expand its functionality. The same instructions are available for other programs that are compatible with Android Auto.
Through the Internet
The second question that often interests car owners is how to watch videos from the Internet using Android Auto. Great news for Android Auto owners is the ability to watch their favorite videos from YouTube hosting. The downside is that this application is not available on Google Play, so the APK file must be downloaded on the Internet. It’s better to do this on the developer’s official website before watching clips on Android Auto.
First log into your smartphone and in the Security settings menu, allow the installation of programs from unknown sources. Otherwise, the smartphone will block the program.
After installation on your smartphone, launch YouTubeAuto (CarStream) to watch videos on your phone.
In this case, they can be sent to the car’s head unit by clicking on the Send To Car button located on the top toolbar.
If there is a dilemma about how to watch movies on Android Auto via YouTube, you need to do additional work. The algorithm is like this:
Launch Android Auto on your smartphone and enter the main menu of the application.
Select About app.
In the window that opens, click on the About Android auto link until a message about enabling developer mode appears at the bottom. As a rule, you need to click on the link 10 times.
Click on the three vertical dots and select For Developers.
At the bottom of the list that appears, check the box next to Unknown sources.
Connect your phone to your car's radio.
You can then play the video on any head unit that supports Android Auto. It could be a Kia, Suzuki or another car.
USB, SD card and supported file formats
In the Vesta glove compartment and next to the cigarette lighter under the radio there is a USB connector, which is designed to connect a USB Flash Card, USB Flash Player with a memory capacity of at least 1024 MB, USB HDD and Phones (for charging at a maximum current of 1.5 A).
The file system of the connected device must correspond to FAT16 (< 2 GB) or FAT32 (> 2 GB). The maximum number of primary partitions should be no more than 4. Each external media connected to the MMC should contain no more than 1024 files and 256 folders (including root directories).
MMC Vesta supports SD cards, which its closest competitors do not:
- SDHC up to 32 GB;
- SD up to 4 GB;
- USB 2.0 up to 64 GB;
- USB 3.0 up to 64 GB (with USB 2.0 support).
The manufacturer warns that the more files/folders on the media, the longer the files will take to download. It is recommended to use external media that contains only audio files, images and video files.
It is strictly forbidden to place files with the extension *.bin in the root directory of external media, as this may lead to the inoperability of the MMC and loss of warranty. In other words, “Firmware”.
To convert video files, AVTOVAZ recommends using the free video converter Freemake Video Converter.
An important note in the operation of the radio: photo and video files are played back in the order in which they were recorded. Therefore, the playback order may not match the input order specified by the user.
A little theory
So, when getting acquainted with the car’s interior, your gaze naturally falls on the central part of the panel, where the new multimedia system (MMS) flaunts. A seven-inch touch panel, elegant X-style features (by the way, these lines can be seen very often in the interior of the car), a standard set of functions in the form of an FM/AM receiver, USB input, AUX, Bluetooth, SD card slot and Hands Free.
Standard set of functions of a standard radio. But how so? There are innovations everywhere, but here everything is standard and uninteresting? Of course not, and here users are in for a surprise. And not even one! Let's consider all aspects of the standard radio in order.
Audio mode
The audio player window is intuitive. All audio files are played on 6 speakers, the sound of the acoustics is at a decent level. You can adjust the sound using the equalizer (there are 6 pre-programmed settings for Jazz, Rock, Voice, etc.).
It is possible to listen to music via Bluetooth from your phone. One drawback worth noting here is that information about the file being played is not displayed on the MMC screen.
Requirements for MP3 files with constant or variable bitrate:
- 32-320 kbit/s at sampling rates of 32000 Hz, 44100 Hz and 48000 Hz for MPEG-1 Layer 3;
- 16-160 kbit/s at sampling rates of 16000 Hz, 22050 Hz and 24000 Hz for MPEG-2 Layer 3;
- 8-160 kbit/s at sampling rates 8000 Hz and 11025 Hz for MPEG-2.5 Layer 3.
Requirements for WMA files with constant bitrate and bit rate:
- 10-320 kbps, with variable bitrate and bit rate 32-192 kbps, and sampling rates 8/11.025/16/22.050/32/44.1/48 kHz.
Requirements for WAV files:
- 8/16/24 bit resolution with 44.1 kHz sampling rate.
Requirements for FLAC files:
- with a sampling rate of 44.1 kHz.
Powerful audio player
SinglePlayer is a powerful audio player for consoles running WINCE 6.0. Made for an alternative shell for SingleMenu and NewMenu.
Using an audio player will make the sound more interesting (there is an equalizer). The player also has an Internet radio (an access point can be made using a smartphone). You can also listen to radio stations on your smartphone and transmit them to MMS via bluetooth.
All player features:
What it looks like on the MMC Lada Vesta (photo by Sardar-Kerimov):
Download to w3bsit3-dns.com or ready-made assembly with radio stations:
To download files you need to log in to the site.
Video mode
To watch movies, you will have to learn how to use a video file converter. A nice feature: if you pause the clip and go to the main menu, then when you switch to the “Video” mode again, playback will begin from the moment it was stopped.
Requirements for video files:
- AVI with support for H.264/ MPEG-4/ MJPEG/ Xvid/ WMV video codecs and WMA/MP3 audio codecs. With resolutions up to 720x536 and frame rates of 30 fps.
- MP4 with support for H.263/H.264/MPEG-4 video codecs and AAC/MP3 audio codecs. With resolutions up to 1920×1080 and frame rates of 30 fps.
- MOV with support for H.263/H.264/MPEG-4 video codecs and AAC/MP3 audio codecs.
- MKV with support for H.264/MPEG-4/MPEG-2 video codecs and AAC/MP3 audio codecs. With resolutions up to 1920×1080 and frame rates of 30 fps.
Recording process
The process can be carried out using built-in Windows tools or third-party programs. If you have Windows 7, 8, 8.1 or 10 installed on your computer, everything is simple, you can work with almost any format. If Windows XP, you will have to install special programs, since the built-in recording tool in this system has low functionality.
The most popular programs are Ashampoo Burning Studio, Astonsoft DeepBurner, Free Easy CD DVD Burner, Nero Burning ROM. Don't worry, the principle of operation is approximately the same in all of them:
Burn Audio CD using Nero Burning ROM. On the left are the files on your computer, on the right are those that are already on the disk
- When you launch the program, several options will appear in front of you, among which will be “Create Audio CD”, “Create MP3 disc” or something similar. Select the desired option.
- The next window usually asks you to give the disk a name. It must not contain spaces or Cyrillic characters.
- Then you need to select the drive in which the recording will be made. Not sure what to choose? Click the Computer icon on your desktop, Start menu, or simply File Explorer. Find your drive in it and see what letter it is designated by.
- You will be prompted to specify the files that will be written to the disk. This can be done by selecting them on your computer and clicking the “Add” button, or simply dragging the desired tracks into a special field. There is usually a scale at the bottom that shows how much free space is left on the media.
- In some programs you can select the recording speed. The lower it is, the less likely it is to make an error, but the process will take longer. For maximum quality, it is recommended to choose options 1x-2x. The option “Copy all data to an image on the computer’s hard drive” will slow down the recording even more, but will almost completely eliminate the possibility of errors. By selecting “Create a multi-session disc”, you will be able to add new files to the media in the future, but this will speed up its wear and tear.
- That's it, all you have to do is click the “Start Burning” or “Burn Disc” button, and the process will begin!
This is interesting: Can digital video recording be evidence in court?
NAVIGATION mode
The Vesta radio is equipped with the CityGID 7 navigation program.
Advantages:
- Ability to select the most suitable cards from a number of third-party manufacturers.
- Convenient map interface in practical terms.
- During testing of navigation programs on ixbt.com, CityGuide (along with Progorod) received the most mentions marked “our choice.”
Flaws:
- No manual map rotation.
- There is no satellite view screen.
- No maps online.
- There are no alternative route options.
- Shows traffic jams on the route, only for a short distance.
There is a map update that occurs via the SD card. You can learn more about navigation from this video:
You can replace CityGuide with a modified version.
General disadvantages
The multimedia Lada Vesta has a common disadvantage - there is no intuitive idea of what and how to turn on. Only the main menu contains clear information. In the depth of the settings, not everything is immediately clear; you need to read, study, and understand for a long time.
What can I say for people who want to buy a multimedia system separately. I do not recommend buying it, as the price is unreasonably high. It is not necessary to buy Chinese radios; for the same money (45 thousand rubles) you can find a proprietary multimedia system on Android.
As a result, the biggest disadvantage is the inconvenient sensor, or rather, the resistive screen. A stylus is required to operate; it's hard to control with your finger. Use is not intuitive. There are some problems with contact synchronization, especially sorting. Otherwise, in this configuration of the Lada Vesta, you can get used to the radio and use it.
I hope the information was useful, good luck to everyone!
Rear view camera mode
The rear view camera is activated automatically when the vehicle is put into reverse. In this case, the sound is not completely muted. However, as it should be. There are markings on the screen that help you more accurately determine the distance to the obstacle.
- a – green dotted mark. Corresponds to a distance of 4.5–4.6 meters of space from the car bumper;
- b – yellow transverse mark. Must correspond to a distance of 1.3–1.4 meters of space from the car bumper;
- c – red transverse mark. Corresponds to a distance of 0.3–0.4 meters of space from the car bumper.
They greet you by their clothes, but they send them off by their minds
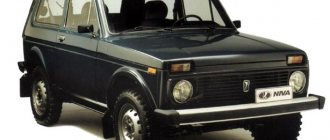
The new model of the Russian automobile industry, Lada Vesta, appeared in the eyes of users as a competitive and modern car, ready to boast a huge number of innovations and original solutions, including the new MMC. All the necessary functions, convenient controls and a well-thought-out audio system indicate that Lada engineers approached the development of the car seriously, having thought through not only the unique and modern exterior of the Lada Vesta, but also carefully worked out the concept of the interior and MMC. So, the Lada cannot be called a model of the lowest price category, guided not by the price of the car, which is important, but by the characteristics of the components of this product.
MMS settings
The radio has a number of settings that will help adapt the device to a specific driver:
- Screen Settings
- Sound settings
- Radio Settings
- Setting up video playback
- Setting up photo display
- Phone settings
- Rear view camera mode
Quick installation
The standard radio is offered complete with an adapter frame, which further simplifies installation of the device. Due to the fact that the radio tape recorder exactly matches the dimensions of the niche on the dashboard, installation is carried out without modifications and without the need to make changes to the electrical wiring and switching wires of the device. Installation can be done at any car service center in the shortest possible time.
The radio* has a built-in adaptation module to the control buttons on the steering wheel (resistive).
The depth of the radio is 140 mm, which fully corresponds to the installation depth of the container in the Lada Vesta.
Specifications
- Front panel size 178x100 mm
- 7″ TFT capacitive touch display with increased brightness and contrast, resolution 800 × 480 pixels, PAL/NTSC
- 720P Video: MOV, MP4, AVI, VOB, MKV, RMVB, MPEG1, MPEG2, TS, ASF, WMV, FLV, PMP, MP3, WMA, OGG, VOB, RVB, MPG, DIVX, AVI
- Bluetooth module with A2DP support
- Mirror link (Android phones)
- AUX, 4 RCA line out, 3 RCA AV out, 2 RCA video out, RCA subwoofer out
- Inputs for front and rear cameras
- Navigation CityGuide
- Power 4x50 W
- USB 2.0
- Micro SD slot for navigation software
- Possibility of connecting and programming analog steering buttons
- Output power 4 × 50 W
- Remote control included
* Installation kit (adapter frame and universal radio, necessary adapters and adapters for your car)
Each installation studio employee has at least 9 years of experience in installing this equipment.
All Intro GUs purchased and installed in our installation center are dismantled/installed free of charge during the entire warranty period in case of failure.
The official INTRO online store (INCAR trademark) sells only certified products of excellent quality. On our website you will find the most complete information on INCAR products: adapter frames, standard radios, rear view cameras, video recorders, ISO adapters and other accessories. Also the latest information about new products and much more. Our store sells only certified products with a one-year warranty.
- After receiving the order, our employees contact the buyer, agree on the details of the order, and upon receipt of confirmation, the order is formed and sent.
- Delivery is carried out by Russian Post EMS. When purchasing a standard radio, we provide FREE delivery throughout Russia, regardless of the number of items in the order.
- All products undergo additional packaging when shipped, which guarantees the absence of mechanical damage.
- After dispatch, a postal item number is sent to the buyer’s email address, with the help of which the recipient of the item can independently track the forwarding process and the date of receipt of the item at the post office. The number is usually sent on the second day after departure.
The multimedia system in modern cars becomes an advantage in a competitive environment. An in-car infotainment system integrates a variety of communication, entertainment and information tools with interactive, intuitive touch controls. MMS is also installed on Lada Vesta. The car owner of the basic configuration can independently install either a standard multimedia system or any other.