The heater control light does not light up
I noticed that when the headlights are turned on, the backlight of the heater control unit does not light up.
I don't know when the lamps burned out. And somehow strange - two at once. The operating instructions do not contain information about replacing them, apparently assuming that this operation will be performed at a service station. Some people have done this often, but this was my first time. So, let's get started. We buy lamps of W1.2W
.
1. It is necessary to remove the turntables and the lever cover:
2. The central trim of the console is removed. According to the collection of technological instructions, you are supposed to pry it off with a slotted screwdriver, but I was afraid to scratch the plastic and used an unnecessary plastic discount card. First we tear off the clips of the upper part, then the lower one.
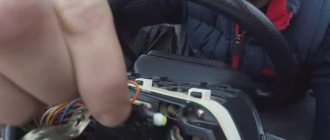
3. Remove the lamp socket:
4. Remove the burnt lamp from the socket and insert a new one:
5. We insert the cartridge into place, connect the plug, turn on the ignition, the dimensions - everything lights up as it should!
We replace the second lamp and assemble everything in the reverse order.
Theme Options
Display
Replacing the VAZ 2112 stove yourself
Replacing a VAZ 2112 stove yourself is a type of work that is the most popular repair with the arrival of cold weather. The thing is that during the warm period, the radiator, which is also called the stove, can wear out, but due to the fact that it is not in use, it is almost impossible to notice this, but when the heater is started for the first time, when antifreeze begins to spill, everything becomes clear .
If this is your first time encountering such a problem, then most likely you will need instructions for replacing the radiator, which we will present as part of this publication. You must understand that the VAZ 2112 was produced with two designs of heaters
so in order to carry out the replacement, you will have to pay attention to the year of manufacture of your car
VAZ 2112 cars produced before 2003 are equipped with an old-style heater, and those produced in a later period were equipped with a new-style heating system.
How to replace an old-style heater on a VAZ 2112?
To begin with, we will look at the question of how to change the VAZ 2112 stove on cars manufactured before 2003
. To make it easier for you to understand the process, we will present the instructions in the form of a step-by-step guide.
1. First of all, you must drain the coolant from the car's heating system. To do this, you should unscrew the cap of the expansion tank and relieve pressure in the system. After this, disconnect the rubber pipe, as well as the heater hose. Move under the car and remove the drain plug, drain the antifreeze into a container that should be large enough - at least 6 liters.
2. Now, you need to remove the rubber hood seal, which is located near the frill.
3. Next, we begin to release the frill. To do this, unscrew the screw, which is located just below the main brake cylinder, as well as four mounting screws, which are located on the right side of the frill. After this, you should loosen the clamps that attach the wiring and hoses to the frill, disconnect the negative terminal and unscrew two more screws that are located on the left side of the frill. Now you can move the frill up; it is not necessary to remove it completely.
4. Next, you must remove the plastic windshield trim. To do this, you need to remove the five screws and two nuts that hold it in place.
5. Now you need to disconnect the power from the sensor, which is responsible for the antifreeze level, as well as the hose that removes steam from the expansion tank and the hose that is used for washing the windows.
6. Next, you must remove the windshield wipers, windshield trim, electric fan and heater housing clamps. This is done by unscrewing the mounting screws.
7. Now, you can remove the cabin filter housing and the fan housing, and then get to the clamps and hoses securing the radiator.
8. Pull out the old radiator, clean the seating area from dust and dirt, install a new radiator and reassemble the structure in reverse order. As you can see, the solution to the problem of the old-style VAZ 2112 stove not working is a fairly simple procedure and does not require complex equipment, although it will take you quite a lot of time. The main thing is to be careful and consistent.
We are replacing the heater radiator of a new VAZ 2112
As we said above, VAZ 12 series cars that were produced after 2003
. were and are being equipped with new-style heating systems. Replacing the radiator in them is carried out somewhat differently than described in the previous section of this article, therefore, we will present separate detailed step-by-step instructions for them, which should be useful to you.
1. First, you must drain the coolant from the heating system. This is done in a similar way to the process described in the previous section of this article.
2. Unscrew the screws that hold the air filter in place, and then remove it.
3. Next you must remove the stove structure. To do this, unscrew the three screws securing its body, remove its left part, and you should move the right part as far as possible to the right, and then lift it up.
4. Remove the steam exhaust hose, which is located on the right side of the sound insulation panel.
The backlight in the heater control unit does not light up. How to fix?
Most likely there is some kind of wire that has come loose! When I bought a car, the speed control light didn’t come on, then suddenly it came on and then disappeared! I'll take the panel apart today!
The backlight of the heater control unit on a VAZ 2112, 2004 stopped working. It burned and stopped suddenly. Everything works, but it’s the backlight that doesn’t work (heater control unit). And when you drive, it turns on itself and after a while it goes out.
- The backlight of the heater control unit on the VAZ 2112 stopped lighting - 2 answers
- The trunk light of the VAZ 2112 does not light up - 2 answers
- What are the signs of a malfunction of the VAZ 2112 heater micro-reducer? – 2 answers
- The heater motor in the VAZ 2112 does not work - 1 answer
- The dashboard backlight and the left side of the dimensions on the VAZ 2112 stopped working - 4 answers
Take out the control unit, remove the handles, remove the plastic panel, remove the light diffuser. You see a light bulb, pull it out, restore normal contact in the socket, put everything back together.
First, check fuse F18, maybe the contact on it is bad or it has blown (the cigarette lighter is also on it, you can check its operation).
But if you do change the light bulb, then it will take 10 minutes, without rushing. You pull the control unit out from the panel, remove the handles and the panel, there is plexiglass there, and under it there is one light bulb, you change it and that’s it.
Subscribe
to our channel in
Index.Zen
Even more useful tips in a convenient format
The trunk light of the VAZ 2112 does not light up
What are the signs of a malfunction of the VAZ 2112 heater micro-reducer?
The backlight of the heater control unit on the VAZ 2112 stopped working
Source
Tips for motorists
Taking into account the existing Traffic Rules, the driver is obliged to turn on the headlights on his VAZ-2112 passenger car before moving off. This means that the backlight on the instrument panel will also turn on, although it is completely unnecessary during daylight hours, because the instruments can be viewed normally without it. Constantly burning instrument panel backlight lamps shortens their operating life and leads to more frequent malfunctions in this electrical circuit.
The simplest reason why the headlights do not light up is when children's playful hands, sitting in the driver's seat, touch the car controls. If they turn the rheostat knob that regulates the amount of light flux to the left all the way, then there will be practically no illumination of the instrument panel. Therefore, before you start troubleshooting, try turning this knob to the right. If the backlight works, then the problem will be easily solved. But if not, then only then will you have to look for the cause of this malfunction.
In this case, you will have to: either check whether the 5-amp fuse F1, which is located in the mounting block, is intact, or turn on the dimensions of your car, get out of it and see whether the parking lamps on the left side or the trunk lighting lamps are on, since all they receive power through this fuse. The right dimensions receive power through fuse F11.
If the left-hand side lamps are on and the instrument panel illumination does not work, it means that fuse F1 has not blown, so the next step is to check the contacts on the rheostat, with which I adjust the brightness of the instrument panel illumination lamps. There are cases when the plug comes off along with the contacts or it fails. You can check this assumption by removing the rheostat and closing its contacts directly. If the backlight lights come on, that means this is the reason.
A possible malfunction leading to loss of instrument panel illumination may be the instrument panel circuit board. This happens due to the burnout of the track on it, along which power is supplied to the backlight lamps. Considering that the instrument panel is not repairable, it will have to be replaced with a new one. And the filaments of the lamps themselves also burn out, although for this to happen on all the backlight lamps of the instrument panel at once, this is unlikely to happen.
Refinement of the backlight of the heater control unit Lada Granta and Kalina
It is no secret that the Lada Kalina heater control unit has migrated to more modern Lada Granta and 2nd generation Lada Kalina cars. Along with it came some shortcomings, for example, dim lighting. There are many ways to improve interior lighting, but we will focus on only one of them, which in our opinion is the best.
The reason for the poor illumination of the stove control unit is the green filter on the sticker. Most often, car enthusiasts simply erase it, thereby making the backlight a little brighter, but this does not solve another problem - uneven glow.
We propose to approach the issue comprehensively, improve the backlight and the scale itself on the heater control unit, and for this you will need:
- Layout of scales in Corel Draw x5 - To download files you need to log in to the site (password: lada.online).
- Matte film with adhesive layer, 0.5 m - 350 rub.
- White translucent film 0.4 m. - 250 rub.
- LED modules for illumination.
- Plotter cutting services - 180 rub.
General questions about replacement: article number, replacement interval, choice
Filter item for searching and ordering online: 11180-8122010-03
How often to change
The plant regulates the replacement of air filters every 30,000 km. Practice shows a gap of 15,000 km from replacement to replacement. Or twice a year before winter and summer, respectively.
Which salon to choose
There are 2 types of cabin filters: carbon and regular. When choosing, consider the following points:
Table 1. Comparison of cabin filters for Lada Granta
| Carbonic | Ordinary | |
| How it cleanses | Detains odors | Does not allow debris and small particles to pass through, all odors pass through |
| Resource | It is believed that coal quickly clogs and after that becomes meaningless | As stated - up to 30,000 km |
| Where is it better to use | In dusty conditions, in a city with a lot of traffic jams | In an area with clean air, without traffic jams and heavy dust |
| Cost, rub. | 250 | 170 |
The choice for Granta is a matter of your preference. The cost of the part remains meager, even if it is impregnated with carbon. If you install a regular white element but change it regularly, it won’t make things worse. If you don’t change it for a long time, anyone will turn into this photo.
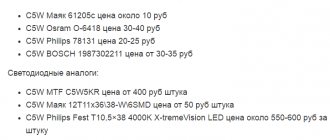
Replacing Heater Backlight Lamps Lada Granta
How to replace running lights on a Lada Grant On a Lada , the dimensions are combined with daytime lights in one lamp. The ignition also turns on the DRLs, and when the headlight turns on, it turns off and the side lights turn on. The main advantage of light sources is efficiency compared to low beam headlights, as well as lower fuel consumption.
Don't confuse DRLs with side lights. This is much less bright and indicates the size of the car when parked at night. If you compare this light with other methods of car lighting, it is the safest (no glare, equipped with sufficient brightness) and consumes the minimum amount of fuel.
Factory equipment assumes that Lada Grant has the simplest incandescent lamps.
Their characteristics are well known to car enthusiasts - the light in the lamps dims, and if they turn yellow, they have a short service life. to replace for this and other reasons . Standard DRL lamps
The characteristics of external light sources are established by Russian legislation. To travel safely on Russian roads without breaking laws, you need to:
- place the bulbs on the front of the Lada Grants body at a height of 25 to 150 cm from the ground;
- maintain the minimum distance between the bulbs (60 cm);
- buy products from 40 to 200 cm 2
Lamps used on the Granta Lada car
Causes of cigarette lighter malfunctions
So, everything is clear with the forms.
But how to choose a device whose use will definitely not burn anything? It is very important to pay attention to whether the maximum electrical load is indicated on the device and what its value is. It should not exceed the standard 15 amperes. Another noteworthy feature is the current strength of the USB connectors. It ranges from 500 milliamps to 2 amperes. It is better in this case to take the maximum. If the device seems too fragile and unreliable in appearance, it is better to refrain from purchasing it. The most meticulously worth inspecting is the connectors of the splitter themselves, those round ones. There should be no circuit board protruding from the bottom of the splitter sockets. The contact sleeve of the splitter should not be too thin. If it appears to be no thicker than foil, the device may be dangerous to operate.
Even when using a high-quality extension cord, remember that the Kalina cigarette lighter is a fire hazard; under no circumstances load the splitter to its full capacity. Don't count on the fuse, because you already understand how quickly it gives out. You also need to be careful with the splitter. On one of the Kalina station wagons, the fuse mentioned above failed when only an empty splitter was connected. This is precisely because of those ill-fated contacts. But after replacing the fuse everything worked again.
Under no circumstances should a more powerful fuse be inserted. Only standard at 15 amps. Otherwise, the wiring will be completely destroyed under the increased load. It is worth paying attention to the plugs. The ones that actually fit will never cause a short circuit. The cigarette lighter may also stop working because dust and oxidation have accumulated in the fuse box. Many car enthusiasts say that if nothing burns out, then it’s only a matter of time. There are 2 simple solutions offered.
- Deliberately break the cigarette lighter itself (that is, not the socket), connecting devices to a splitter.
- Bend the contacts in the socket a little further.
Replacing suspicious plugs with more suitable ones also helps. Take a closer look at the devices that you want to power from the cigarette lighter, otherwise you won’t have enough time to change fuses.
Types and causes of breakdown
These devices have several types:
- low beam headlights. Switched on while the vehicle is running. In Russia it is allowed to use them as a light source for daytime driving;
- high beam headlights. Operate at reduced voltage. This helps to reduce the intensity of light, which in some cases does not increase the visibility of pedestrians and cyclists on the road;
- fog lights. Their use in Russia is permitted (clause 19.4 of the traffic rules);
- front turn signals;
- individual light sources at the front of the vehicle with specific light intensity patterns.
The main manufacturers of high-quality DRLs are such brands as:
These and other models of light sources may differ in shape (rectangular, round, oval), the number of diode bulbs inside, power, and brightness.
How to change lamps
The lighting system of the Lada Granta is simple and practical. To change headlight bulbs, you don't need any special tools. Just read our instructions and follow the recommendations.
Front optics
Lada Granta is equipped with H4 low and high beam lamps. To change the lamp you will need gloves, a long straight screwdriver and a flashlight.
When replacing a lamp, do not hold it by the cylinder. During operation, it becomes very hot and cools through the glass. If there are particles of fat from the fingers on the cylinder, the heat transfer of the lamp will be disrupted. It will burn out quickly.
First, remove the cover that covers the headlight. It is located behind the headlight under the hood. To remove it, you need to press your finger on the plastic pawl, which is located on top, and use a screwdriver to press the cover off the two guides.
Install new lighting
The required increase in brightness or bulb life can only be achieved by replacing existing bulbs. Motorists often replace the halogen light sources installed in Lada with LEDs. As a rule, this task can be solved even by a person who has no experience in replacing a lamp. However, you need to know a few nuances. It is not enough to simply place a new diode in the right place - the process has its own characteristics.
- it is often necessary to disconnect the previous base from the diode in order to move its parts into the desired holes;
- The driver will need to check the polarity of the light sources to the "Fuse" Grant to the fuse. Failure to comply with this requirement will result in the explosion of the fuse responsible for the mains voltage. The fuse installed in this car model is capable of shutting off the safe operation of the electrical circuit.
Before replacing light bulbs, ensure that the procedure complies with applicable laws.
Also be sure to undergo a routine inspection. This will indicate whether the change process is dangerous. Once the old light source has been removed, it should not be disposed of immediately. If you fail the test with the new lamps, it would be logical to replace the old ones. Also, keep in mind that Russian Federation laws only allowed white and yellow vehicle lighting—other colors were outlawed.
Changing the lighting on the Lada Grant to the recently popular LEDs has many advantages:
- less electricity and therefore fuel consumption;
- longer service life (some Lada Grants have a service life);
- excellent visual effects, bright asphalt;
- These models do not place a large load on the generator and do not overload the fuse.
To replace the correct headlight, follow the algorithm:
- Remove the cartridge by turning it counterclockwise.
- Remove the broken product by pulling it towards you.
- Make sure the lamp antennas match the lamps in the carriage and push them into place at a 45 degree angle.
Correct placement of the diode antenna
Installing lighting in the left headlight has its own characteristics, since it is more difficult to reach.
Before the replacement process, remove the air filter by first unscrewing the antifreeze hose. Then remove the 3 rubber supports that the machine is mounted on. The following steps are the same as replacing the right headlight.
Lada Granta liftback 2022, engine Gasoline 1.6 liter., 106 hp, Front drive, Manual — styling
Comments 14
The LED can be found not green, but turquoise. Just choose a resistor for it so that at 14.4 volts it has the voltage and current recommended by the manufacturer. Well, or a warm white LED, or with a resistor. There are 1000 radio components in the store, or chip-and-dip
It’s easier, in my opinion, to limit ourselves to a white LED.
These diodes are complete. After a while they will start blinking and then go out. Or they will go out immediately.
I have LEDs in my rear license plate light. They can’t go out for a year and a half))
I'm happy for these diodes. But diode is different from diode. Specifically, those in the photo cannot withstand the 14 volts that the generator produces. Personally, for me it gives out even more. This is the first one. Secondly, I gave these to a friend. It was enough for 2 months. Well, the third thing. There is a company that produces these boards completely. And nothing burns there, since it’s done correctly (with ballast). Color as desired. (Not advertising).
I ordered the payment. Not yet. I will test it. In general, I will say this: a soldered diode can burn out, even in a conventional design. It all depends on the design itself.
Refinement of the backlight of the heater control unit Lada Granta and Kalina
It is no secret that the Lada Kalina heater control unit has migrated to more modern Lada Granta and 2nd generation Lada Kalina cars. Along with it came some shortcomings, for example, dim lighting. There are many ways to improve interior lighting, but we will focus on only one of them, which in our opinion is the best.
The reason for the poor illumination of the stove control unit is the green filter on the sticker. Most often, car enthusiasts simply erase it, thereby making the backlight a little brighter, but this does not solve another problem - uneven glow.
We propose to approach the issue comprehensively, improve the backlight and the scale itself on the heater control unit, and for this you will need:
- Layout of scales in Corel Draw x5 - To download files you need to log in to the site (password: lada.online).
- Matte film with adhesive layer, 0.5 m - 350 rub.
- White translucent film 0.4 m. - 250 rub.
- LED modules for illumination.
- Plotter cutting services - 180 rub.
We remove the central trim of the instrument panel (dashboard), to do this, use a screwdriver to pry up all the handles of the heater controls, and then the plastic trim itself, snapping it around the perimeter, starting from the lower right corner. Then we install the LED modules on double-sided tape. We are guaranteed bright illumination.
We carefully glue the cut out models; the first layer is a light filter for red and blue temperatures. The second layer is a white translucent film, and the third is a black matte film. The reflectors on the plastic can be aligned so they are out of the way, but the reflectors on the inner rings can be left alone.
As a result, we get uniform and bright illumination of the stove control unit. You can compare with how it was and how it became:
Replacement process
A domestic manufacturer like AvtoVAZ is used to surprising its fans, believing that this is the only way to refocus the attention of modern drivers on domestic cars, to make them believe that they are no worse, and in some respects better, than foreign cars. Based on this, each new AvtoVAZ model impresses not only with original engineering solutions, but also with more interesting design ideas. Unfortunately, for some reason only the heater control knobs remained unattended
They are made of rough plastic, and the unattractive shape is completely unsuitable for a stylish interior
Unfortunately, for some reason only the heater control knobs remained unattended. They are made of rough plastic, and the unattractive shape is completely unsuitable for a stylish interior.
If you do not want to put up with some aesthetic flaws, we suggest you familiarize yourself with our recommendations, based on which you can transform the heater control panel, decorating it with bright and attractive switches.
Algorithm of actions
Initially, you will have to look for stylish heater handles that will impress you with their appearance. You can borrow them from foreign cars. Of course, they won’t fit your car perfectly, but won’t your “golden” hands work wonders if we tell you how to do it all.
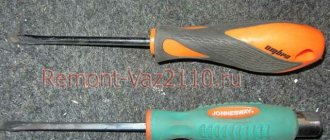
So, after you managed to find beautiful switches for the heater, maybe even decorated with neon lighting, you can begin to directly modernize the heater control panel. Don't forget to prepare the necessary tools, because you definitely won't be able to create a miracle with your bare hands. You will obviously need:
- wire cutters;
- file;
- file;
- Super glue;
- old heater switches;
- new options from foreign cars.
Take the old switch in your hands, turn it over, now you will definitely find the seat located in the center. This is what you need to carefully cut off. Now take the new switch and try this cut part on it
It is very important that they “make friends”; if you notice extra parts that prevent tight contact, we recommend that you work with a file, cutting off excess protruding parts or uneven surfaces
Once you are sure that the cut piece fits perfectly on the new handle, take superglue and glue the two pieces together. Do similar actions with the second handle for the heater. We are confident that you have made the decision to replace both switches and not just one. Otherwise, the entire modernization process will be meaningless. Leave both handles to rest for a bit, but seriously, let the superglue grip both parts of your upgraded handle as tightly as possible. After a short period of time, which is enough for the glue to work, take the switches and place them in their original place. Due to the fact that we have preserved the central part, they will “sit down” without problems. The outer surface of the handles and their shape will contribute to a noticeable improvement in the appearance of the heater control panel
The lighting that accompanies your new heater switches will also attract attention.
After carrying out such simple manipulations, your car’s stove will delight you not only with good heating of the interior, but also with a beautiful view.
So, anyone who is not afraid to work and who, using the recommendations, begins to act confidently, can modernize something in their own car.
Source
Basic points
The heater control mechanism may differ depending on whether the car has air conditioning and what manufacturer it is from. Although there will be some changes in the design, the types of breakdowns, their causes and solutions will not differ. Therefore, we will consider general situations. Typically, VAZ-2171 owners face three common problems:
- Failure to switch the direction of air flow.
- Lack of ability to change air temperature.
- Difficulty switching operating modes.
Replacing switches and backlight lamps on the Lada Granta instrument panel
Tools:
- Open-end wrench 10 mm
- Pliers
- Medium Phillips screwdriver
- Set of plastic mounts
- Small flat screwdriver
Parts and consumables:
- Trunk release button
- Outdoor Light Switch
- Hazard switch
- Heated rear window switch
- Switch for operating modes of the heating fan and interior ventilation
- Lamp W1.2W - 2 pcs.
Replacing the trunk lock actuator button
1. Disconnect the wire terminal from the negative terminal of the battery.
2. To replace the trunk lock actuator switch, remove the mounting block cover from the instrument panel.
3. Using pliers, squeeze the two latches of the switch and remove it from the cover of the mounting block.
4. Install the trunk lock actuator switch in the reverse order.
Replacing the Outdoor Light Switch
1. To replace the exterior lighting switch, remove the mounting block cover from the instrument panel.
2. Using a Phillips screwdriver, unscrew the screw securing the switch.
3. With the top of the switch tilted toward you, squeeze the two connector clips (indicated by arrows) of the wiring harness and disconnect the connector from the switch.
4. Remove the exterior light switch.
5. Install the exterior lighting switch in reverse order.
Replacing the hazard warning switch
1. To replace the hazard warning switch, remove the center trim of the instrument panel.
2. Squeeze the two switch latches (indicated by arrows) and remove it from the instrument panel trim.
3. Install the hazard warning switch in reverse order.
Replacing the rear window heating switch
1. To replace the rear window defroster switch, remove the center trim of the instrument panel.
2. Squeeze the two latches of the switch and remove it from the instrument panel trim.
3. Install the rear window heating switch in reverse order.
Replacing the heating and interior ventilation fan operating mode switch
1. To replace the heating and interior ventilation fan operating mode switch, remove the central trim of the instrument panel.
Priora: how to remove the panel?
1) On the back of the dashboard, unscrew the 4 screws (asterisk). 2) Remove the glass from the instrument panel.
3) Place molar tape on the pad and mark the position of the arrows with marks. All instrument panels are calibrated, this procedure will help us accurately set the position of the needles during assembly.
4) Remove the arrows. The arrows must be pulled perpendicularly upward, while simultaneously scrolling them against the direction of travel.5) Remove the standard lens
6) Remove the metal screen holder. On the back of the instrument panel, we unsnap the metal latches of the screen.
9) In order for our scale to glow with the color we need, it is necessary to erase the green filter from it; this is done using cotton swabs, solvent or alcohol (do not use acetone). If desired, the red divisions can be left. After this procedure we get a clean pad.
10) A similar procedure must be done with the screen diffuser.
11) It is necessary to enlarge (drill out) the holes in the plastic light diffuser and paint their inner edges black (a black marker is suitable for this), this is necessary in order to install wells for illuminating the arrows. The light of the arrows will thus not illuminate the main scale.
Wells are made from any plastic tube (syringe), adjusted in diameter as shown in the photo, or thick paper folded in several layers and wrapped in black tape.
13) We begin to install the boards themselves, to do this we solder the wires according to the following diagram: a) In the version without soft ignition, you need to solder 2 wires: GND from the backlight board to 19 (ground) contact of the instrument panel, IG from the backlight board to 18 (light control ) instrument panel contact.
b) In the version with soft ignition, it is necessary to solder 3 wires: GND from the backlight board to 19 (ground) contact of the instrument panel, IG from the backlight board to 21 (ignition) contact of the instrument panel and ILL from the backlight board to 7 (dimensions) contact of the instrument panel .
If you installed a version without soft ignition, then there is always the opportunity to modify the board by installing a soft ignition unit on it.
DETAILS: Replacing the front wheel bearing of Lada Kalina
When the negative wire is connected to the -CH1 pad, the screen will light up simultaneously with the arrows; when the negative wire is connected to the -CH2 pad, the screen will light up along with the scales (applies to boards with a soft ignition unit installed).
On the reverse side we glue the adjustment buttons of the smooth ignition unit onto double-sided tape.
14) We install our wells, fixing them if necessary with a drop of glue, and install the standard light diffuser in place.
If you want to install sound insulation in your Lada Priora or tune the interior, to do this you will first have to dismantle its dashboard.
You can do this yourself if you follow our instructions.
Replacing the backlight bulbs of the heater control unit Lada Granta, removing the front console
Removing the center console trim of the Lada Granta More details
Replacing the backlight lamps of the Lada Kalina heater Read more
Analysis of the central panel of the Lada Granta Fly Read more
Replacing center console lamps (heater panel). Lada Kalina More details
Kit for overexposure of the interior on Grant. More details
INTERIOR RELIGHT WITHOUT SOLDERING FOR 30 RUB FOR ANY CAR Read more
Heater control knobs Lada Granta More details
COMPLETE overexposure of the interior on GRANT! EVERYONE can do it! More details
Removing the heater panel on Kalina. Replacing light bulbs in a beard on Kalina. More details
Cool COOL stoves for Lada Granta WITHOUT MODIFICATIONS! More details
Overexposure of the Lada Granta (Kalina-2) tidy More details
How to remove the center console trim of the Lada Kalina instrument panel Read more
Top 5 modifications to Lada Kalina. More details
20 PRODUCTS FOR LADA GRANT FROM CHINA WITH ALIEXPRESS COMPETITION Read more
Ali express for Lada Grants and Kalinas Read more
remove the console on Kalina 2, and change the backlight on the stove adjustment Read more
Turning the heater on the Lada Granta with Ali Express Read more
Kalina LED heater Read more
Replacing light bulbs in the heater block for Renault Logan before 2010. Read more
Quick repair of the heater regulator on the Lada Kalina Read more
Fan problems
This will be indicated by noise or strong squealing while the car is moving. First you need to find out what is causing the fan failure. In some cases, the lower part on the heater housing falls off. Then the hooks are installed in place, which serve as fastenings.
However, it is more common to see broken tabs on the heater unit housing. Here the housing needs to be replaced. Another reason is uneven shaft expansion coefficients if the fan is heavily worn. In this case, experts recommend replacing the stove motor or its bushing. Sometimes the fan makes noise because of the washers, which are used to eliminate axial play. The element needs to be removed and cleaned. Replace the washer with a fluoroplastic one, then lubricate everything well.