When buying a car, car enthusiasts pay a lot of attention to the braking system. Since this system is responsible for the safety and comfort of driving. Ill-designed and ill-conceived brakes can cause traffic accidents and cause a lot of minor inconvenience to the car owner.
In its latest creation (Lada Vesta), AvtoVAZ showed a lot of innovations, starting from design, engine and ending with the chassis of the car. The brake system of the Lada Vesta was also not deprived of the attention of the developers and has undergone many changes and improvements.
Main differences between disc and drum
The braking mechanism consists of several parts and differs in two types of design.
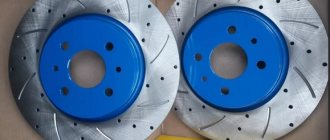
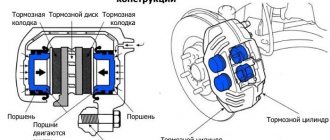
The disk unit has an open design, allowing the device to operate for a long time without overheating. When you press the brake pedal, the brake pads are pressed against the disc mounted inside the wheel rim using a caliper. The degree of compression of the disc by the calipers is very high, which allows the car to brake more efficiently. As a result of heavy loads, the mechanism has a relatively short resource.
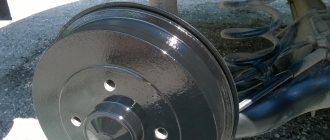
The drum mechanism has a closed cylindrical body, which prevents the entry of dirt and dust and has a long working life. The brake pads are pressed against the inner surface of the drum, causing the car to stop. The pressing force of the elements is comparatively lower than that of analogues with a disk, therefore such mechanisms are considered less effective.
The combination of front discs and rear drums is optimal in terms of efficiency and durability. This version of the Lada Vesta justifies itself with its reasonable price and reliability.
Conclusion
Modification of the standard brakes of the Lada Vesta is a personal matter for each car owner. Provided the car is used moderately and the driving style is non-aggressive, the stock rear brakes are sufficient.
If you decide to install it, strictly follow the recommendations outlined in the article. If you have insufficient experience, contact service station specialists for help.
Note to the driver! If desired, tune the handbrake handle on the Lada Vesta. Motorists purchase a leather cover (seam with red stitching), as well as a pre-installed cup holder on the rear side. Cost from 800 rubles.
Rear brakes on Lada Vesta
Lada Vesta brakes The manufacturer installs rear disc brakes (RDB) only on sports versions of the Lada Vesta intended for racing.
This is due to the fact that sports cars are not equipped with an ABS safety system, and more efficient devices with discs can cope with skids. For all other versions, the car is equipped with a drum unit at the rear. Each car enthusiast can decide for himself whether to install drum or disc rear brakes on his car. He will not feel much difference from replacing the elements.
Purchase and installation of disc brakes
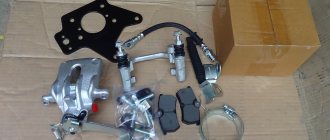
You can buy Lada Vesta rear disc brakes at any AvtoVAZ specialized store or on online store websites. The average price for a complete set of spare parts is 15 or 18 thousand rubles, depending on the presence of an ABS sensor. The brake pads should be changed after 30-45 thousand kilometers.
In order to install a motor instead of drums, you must follow a certain procedure:
- remove the wheel from the car beam;
- unscrew the nut from the hub;
- unscrew the bearing and remove the drum;
- install the disc and caliper on the beam hub, tighten the bearing;
- tighten the bearing nut.
After installing all braking mechanisms, it is necessary to check the brake fluid level in the hydraulic drive reservoir. If it deviates from the norm, you need to add fluid.
Replacing drum brake pads
Before starting work, the handbrake lever should be completely lowered down. The installation process has its own procedure:
- remove the rear wheel;
- using a slotted screwdriver, unscrew the ratchet nut that adjusts the length of the spacer bar;
- remove the block and replace it with a new one;
- install the drum back;
- tighten the bearing nut.
Work progress
For the right and left wheels the algorithm of actions is the same. Before you start replacing the rear brake pads of a Lada Vesta yourself, you need to drive the car onto an overpass, and then remove the sedan from the parking brake.
Next, the rear wheel is removed, and a support must be placed under the car.
To dismantle the drum, the pads must first be brought together. This is done with a regular screwdriver - it is inserted into the threaded holes in the drum itself, and it rotates a special ratcheting nut for automatically adjusting the gap between the surface of the brake drum and the pads. This will allow you to shorten the bar (spacer).
The photo below shows the entire mechanism with the drum removed. The nut rotates with the screwdriver up, in the direction indicated by the red arrow.
When this is done, you need to remove the drum bearing cap. It fits quite tightly, and therefore a chisel and a hammer are used for the work.
After the cap is removed, access to the hub bearing nut will open, which needs to be unscrewed using a 30 mm wrench and a socket.
After unscrewing the nut, you need to remove the brake drum (it is dismantled along with the bearing).
When the drum is removed, you must work carefully so as not to touch the ABS system sensor, marked with a red arrow in the figure.
Using a screwdriver, pry up and remove the spring (pressure) of the rear pad, as well as the support post. The support post of the second block is dismantled in the same way.
Then you need to remove the hook of the tension spring (lower) from engagement with the brake pad, after which the spring itself is removed.
The next step is to move the pad subassembly (rear) away from the brake shield
You need to work carefully, as there is a risk of damaging the brake cylinder seals.
The upper tension spring is removed in the same way.
When this is done, you can remove the spacer bar, and then the front block. You must first disconnect the end of the handbrake cable from the rear block, and then remove it too.
The mechanism for automatically adjusting the gap between the rear brake pads of the Lada Vesta is a spacer bar (composite).
When you press the brake pedal, the pads move apart and are pressed against the surface of the drum. This occurs due to the work of the wheel cylinder pistons. As for the protrusion of the lever, it moves in the opening between the teeth of the nut (ratchet).
As the pads wear, the nut rotates 1 tooth under the influence of the adjuster. This lengthens the bar (spacer) and moves the pads closer to the surface of the brake drum. Thanks to this complex, there is no need to adjust the handbrake.
The spacer bar itself has a complex design, and therefore if rust appears on it or if it is damaged, it is recommended to install a new part. If the condition is normal, it is better to wash the bar and lubricate it with a plastic compound.
Before starting assembly, you need to reduce the length of the bar as much as possible by screwing in its rear end.
Installation of the rear brake pads of the Lada Vesta is carried out in the reverse order.
Before installing the brake drum, its working area must be thoroughly cleaned with a wire brush. But when working, you must be extremely careful so as not to catch the ABS master ring.
The drum is secured with a hub bearing nut, which must be tightened to a force of 175 Nm. It is also strongly recommended to install a lock nut, this is especially true for the left wheel.
Self-replacement of the rear brake pads of a Lada Vesta on the second wheel is carried out in the same way.
When the work is completed, you need to check the brake fluid level in the reservoir. If it is insufficient, add liquid.
To adjust the brake pads, you need to press the brake pedal several times. Then, pressing the pedal, raise and lower the handbrake, while keeping the button on the handbrake constantly pressed. At this time, soft clicks will be heard from the rear wheels as the auto-adjustment mechanism operates. The handbrake needs to be raised and lowered until they stop coming.
If the need arises, you can additionally adjust the hand brake, which is done with a 10 key - there is a nut under the lever that should be tightened.
This completes the independent replacement of the rear brake pads of the Lada Vesta.
Additional security systems on Lada Vesta
In addition to the main braking mechanism, designed to control the car by the driver pressing the pedal or using the handbrake, the AvtoVAZ car has a number of adaptive electronic devices:
- ABS – prevents wheel locking during emergency braking;
- HSA – assistance when starting off and driving on an incline;
- TCS is a traction control device that helps overcome light off-road conditions without slipping, distributing torque to the wheel depending on its load;
- ESC - exchange rate stability system controls the behavior of the car in a skid, thanks to which the car maintains the specified trajectory;
- EBD is a braking force distribution device that allows you to apply different forces and influence the speed of stopping.
Considering all these innovations on the Lada Vesta, paired with good braking elements, they can prevent any emergency situation on the road related to the stability and control of the car.
Rear wheel disc brakes (RDB) are installed on Lada Vesta from the factory, but not on all trim levels. Tuning enthusiasts who have rear drum brakes have a choice: buy a HA kit for Vesta from third-party manufacturers or modify the brakes according to the factory version. In this article we will tell you what is required to install a standard HTD kit.
One of the owners of Lada Vesta Exclusive managed to find out from an AvtoVAZ employee what was needed to replace Vesta’s drum brakes with disc brakes. According to him:
- There is no need to change the beam.
- There is no need to flash the ABS block.
The second photo shows that between the beam and the axle there is a spacer (factory) to which the boot is attached. In the factory version, the disc and hub are made separately and this is a huge advantage; there is no need to constantly change bearings with each disc replacement.
Articles
standard set of Lada Vesta HA:
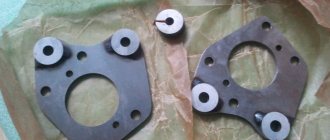
- 8450031133 Left rear brake mounting bracket:
- 8450031132 Right rear brake mounting bracket:
- 8450031161 Bolt M10-1.25-40;
- 8450031687 Left rear brake protective cover:
- 8450031686 Right rear brake protective cover:
- 00001-003836021 Hex head screw;
- 8450031130 Rear wheel hub assembly;
- 8450031131 Rear brake disc;
- 21080610526810 Clamp fastening screw;
- 8450031162 Rear right brake assembly;
- 8450031163 Rear left brake assembly;
- 21080-2904194-00 Ball joint bolt;
- 00001-000516870 Washer 10 Table 10188;
- 21080-2904194-00 Ball joint bolt;
- 00001-000516870 Washer 10 Table 10188;
- 11196-3502089-00 Rear brake pad set;
- 8450031129 Rear brake flexible hose assembly: 2 pcs;
- 8450031137 Brake hose mounting bracket, left;
- 8450031136 Right brake hose mounting bracket.
Description of innovations
On the Lada Vesta, the brakes received a number of new functions. The new car has such useful systems as ABS+BAS in all trim levels. The front pads have several technological differences compared to the rear ones. Lada Vesta is equipped with more expensive and high-quality brake system components compared to previous cars produced by AvtoVAZ. More advanced mechanisms and technologies are used.
The front wheels of the Lada Vesta are equipped with disc braking mechanisms. The rear wheels of the car are equipped with drum systems. In addition to the mechanisms and technologies listed above, Lada Vesta has:
- EBD (electronic brake force distribution system);
- HSA (a system that helps with hill climbs);
- ESC (the car is also equipped with a stability control system);
- TCS (traction control system, helps get out of difficult situations on the road).
Many technical innovations make Lada Vesta a pioneer for the Russian automobile industry in various aspects. Innovations in the braking system create all the conditions for a safer and more comfortable ride.
The best manufacturers, brands, analogues
The working brake system in a car is for the safety of the driver, passengers, and other road users. The basis of the design is:
During systematic use, parts wear out, linings wear out, and braking efficiency decreases. The process of preventing the brake circuit is simple, but requires attentiveness on the part of the technician.
Step-by-step instructions for replacing the front brake disc on a Lada Vesta car
- Let's jack up the car.
- We remove the wheel.
- Unscrew the caliper fasteners.
- We remove the pads.
- Remove the brake disc (hereinafter referred to as TD).
- Prevention.
- Assembly.
Replacement of rear brake drums (hereinafter - TB) is carried out according to a similar scheme:
- Let's jack up the side of the car.
- We remove the wheel.
- We knock the drum out of its seat.
- After maintenance we install it in place.
- We reassemble the structure.
Replacement procedure
During replacement, you will need to bend or trim the steel screen.
After replacing the brakes, the spare wheel fits, but the clearance is too small. Just in case, you could take a set of 6 mm wheel spacers (4/5*100 CB-60.1).
ATTENTION
owners of Ptalomey R16 wheels! After installing Nissan Tiida brakes, there is critically little space left between the caliper and the disc spokes, less than a millimeter! In this case, it is necessary to install 5 mm spacers:
Review of Manufacturer Prices
| Catalog article of the brake disc Lada Vesta | Price in rubles |
| Front TD | |
| Original Lada Vesta (8450031577) | From 2500 |
| Analogs | |
| NF (NF1699131) | From 1500 |
| Swag (60924165) | From 1800 |
| Brake discs Lada Vesta Brembo (Brembo) (09907875) | From 3200 |
| Rear TB | |
| Original Lada Vesta, X-Ray(8450031131) | From 4000 / set |
| Analogs | |
| NK (202264) | From 1400 |
| Valeo (297764) | From 1800 |
| JURID (561997JC) | From 1850 - 1900 |
| Rear brake discs for Lada Vesta ATE | From 2700 - 2900 |
| *prices are as of 04/08/2019 | |
Front disc dimensions:
- Thickness: 19.8 mm.
- Height: 44 mm.
- Number of holes: 4.
- Diameter: 260 mm.
- Allowable wear: 11.2 mm.
Recommendations for the selection of parts and components
We recommend purchasing domestic spare parts for the Lada Vesta, since their cost is 10–15% cheaper than imported analogues. The workmanship is approximately the same.
Previously, at the time of the company’s formation, drivers gave preference to foreign parts. Thanks to the introduction of advanced technologies in the production process of components, domestic standards have increased and quality has become equal.
Despite the fact that you can purchase spare parts from Vesta Sport for production Vesta models, carry out the installation at a service station. Don't skimp on repairs when it comes to your security system.
Which Lada Vesta models have rear disc brakes?
Of the entire Lada Vesta model range, only Lada Vesta SW and SW Cross are equipped with rear brake discs.
Conclusion
It is not difficult to replace brake discs on a Lada Vesta car yourself. Contact the workshop in case of emergency or if you notice a major breakdown.
Domestic or foreign parts - this is the question motorists ask. The workmanship and service life of consumables are approximately at the same level. However, the cost of Russian spare parts is 20–30% cheaper than imported ones. The average service life of discs and drums is from 100 – 120 thousand km.
Required
- Left caliper (Tiida) Fenox, article number CTC5773 (analogous to Nissan 41011-EM10A).
- Right caliper (Tiida) Fenox, article number CTC5774 (analogous to Nissan 41001-EM10A).
- Perforated brake disc Brembo (2 pieces), article 0981372X, or Renault 7701207829 (or equivalent), you could also take Brembo 09813776 (slotted), Brembo 09813724 - regular ones.
- Brembo front disc brake pads, article number P56065 (can be Nissan D1060EM10A or equivalent).
- Installation kit for front brake pads, article number 41080AC290.
- Brake hoses from Vesta SW / SW Cross, article number 8450031128 (they are 7 mm longer than the sedan ones.)
- Nissan front brake hose O-ring, article number 46237A4600 (2 pcs).
- Grease for TRW guides, article number PFG-110.
- Lubricant for Ate brake systems, article number 03.9902-1002.2.
Price
such a set of brakes costs 25-35 thousand rubles.
buy it
in our online store (link to kit).
Reviews
| № | Positive |
| 1. | Gennady (otzovik.com): mileage 80,000 km, brake circuit is working, replaced the front pads once. |
| 2. | Vladimir (www.zr.ru): the brakes in the Lada Vesta are effective, they work quickly, there are no comments. |
| 3. | Sergey (autobann.su): the car is two years old, no capital investments. I carry out technical inspections in a timely manner and buy original consumables. |
| 4. | Vladimir (lada-vesta.net): there are no special comments on the TD, the quality is good, but when sand gets into the caliper, a metallic creak and grinding sound is heard. The spacer plate and pads are covered in rust. |
| 5. | Dmitry (otzovik.com): review of the car is positive. I've been using Lada Vesta for two years and have no particular complaints. |
| 6. | Semyon (www.zr.ru): I noticed that in the rain the effectiveness of the brakes decreases, the pedal increases free play. |
| 7. | Maxim (autobann.su): before the Lada Vesta there was a Granta, the quality of the latter is not the best. Well done engineers, they finalized the model properly. |
| 8. | Georgy (lada-vesta.net): actual mileage is 74,000 km, the condition of the hub mechanism and steering knuckle is good, production is minimal. TC and TD are worn out by 60%, reserve is at least 15%. |
| 9. | Stepan (otzovik.com): I am pleased with the quality of workmanship and assembly of the car. There were no major breakdowns; minor ones were fixed on my own. |
| 10. | Vladimir (www.zr.ru): comrades recommended installing brake system elements from Renault Megane, they say the quality is better there. Not ready for large-scale spending yet. |
| 11. | Alexander (autobann.su): the car is two years old, standard equipment, no comments, the interior is quiet, the suspension is strong. |
| 12. | Mikhalych (https://forumvesta.ru): I’m proud of my domestic car; in three years of active use it has never let me down. Good brakes are a guarantee of safety on the road. |
| Negative | |
| 13. | Konstantin (www.zr.ru): as soon as it rains, the discs immediately creak, no matter what I did, it didn’t help. The dealer refuses to replace it due to a non-warranty issue. |
| 14. | Vitaly (otzovik.com): after purchasing the Lada Vesta, I immediately replaced the original TCs and TDs with imported ones. The quality of domestic spare parts leaves much to be desired. |
| 15. | Grigory (autobann.su): the rear drums turned out to be defective, replaced under warranty from an official dealer. |
| 16. | Kirill (lada-vesta.net): if possible, replace original disks and drums with imported ones. The service life of Russian ones is short. |
Inspection of the body from the Lada Vesta interior
After examining the front panel in the showroom, the car service specialists stated that, judging by the joints and the quality of the materials, it would begin to creak within six months. Experts have noticed that car window seals are not of very high quality; therefore, after some time of using electric windows, scratches from accumulated dust and dirt will appear on the windows.
Replacing headlight bulbs will be convenient. Hands can easily reach the lamps in the engine compartment. But replacing taillight bulbs will be complicated by the fact that it will be necessary to fold back the trunk lining. It is also difficult to find the lamp socket from the taillight. In addition, it is worth noting the presence of plugs in the front fender liners, which make access to the fog lamps easier.
In the table below we show the cost of all repair work on a Lada Vesta car, which was announced by specialists from a private independent car service center.
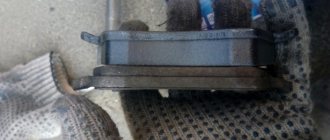
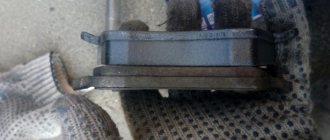
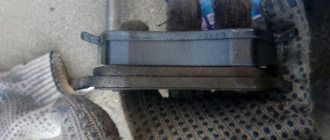
We replace the pads of a Lada Vesta car in case of maximum permissible wear of their linings - the minimum thickness of the pad, including its base, must be at least 6 mm.
We carry out the work on a flat area, inspection ditch or overpass.
If the fluid level in the hydraulic brake reservoir is at the MAX mark, then before installing new pads, use a syringe or rubber bulb to pump out some of the fluid from the reservoir. This operation must be performed so that when the piston is pressed into the wheel cylinder of the brake mechanism while installing new pads, fluid does not flow out from under the reservoir cap.
Using a metal brush, we clean the spring brackets and pad seats in their guide from dirt and corrosion.
To replace the cover of the upper guide pin, you need to unscrew the bolt of the upper fastening of the bracket to the pin and remove the bracket from the pad guide. Before installing the pin, put a little grease into the hole in the pad guide...
We similarly replace the pads on the other side of the car.
During operation, the surface of the brake disc becomes uneven, as a result of which the contact area of the new, not yet worn-in pads with the disc decreases
Therefore, during the first 100 km of driving after replacing the pads, until the new pads have broken in, be careful, as the car’s braking distance may increase, the pads may get hotter than usual, up to the appearance of light smoke and smell, especially in hot weather.. https: //www.youtube.com/embed/zAOeWh3Efdc. https://www.youtube.com/embed/zAOeWh3Efdc
Sources
- https://autoruk.ru/lada-vesta/tormoza-lada-vesta/remont-perednikh-tormozov-lada-vesta
- https://motormania.ru/auto-pomosh/lada-vesta-stoimost-rabot.html
- https://www.zr.ru/content/articles/852978-lada-vesta-zamenyaem-kolodki-tormoznyx-mexanizmov-perednix-koles/
