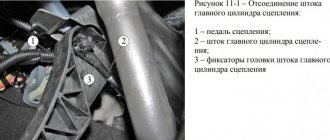
Information
Visitors in the Guests
, cannot be posted on this publication.
Video on the topic “Lada Granta. Removing the cigarette lighter, replacing the Granta backlight lamp"
Replacing the cigarette lighter on a Priora and its backlight lamp
Lada Granta - installing a socket instead of a cigarette lighter.
How to replace the cigarette lighter in Kalina, Priora, Grant. Installation of a convenient cigarette lighter.
The cigarette lighter does not work on the Lada Largus
The Lada Largus passenger car is equipped with a cigarette lighter located in the lower left part of the front console. Drivers nowadays do not use it for its intended purpose as often as before, since the cigarette lighter socket in most cases while driving is usually occupied by the plug of the DVR or some other additional devices.
The main reason for cigarette lighter failure is the driver’s inattention or insufficient knowledge about the structure of the cigarette lighter socket. It is for this reason that most short circuits occur, leading either to the blowing of the fifteen-amp fuse F38, or to the failure of the cigarette lighter socket itself, in which a specially installed ring insert melts on the back of the positive contact, thereby preventing the occurrence of a fire in the insulation of suitable wires to it.
Short circuits inside the cigarette lighter occur due to the lack of a uniform standard for the diameter and depth of its socket. Therefore, incorrectly connecting non-standard Chinese-made plugs to it to power additional consumers with long side contacts leads to a short circuit and blown fuse F38. And the fuse rating of 15 amperes is sometimes insufficient to power more powerful tire pumps through the cigarette lighter socket.
To replace it, you will have to open the cover of the mounting block located on the left side of the front panel. On its reverse side there is a designation of fuses in the form of pictograms. Since fuse F38 also protects the power supply circuit of the head sound reproduction device from the ignition switch (audio system), therefore its pictogram is made in the form of a radio panel with a musical note. The color of this fuse is blue, and you need to look for it in the lower right corner.
If no one has opened the cover of this mounting block before you, then on its reverse side you will see one spare fuse of different ratings, differing from each other in color. You can easily find a 15-amp blue fuse and, using tweezers located here, replace the blown fuse F38. But, for the future, you will have to independently purchase fuses of the appropriate rating, which will be in your reserve just in case of a fire.
Source
Possible causes of failure
There are quite a few reasons why the cigarette lighter on a Priora may not work, but most often they are of the same type and are associated with improper use of this part or due to its aging.
- Contamination of the contacts inside the cigarette lighter, which makes it impossible to conduct current through them. This problem occurs quite often if the cigarette lighter is used as intended. Remaining ash gets inside the cigarette lighter and contaminates it.
- The cigarette lighter connector, which is connected to it from below, is also susceptible to damage. When using powerful accessories, the contacts may burn.
- The cigarette lighter fuse is one of the most common problems with a non-working cigarette lighter. Fuse blowing occurs due to a possible short circuit or the use of powerful car accessories.
- A malfunction of the cigarette lighter illumination does not lead to its failure, but still, when something in the car does not work, it is not good and requires repair.
The cigarette lighter on the Largus does not work
You found information about the Lada Largus cigarette lighter not working - come in, we have become even more convenient. Techniques and technologies for car repair in garage conditions. How to repair a car yourself at home. We will help you with repairs and repair the car yourself. We know how to restore a car with minimal investment. I have attached video instructions.
Category: Car repairs
Laughter on topic: Cleanup is when those who don’t litter clean up after those who do. For free.
Published by Admin: at the request of Paruyr
Car owner's response: The chassis, transmission and engine correspond to the best examples of world brands in this class. Price and quality, the presence of additional options even in the minimum configuration, handling and comfort (especially felt on long trips), stability in corners
Mounting block of fuses, fuses and relays under the hood of Lada Largus (Largus)
Cooling fan high speed relay (for vehicle with air conditioning)
Cooling fan motor
Air conditioning compressor electromagnetic clutch
Cooling fan low speed relay (on vehicle with air conditioning) or cooling fan relay (on vehicle without air conditioning)
Cooling system fan motor (on a car with air conditioning - through a resistor)
Fuel pump and ignition coil relay
Fuel pump and ignition coils
Engine control system main relay
Oxygen concentration sensors (heating circuit); fuel injectors; canister purge valve; relay windings K1, K2, KZ; Engine control ECU
Fog lamps
Heater Fan Relay
Heater fan motor
Circuit breakers.
Circuits: constant power supply to the engine control system ECU; main relay windings of the engine control system
Power circuits: fuel pump and ignition coil relays; engine control system main relay
How to remove the cigarette lighter VAZ Largus
Replacing the cigarette lighter on a Priora and its backlight lamp
How to easily and simply remove and replace the cigarette lighter assembly on a VAZ 2170 car without removing the floor tunnel...
Cigarette lighter. Replacing the cigarette lighter. Wires and cigarette lighter socket.
If you liked the video, click like and subscribe to our channel and of course share this video, we...
How to remove the cigarette lighter
Using the Opel Corsa D as an example.
installation of an additional cigarette lighter socket on a Renault Duster
installation of an additional cigarette lighter socket on a Renault Duster. The entire installation process, from removing the panel,...
SHOCK. WHAT I FOUND FOR LADA LARGUS ON ALIEXPRESS + COMPETITION
In this video you will find 20 products for Lada Largus that can be bought on Aliexpress (1) Trim...
Replacing a cigarette lighter light bulb on a Renault
Detailed description of replacing the cigarette lighter light bulb in the cabin on a Renault Great knowledge about Renault https://remontiruemrenault.ru/…
How to replace the cigarette lighter on a Priora in 3 minutes
How to quickly and efficiently replace the cigarette lighter on a Priora. The cigarette lighter is burnt out and needs to be replaced with a new one...
How to change the tilt of the seat backs of the middle row of LADA Largus
Make your passengers happy by spending 10 minutes of their time. Become a YouTube Partner https://youpartnerwsp.com/join?9658…
installing a 12v socket in a car with your own hands
installing a 12v socket in a car with your own hands.
Cigarette lighter repair
All fuses are intact, but the cigarette lighter does not work. Cigarette lighter repair. In the video I said that instead of...
Lada Largus radio does not work
Hello everyone, today I want to talk and figure out why the radio on the Lada Largus car does not work. There are plenty of reasons for this. As you already know, Largus comes from the factory with a radio and four standard speakers. Standard speakers are located on the front and rear doors. I would like to say right away that if you do not like this radio, then to install another one you will have to purchase special adapters.
There are many reasons why the radio does not work on Largus, so we will try to look at the most basic reasons that you can eliminate with your own hands. So, let's go. If when you turn on the radio it does not show signs of life, then the first thing you need to do is check fuse F28 (15A).
In order to understand whether the fuse has blown, you don’t even need to open the mounting block, since if the fuse is blown, then your instrument cluster and the ceiling lamp will not work. All these devices are powered through fuse F28.
Sometimes it happens that the Largus radio itself turns on, but not a single sound comes out of the speakers. In this case, you will need to check fuse F38 (15A). You can check as follows: you need to check whether the car's cigarette lighter is working. If the cigarette lighter works, then the fuse is intact, then you need to check the wires going to the speakers.
Also, poor operation of the radio may be associated with poor contact that goes to the ground of the car. In this case, you need to check the contact of terminal A8 of the radio.
Well, that’s all, we have looked at the main reasons why the standard radio on a Lada Largus car does not work. Bye everyone.
Cigarette lighter repair instructions
If the cigarette lighter stops working and you decide to do the repairs yourself, first of all you should dismantle it. The complete procedure for repairing the device is as follows:
- Initially, you should have a new, working copy on hand.
- Remove the negative battery terminal
- Using pliers, carefully remove the cigarette lighter from its socket.
- Lift the device by the edges one by one, without sudden movements, so as not to break the contacts
- When the cigarette lighter is in your hands, pay attention to its contacts, there should be no burning on it
- If a soldered wire is found, solder it
- Install the mechanism into the socket, doing all the steps in reverse order.
Another common problem is that current flows, but the coil does not heat up. In this case, the head must be completely replaced. It is necessary to install new, original spare parts of the device in accordance with their specific brand of car. If the above steps do not bring the desired result, install a new cigarette lighter.
The radio on the Lada Largus does not work
On the Lada Largus passenger car, a standard radio and four speakers are already installed on the conveyor, located in the front and rear doors, and for its connection there are two wire harnesses (power supply and speaker connection), at the ends of which a pair of plugs are installed. But, these plugs do not comply with the ISO standard, and if you do not like this radio, then to connect another radio you will have to purchase adapters.
There are many reasons why the standard radio may refuse to work. Therefore, we will only talk about those malfunctions that the driver himself can eliminate, even if he is not very well versed in electrical engineering.
If, when you turn on the radio, its head unit does not show any signs of “life,” then it will be necessary to check the integrity of fuse F28 (15A), since it is through it that power is supplied to the volatile memory of the radio, where its settings are stored. To do this, you don’t even need to open the cover of the mounting block, located on the left side of the front panel, because if it burns out, the instrument cluster and the interior and trunk lamps will not work, since all these devices are powered through fuse F28. And if this fuse is intact, then you will need to check the condition of the contacts and the wire going from this fuse to terminal A4 of the radio.
There are times when the head unit of the radio turns on, but no sounds are heard from all four speakers. Then you will have to check fuse F38 (15A), since power is supplied to the speakers through it. This can be done by checking the functionality of the cigarette lighter.
Largus dashboard
The Largus instrument panel consists of a frame and a decorative trim. The frame is made of steel; it holds all the blocks and wires of electrical equipment installed in the cabin. Steering elements are also attached to it. The frame is part of the vehicle's power structure; it is attached to the base of the body and the A-pillars.
A decorative trim is a molded plastic part. It is screwed to the frame using screws. The steering wheel and the interior heating and air conditioning system are mounted on the decorative panel. It is also equipped with control instruments, linings and a glove box.
Lada Largus - fuses and relays
Lada Largus is a cargo-passenger station wagon, which was produced in various versions. The most popular is Largus Cross with 8 and 16 valves. Years of production: 2012, 2013, 2014, 2015, 2016, 2022, 2018 and 2022. After that, the car was restyled and the updated one is produced from 2022 to the present. In this article you will find a description of fuses and relays of the Lada Largus with block diagrams and photo examples of execution. Let's highlight the fuse responsible for the cigarette lighter.
The design of the blocks and the purpose of the elements in them may differ from those presented and depend on the year of manufacture and the level of equipment of your Lada Largus (norm, standard, luxury).
Installing a cigarette lighter with illumination MANOVER or be careful - POSSIBLE "short circuit".
When I first saw the Lada Largus, I immediately decided for myself: I will have it.
A story about how a 10-minute replacement of a standard cigarette lighter with a MANOVER illuminated cigarette lighter smoothly turned into a short circuit, the loss of two 15A fuses, complete disassembly of the tunnel lining, and creative work with a file.
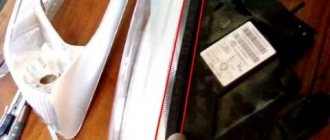
Unexpectedly and inexpensively, I got this cigarette lighter with backlight MANOVER MR3312702.
And this is a contact that is missing in the standard cigarette lighter. Actually, like the yellow glass itself and the block with the light bulb. )
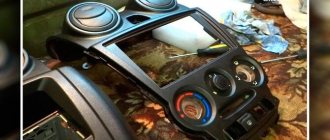
Let's start replacing the standard cigarette lighter with this one, without dismantling the tunnel lining.
We take out the “pipka”. And inside the cigarette lighter we see these symmetrical slots. Using a thin screwdriver, press inward and turn slightly clockwise and counterclockwise to pull out the central metal sleeve with the connector.
We disconnect the connector from the cigarette lighter and tie a wire to it. For what. It will come in handy later. Next, take out the black plastic rim. (The photo turned out bad, and there was no point in uploading it.) To get it out, I stuck my index finger inside and pulled it out on my finger. )
Now I'm starting to install a new illuminated cigarette lighter! Let's take it apart. The cigarette lighter is separate, the illuminated bezel is separate. That's what the delay was for. We pass the wire through the rim.
And install it in its normal place!
And now the wire pulls the connector out. This is much more convenient than having to pick it out with something later.
We connect the connector to the cigarette lighter.
And we insert it inside. To your place.
I turn on the dimensions, the backlight works (it’s not visible in the photo, but it glows, it’s a little dim, but it still glows).
Block in the cabin
It is located on the left side of the dashboard, on the driver's side, behind the protective cover.
Photo - diagram
On the back of the protective cover, on some models, the current fuse assignment diagram will be printed.
p, blockquote 10,0,0,0,0 —>
| 1 | 20A Windshield wiper and washer, central electronic switching unit in the passenger compartment (UCC), power consumer relay unit (rear window heating relay control) |
| 2 | 5A Instrument cluster, engine control unit, fuel pump relay control, ERA-Glonass car terminal ('19-'20) |
| 3 | 10A Brake Lamp Switch, Auxiliary Brake Light |
| 4 | 10A Turn signals, diagnostic connector, transponder unit ('12-'16), daytime running light relay ('12-'16), central electronic switching unit (UCCU), immobilizer antenna, parking system control unit ('16-'16) '20) |
| 5 | Signal |
| 6 | Reserve |
| 7 | Alarm |
| 8 | Reserve |
| 9 | 10A Left headlight (low beam), instrument cluster, headlight washer pump ('12-'16) |
| 10 | 10A Right headlight (low beam) |
| 11 | 10A Left headlight (high beam), instrument cluster |
| 12 | 10A Right headlight (high beam) |
| 13 | 30A Rear windows |
| 14 | 30A Front windows |
| 15 | 10A Anti-lock system (ABS) control unit, acceleration sensor, steering wheel angle sensor |
| 16 | 15A Heated front seats |
| 17 | 15A Horn |
| 18 | 10A Left side parking light, license plate light ('16-'20), glove box light ('16-'20) |
| 19 | 10A Right side parking light, license plate light ('12-'16), glove box light ('12-'16), switches and interior lighting (instrument cluster, hazard warning switch, air conditioning control panel, audio system, central switch) lock, cigarette lighter, rear window heating switch, - driver's door window-lift switch, heating impulse switch, interior door handle lock switch), central electronic switching unit in the cabin (UCC) |
| 20 | 7.5A Rear fog light (left lamp), instrument cluster |
| 21 | 5A Heated mirrors |
| 22 | 5A '19-'20: Automotive terminal "ERA-Glonass" |
| 23 | Reserve |
| 24 | 5A '12-'16: Electric power steering pump |
| 25 | 5A '12-'16: LPG control system |
| 26 | 5A Control unit for airbags and seat belt pre-tensioners |
| 27 | 20A Rear wiper and washer, reversing lamps (right lamp), headlight washer pump ('12-'16), driver's seat belt horn ('16-'20) |
| 28 | 15A Audio system, instrument cluster, interior lighting (central lamp, 3rd row lamp), luggage compartment lighting, central electronic switching unit in the cabin (UCC) |
| 29 | 15A Diagnostic connector, central electronic switching unit in the passenger compartment (UCC) |
| 30 | 20A Central locking, central electronic switching unit in the passenger compartment (UCC) |
| 31 | 15A Front fog lights |
| 32 | 30A Heated rear window, heated mirrors |
| 33 | Reserve |
| 34 | Reserve |
| 35 | Reserve |
| 36 | 30A Heater, air conditioning control panel ('16-'20) |
| 37 | 5A Electric drive of external rear view mirrors |
| 38 | 10/15A Cigarette lighter , audio system |
| 39 | 30A '12-'18: Heater, air conditioning control panel |
| 10A '19-'20: Heater, car terminal "ERA-Glonass" |
Removing the dashboard
Important elements of the car are hidden under the dashboard in Largus. To repair or replace them, you need to remove the dashboard. This is easy to do on your own; it is not necessary to involve specialists. Before you begin, read the instructions and make sure you understand everything in them.
- Phillips screwdriver;
- flat screwdriver;
- torx key t50;
- torx t20 key.
Stages of dismantling the Lada Largus instrument panel:
- Remove the negative cable from the battery.
- Lock the airbag control module.
- Remove the steering wheel.
- Disconnect the switch under the steering wheel with the driver's airbag.
- Unplug all appliances and set them aside.
Pull out the floor mats and unscrew the floor tunnel lining.
Block under the hood
It is located on the left side of the engine compartment next to the battery and is covered with a protective cover.
Option 1
Photo - diagram
p, blockquote 16,0,0,0,0 —>
| F1 | Reserve |
| F2 5A | Circuits: constant power supply to the engine control system ECU; main relay windings of the engine control system |
| F3 25A | Power circuits: fuel pump and ignition coil relays; engine control system main relay |
| F4 30A | Cooling fan relay power circuit (on vehicle without air conditioning) |
| F5 40A | Power circuits: air conditioning relay; low speed cooling fan relay (on a car with air conditioning); high speed cooling fan relay (on a vehicle with air conditioning) |
| F6 25A F7 50A | ABS control unit circuits |
| F8 60A | Circuits: power supply to all consumers, powered from the ignition switch; left under steering switch |
| F9 40A | Interior fuse box power supply circuit |
| k1 | Cooling fan high speed relay (for vehicle with air conditioning) |
| k2 | Air conditioner relay |
| k3 | Cooling fan low speed relay (on vehicle with air conditioning) or cooling fan relay (on vehicle without air conditioning) |
| k4 | Fuel pump and ignition coil relay |
| k5 | Engine control system main relay |
| k6 | Cigarette lighter relay |
| k7 | Fog light relay |
| k8 | Heater Fan Relay |
Option 2
Designation
p, blockquote 19,0,0,1,0 —>
| 299-1 | 231(A) | Fog light relay |
| 753(B) | Headlight washer pump relay | |
| 299-2 | 233 | Heater Fan Relay |
| 597-1 | F1 (60 A), F2 (60 A) | Electronic control unit for ABS and ESP systems |
| 597-3 | F1 (50 A). F2 (25 A) | Exterior light switch, interior fuse box |
| 784 | 700(A) | Cooling fan relay |
| 474(B) | Air conditioning compressor relay | |
| 1047 | F1 (30 A) | Relay box power supply |
| F2 (25 A) | Injection relay power supply | |
| F3 (5 A) | Power supply for injection system relay, ECU | |
| F4 (15 A) | Not used | |
| 238(A). | Injection blocking relay | |
| 236(B) | Fuel pump relay |
How to replace the cigarette lighter
To achieve a successful result, you need to follow simple instructions:
- Turn off the ignition and power to the battery in advance (remove the “-” terminal).
- Remove the cigarette lighter cover.
- Using a flat-head screwdriver, remove the metal core of the device.
- We take out the plastic rim.
- We take out the lamp and install a new one.
- After this, we fix the socket with the new working lamp into the rim.
- Now we install the plastic cover and rim in place. It is important that the bulb faces backwards when installing, otherwise the grooves will not line up and it will not work.
- The last thing we replace is the core; it should also be directed backwards.
- Finally, close everything with the cigarette lighter lid.
Now you can connect the battery back and check the operation of the cigarette lighter.
Video about additional cigarette lighter
Sometimes a second outlet is needed in the trunk or other location. For this you will need:
- drill with a bit of suitable diameter;
- files;
- wire cutters;
- cables, cross-section diameter 1.5 sq. mm;
- insulating tape;
- new cigarette lighter.
- We open the circuit.
- We find a level place.
- We cut a hole of a suitable diameter and clean the edges.
- We install the car cigarette lighter, connect it according to the pinout.
- We test the functionality and assemble the unit.
Below is a video on how to remove the cigarette lighter and install an additional socket on Largus and Kalina models, which will help you understand the situation.
New cars > Cigarette lighter >
Author of the material: Dumchenkov Mikhail
Did you like the material? Share with your friends:
Have questions about car repairs? Ask them in the consultation section, to do this, click on the link below.
auto mechanic
- Acura
- Alfa Romeo
- Audi
- Bentley
- BMW
- Cadillac
- Chery
- Chevrolet
- Citroen
- Daewoo
- Dodge
- Fiat
- Ford
- GAZ
- Geely
- Hawtai
- Honda
- Hyundai
- Infiniti
- Jaguar
- Jeep
- KIA
- Land Rover
- Lexus
- Lifan
- Lincoln
- Mazda
- Mercedes-Benz
- Mini
- Mitsubishi
- Nissan
- Opel
- Peugeot
- Porsche
- Renault
- Skoda
- SsangYong
- Subaru
- Suzuki
- Toyota
- UAZ
- VAZ
- Volkswagen
- Volvo
© 2022 Daciaclubmd If you do not agree with any provision of this Disclaimer, do not use this Site. Please read Disclaimer and Privacy Policy before use.
Copying materials is permitted only with an active hyperlink to our website.
A device for lighting cigarettes in a passenger car, powered by the car's 12-volt power system.
Checking fuses
And now the TERRIBLE part.
Now I decided to check the functionality of the cigarette lighter itself! I pressed the button. She fixed herself. And a few seconds later the radio turned off and at the same time I heard a click on the left side of the dashboard! The cigarette lighter didn't click. Whoops, “KZ” I thought, and I was right.
The 15A fuse is dead. Since the new cigarette lighter was still brand new and was very tight to fit, it was not possible to get it out easily and we had to disassemble the tunnel casing. And I also decided to check, perhaps a “rake” appeared inside, which caused a “short circuit”.
Having dismantled the tunnel. Checking everything again and making sure that the wires are not shorted anywhere, neither in the casing, nor in the line, nor on the cigarette lighter. Changed the fuse. Everything is working. Turn the cigarette lighter back on to heat up. Minus another 15A fuse.
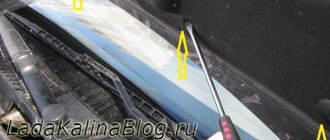
Here's where it is (marked):
I took it completely out of the lining. I began to study it thoroughly. Call a tester. Everything is fine. There is no “KZ” anywhere. Then I press the button, there is a contact. Just not in the place where I expected him. In general, inside at the bottom of a metal sleeve (aka “-“), there is a dielectric, and on it there is a bracket with wings (aka “+”). So, the “seasoned” manufacturer MANOVER, saved on dielectrics, and could not withstand the width of the wings of the bracket! When you press the button, it spreads these wings, and they give a “short circuit” to ground.
By disassembling two cigarette lighters into their component parts and repairing them. There was some overlap in components and some inconsistency. Manufacturers are different. In general, it was decided to assemble a cigarette lighter based on the standard one! Since it is made with high quality, it works, and it has everything for backlighting... Only it lacks one contact.
So. From the MANOVER cigarette lighter we take only the backlight contact bracket and dielectric plates. Everything else is a standard cigarette lighter.
Let's try it on. The blade-contact coincides, the bends of the bracket coincide. The only thing that doesn't match is the width of the backlight contact. Let's take the tool!
We remove about 0.5mm from the outside with a file. I tried it on all the time. Until she started to go into the connector slide. I removed the burrs around the perimeter of this blade. And inserted it into the standard cigarette lighter socket.
We place dielectrics on top of the contact (taken together with the MANOVER cigarette lighter bracket).
Now we assemble the standard cigarette lighter (screw on the upper part of the cigarette lighter - the sleeve).
I rang the “KZ” with a tester, everything is normal.
We connect directly to the connector and check. The backlight works.
And now the functionality of the cigarette lighter itself?! Works. There is no "KZ".
We install it in the regular place of the tunnel lining.
We connect all connectors. Assembling the tunnel linings.
Control check. “KZ” no! Everything is working normally.
RESULT: 1. Instead of 10 minutes, the replacement took 3 hours; 2. “-” 2 fuses for 15A; 3. Creative “handjob”; 4. Disappointment in the quality of MANOVER; 5. You may have to change the backlight brightness. 6. And no matter how strange it sounds, “comrades” from the Middle Kingdom do such things with better quality.
The relationship between a car lighter and a radio in VAZ cars
A common problem for all VAZ car models (2114,2115, 2109, 2110, 21099), this is the same voltage supply circuit to the car player, with output to one common fuse, which is additionally responsible for the power supply:
- cabin heater (stove);
- cigarette lighter;
- heated rear window;
- the radio itself.
Thus, a failure as a result of a break, short circuit, etc., in the electrical circuit of any device leads to the shutdown of the rest.
Since the tape recorder is equipped with an additional safety device, coming after the main one, after checking them and replacing them, if necessary, the operation of the head unit, like all the above-mentioned equipment, is restored. If only the cigarette lighter (without the player) resumes operation, the cause of the malfunction should be sought in the car radio itself (which is the topic of a separate article).
Methods for solving the problem
Now that the main causes have been sorted out, you can move directly to elimination methods.
It is worth warning that if the motorist does not understand the design or is not sure that he can repair the fault on his own, then it is recommended to turn to a professional car service center.
So, let's look at what ways to deal with the malfunction.
Fuse
Disassembled dashboard while searching for fuse and cigarette lighter faults.
The most common cause of malfunction or inoperability of the electrical circuit of individual elements is the notorious fuse.
This is where you need to look for the cause first.
The fuse box socket – F4 – is responsible for the radio and cigarette lighter. The fuse marking in it should be 20A.
But it does not always withstand the load placed on it. Thus, frequent and large use of additional devices can lead to frequent burnout of this element. Therefore, to check it is worth removing and inspecting the fuse itself. If necessary, the element is replaced with new ones and if everything works, then the reason has been found. But if the problem does not go away, then you should look for it in other places.
Contacts
Checking the contact group of fuses for malfunction
A contact group is another common cause of a non-functioning electrical circuit. In most VAZs, the connecting contacts of the fuse with the block or in the circuit of the wire block oxidize or burn out, and molten plastic can interrupt the contacts.
To troubleshoot the problem, you need to check all the contact blocks of the wires that go from the radio and cigarette lighter to the fuse box. So, it is oxidation and insufficient contact that can lead to the inoperability of the elements.
Wiring
Another reason could be broken power wires. So, in order to find and fix the fault, you will need a tester that will test the wiring and find a broken wire. It is recommended not to fasten the wire using the old “old-fashioned method” using electrical tape, but to replace it with a new one. This will take little time, so it’s better to do everything in such a way that you get a short circuit and cause big problems.
Short circuit
Location of frequent failure of the cigarette lighter socket.
The worst thing that can happen is a short circuit. The reason for this phenomenon is that frequent use of the cigarette lighter loosens the socket and this can lead to the contacts crossing and causing a short circuit.
The standard cigarette lighter is just a disaster for the VAZ-2114.
Here, the treatment for the malfunction is quite simple - replacing the socket. But, often motorists take a low-quality and cheap product, which repeats the procedure after a short time.
Bulb
Cigarette lighter illumination at night VAZ-2114.