To reduce environmental pollution and increase the environmental friendliness of the vehicle, the VAZ 2110 has a catalytic converter. For its normal functioning, a sufficient amount of oxygen must be present in the exhaust gases.
The task of monitoring this is assigned to the lambda probe. It measures the oxygen concentration and sends information about this to the main module. The ECU analyzes the received data and, according to the established algorithm, generates a control command to create an air-fuel mixture with a certain proportion of its constituent parts.
What is this?
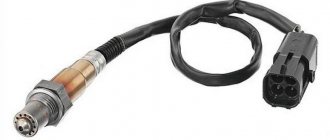
An oxygen sensor or lambda probe for a VAZ 2110 is a device that is located on the exhaust manifold in the exhaust system of your car.
Data transmitted from the device allows the electronic control unit to optimize the composition of the air-fuel mixture. If the mixture entering the combustion chamber turns out to be lean or excessively rich, the sensor reports this, after which the mixture begins to be adjusted.
Location and service life of the controller
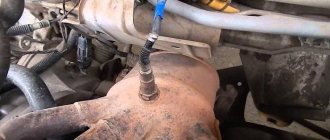
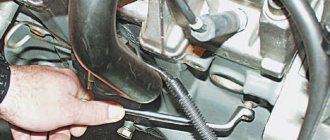
On a VAZ-2112 with engines with 16 valves, the measuring device is located at the exhaust pipe, between the exhaust manifold and the coupling.
To replace the device, you must gain access to the underbody of the vehicle body. For the best convenience, you need to drive the car into a garage with a pit or drive onto an overpass located near the highway. The service life of the oxygen sensor may vary. If a motorist uses a high-quality fuel mixture, the service life will be up to 110 thousand kilometers. In the case when a low-quality mixture is used, the service life is reduced to 85 thousand kilometers.
Device
The design of the lambda probe includes the following elements:
- Body made of metal;
- An insulator made from ceramics;
- O-ring with cuffs and wiring;
- Protective cover with ventilation holes;
- A circuit contact through which current is conducted;
- Ceramic tip;
- Filament coil;
- Protective shield with holes that allow gases to escape.
As you may have noticed, the design involves the use of heat-resistant materials. Not surprising, since the oxygen sensor has to operate under extreme temperature loads.
In this case, devices range from single-wire to four-wire.
If you continue to drive with a faulty lambda probe
Briefly:
• Reduced compression in the cylinders, increased wear of compression rings and cylinders and, as a result, a reduction in engine life. Failure of spark plugs.
• Guaranteed failure of the catalyst and the 2nd lambda probe if you continue to drive with a faulty 1st lambda probe.
• Deterioration of cold engine starts, uncomfortable driving, accompanied by reduced power and floating idle speed and sometimes dips at speed from 2000 to 3000.
• Increased fuel consumption, on average by 5-20% of normal and even up to 50% in severe cases, which ultimately will result in the cost of a new lambda probe over the course of a year.
• A check engine light that simply adds worry to your life and behind which you can see another problem.
More details:
If any malfunction of a modern car appears, it is necessary to hasten to eliminate it, preferably refusing further intensive use until it is eliminated. This applies to lambda probes more than to any other parts. As is already known from the article “What is a lambda probe for?”, this sensor, together with the catalyst, is responsible not only for cleaning exhaust gases from harmful impurities, but also for the correct mixture formation in the combustion chambers. It sounds quite innocent, and many car enthusiasts believe that after the oxygen sensor fails, all that threatens them is an increase in harmful impurities in the exhaust system. However, this is not the case.
Let's try to figure out what happens to the engine and its systems when you continue to operate a car with a faulty oxygen sensor, using the example of two main threats.
Reducing engine life. Let us briefly describe the mechanism of this process, which develops in two directions.
As a result of a malfunction of the sensor or its incorrect operation under the influence of external factors, an over-enriched fuel mixture may be supplied to the cylinders. This mixture does not burn completely, as a result of which the electrodes and insulators of the spark plugs and combustion chambers become covered with black soot. Heavy carbon deposits coke the cylinder compression rings. An incomplete fit and a decrease in compression occurs, as a result of which some of the gases enter the crankcase and “poison” the oil.
But this is not as dangerous as the process that runs parallel to the one described above. The remains of unburned fuel that has penetrated the compression rings wash away the oil film from the surface of the cylinder, causing dry friction, leading to a reduction in its service life, and in advanced cases, to overheating of the engine.
Failure of the catalyst and the 2nd lambda probe. As we have already found out, exhaust gases with remaining fuel enter the exhaust pipe. As a result, the catalyst begins to work in emergency mode, burning out the remaining fuel. Gradually the catalyst is destroyed, the products of its destruction begin to clog its honeycombs. The catalyst begins to overheat and melts, finally sealing its entire honeycomb structure. As a result, the engine power finally drops and the car stops driving due to the fact that there is no room for free exhaust gases. During this process, the 2nd lambda probe is also poisoned.
Another important reason why you should quickly replace the oxygen sensor is the need to turn off the illuminated Check Engine light, since behind an error in the lambda probe, you can overlook the appearance of another error
Causes of failure
Old and new samples
Before starting the test, it is necessary to determine the reasons why the sensor stopped working correctly.
- Coolant has leaked inside the device.
- Unsuitable cleaning agents were used to clean the body of the device.
- The gasoline you fill your car with contains large amounts of lead. A popular breakdown typical for cars of those owners who prefer cheap gas stations.
- A banal overheating of the heat-resistant sensor, which again occurs due to low-quality fuel.
Article on the topic: Diagram, pinout, repair of the VAZ 2110 dashboard
Crankshaft position sensor VAZ 2110
The crankshaft position sensor of the VAZ 2110 injector is quite important, since without it the engine cannot be started. Any malfunction of it brings the “tens” ECU or “brains” of the engine into a stupor. The sensor monitors the position of the camshaft (and therefore the pistons in the cylinders) in real time and allows the spark plugs to work in time. The spark plugs receive a signal from the ignition module that the upper compression point in the cylinder has reached and it’s time to “light” the spark. The sensor itself looks schematically as in this figure -
This is a small electromagnet that picks up the position of a toothed pulley that rotates nearby. The pulley has 58 teeth, which create electromagnetic disturbances. Actually for an injection engine, this is the main and most important sensor.
Symptoms of malfunction
Where is it installed
By the behavior of the car, you can quite easily determine that the lambda probe has become unusable:
- The car jerks while driving;
- The revolutions are floating;
- The catalyst is not working properly;
- Fuel consumption increases noticeably;
- Exhaust gases contain a large amount of toxins.
The operation of this sensor requires constant monitoring. According to the operating manual, the check is performed every 10 thousand kilometers traveled. But if the operating conditions of the car are difficult, you have to regularly drive in difficult conditions, or the engine is overloaded, then it is better to check it more often.
Speed sensor VAZ 2110
The VAZ 2110 injector speed sensor is installed on the gearbox, more precisely on the speedometer output shaft. If the sensor is faulty this can cause the car to stall at idle in some cases. When the spirometer needle begins to move abnormally (intermittently) on the instrument panel, this should alert you. After all, this may indicate a malfunction of the speed sensor. The sensor itself looks like this, look at the photo.
The principle of operation of the “tens” speed sensor is based on the Hall effect; when the gearbox shaft rotates, the sensor transmits a pulse signal. The higher the rotation speed, the higher the frequency of the pulse signal. This is how the speed of the car is measured. Two types of sensors were installed on the VAZ-2110, one has a square connecting block, the other has a round one.
Visual inspection
The check should always begin with a visual examination of the condition of the oxygen sensor.
- Inspect the wires. They must be intact, without traces of damage or defects. Check all connectors for tight connections.
- Soot on the lambda probe indicates a malfunction of the device heater. Also, such deposits are caused by an excessively rich air-fuel mixture.
- If you notice shiny deposits on the surface of the element, this indicates an excess of lead in the fuel you are filling the tank with. This situation requires mandatory replacement of the oxygen sensor, since lead could damage the internal device.
- Gray or white deposits are the result of various types of fuel additives affecting the sensor. They often cause the probe to break and have to be replaced.
Use a gas burner or stove
In this case, we will need a gas stove or burner and the already known phosphoric acid.
POPULAR WITH READERS: How to properly install a child car seat, selection criteria
The device is lowered into the acid for a few seconds and quickly brought to the fire.
Be careful not to expose any plastic covers that may be on the device to high temperatures.
After a certain time (you won’t have to wait long), a light gray salt will appear on the surface of the sensor core as the acid boils.
The acid should completely boil away. Do not allow vapors of the chemical compound to enter your respiratory system.
Remove the lambda probe from the fire, and then repeat the procedure again until the salt no longer appears.
Instrument testing
For such work, you can use a tester, oscilloscope or digital voltmeter. Considering the features of these devices, a voltmeter would be the optimal solution.
Examination
The check sequence will be as follows:
- Start the engine and let the car warm up.
- Next, we find the element we are interested in. If there are soot deposits or other external signs of a malfunction, there is no point in carrying out further testing with instruments. And so it is clear that it is out of order and needs to be replaced.
- Also check the condition of the wiring, the presence or absence of mechanical damage on the device.
- If everything looks fine, unplug the connector and connect a voltmeter.
- Now you can start the engine.
- Press the gas pedal in neutral to reach the 2500 rpm mark. After this, release the pedal.
- Remove the vacuum tube from the fuel pressure regulator.
- We check the oxygen sensor for functionality. To do this, look at what the voltmeter shows. If the reading is 0.8 volts or less, the probe is not working.
- It would be a good idea to check the device for a lean mixture. To do this, you need to turn on the air intake using a vacuum tube.
- If the voltmeter reads 0.2 W or less, the oxygen sensor is working normally. Deviation from these indicators indicates a breakdown of the device. Therefore, it needs to be replaced.
Article on the topic: Which thermostat to install in the VAZ 2109 for the winter
How to extend the service life of a recreation center
To extend the service life of the sensor, you will need to follow the following recommendations:
- Conduct a technical inspection of the vehicle on time;
- use only original spare parts for the car;
- do not allow the use of low-quality fuel mixture;
- Contact a car service if you find problems with engine operation.
You can change the oxygen sensor on a VAZ-2112 yourself without going to a car service center. Only original components must be used. If there are problems starting the engine, you should check the correct operation of the lambda probe.
Restoring the performance of the lambda probe by cleaning
In some cases, the oxygen sensor stops working only because the holes in the protective screen and the ceramic tip itself are covered with soot. To restore the functionality of the part, it is necessary to clean the soot from the lubricating zone, but when performing such work, you must follow certain rules
It is important not to use for cleaning:
- metal brushes;
- sandpaper;
- files;
- other objects that can damage the ceramic element.
The best method to get rid of contaminants is to soak the ceramics of the lambda probe in a solution of orthophosphoric acid, but to do this, you must first carefully saw off the protective cap. If acid cannot be found, you can use a rust converter, which is sold in stores selling auto chemicals. Of course, to clean the part from soot deposits, the sensor must be removed.
To soak a ceramic tip, it must be placed in liquid for 15-20 minutes; the soot should disappear from the surface on its own. If the deposits are not completely removed, they can be cleaned with a soft toothbrush. After the procedure, you need to secure the protective screen using camp welding. When it is not possible to restore the lambda's functionality, there is only one option left - to buy a new oxygen sensor.
