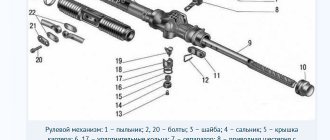
First vibration-isolating layer
Following the standard trunk noise insulation scheme, the first layer means covering the surface inside the trunk with vibration material. The highest quality vibration-absorbing materials are considered to be materials from STP and Shumoff.
First, you need to cut several sheets of a certain size and shape from a single sheet of vibration-isolating material, and then slightly warm up the bitumen side using a technical hair dryer.
Then the heated sheets of vibromaterial are carefully laid on the cleaned and degreased trunk frame and carefully rolled out with a hard roller made of iron or plastic.
After the first sheets fill most of the trunk area, the next sheets of vibration material should be prepared in the same way. They must be overlapped.
As a result of the manipulations performed, the metal surface of the body should be covered by 55-100%, depending on the material used.
Removal from passenger door
Once the music system is removed, you can begin the main part of the repair. You need to remove the door trim on Kalina in the passenger seat in a certain sequence:
- The decorative panel is removed. To do this, unscrew 8 clips and 2 screws. The inner handle is held on by two self-tapping screws.
- An awl is used to pry up the edge of the plug for removal. There are two of them, so you need to remove both.
- The opening mechanism is pulled back to remove the securing screw. After this, two screws are unscrewed from the inside of the handle. They are located opposite the cavity of the plastic pocket.
- One edge of the panel is pryed off; you can use a screwdriver to do this. When it becomes possible to grab the edge, all that remains is to pull the element towards you.
- The wires from the electric window lifter are disconnected, the block is removed.
To avoid scratching the panel with a screwdriver, wrap the tool in a soft cloth.
Second soundproofing layer
The second layer of sound insulation is designed to suppress unnecessary sounds and retain heat, depending on the material used. The basic principle of operation at this stage is to glue sound-absorbing Accent and heat-insulating Splen on top of the vibration-insulating material. Both materials have a self-adhesive base, so their installation does not require significant effort and special knowledge in the field of sound insulation.
It is necessary to cover the surface with soundproofing material 100%. The only exceptions are technological openings, namely ventilation openings. Only in this case will it be possible to achieve the greatest effect.
Removing the rear door trim
The rear door structures are secured with 10 plastic holders and 2 screws. The first fasteners hold the door panel, and the second fasteners hold the handles. Disassembly technique:
- The handle of the mechanical window lifter is being removed. It is important to note that this element is held in place by a plastic half ring. It is carefully pryed up with an awl.
- The plugs on the door handle are removed, then the fasteners are unscrewed.
- The lower far corner of the panel is pulled back, and then the first piston is removed.
- Hold the door card with your hand and remove the remaining clips.
- The covering is changing.
There are differences between Kalina 1st and 2nd generation. In the first case, the opening handle lever is unscrewed, but in the second option this is not required, since it is screwed directly to the door.
The final stage of soundproofing the trunk
In order for the soundproofing of the trunk to be most effective, at the final stage of the technological process it is also necessary to soundproof the plastic in the trunk. Following the algorithm described above, the trunk roof lining is made heavier, which is subsequently covered with bitoplast. Then all wiring is wrapped in Anti-creak. And to avoid unnecessary squeaks, the side shelves and plastic linings of the window mullions are also glued with modelin.
Do not forget that sound insulation of Kalina will be effective only if sound insulation was carried out not in one of the components of the car, but in the entire car as a whole. If you soundproof one trunk, you will certainly notice a certain difference. But things will be completely different if your iron “horse” is soundproofed in all parts of the car.
Removing the trim from the driver's door
The algorithm for disassembling the driver's door structure is similar, but there are some subtleties of this process:
- First, the plugs are removed from all fasteners. They are pryed off with a screwdriver.
- The panel plastic will be easier to remove if you first unscrew the fragment for adjusting the mirror structures. Unlike the passenger door, the driver's door has one screw. It is located under the plug.
- The opening mechanism is removed last.
- If your car is equipped with electric mirrors with remote control, then to remove the rear view adjustment panel you need to unscrew the screw located at the bottom.
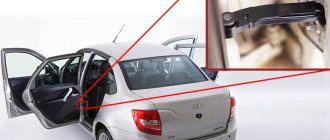
How to remove the lock and replace the cylinder
To gain access to the trunk lock of the Kalina sedan, it is necessary to dismantle the internal plastic trim. It is held on by two bolts, which makes it easy to remove. They are located in the places where the handle is installed, in the so-called latching pistons. You can pry them off using an ordinary screwdriver.
The design of the trunk lock of the Kalina hatchback consists of two parts. This is the larva and the mechanism itself responsible for blocking the door. Elements must be disconnected individually. Below you will find information about such deletion.
If you need to replace the larva, everything can be done in a couple of movements. All you need is a deep socket and a flathead screwdriver. Then you should unscrew the bolts and release the desired part of the housing. When the work is done, you need to use a plastic screwdriver to remove the clamp, which is attached to the body of the larva. Next, it is carefully removed, holding the spring. Then the replacement is made, but in the reverse order.
Replacing a trunk lock or disassembling the entire mechanism requires a lot of effort. You need to unscrew the door lock using a screwdriver. There are only two bolts, so the job is quick. You can remove the mechanism using a Phillips screwdriver. When everything is done, just pull the lock and it will come out easily.
To summarize, it is necessary to note what tools are needed for the job. These include:
- plastic screwdriver;
- deep head;
- Phillips screwdriver.
The work is not at all difficult, the main thing is to purchase an electric trunk lock and perform all the steps described.
Why is the door trim removed?
The technology of disassembling and replacing a decorated panel was first used by VAZ specialists in 2008. The main problem with self-dismantling is the mobility of the door, which is why in this process you will need an assistant who will hold the structure. Removing the Kalina rear door trim is necessary when:
- It is necessary to get to the elements that are inside the door in order to dismantle the window lifters.
- You need to install music speakers that are mounted in door structures.
- The electric window lifts have broken down or the mechanism requires lubrication.
- Glass tinting or replacement is carried out.
- The cladding has lost its appearance due to long-term use of the vehicle. The panels are worn or have scratches.
- The driver wants to change and refresh the interior.
- Body work is carried out: rotten fragments are cut off and then welded.
- Anti-corrosion treatment is carried out.
- Car painting is provided.
- Vibration and sound insulation of the body part is carried out.
Any of these procedures requires removal of the trim. Without disassembling the inner panel, it will not be possible to replace the lining or gain access to the internal mechanisms of the door card.
How to install the activator
The only way for the viburnum to get into the trunk is to turn the key and press the button. Naturally, doing this is not always convenient. Weather, busy hands and other troubles contribute. At this stage, many car enthusiasts begin to think about the trunk activator. It is quite possible to do this, you just need to try a little.
The Kalina station wagon trunk lock activator is easy to install. It is enough to take a self-drilling screw and secure it on one side with it and on the other with a wire holder. To check the device, you need to connect it to the standard connector.
The only problem in all this work may be the back door being picked up at the wrong time. After the current stops supplying the activator, it closes with the first latch, but the trunk is not completely closed. In order to get into the so-called fifth door, you will have to use the key again.
A lock with a button is not difficult. But during work it is necessary to assemble the circuit and stretch the wires. In this case, one programmable alarm channel (additional) should be used.
Installing an activator for locking/unlocking the trunk lock on a Lada Kalina hatchback
I have long wanted to open the trunk with a button, everyone knows that in Kalina it is very difficult to do this, for example, I got into the car, started the engine and need to throw something into the trunk, to do this you need to turn off the engine, get out, insert the key, open the trunk, in general it is very inconvenient! And after washing in winter, the lock may freeze so much that you will have to drive until spring)
The question, as always, began with studying the topic, there are 2 types of lock buttons, the old and the new (since 2010) model.
I can say I was lucky, the old-style lock button and the trunk operation algorithm I need looks like this (if yours is different, then the new-style button)
What is most interesting in any Kalina is almost everything to unlock the trunk with a button, everyone saw a third button on the key fob just for opening the trunk (the button needs to be pressed and held for 3 seconds), wires are laid in the trunk for the activator and the standard place for its installation is in trunk, you need to add a little!
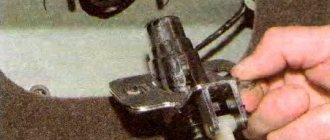
General view under the trunk trim:
Connector for connecting the activator:
In general, you will need to buy an activator, absolutely any one, I took this one:
I modified the ends of the wires a little so that they fit into the standard connector:
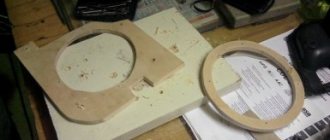
You will need to make the following part, it is called a rotary washer:
Then you can remove the trunk trim (attached to the pistons), take out the retaining ring and the plastic pusher (see photo 1) and try on the parts, they should look like this:
In these 2 photos below the principle of operation, the activator pushes the rotary washer:
You will also need a regular washer with an internal diameter = the internal diameter of the plastic pusher. The thickness of the washer must be very small so that the entire system can be assembled, here is a photo:
After that, we put everything back together, first insert the plastic pusher, then the rotary washer, then the nut. We fix everything with a locking ring (if it doesn’t fit, then you need to make the washer even thinner)
We insert the activator into a place specially prepared for this:
We connect the wires (I wrapped them with electrical tape just in case so that they would stick better)
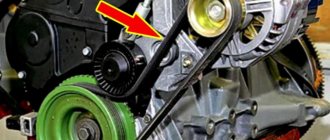
Installing and adjusting rods:
Video of how it all works:
Now I’ll tell you how everything works in words!
Firstly, the door does not open on its own, you still need to press the open button, but the key is no longer needed! (If you wish, you can use the key if the battery is suddenly disconnected). Here are some examples of work:
— On the remote control, press the door open button once, only the driver’s door will unlock. Press the button again - the passenger doors and trunk will unlock! When we close the car, all the doors and trunk are blocked (it’s no longer possible to leave the trunk open, but this has happened)
— If you press and hold the trunk open button on the remote control for 3 seconds. then only the trunk door will unlock!
— You can also use the door open/close button from the interior. You can open/close the trunk together with the doors!
In general, now everything has become the way I would like it to work initially! But why hasn’t AvtoVAZ done this at the factory yet?!
Issue price: 150 rubles
The placement has been agreed upon with the author Timofey Golubev.
Installation of a 2-level shock sensor on a luxury Kalina on a Lada Kalina hatchback
I will continue to talk about what has been done with the machine until today. It all started with the fact that for insurance
Electric drive: easy installation option
The technique is simple, the only thing needed is to make a rotating plate and a rod for it yourself. The wiring should be routed to the electric lock and connected to a special control unit. When disarming the car, the electric trunk lock will be activated after the fifth door opening button is unlocked.
The entire installation task is based on connecting the electric lock to two wires. You can purchase the part at any auto store. The trunk end must be additionally hidden to prevent water from getting into it. Otherwise, it will periodically short out during rain.
An important attribute is the trunk hinges. Wires are often broken in this place, so their condition must be carefully monitored.
Before installing the electric drive, the trunk lid trim is removed. The main thing is not to damage it during this process. It is recommended to choose a lock that will not need to be modified during operation.
An important step in the installation process is wiring; you can use those wires that are standardly suitable for the fifth door of the car.
Power is taken from the cigarette lighter. An important point is the installation of a protective fuse. The wire is laid along the threshold; it will take approximately 3.5 meters. Then the installation takes place.
It is advisable to choose an option that does not require drilling additional holes. The procedure consists of connecting the wires according to the diagram. Important: you can use the wire that goes to the trunk light.
Installing an electric drive is not difficult, but for the first time it is a labor-intensive process. If difficulties arise, you can seek help from a service station.
Preparation for dismantling
Our instructions will help you understand how to remove the rear door trim on Kalina and determine the further algorithm of actions. Before this, dismantling is carried out. Required::
- slotted screwdriver;
- awl;
- flat screwdriver;
- sharp knife.
The door of the Lada Kalina Cross and other sedans is held on by plastic fasteners, so dismantling is prohibited at sub-zero temperatures. If there is a need to remove the casing in winter, then this should be done in a heated room to eliminate the risk of breaking the connecting clips. For the front door you will need 8 pieces, and for the rear door 10. Preparing for dismantling step by step:
- The handles are removed, the latches, which are designed to lock the door lock, are unscrewed.
- The speakers are unscrewed using a Phillips screwdriver. To do this, you need to unscrew the four bolts and then disconnect the wires.
- The blocker and acoustics are turned off. Sometimes the elements of the music system are attached to a metal frame.
After 5 years of operation, car fastenings become brittle, so it is better to purchase additional parts in advance.
Brief history of Lada Kalina
Development of the new product began back in 1993. Five years later, as part of the project, the model received the name Lada Kalina, which is still used today. Before the car went into production in 2004, prototypes of various body styles were shown in 1999, 2000 and 2001.
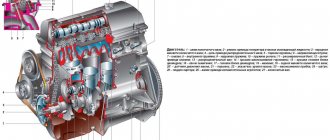
First generation Lada Kalina
Production of the first generation model lasted from 2004 to 2013. It was accompanied by the gradual development of the car and the improvement of its equipment. From the very beginning, the model was equipped with a 1.6 liter 8-valve engine , but already in 2007 it was replaced by a 16-valve version with more power.
From time to time, Lada Kalina cars were withdrawn after defects were discovered, but this did not prevent them from taking 4th place in popularity in the manufacturer’s territory. Despite promises of significant modernization, the production of representatives of the first generation gradually ceased from 2011 . It was here that AvtoVAZ stopped producing the sedan model.
Second generation Lada Kalina
On May 16, 2013, production of the second generation began. The car received 2 body options: “hatchback” and “station wagon”. It has completely changed in appearance , the equipment has been improved and new options for more powerful engines that meet the EURO-4 standard have appeared.