Many car owners are faced with a situation where, after starting the engine, the on-board computer or one of the devices begins to show that the battery is being recharged.
The consequences of this situation are very different and depend on how much the voltage in the on-board network exceeds the nominal one.
Slightly increased parameters will only negatively affect the battery (boiling of the electrolyte followed by its evaporation), but if the voltage coming from the generator greatly exceeds the norm, then electrical consumers may fail.
In any case, overcharging is a phenomenon that must be eliminated, otherwise it will not have the best effect on the service life of the battery and electrical appliances.
Next we will look at why the generator produces a higher voltage of 16, 17 volts into the car’s on-board network, the reason why U jumps and how to eliminate them.
Let's start the renovation
There may be several reasons for the battery not charging. The instructions below are quite universal and are suitable for any case.
Troubleshooting algorithm:
- First of all, we check the serviceability of the belt and its tension. If it is damaged or loose, charging will be less than normal and will ultimately lead to battery failure. The belt is also partly responsible for the operation of the cooling pump, so a damaged belt can cause other problems as well.
The problem can be determined by the sign when, when the engine is running, the voltage in the power circuit is within the normal range, but immediately after connecting the load it disappears. Another sign of a weak belt may be a whistling sound. It may appear immediately after starting the engine or when large current consumers, such as lights, are turned on.
This needs to be corrected, since a poorly tensioned belt slips during operation of the mechanism, which accelerates its wear. It must be tightened to a deflection level of 12 - 17 millimeters with a pressure of 10 kgf, or replaced with a new one;
- In order not to waste time and not draw false conclusions, you need to check the voltage on the battery with the engine stopped and running. The normal supply voltage of the machine when the engine is running should be 13.6 - 14.1 volts. A voltage below this will indicate a weak belt (point 1), a faulty regulator relay, or a failed diode bridge.
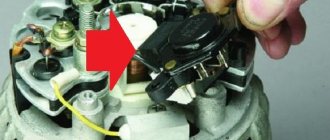
- If everything is fine with the belt, remove the charging relay and check the wear of the brushes. They should be longer than 5 millimeters, this can be seen visually, but to be sure, check with a ruler. If they malfunction, replace the VAZ 2022 charging relay.
How to change the regulator relay
If necessary, the generator relay 2107 is replaced with a new one if the diode bridge is working properly and the voltage is significantly higher than required or lower than normal.
You can replace the relay-regulator either by removing the generator or carry out repairs without removing it. To do this, of course, you need to know how to attach the relay, since you will have to work almost by touch. The only tool you need is a short screwdriver. The repair is carried out from above, under the hood.
Replacing the brushes of the VAZ 2107 generator is not carried out separately. The brushes are changed together with the voltage regulator, although everything can be done if desired.
Why does the charging current decrease when the engine warms up, VAZ 2107?
When the engine starts, there is a normal charge; as the engine heats up, the charge level becomes less. I changed the “chocolate”, stretched the ground wires - nothing changed. I removed the generator and sent it for diagnostics - they said that everything was working, normal. I don’t even know what to do anymore. They say that this often happens in injection classics.
- Why does the VAZ 2107 battery drain quickly? – 6 answers
- It's hard to start a car - 3 answers
- Tachometer needle jumps at 2107 - 6 answers
- Why might the new generator fail? – 6 answers
- The battery on the 2107 was not connected correctly – 6 answers
I have a similar situation with the 2107 classic injector. If the issue is resolved, please share your experience. I replaced both the LV and the diode assembly on the standard generator, and even replaced it with two new generators. I replaced the negative wire and moved its other end from the cylinder block to the receiver bolt. I called and cleaned all available contacts and terminals. Now I’m working on a version of detecting a current leak or connecting an unauthorized consumer. Which appears only when the load is turned on, in the form of headlights, heaters, emergency lights, glass heater, etc. A pointer tester is only needed for measurements. Turn it on in DC current measurement mode at a high limit, probably 10 A, between the battery terminal and the tip of the negative (or positive) wire. Turn on the ignition, look at the ammeter readings, at least before turning on the radiator fan. Record the constant value or change in current, within what limits and for how long. Gradually add a load (connect low beam, then high beam, then others) and monitor the change in current in a similar way. An anomalous value should appear, something higher than 7-8 A. After identifying such a current value, take turns on the mounting block, remove the fuses and monitor the ammeter needle. There will be a fuse, after disconnecting which the current will decrease to less than 7-8 A, jump or stop changing. The circuit that this fuse protects should be carefully examined for its connections, routing locations, etc. It would be good, for clarity, to connect a voltmeter to the battery terminals. I myself, urgently, cannot do this kind of thing. Try it if it seems convincing. Then report the result.
When starting the engine, especially in winter, the starter consumes a large current, therefore the battery is intensively discharged.
The engine started, the battery began to charge from the generator (restore consumed energy). The ammeter will then show increased energy consumption.
As the engine warms up, the battery charges and energy consumption decreases. Consequently, the ammeter shows a decrease in energy consumption, down to zero, when the battery is fully charged. That's the whole theory.
And the next thing, if you have a generator with a 6-diode bridge, then replace the bridge with an 8-diode one. In this case, it will be necessary to use the central terminal of the winding (star) of the generator.
And set the voltage regulator to 14.5 V, for example Germany. And also, replace all incandescent lamps with LED ones and you will be happy.
Lada 2107 Injector › Logbook › The voltmeter needle is shaking and the battery indicator is flashing
Hi all!
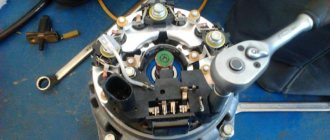
After some time, the reddish battery icon began to light up on the device panel. I inspected the condition of the alternator belt, turned it normally and the battery was initially charged. But a little later the charge began to temporarily disappear, and later it completely failed, so at one point I had to drive on one battery without headlights and a heater on a winter evening. Well, after all, you can clearly understand that the problem is in the generator. When I drove the car into the garage, I got down to business and saw that antifreeze was running from the pipe and getting into the generator. I changed the pipes and clamps, although when I removed the top pipe, even more cooling water rushed onto the generator (At my native AvtoVAZ they installed the best clamps in the world - tape clamps, thank you, I happily got tired of them, it took more time to work on them than on a major repair ). I removed the generator itself and brought it home for repairs and cleaning, because it was quite cold in the garage. I disassembled it one hundred percent, checked the diode bridge (I already changed it here and there 2 years ago), all the diodes are working! The bearings are also ok. I wiped everything down to the maximum. I changed the voltage regulator (the pill as they call it) and the capacitor. (The photo shows the almost assembled generator 372.3701). At night (that is, in the dark)
I left it to warm up on a hot battery just in case.
The next day I brought the generator to the garage for assembly. I placed it in my space, tightened the generator belt to the normal extent, and connected the wires. I didn’t immediately put on the motor protection. I think I'll check it first, in case something is wrong again. I installed the battery, started the engine, everything is fine - there is no this icon on the panel. I assembled the machine one hundred percent. I started the engine again, and just drove out into the street, and there was this badge again! I’ve been driving for the second day now, I’m watching, the voltmeter on the panel indicates a good charge (approximately on the black space between the 2 green stripes), but it’s shaking a little. Also, the reddish battery indicator flashes. The charge seems to be going on, otherwise it would not show such a level on the voltmeter.
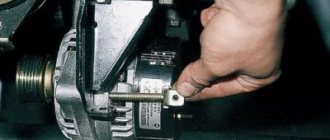
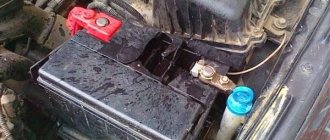
Started the engine. So far everything is the same. I applied the probes of a separate voltmeter to the terminals and began to inspect and move the wires under the hood. I didn't find any problems with the plus. Well, on the minus side, I saw a small thick black wire that goes from the battery terminal to the TV, screwed to the 13th bolt. Its condition is pictured below. On the right, in close focus, you can especially see what’s wrong with him. Where did this come from?! Maybe the wire just wore out, and 2 years ago the car alarm installers decided to attach a small thin wire to this place. The little electrical tape that they wound was frayed, so I pulled out the battery to recharge during frosts and the hairy copper simply oxidized over time and gave up the load with resistance. I unscrewed this negative wire, removed it, and saw that the battery icon had disappeared from the device panel, but the voltage on the standard voltmeter had dropped and the needle began to wobble even more widely (voltage surges increased).
I brought the wire home, cut off one hundred percent of the oxidized copper, later tinned the bare ends with tin and rosin, soldered them, and then insulated them perfectly. I screwed the negative wire into my space, checked it, and now everything is in order. Only the needle of the standard voltmeter twitches.
This day I decided to move the main negative wire from the battery terminal from the motor to the receiver holder. The result is that the voltmeter needle no longer wobbles. Photo attached. The mounting space is highlighted in red. It is attached to the existing 14mm bolt. Before tightening it, I cleaned the contacts and this space with sandpaper.
Source: www.drive2.com
Troubleshooting VAZ 2107 battery charging problem
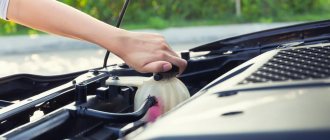
First, you should check the serviceability of the alternator belt - it is this that causes the alternator to rotate and generate current. This belt drives the coolant pump, so this malfunction also manifests itself in engine overheating.
If the charge indicator lamp does not light up, and the voltmeter shows normal voltage of the on-board network, and the battery does not charge, the reason is in the contacts at the terminals.
You should remove the wires from the battery and clean the battery terminals and wires with emery cloth. If the charge does not appear, it is necessary to measure the voltage at terminal “30” (generator output) with the engine running. If the voltage at this terminal and the battery is very different, you need to clean the contacts and ring the wire going from the generator to the battery. The faulty wire must be replaced.
If, when the engine is running, the voltage in the on-board network is within normal limits, but when a load (headlights) is connected, it drops, the reason lies in the weak tension of the alternator belt. As the load increases, the weakened belt slips. A correctly tensioned belt should bend by 12-17 mm with a force of 10 kgf. A loose belt must be tightened or replaced.
Important: if the belt is over-tensioned, excessive load occurs on the bearings of the generator and pump, which can lead to their failure. Other reasons for the lack of charge may be a broken rectifier diode on the generator, an open or shorted rotor or stator winding
Other reasons for the lack of charge may be a broken rectifier diode on the generator, an open or shorted rotor or stator winding.
Diodes can be checked using a multimeter or a test lamp. Using a multimeter, you can check the resistance of the diodes in the direction in which they should be locked. To check with a test lamp, you must remove the “+” terminals from the battery and connect the test lamp. The wire of the test lamp must be touched in succession to the three bolts of the rectifier devices. Then perform the same operation, only disconnecting the “-” terminal. If the lamp lights up, the diode being tested is broken.
If one of the diodes malfunctions, the diode rectifier assembly must be replaced.
A break in the stator winding is determined with a multimeter by measuring the resistance between the rectifier unit mounting bolts. Lack of contact between the winding and the other indicates its breakage. In this case, it is necessary to replace the winding or generator assembly.
A common cause of generator failure is brush wear. To check them, you need to dismantle the brush assembly. The length of the brushes must be more than 5 mm, otherwise they need to be replaced. Also, the brushes may become warped or “stick” in the wells. Therefore, it is necessary to check the condition of their side surface.
Note: the VAZ 2107 generator (carburetor) is no different from the unit for the injection version of the “Seven”. Therefore, all tips for checking and repairing the generator are relevant for both modifications of the car.
If the warning lamp does not light up and other devices do not work when the engine is running, and the battery is not charging, the reason is a blown fuse or a breakdown of the ignition switch (relay).
Where to start checking
If the VAZ 2107 battery icon does not light up, the voltmeter gives normal readings, but the battery does not charge, which means there is no (or insufficient) contact at the terminals. Their severe oxidation can simply lead to the fact that voltage from the generator will not be supplied to the battery. Therefore, it is necessary to remove the terminals, thoroughly clean them, as well as the battery terminals, then reconnect the battery to the on-board network and check the functionality of the charging system.
If the voltage on the VAZ 2107 battery is still below normal, it is necessary to measure it at the output of the generator with the engine running. Is there a big difference between the pin and battery readings? Try cleaning the contacts and checking the wire connecting the battery to the generator. Out of production - requires replacement.
The next item to check is the alternator drive belt. When loosened, it will slip along the pulley, as a result of which the generator will not be able to generate the required amount of electricity. And although charging will occur (if the circuit is working), this will not be enough. In this case, the engine is running, the voltmeter shows the norm. However, if the system is loaded a little more, for example by turning on the headlights, the voltage will drop sharply. So, if the battery charge on a VAZ 2107 disappears, this indicates that the tension belt is loose and is slipping. The belt must be tensioned; if it wears out during operation, replace it. But you can’t overtighten either: excessive belt tension causes overload of the pumps and generator bearings.
The third circuit component that is checked during initial diagnosis is fuse no. 10 (in the fuse box). It is he who is responsible for supplying voltage to the battery: the VAZ 2107 battery charging fuse has blown - the system will not work.
If everything is in order with the terminals, the belt, and the fuse, then you need to further look for the reasons for the low charge of the VAZ 2107 battery.
Replacing a voltmeter on a VAZ 2107
After problems with the generator and unstable voltage, I decided to install a digital voltmeter to monitor the voltage in the car's on-board network. To do this, I ordered a car voltmeter with an LED screen from Aliexpress, which can be built into the panel.
I decided to install it in place of the standard radio, since my radio was moved upstairs.
We need: - Yellow (there was no red) and black wires, 2 meters each, with a cross-section of 1 mm, smaller is possible - A plastic plug for the radio where the voltmeter will be inserted - A switch to prevent battery discharge - Male-female and ground terminals » — Set of heat shrink tubing — 10 A fuse — Handy tools and soldering iron
We will connect it directly to the battery terminals for a more accurate measurement, according to this scheme:
For visual monitoring of the state of the vehicle's electrical equipment and, in particular, battery charging, the VAZ 2107 instrument panel has a built-in VAZ 2107 battery charging sensor and a battery charge warning lamp.
These two indicators are enough for the driver to monitor the status of the vehicle’s on-board network.
When the ignition is turned on, the charge indicator light comes on and the battery charge sensor needle rises into the white zone. After starting the engine, with a working generator and electrical circuit, the warning lamp goes out and the needle of the battery charging sensor (voltmeter) rises to the green zone.
However, these two indicators are not always “friendly” with each other and it can be difficult for the driver to assess the real situation with the battery charge. For example, the charge lamp has gone out, and the charging sensor is not included in the green zone and other options.
In order to better understand the interaction of all elements in the charging circuit, VAZ 2107 owners need to imagine their work and know what the VAZ 2107 battery charging circuit looks like.
When the ignition switch is turned on, power flows to the contacts of the ignition relay and then to fuse No. 10, then to the contacts of the charge control lamp and the VAZ 2107 battery charging sensor. Next, power through the diode, the mounting block is supplied to terminal (61) of the generator. Then the voltage is applied to the terminal of the relay-regulator (built into the generator) and then through the brush to the slip ring and the excitation winding, which causes the generator to start.
As the engine speed increases, the generator armature speed also increases, which leads to an increase in voltage,
which must be kept within specified limits. To regulate the voltage, the generator is equipped with a VAZ 2107 battery charging relay, whose task is to maintain a voltage of about 13.7 - 14.2 V.
In cases where low or high voltage is observed, the VAZ 2107 battery charging relay must be replaced, since it is not repairable.
If you suspect a faulty relay-regulator, you cannot remove the terminals from the battery to check the charge, as this can lead to failure of the charging relay itself, the ECU and other electronic devices of the car.
How to check the operation of the generator
The battery in a car is an important element of the system, which is responsible for providing the car’s on-board network with electricity. The generator is used to charge the battery while it is active. Unstable operation of a device generating electricity causes a voltage drop in the network and failure to restore the capacity of the power source.
Normal generator performance means timely and complete replenishment of the battery charge level, which decreases under load. Checking the battery charge level from the generator is simple and can be done by the car owner himself.
Diagnostics of an automotive energy-generating device includes a visual inspection of the unit, its elements and related parts, as well as voltage and current measurements. At least twice a year, you should check the tension of the drive belt, excessive weakening of which leads to a decrease in the performance of the generator, and sometimes can lead to breakdown of the device. Once a year, you can check equipment elements - fasteners, diode bridge, voltage regulator and others. Timely maintenance of the battery will also guarantee the absence of problems - cleaning the terminals, adding distilled water.
What to consider when choosing a new battery
According to the passport, the battery is designed for 3-5 years of active use (in reality it turns out to be less). Therefore, over time, it becomes necessary to buy and connect a VAZ 2107 battery instead of a failed one.
When purchasing a new battery, you should consider a number of parameters and characteristics. Battery type: serviced and maintenance-free. The first option allows you to check and replenish the electrolyte level. This makes it possible to use the battery longer.
The next question is: what power will the battery on the VAZ 2107 be most efficient. Batteries with a capacity of 50–60 Ah are suitable for this model. However, given that modern cars are equipped with energy-intensive equipment, it is better to opt for more capacious batteries. In addition, carburetor VAZ models require more powerful batteries - they consume more energy when starting. In terms of dimensions, the VAZ 2107 requires power supplies with dimensions of 242*175*190 mm. The vast majority of samples available on the market fit them.
When choosing a battery, you should also take into account the place of residence of the owner of the “Seven”. For those who live in the south, you can purchase a less powerful battery. Northerners are advised to prefer a battery with a higher capacity: in the cold, the car starts with high energy consumption.
Confronting attackers
Due to the fact that the battery is not cheap, the problem of protecting the VAZ 2107 battery from theft is quite acute. Opening the hood of a “classic” is not difficult, so thieves keep a close eye on the “seven”.
Experts offer several options for preventing theft.
- Secure parking or secure garage.
- Alarm installation.
- Installing a hood lock. Let’s be clear right away: few people take this step. Welding work is required, the appearance deteriorates and it is quite easy for a professional to pick the lock.
- Take the battery with you. The timing is inconvenient but effective. If you leave the car for a short time, it is defenseless: the battery can be removed in the parking lot near the supermarket.
- Reliable battery mount. Almost the most popular method. Fasteners are installed with a secret that prevents disassembly and makes theft difficult. Combined with reporting, this is a very effective method.
But all experts agree that the most reliable protection for the battery against theft of a VAZ 2107 is complete. A combination of multidirectional measures will give the best results!
No charging: signs and reasons
If the voltage from the generator for some reason stops supplying the battery, it will be discharged in a few days. And in the event of a complete failure of the battery installation, you will have to provide the entire on-board network, including the ignition system, yourself. So she can work for no more than an hour.
Signs of no charge
Symptoms that the alternator is not charging the battery include:
- a constantly burning or intermittently turning on warning light on the dashboard;
- rapid battery discharge;
- reduction in the performance of individual electrical devices on the machine's on-board network.
Signal lamp
There is a special lamp on the dashboard of the “Seven” that indicates that the battery is not charging. If the generator circuit is operating in normal mode, the lamp lights only when the ignition is on until the power unit starts operating. It should go out after the engine starts. If it continues to light, most likely the battery is not charging.
It also happens that the control lamp turns on periodically. This is a sign that voltage is either not supplied to the battery at all, or is supplied inconsistently.
Battery drains quickly
If the generator or its circuit malfunctions, the battery will not receive the voltage necessary to charge it. In addition, she will have to power part of the car’s electrical equipment, consuming her own electricity. In such a situation, the battery will quickly run out. You will be able to understand this when difficulties arise in the process of starting the engine. Receiving insufficient energy, the starter will sluggishly turn the crankshaft flywheel or only “click” the traction relay.
Reduced electrical performance
Some electrical appliances will also help you understand that the generator is not operating normally. If you suspect a malfunction in the operation of the generator set, you can, for example, start the engine, turn on the headlights (if they have conventional incandescent or halogen lamps) and see how they shine. If the generator malfunctions, their brightness will be an order of magnitude lower, because the lamps are also designed for a certain rated current. A decrease in performance may also be observed at the heater fan. It will spin the blades noticeably worse. When it is turned on, the light from the headlights will be even weaker.
Reasons for lack of charging
There are few reasons for the battery not charging. These include:
- violation of the integrity (break) of the drive belt;
- belt loosening;
- a break in the wiring of the electrical circuit of the generator or severe oxidation of the connecting terminals;
- rectifier malfunctions;
- voltage regulator failure;
- a break in the generator windings or a short circuit.
Belt break
Although the belt is designed for 50 thousand km, it can break even after several days of use. Especially if there are defects in the pulleys of the device itself, the crankshaft or the pump. In itself, a break in the generator drive belt is not dangerous for the engine, but only if this malfunction is detected immediately. And the point here is not so much the lack of charging, but the pump stopping. If it stops working, the engine will instantly overheat. And this is already fraught with burnout of the cylinder head gasket with all the ensuing consequences. So if the warning light comes on or other symptoms of alternator malfunction occur, the first thing to do is check to see if the drive belt is intact. To do this, you need to stop the engine, open the hood and perform a visual inspection of the generator set drive.
Loosening the belt
The drive belt must have a certain tension. When the tension is weakened, it will slip on the crankshaft pulley, not providing the number of rotations of the generator rotor that is necessary to generate current with the required parameters. A sign of a loose belt is a characteristic whistle, which most often occurs when air humidity increases. When the belt slips, the warning light usually does not come on, but in some cases it may turn on for a while or blink.
Open circuit and terminal oxidation
The battery will not charge even if the integrity of the wires in the generator connection circuit is damaged. The battery charging circuit is quite simple: just one wire connects the positive terminal of the battery to terminal “30” of the generator set. It is through this that the voltage is supplied. The battery negative is connected to ground, to which the generator housing and the corresponding winding terminals are also connected. You just need to check for contact between the indicated points in the circuit.
Getting to the repair site
Finally, about what to do if an overcharge is detected while on the road and you need to get to the place of repair.
If the voltage does not exceed 15 V, then you can safely continue driving, but try not to give high speed to the engine and reduce the number of switched on electrical consumers as much as possible (keep only the necessary ones).
If the overcharge is strong (more than 16 volts), you can first loosen the tension of the generator drive belt, which will reduce its performance (although the belt will quickly wear out).
If loosening the belt does not produce any results, and the voltage continues to jump to high values, you can turn off the generator (disconnect the wires from it). In this case, the on-board network will be powered only from the battery.
If the battery is well charged with a minimum number of consumers on its charge, you can travel 70-90 km, but after that the battery will need to be well charged with a charger.
Battery charging circuit
The same scheme is used not only on the VAZ 2107; a similar one is used in any other car. The only difference is in the components - they are designed for different currents and operating modes. Charging circuit:
- the negative terminal of the battery is connected to the metal body by a thick copper bus;
- the entire electrical system of the car is connected to the positive terminal - there are two buses: to the starter and the generator (“30” terminal);
- from the positive terminal of the generator, voltage goes to the fuse box and ignition switch;
- from the ignition switch the voltage goes to the mounting block with fuses;
- only after it is power supplied (protected by fuse F10) to the control lamp, signaling insufficient charging, as well as to the voltmeter - a device that measures voltage;
- After this, power is supplied to the fuse box and goes to the “61” terminal of the generator set - to the brush assembly.
Battery charging circuit
For a general understanding of the reasons for overcharging, first consider the battery charging circuit diagram. And although it is structurally different on different cars, the general principle of construction is the same.
This circuit includes:
- Generator.
- Relay regulator.
- Fuse box.
- Egnition lock.
- Charge indicator lamp.
- Battery
Rectifier block (diode bridge).
The charging system works using the example of the VAZ 2106 and other cars from the “VAZ classic” series as follows:
- After starting the power plant, through a belt drive, the crankshaft begins to rotate the generator rotor, as a result of which this unit generates electricity.
- Since automobile generators use alternating current, the generated energy goes to the rectifier unit, where alternating current is converted into direct current.
- After the rectifier unit, the electricity is supplied to the relay regulator, whose task is to maintain the voltage in a given range.
- After the regulator, the electrical energy passes through the circuit through the fuse box, the ignition switch and the charge indicator lamp, then returns to the output of the generator, and from there it is supplied to the battery.
The detailed diagram is shown below.
Why does the tachometer jump on a VAZ 2107?
If you are a little familiar with classic or contactless ignition systems, then you know that in them the tachometer is connected to the “K” terminal of the coil, or to a switch. This is where the impulse appears, which is necessary for the correct operation of the device. The speedometer is driven by a cable (if we are talking about a carburetor).
If you have an injector in the fuel system, then first of all look to see if the “Check Engine” warning light is on. If yes, then you need to do diagnostics to determine the exact malfunction. If not, then the diagnosis will not bring any results.
This step is relevant if you have an injector and a carburetor. Carefully inspect all electrical wiring, not only those parts that relate to the device, but also those lying nearby. The main thing is that there is no damage to the insulation, as this can lead to a short circuit.
Using a multimeter, check if there is ground on the tachometer. Very often, poor-quality contact becomes the reason why the VAZ 2107 tachometer jumps. Of course, if there is no minus in the entire dashboard, then you will not have a car, but a New Year’s garland - all electrical appliances will begin to turn on and off at their own discretion.
Ignition system
As mentioned earlier, the ignition system of the VAZ 2107 car and the tachometer needle are connected to each other; they cannot exist without each other. And if the arrow twitches, and all the above tips did not help, you should pay attention to the condition of the ignition parts. First, inspect the wires for damage or missing contacts.
It is entirely possible that there is a break inside the device itself. The photo shows a wiring diagram, study it to get an idea of where the wires go and where they come from. If the power system has a carburetor and a traditional ignition system is also installed, then it is possible that a breakdown of the capacitor installed in the lower part of the distributor has occurred.
The needle almost always jumps if there is a malfunction in the ignition system. It is entirely possible that the Hall sensor is malfunctioning. But in this case, unstable operation of the motor will be felt. If you have an injector, then you should check the condition of the engine speed sensor and all connecting wires.
Very often failures occur after the tachometer has been disassembled or replaced. If you have done such things, then you need to carefully examine whether the device is installed correctly, is the connection made in accordance with the diagram, is the needle at zero when the engine is stopped? It should be noted that there is a switch on the back of the device; it is designed to set the needle to zero.
But there are times when at idle the needle behaves completely decently. But at speed, when the speedometer crosses the 80 or 100 km/h mark, the needle begins to twitch very much. With all this, misfires may even occur. This is a sign that there is a breakdown in the ignition switch and it needs to be replaced urgently. That's all that can be said about the device designed to measure crankshaft rotation speed.
Source: vaz-remzona.ru
What else to check
- Voltage regulator;
- Generator rectifier unit;
- Diodes;
- Generator for broken windings;
- Generator brush assembly;
- Contacts on the terminals of the generator, mounting block.
Let's continue... Diodes are checked with a test light or multimeter. If one of them is broken, the entire rectifier will have to be replaced.
To check the stator winding you need the same device. The resistance between the fasteners of the rectifier unit is measured. If there are no contacts between them, you need to replace either the winding or the entire generator.
The generator itself often fails due to wear on the brushes. To check them, you need to remove the brush assembly and measure the length of the elements. If it is 5 mm or less, the brushes must be replaced.
Almost all of the above system components are replaced when they fail, since they cannot be repaired. Only some of the generator problems can be repaired, but this can only be done by a qualified auto electrician.
The worst thing is if problems with recharging occur while on the road. Without recharging the battery, it will eventually run out completely. And even if you manage to find the cause of the breakdown and eliminate it, you will no longer be able to start the engine with the starter. It will be possible to start a VAZ-2017 with a dead battery only from a tug or pusher.
Diagnostics and repair work
If you suspect that the battery is not charging, you need to carry out a series of diagnostic and repair work in this order:
- Stop the car, turn off the engine.
- Raise the hood and check the integrity of the drive belt. If it is intact, check its tension by pressing with a screwdriver or other tool on the belt branch in the middle between the generator and crankshaft pulleys. The deflection in this place should be 12–17 mm.
If the voltage is lower, the cause must be sought in the rectifier, stabilizer or generator windings. In any case, further diagnostics require dismantling the generator.
Video: tensioning the alternator belt
Dismantling the generator
To remove the generator set, you must:
- Open the hood, disconnect the wires from the battery.
- Using a 17 mm wrench (for units type 9412.3701 a 13 mm wrench), completely unscrew the nut securing the device to the adjusting bracket.
Video: removing the generator
Checking the rectifier module, stabilizer and windings
To diagnose the rectifier, regulator and windings, you will need a multimeter and two pieces of wire with clamps. To check, you need to carry out the following work:
- Switch the multimeter to resistance measurement mode.
- Connect the positive probe of the device to terminal “30” of the device, and the negative probe to its “ground”. The resistance between these points may vary, but if it is close to zero, the windings may be shorted to ground or one of the rectifier diodes may be broken.
Generator repair
If problems are detected with the rectifier module or windings, the faulty part must be replaced. To do this you will need:
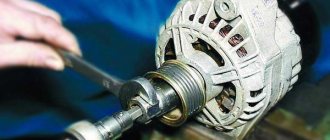
- Use a screwdriver to secure the generator impeller by resting one of the blades against it.
- Using a socket or 19 mm socket wrench, unscrew the pulley fixing nut.
Video: repair of VAZ 2107 generator
About their device
Before finding out the importance of the elements of the ignition system in question, it is necessary to understand their structure. Structurally, the high-voltage wire consists of the following parts:
- A conductor through which current flows.
- Insulation - rubber or silicone is used as an insulating material.
- Protective caps on both ends.
- Metal contacts.
Each element performs corresponding tasks, and at the slightest violation of integrity, it will be necessary to replace it. Armored wires cannot be repaired, since they play one of the main roles in the car’s ignition system, and also belong to the category of consumables.
It is a mistaken belief that armored wires on a car are ordinary wires that are designed to transmit current from a source to a receiver. As you know, VAZ 2107 cars were produced in two variations of the fuel supply system - carburetor and injector. Although many parts and mechanisms on the carburetor and injector are the same, this does not apply to the GDP. The carburetor VVP differs from the injection one on the VAZ 2107 in the following parameters:
- The length, on which the amount of resistance also depends. The wires on the injection unit are shorter than on the carburetor.
- Fasteners that connect to the distributor on the carburetor and the ignition module on the injector.
- The amount of GDP. There are four of them on the injector, and five on the carburetor.
- Type of caps.
Knowing the design differences, you must also understand that high voltage flows through the wire. The current comes from the distributor or MG through the wires to the spark plugs. The slightest malfunctions lead to the fact that current is not supplied to the spark plug, and a spark does not occur. If a spark does not occur, the cylinder does not work, which negatively affects the operation of the engine.
Removing the generator
The instructions for repair and operation of VAZ 2107 vehicles provide a routine sequence of work on how to remove the generator on a VAZ 2107:
- The car is placed on an overpass or lift;
- Remove the battery;
- Using a socket wrench (preferably with a cardan) 17 (model 3701) or 13 (model 9412.3701) the tensioner nut is unscrewed.
- The engine mud protection is removed;
- The belt is dismantled;
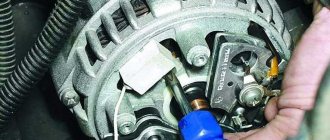
- The wires from terminal 30 are disconnected;
- Using a 19mm spanner, remove the fixing bolt;
- The generator is removed from the bottom of the engine.
It is possible to remove the generator on a VAZ 2107 without a pit or a lift without any problems. To do this, you just have to lay down a bedding and, if desired, jack up the front of the car under the beam so that it is slightly higher, although you can remove the protection this way.
What to do if there is no charge, weak charge (battery is discharged)?
If the battery of your VAZ 2107 is discharged, then one of three elements may be “to blame”: the generator, the voltage regulator, and the connections between them. Determining “who is to blame” can be very simple, even without additional devices. How this article will help.
We carry out testing using standard equipment
To monitor the operation of the generator on the “seven” there are two instruments: a voltmeter and a control light on the instrument panel. With their help, you can track the cause of your troubles.
1) Turn on the ignition without turning on the starter and look at the warning lamp. It should shine at full intensity, as in the photo. The voltmeter needle, normally, stands on the white part of the scale (photo). Let's say everything is OK - go to point 2
The battery charge control lamp is on
Position of the voltmeter needle before starting the engine (ignition on)
The lamp does not light, the voltmeter needle remains at zero when the ignition is turned on.
Check fuse No. 10 in the mounting block. 99% of the time it will be burnt out. In this case, all other lamps on the instrument panel will also be de-energized. Replace it with the same one and test again. If the fuse burns out again, you need to look for the cause, that is, a short circuit. We check whether the wires from the generator are disconnected, whether the insulation is frayed somewhere, etc. Diagram 3 at this link will help you find the reason
The lamp does not light up, the voltmeter needle shows normal
We check the wires on the generator to see if the wire has come loose from terminal “61”. If everything is normal there, you need to check whether there is a “plus” on this wire using a test lamp, an indicator screwdriver or a multimeter.
Terminal “61” of the VAZ-2107 generator
If there is a “plus”, we check the “tablet” (aka “chocolate”) and the generator.
There is no “plus” - you will have to remove the instrument panel and check the lamp. Replace the burnt out one. How to remove the panel, watch the video
2) Start the engine. The control lamp should go out, the voltmeter needle goes into the green sector and is located from the middle to the right edge (photo). If everything is so, then most likely the generator is working normally.
The voltmeter shows normal voltage (charging is present)
The lamp remains on or dims slightly
If you give it gas, it goes out at high speeds and lights up again when they decrease. The voltmeter needle is in the white sector and goes to the edge of the green when the speed increases. The generator output is faulty. The same conclusion if the lamp continues to light at any speed, and the voltmeter needle is in the white sector and even goes to red.
Voltage too low (motor running). Weak charge
3) If the generator seems to be working, but the battery is gradually discharging, we will perform another check. We start the engine, turn on the heater fan and low beam, take the key to “10” and, loosening the negative terminal of the battery, remove it. An idling engine (about 900 rpm) should not stall. If the engine stops, put the terminal back in place and start it again. While holding the speed at 1200-1500, remove the terminal again. Has the engine stalled again? Then turn off the headlights, leave the heater fan on and repeat the test. Now the engine with the negative terminal disconnected from the battery continues to run. The generator output works, but does not produce the required current; it needs to be repaired.
Note! During such a check, it is better and safer to work together. Do not disconnect the battery terminal without at least turning on the heater fan or other load.
A voltage surge at the time of shutdown can “burn” the electronic elements of ignition systems
You need to be especially careful on a car with an injection engine.
Diagram, procedure for connecting VAZ high-voltage wires.
First, let's decide which of the four cylinders is first?
The first cylinder in front-wheel drive VAZs is located closer to the timing belt. If you look at the engine from the front, the first cylinder is the leftmost). And then everything is simple - from left to right - 1, 2, 3, 4.
In rear-wheel drive VAZ Classic and Niva, the first cylinder is located closer to the front bumper of the car.
Add. equipment: Installed a digital voltmeter in the VAZ-2107 panel
After problems with the generator and unstable voltage, I decided to install a digital voltmeter to monitor the voltage in the car's on-board network. To do this, I ordered a car voltmeter with an LCD screen from Aliexpress that can be built into the panel.
I decided to install it in place of the standard radio, since my radio was moved upstairs.
- The wires are yellow (there was no red) and black, 2 meters each, with a cross-section of 1 mm, maybe smaller
- Plastic plug for the radio receiver where the voltmeter will be inserted
- Switch to prevent battery drain
- Male-female and ground terminals
- Heat shrink tube set
- 10A fuse
- Handy tools and soldering iron
We will connect it directly to the battery terminals for a more accurate measurement, according to this scheme:
There is a mistake in the video and the wrong diagram is indicated - the button and fuse should be on the “positive” wire (!).
We solder the terminals to the wires, insulate the contacts with heat-shrinkable tubing, you can also use connector chips.
I’m not soldering the ground terminals yet, since I’ll have to pull the wires through the under-torpedo space into the engine compartment - I’ll solder them on site.
In the plastic plug we cut out holes for the sensor and button.
We collect everything, it turned out something like this.
We pull the wires under the panel and through the engine shield to the battery. Yellow (red) goes to the “+”, black to the “-” battery. We leave a small margin in length in the center console for ease of removal of the entire structure.
Now we solder the ground terminals to the wires and screw them to the battery terminals.
We check the readings using a multimeter through the cigarette lighter. We make a mental correction of about 0.1 Volt to the readings due to the loss of voltage in the wires - this means we have 12.4 Volts at the battery terminals.
Done, now there is no need to constantly carry a multimeter with you.
Reasons for overcharging
A malfunction of the relay regulator is the most common cause of battery overcharging.
Due to a breakdown, this unit ceases to perform its functions and “passes” all the voltage generated by the generator into the on-board circuit, and it can reach 25 V. Naturally, not a single electrical appliance in a car is designed for such a voltage, so the elements of the on-board network begin to burn out .
Regulator failure can be partial or complete. In the first case, this element still performs its functions, but “passes” a voltage slightly higher than needed (for example, 15 V).
In this case, the overcharge of the battery can only be detected by readings from measuring instruments or the on-board computer. Electricity consumers practically do not “suffer” from such voltage, but even such an overcharge negatively affects the condition of the battery - with a constant process, the battery “boils out” and fails.
If the relay-regulator is completely malfunctioning, high readings (over 16 V) begin to damage consumers - light bulbs and fuses burn out first, then other devices. A significant excess of voltage can cause a fire in the electrical wiring.
Despite the fact that a partial breakdown of a relay does not pose a significant threat to the vehicle’s on-board network (with the exception of the battery), it should not be ignored, since at any moment it can develop into a complete failure of the element.
Since the relay-regulator is the only element that prevents the battery from overcharging, many car enthusiasts, when they detect increased voltage in the on-board network, immediately replace this unit.
But installing a new regulator does not always help; often the problem remains. Naturally, suspicion in this case falls on the generator. This unit can actually overcharge in the event of a breakdown of the diode bridge or a break in the windings, or a breakdown of the armature to the housing.
READ ON THE TOPIC: Car generator voltage, normal at idle and under load.
But if replacing the regulator relay does not help, you should not immediately change or send the generator for repair.
IMPORTANT: Often the reason for overcharging the battery lies in poor contact of the wiring of the battery charging system circuit (described above).
The reason is very simple: at the point where the contacts are oxidized, resistance arises, which the relay-regulator “perceives” as a load in the on-board network. For example, this can happen in the fuse box.
To compensate for it and prevent a drop in voltage, the regulator begins to “pass” large values, resulting in an increased voltage being supplied to the battery.
Therefore, in searching for the cause of battery overcharging, you should first check the relay-regulator, then the charging system circuit (all connections, as well as the fuse), and only after that remove and diagnose the generator.
Theory “on fingers”: how everything works
On the VAZ 2107, devices can receive power from 2 sources. The first is the battery, the second is the generator. The battery supplies energy when the engine is turned off. It has a certain charge, consumed as needed. The generator produces electricity, but only if the rotor is spinning. That is, with the engine running.
Battery operation diagram: 1. Battery, 2. Negative diode, 3. Additional diode, 4. Generator, 5. Positive diode, 6. Stator winding, 7. Regulator, 8. Rotor winding, 9. Capacitor, 10. Mounting block, 11. Control lamp, 12. Voltmeter, 13. Ignition relay, 14. Lock.
The battery charge is used to start the engine. When the engine starts running, the battery energy is not consumed: the generator supplies all devices with it. A charge is also supplied to it to restore wasted energy. But if the battery is not charging, its own energy will be enough for a limited number of starts. The battery will then be completely discharged. And the car owner will have to solve the problem of how to start a VAZ 2107 if the battery is dead. After all, not everyone has “crocodiles” in their trunk, and not everyone will agree to share electricity with their battery.
Indicator light
As you can see from the diagram, there are a large number of components involved in the charging system and each of them can cause poor or no charging. A warning light is installed on the dashboard to monitor the battery charging process.
If the system is in good condition, the control signal is activated after the factory. But when the engine reaches operating mode, the VAZ 2107 battery charging lamp does not light up. This means that the battery's energy supply is replenished by the generator. At the same time, the needle on the voltmeter moves to the green sector.
Signs of battery failure:
- The VAZ 2107 battery charge arrow clicks.
- The detector signal does not turn off. In some cases, the VAZ 2107 battery light blinks.
- After starting the engine, the voltmeter needle does not go into the green zone.
- With the engine running, the battery voltage should be around 13.9.
- The permissible deviation in any direction does not exceed 0.3 V. An undercharge of the VAZ 2107 battery within these limits is still not terrible.
A voltage drop of 12 V says: the generator is not charging! The VAZ 2107 battery charging lamp lights up dimly - the battery is discharged.
Signs of faulty wires
There can be many different signs of faulty high-voltage wires, but there are several signs that, once detected, require the wires to be replaced.
- The car jerks when you press the gas pedal. This is due to the fact that with a higher load the engine needs a large amount of fuel and its timely combustion, but since the wires are not able to give a spark at the right time, the car begins to twitch.
- When starting the car, one or more cylinders may not fire. This is due to the fact that when a spark is transmitted, it breaks through to the housing due to breakdown of the insulation.
To check the wires in more detail, you need to remove them from the car and carefully inspect them.
The wires should not contain:
- Gusts;
- Zadirov;
- Insulation breakdowns;
- Cracks in the plastic case;
Rupture of the protective cap of the GDP
If such problems are found on the wires of your car, then they need to be replaced.
Cost and articles
Below are prices and articles for good and high-quality high-voltage wires for VAZ cars, both for 16 and 8 valve engines.
| Manufacturer | Number of valves | vendor code | Price, (rubles) |
| Standard | 16 | 21120-3707080-81 | 990 |
| SLON | 16 | 2112-3707080 | 1450 |
| VOLTON | 16 | VLT-2112005 | 915 |
| TESLA | 16 | Т516M | 1710 |
| LADA | 8 | 21110-3707080-82 | 695 |
| TESLA | 8 | Т514M | 875 |
| Standard | 8 | T684H | 620 |
| Original | 8 | 21110-3707080-12 | 710 |
Wire selection
Many people face a problem when replacing wires, and it’s hard to say which company to choose, which one is better, but new wires are always better than old ones, so you need to evaluate your capabilities strictly by the thickness of your pocket. The price range for high-voltage wires is quite large.
The most popular brands of high-voltage wires are SLON, AvtoVAZ, TESLA, these brands have proven themselves well and are in good demand.