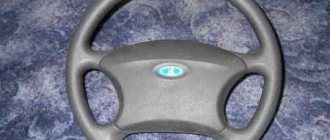
A fairly well-known “childhood disease” Kalin with the Makhachkala EUR is a clanking noise in the steering wheel area and the sound resembles the rolling of balls in a plastic box. In principle, there is nothing terrible about it in terms of malfunction, but only an unpleasant knocking sound, as if the steering rack is rattling. Many are afraid to get into the EUR and so put up with it, I also had such a phobia and finally, after reading the forums, I decided to defeat the bullshit in the EUR. After reading Nikolai-Kalinovod’s post, I decided to adjust the special nut, which allows the play between the worm and the gear to be adjusted and causes the knocking noise to occur.
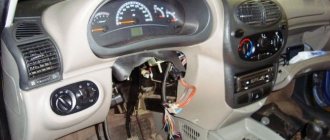
To remove the EUR, you must first remove the negative terminal from the battery - this is so that when disassembling you do not short out anything, since there will be a lot of ends hanging from the connectors. The process of removing the EUR has been described many times, so I’ll briefly say what you need to do: - first set the wheels of the car straight, - unscrew the two plastic halves around the steering wheel and the partition under the steering wheel, - use a 13 key, unscrew and pull out the cardan shaft bolt - remove the pads from the steering column switches , and also from the EUR - using a 13 socket wrench, loosen the two lower nuts securing the steering column - using a 13 socket wrench, unscrew the two upper nuts securing the steering column, while supporting the column so that it does not fall and carefully remove it to the floor
Many owners of Lada Kalina and Lada Granta are familiar with the problem of extraneous noise when turning the steering wheel (during short swings) or when driving on an uneven road. If the car is equipped with a geared electric power steering (EPS) manufactured in Makhachkala (catalog number 11186-3450008-00), then this may be the reason. This EUR is not installed on the Lada Priora. It is noteworthy that knocking is not observed in EUR (gearless) manufactured in Kaluga or MONDO. We'll tell you how to fix this problem.
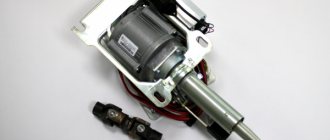
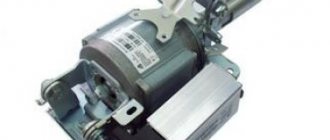
The main reason for the appearance of knocking in the electric power steering is the presence of play , which appears during the operation of the car. If the knocking sounds resemble drumming, then most likely the bearings are not tightened properly. Most often, the smallest of the three electric drive rotor bearings, which is located on top of the conical part of the power steering housing, rattles. You just need to tighten the adjusting nut (do not overdo it, otherwise the bearing will break).
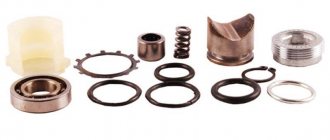
Some versions of the electric power steering do not have an adjusting nut, and if you disassemble the amplifier, you will notice adjusting washers between the bearing and the gear. In this case, the backlash can be reduced by installing additional washers , selecting them experimentally. It is worth considering that the thicker the gasket, the tighter the steering wheel will rotate, and too small the thickness of the washers will cause the EUR to knock.
With this modification of the electric power steering, you will have to remove and disassemble it. The most difficult thing will be to divide the electric amplifier into two halves. When reassembling, do not forget to apply lubricant . During assembly, do not strip the threads, they are weak.
Read also: Turbo timer for Ford Transit
If a metallic knock appears when you turn the steering wheel all the way in both directions, then most likely you are simply bumping into the end of the steering rack. In this case there is no cause for concern.
In some cases, it is impossible to do without repairing the electric power steering and replacing worn parts with new ones. The radical way to get rid of the knocking is to remove the EUR altogether, or replace it with a gearless one.
A knock when turning the steering wheel may not always be caused by the electric power steering; sometimes extraneous noise occurs due to the steering rack or column.
Electric power steering is a component used to provide more comfortable driving. Not so long ago, domestically produced cars began to be equipped with EUR, in particular, in this article we will talk about Lada Kalinas. What malfunctions can occur with the Kalina EUR and what troubleshooting methods are there? Find answers to these and other questions below.
Repair of electric power steering on Kalina. Signs of breakdown and repair
Electric power steering is a problem area for the Lada Kalina.
Surely this is due to the fact that the domestic auto industry has only recently become acquainted with the ESD. Avtovaz has not yet learned how to make good steering systems. Therefore, repairing electric power steering on Kalina remains a common practice. But it is best done by specialists. Amateurism will be inappropriate here - it can only aggravate the situation. The steering system is an important component, the serviceability of which determines the efficiency of driving and, of course, safety.
Repairing the electric power steering on Kalina is a responsible job that requires certain knowledge in the field of power steering. And since a minimum number of car enthusiasts have such knowledge, mostly when problems arise, drivers go to a service station, which is fundamentally correct.
The reason why the VAZ Kalina generator howls
- Registration
- Entrance
- To the beginning of the forum
- Forum Rules
- Old design
- FAQ
- Search
- Users
Good day, gentlemen!
The other day I started 21103 and there was a strange howl (not from the engine), but from the generator. Later I noticed that at speeds less than 1000, the battery light comes on (i.e. there is no charging).
How to solve the generator whine problem? The belt is tensioned as expected
hmmm, I'll have to look at what and how this weekend
Damn diode bridge. Smart guys. He has something to do with it.
Look at the brushes, belt, and bearings.
And the bridge has nothing to do with it.
I’ve had this gimmick since the car was born! I ask my service station workers - they stand like sheep, and the manager (shaggy bastard) generally said: - This is a feature of these engines. - jerk!
Essentially: when it’s cold, in the range from 65-75 degrees - strongly, when the engine is warm - in places, not so “defiantly” - “SOMETHING” was whining (moaning), at first they suspected either the pump or the gene - after we tried to change the electrical load, it became clear - gene! When you turn on the maximum electrical equipment, the howling becomes stronger. The “specialist” tried the gene belt and said that it was too tight - he let go - I started it - quietly - hurray! — I clacked the equipment — it’s normal — I arrive at the garage — I hear — howls — HERE’S MOTHER OF EVO! I tried to adjust the belt tension myself - sometimes more, sometimes less - the result: it howls in any situation - if it doesn’t howl when it’s cold, then it will when the engine is warm - and vice versa!
So please enlighten me on what is there and where to look and tweak? GENA IS NOT COVERED YET.
Source
➤
How to determine the malfunction?
Despite the fact that repairing the EUR requires contacting a car service, you can detect the first symptoms of a malfunction yourself
.
Viburnums on the front panel have a special yellow indicator, which, in the event of a breakdown of the electric amplifier, lights up and reports an error in the system. If it lights up, it means you have another reason to visit the nearest auto repair shop. But it’s immediately worth noting that the yellow indicator does not indicate a critical malfunction, but only signals the occurrence of a problem that allows you to drive the car, but without the participation of the ESD.
If the electric power steering has completely failed, it is better to stop immediately and pull out its fuses.
. In Kalina they are located on the left side of the steering wheel. Theoretically, in case of malfunctions, the EUR should turn off on its own. However, it doesn’t happen once at a time. Therefore, to be sure, it is still worth taking care of the fuses.
Possible malfunctions and their causes
The main problem that causes damage to the electric power steering is a malfunction of the speed sensor.
The EUR installed on Kalina does not work with a constant force applied to the steering rack. The amplifier begins to operate at full strength only when the car is moving at low speed or is at rest. When accelerating, the power steering forces on the steering rack decrease. That is, the lower the speed, the more the power steering starts to work.
The naturally described malfunction can only be detected when the car is standing still or moving at low speed
.
This failure can only be corrected by completely replacing the speed sensor. Moreover, here it is not necessary to go to the service. You can replace everything yourself.
The second malfunction may be hidden in the EUR itself. Basically, it consists of self-disabling the electric power steering due to the fact that it has not passed self-test. That is, the device turns off automatically so as not to interfere with the driver when driving the car.
This kind of malfunction guarantees a trip to the service station and will require you to spend a lot of money.
About qualified electric amplifier replacement
If there is a need to replace the mechanism when the ESD does not work, we recommend contacting experienced technicians. When the car is under warranty, the most rational measure would be to contact the dealer network to resolve the problem.
There are situations that do not allow you to resort to these two methods of eliminating an amplifier malfunction. Then the only solution will be to manually replace the mechanism that has become unusable.
Let us immediately make a reservation that the replacement process if the EUR does not work is characterized by sufficient complexity. To carry it out successfully, you will need experience and the possession of special tools. Unqualified replacement actions can aggravate the scale of the breakdown, which will entail a significant waste of money on more expensive repairs in service conditions.
Before the actual replacement procedure, we recommend that you carefully study the entire list of features and actions if the ESD does not work. Here you will need to delve into the connection diagram of the unit, which will avoid damage to the electrical components of the mechanism.
To remove the amplifier, partial disassembly of the front panel of the Lada Kalina is necessary. After this, the device itself must be disconnected from the entire list of supply wires. Sometimes owners repair the electric power steering, avoiding the need to replace it with a new unit. As a rule, after a complex of restoration work, standard devices work no worse than their new counterparts.
A common malfunction is the occurrence of a knock that clearly comes to the driver from under the panel or the amplifier turns off. This phenomenon may be accompanied by a characteristic squeak that occurs during rotational actions with the LADA Kalina steering wheel. This situation is usually solved by using a special lubricant. If such an action does not bring the expected result, then a more detailed diagnosis of the amplification mechanism will be required.
To install the electric power steering in the seat of the Lada Kalina, you will need to be attentive and patient. All cable connectors must be tightly seated, and the device itself must be firmly secured. Only after this can you proceed to the reassembly of the previously dismantled front panel components.
Additional reasons
Troubles in the operation of the electric power steering can be caused by:
- voltage drop due to possible circuit breaks due to wiring faults;
- exceeding the internal combustion engine speed;
- lack of speed sensor information.
In general, it is clear that there are not so many reasons why the ESD fails. Some of them are critical, some are not. But in any case, you need to take care of promptly eliminating the problem.
Today it is difficult to find reliable electrical circuits for an amplifier from a domestic car. Such information is mainly available only in services, and no one will share it with you. Therefore, repair of the electric power steering on Kalina is possible only within the walls of the service station
, since amateurism can be expensive. Here it is better not to take risks, not to be stingy, but to trust competent specialists.
How to eliminate knocking noise in the electric power steering of Lada Kalina, Granta
Many owners of Lada Kalina and Lada Granta are familiar with the problem of extraneous noise when turning the steering wheel (during short swings) or when driving on an uneven road. If the car is equipped with a geared electric power steering (EPS) manufactured in Makhachkala (catalog number 11186-3450008-00), then this may be the reason. This EUR is not installed on the Lada Priora. It is noteworthy that knocking is not observed in EUR (gearless) manufactured in Kaluga or MONDO. We'll tell you how to fix this problem.
The main reason for the appearance of knocking in the electric power steering is the presence of play , which appears during the operation of the car. If the knocking sounds resemble drumming, then most likely the bearings are not tightened properly. Most often, the smallest of the three electric drive rotor bearings, which is located on top of the conical part of the power steering housing, rattles. You just need to tighten the adjusting nut (do not overdo it, otherwise the bearing will break).
Some versions of the electric power steering do not have an adjusting nut, and if you disassemble the amplifier, you will notice adjusting washers between the bearing and the gear. In this case, the backlash can be reduced by installing additional washers , selecting them experimentally. It is worth considering that the thicker the gasket, the tighter the steering wheel will rotate, and too small the thickness of the washers will cause the EUR to knock.
With this modification of the electric power steering, you will have to remove and disassemble it. The most difficult thing will be to divide the electric amplifier into two halves. When reassembling, do not forget to apply lubricant . During assembly, do not strip the threads, they are weak.
If a metallic knock appears when you turn the steering wheel all the way in both directions, then most likely you are simply bumping into the end of the steering rack. In this case there is no cause for concern.
In some cases, it is impossible to do without repairing the electric power steering and replacing worn parts with new ones. The radical way to get rid of the knocking is to remove the EUR altogether, or replace it with a gearless one.
KALINA WILL NOT START, THE STARTER SPINS
Possible malfunction Diagnostics Remedies
The fuel tank is empty. The fuel level gauge has an arrow at zero. Fill with gasoline. The battery is discharged. The voltage at the battery terminals when consumers are turned off is less than 12 V.
When you try to start the car, a cracking sound is heard from under the hood. Charge the battery or replace it with a new one. Oxidation of the battery terminals or wire terminals, not a tight fit. When you try to start the engine, the voltage in the on-board network drops much more than at the battery terminals. In this case, a cracking sound may be heard under the hood. Clean the contacts, lubricate them with technical petroleum jelly and tighten the terminals. Unreliable connection of the electrical circuits of the engine control and power supply systems. Check the connections of the connectors, the reliability of the contacts in the blocks. Eliminate the malfunction in the wire connections. Increased resistance to rotation of the crankshaft (scoring on the shafts, bearing shells, parts of the cylinder-piston group, deformation of the shafts, frozen engine oil, jammed generator, jammed coolant pump) The crankshaft turns slowly. If the engine is started in severe frost, and the engine was working properly the day before, then most likely the engine oil has frozen. If you hear unusual noises when starting the engine, check the free rotation of the pump and generator pulleys. Use the recommended engine oil. Repair the engine. Replace the pump and generator. Malfunction in the ignition system. Check for the presence of a spark. Check the circuits and devices of the ignition system. Replace faulty elements of the system. High-voltage wires are connected in the wrong order, or the wire is disconnected. Inspect. Connect the wires in the correct order. The timing belt is broken or the belt teeth are cut. Open the front timing cover and check. Replace the timing belt. The valve timing is broken. Check the marks on the crankshaft and camshaft pulleys. Set the correct location shafts Malfunction of the ECU (brains), its circuits, crankshaft position sensor or coolant temperature Check the supply of +12V to the ECU, the sensor circuit, and the absence of damage to the sensors themselves. Replace the ECU, sensors. The idle air control or its circuits are faulty. Check the idle air control. When starting the engine, lightly press the gas pedal. If the engine starts and stalls when the gas pedal is released, the sensor is faulty. Replace the sensor. The fuse is blown or the main relay of the control system is faulty. Check the fuse and relay. Eliminate the cause of the fuse blown. Replace the fuse and relay. The fuse and fuel pump relay are blown. The circuit, relay or pump is faulty. When the ignition is turned on, there is no sound from the pump. Check the fuse. Apply voltage to the pump from the battery. Clean the contacts, replace faulty circuits, replace the fuse, pump and relay. The fuel filter is dirty, the water in the fuel line is frozen, the fuel line is damaged. Check the pressure in the fuel rail
and the condition of the fuel lines. Replace the filter, blow out or replace the fuel lines. B There is insufficient pressure in the fuel rail. Check the pressure in the fuel rail, the pump strainer and the condition of the fuel lines. Clean the filter.
Replace the pump, fuel pressure regulator. The injectors or their power supply circuits are faulty. Check the injector windings with an ohmmeter. Check the chains for breaks. Replace the injectors, replace the chains. Air leaks into the intake tract. Inspect the joints and fits of the hoses, clamps. During start-up, turn off the vacuum brake booster and plug the receiver fitting. Eliminate air leaks, replace the vacuum booster
Repairing electric power steering on Kalina - do it yourself in case of knocking and other problems
Moderators are asked to move this to the steering wheel FAQ or to the section header.
This concerns the EUR produced by the Makhachkala Aviaagregat plant. Kalina 2006
So I defeated the strumming and knocking in the EUR itself. I took it off three times, the first time in the summer I tightened a special nut with two holes, it didn’t last long, the crack remained. I filmed it for the second time this month and decided to take apart the EUR more. I separated the halves and saw the whole mechanism with my own eyes. When disassembled, there is no knocking, but as soon as I connect the halves, the knocking appears again. As a result, I stuffed more grease into the worm crankcase and put everything back together. It’s winter now, and in the morning, while the car was cold, the EUR didn’t make any sounds, but as soon as the interior was warmed up, the drumbeat started again. the lubricant simply became softer and play appeared. In general, this extraneous sound bothered me for no less than four years, I endured it. I was afraid to get into the EUR. But the time came to deal with the problem, and I removed it for the third time.
Next, I will describe the repair and modification process.
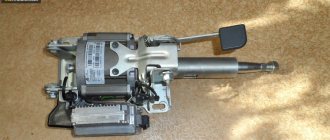
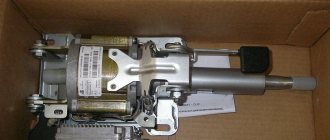
We will remove the steering column.
Disconnect the “-” terminal of the battery. The wheels are straight. Inside, remove the plastic around the steering column. We disconnect the electrical connectors of the ignition switch, immobilizer, disconnect two connectors from the EUR itself (the large one and the smaller one next to it on the left), you also need to disconnect the connectors of the steering column switches for the wipers and turn signals and remove them themselves, everything is simple there, disconnect the horn connector. Maybe I missed something, but in the end all the connectors from the steering column need to be disconnected. Next, at the bottom, using a 13mm head, unscrew the nut on the driveshaft in the middle, where there are no splines, but just a flat part that connects to the steering shaft driveshaft, and disconnect the driveshaft. Now unscrew the four 13mm nuts that secure the steering wheel. column to the body. Do not unscrew the last one completely, this whole structure weighs 10-12 kg, so carefully, holding it with your hands from below, unscrew the last nut and lower everything to the floor. Now you can take the steering column out of the car and disassemble it.
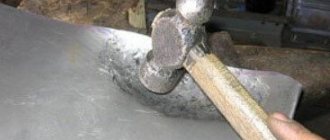
We put it all on the floor on the steering wheel. First, disconnect the bracket (4 x 13 bolts). Next, mark the position of the cardan and shaft with a marker, unscrew the nut to 13 and remove the cardan. Now, using a high 27 socket, unscrew the large nut on the shaft. All that remains is to unscrew the three 13mm bolts that connect the two halves of the EUR. The halves will begin to move around each other a little. Now you need to be careful
To separate them, to do this, use a flat and powerful screwdriver to pry up the upper half in several places, just do not put pressure on the ears of the fastenings (where there were three bolts) - the alloy is powder, you can break off the ears. We wiggle it a little and the upper half should slide up and come off. If everything went well, then we should find a thin washer on the shaft near the plastic gear (sometimes it sticks to the bearing in the upper half). As I found out experimentally, this adjusting washer is responsible for the clearance at the point of engagement of the plastic gear and the EUR worm. Over time, the gear wears out, wears out, the gap changes, backlash appears, hence the knocking and clanking noises. I found a tin can at home, cut out a similar washer and placed it under the factory one.
The thickness of the new washer is approximately 0.3 mm. Those. In the end we got two washers: mine and the factory one. I assembled the halves, secured them with one bolt, and began to twist and listen. and the knocking stopped. I was shocked and very happy. So, after all, there was wear and the sound was due to it. In general, I put everything back together, put it on the car and went to check it out. I drove onto a section of road with bad asphalt (like a ridge) and here it was SILENCE. very, very quiet. I just didn't recognize the car. But I suffered for 4 years, thinking and wondering how to overcome this nasty knocking and strumming. Yes, and the steering wheel has become heavier, more pleasant on the highway, it seems like the feedback has increased. I am very pleased with the work, I recommend it to everyone.
Causes of failure of the electric power steering on the Lada Kalina
For the first time, the Russian auto industry installed electric power steering on Kalina. At the first stages, it worked extremely unstably, up to a complete shutdown. Later, they tried to eliminate the shortcomings, but the EUR remained a weak link and periodically fails, as evidenced by the exclamation mark on the panel. This is evidenced by the feeling of a heavy steering wheel, and turning with one hand becomes difficult.
The principle of operation of the electric booster is to reduce the force that needs to be applied when turning the steering wheel. The Kalina electric power steering control unit uses sensors to calculate the operation of the electric motor at the current speed and torque. Thereby giving a signal of the effort with which the driver needs to be helped when turning. After all, it does not work constantly and needs adjustment, which is carried out by the block.
Operating principle and design of rack and pinion steering mechanism
When the steering wheel rotates, torque is transmitted through the column shaft through a helical gear to the rack, which is connected to rods that change the angle of rotation of the wheel hub. The working pair in the rack and pinion mechanism is the helical gear located on the column shaft and the PM rack.
Kalina's steering rack is placed in an aluminum housing (case), which includes a helical gear connected to the column shaft. The helical drive gear meshes with a rack and is supported by two bearings and a bushing on the crankcase. The rack also has an oblique tooth with a variable pitch, with a smaller pitch on the peripheral part. As a result, the driving behavior becomes more natural and comfortable, and the steering wheel angles are reduced. In a car with a variable ratio rack, the steering range of rotation is 720°. In this case, the driver, turning the wheel one revolution, reaches the right or left stop. During linear motion, the gear shaft is in the zone of straight teeth. When cornering or maneuvering, the steering responds more dynamically. In the area of the rack, which has oblique teeth, the gear ratio decreases rapidly as the steering angle increases.
For fans of fast driving, a Kalina Sport steering rack can be installed, which has a gear ratio of 3.1, unlike other models, in which this figure is 4.02. This shortened version allows you to feel the car better, but increases the risk when driving at high speeds.
Reasons for shutdown
The main reason lies in the electric power steering. When ignited, the system performs a self-diagnosis and if the mechanism does not pass it, a signal is turned on indicating a malfunction. The color of the signal indicates the degree of danger. The light turns red, the problem needs to be fixed urgently. If the color is yellow, the vehicle can be operated, but safety precautions should be taken. There may be several reasons why the electric power steering on Kalina does not work:
- speed sensor malfunction;
- torque sensor malfunction;
- speed exceeds 60 km/h;
- engine speed is less than 400 per minute;
- failure in the control unit;
- poorly soldered contacts;
- insufficient tension.
Fuse box
The weak link of the electric power steering on Kalina is the fuse box; if something doesn’t work, it’s worth checking them. To get to them, you need to open the dashboard, to the left of the steering wheel. To do this, pull the top part towards you and the latch will open.
Check if the fuse is working, if it fails, replace it. It is very easy to check, check the integrity of the thread inside the fuse. Changing a 50 amp relay to a 30 amp one will also help.
Newer versions of Kalina are equipped with electric amplifiers from Hyundai, which has a positive effect on its reliability. However, there are still thousands of cars with the domestic version, which malfunctions and breaks down from time to time. Now it will be easier for you to repair the electric power steering on Kalina yourself. The main thing to remember is that not every amplifier shutdown is a breakdown. And you can find the problem yourself and fix it, but somewhere you will have to go to a service center.
Checking the rectifier unit (diode bridge)
To perform this diagnostic, it is necessary to remove the diode bridge from the Kalina generator; this was described in more detail in previous articles in this section.
Then we connect the tester with the black wire to the negative plate of the block, and the red one in turn to the three contact terminals of the diodes. This way we check all the rectifiers in the block. The values on the device should be in the range from 400 to 800 Ohms. Personally, on my Kalina, during this test, all diodes showed a resistance within 535 Ohms. But the repair instructions from the Third Rome publishing house talk about numbers of 580-620 Ohms. I will say right away that when I rang two serviceable generators, the values specified in the manual were not achieved, although there were no problems with charging, so I personally doubt the accuracy of the data in this instruction.
Then we carry out the same operation, only swapping the contact wires of the multimeter. In this case, the device, with working diodes, will show infinity, that is, its readings will not change:
What malfunctions threaten the EUR on Kalina and what are the ways to eliminate them?
Electric power steering is a component used to provide more comfortable driving. Not so long ago, domestically produced cars began to be equipped with EUR, in particular, in this article we will talk about Lada Kalinas. What malfunctions can occur with the Kalina EUR and what troubleshooting methods are there? Find answers to these and other questions below.
Causes of EUR failure
Why does the electric power steering on the Lada Kalina not work, turns off and refuses to work, what are the signs of a steering wheel with power steering knocking, jamming, biting or squeaking? To repair the system yourself, you need to know how diagnostics are carried out and what causes precede the breakdown. Most often, the failure of the amplifier is caused by a breakdown of the unit itself and the amplifier fails. Problems of this type are resolved by thoroughly checking the system to identify the exact problem.
As practice shows, often the inoperability of the electric amplifier (failure) is associated with a breakdown of the speed controller.
- the steering wheel is jammed,
- jams
- becomes tight
- and others
Because the speed controller sensor ensures activation and deactivation of the electric power steering under different driving modes. The amplifier on Kalina works if the car is moving at low speed. When the speed begins to increase, the booster automatically turns off, allowing for safer machine control when driving at high speeds.
So, briefly about the reasons for the inoperability of the EUR:
- The speed controller has failed or the control unit does not receive or disappears a signal from it. In this case, the reason may lie in either a breakdown of the sensor, damaged wiring, or poor contact of the controller with the on-board network.
- The voltage in the vehicle's electrical network has decreased. The reasons can be different, ranging from a dead battery and an inoperative generator to the use of inappropriate electrical equipment in the car.
- The permissible crankshaft speed has been exceeded.
- Incorrect operation or failure of the control module. Depending on the cause, the control unit may need to be repaired; more detailed diagnostics need to be done.
Diagnostics
To check the amplifier in a car, you need to remove the plastic trim on the steering column; to do this, unscrew the bolts securing it from the bottom.
Then you will need to get to the 8-pin plug, its pinout is as follows:
- The blue contact is connected to the ignition switch, this is 12 volt power;
- the red-brown contact is the connection cable to the tachometer;
- the gray contact goes to the car speed controller;
- white and pink wire - amplifier control indicator;
- black-yellow contact is a diagnostic line;
- the next contact is empty, the wire is not connected to it;
- brown contact is ground;
- empty.
Dismantling and disassembling the electric amplifier
Before removing the amplifier, you need to remove all the steering column switches. Remove the steering rack cover and dismantle the devices, remembering to disconnect the connectors from the power supply.
How to remove the EUR with your own hands:
- After removing the switches, you will need to dismantle the lower cross member of the dashboard. To do this, you need to press the fasteners that secure the connector with wires, and then disconnect the wiring from the control module. Once these steps are completed, you can disconnect the connector from the switches.
- The system bracket is secured with nuts; you will need to unscrew them with a wrench.
- After this, the steering rack will need to be carefully lowered down. To do this, you will need to find the bolt that secures the driveshaft to the booster shaft. This bolt must be unscrewed, but when unscrewing, you will need to fix the nut, this will prevent it from turning. When the bolt is removed, the fastening will need to be loosened, after which the intermediate shaft will be carefully removed. At this stage, we recommend marking the position of the shaft and gears; you can use a marker for this. This step is very important because doing it will prevent possible installation problems in the future. If the marks on the shafts do not match, this may cause problems with the amplifier. When dismantling, be careful not to damage the wiring, as this will also lead to the inoperability of the ESD.
- When the unit is dismantled, it will need to be disassembled and the failed elements replaced. Further editing is done in reverse order (the author of the video is Murzik Bely).
How can I lubricate and adjust the EUR?
How and with what to lubricate the amplifier?
Litol can be used as a lubricant; the procedure is performed as follows:
- First you need to remove the plastic casing; to do this, unscrew the bolts that secure it. To unscrew, use a Phillips head screwdriver. It is also advisable to remove the lower cross member of the instrument panel, located under the steering wheel.
- Next, unscrew the two bolts that secure the amplifier itself; for this you will need a 13mm wrench. After this, the column can be released down.
- Unscrew another bolt, after which you can do the actual lubrication.
- First, the steering wheel is turned to the left until it stops. The lubricant is poured into a 10 cc syringe, which needs to be sprayed into the hole formed. You need to throw out all 10 cubes.
- Then the steering wheel is turned to the right until it stops - the syringe is again directed into the hole, all the lubricant is sprayed out.
- After this, the steering wheel should be turned to the middle position and again sprinkled with lubricant into the hole.
- Next, the steering wheel must be turned in different directions until it stops several times. The lubrication operation is repeated again.
- Then all the components are assembled in reverse order.
How to tighten the electric power steering rack?
The appearance of a knocking sound in the operation of the electric power steering is associated with the need to tighten the steering rack.
How to do it right:
- First you need to disconnect the battery; to do this, disconnect the terminals from it. Unscrew the battery mount; to do this, you need to unscrew two more nuts located at the edges. After this, the battery is removed and put aside.
- Then you need to lift the plastic stand, there are four more screws under it, they can also be unscrewed.
- Having done this, it is necessary to move this stand forward until the platform is disconnected from the air filter housing retainer pad. After this, the trim can be moved back, this will provide freer access to the rail itself.
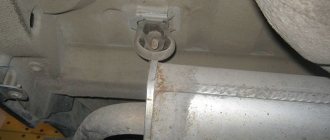
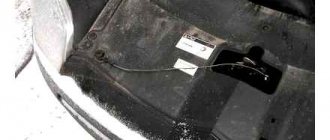
- At the next stage, you will need to crawl your hand under the rail. Directly below it, as shown in the photo, there is a rubberized cap; it will need to be removed, this will allow the key to access the adjusting nut.
- To perform adjustment work, you will need a special wrench to tighten the rack; without it, the adjustment procedure will not be possible. Using this wrench, you need to crawl under the car rail to install the tool in the required hole.
- When adjusting, be careful not to overtighten the rack. If its tightening is very strong, then when cornering the rack will bite, and this, in turn, may affect the safety of movement. The angle of adjustment is always different, it depends on how much the nut is loose, but usually when performing such work the nut is tightened by approximately 30 degrees. This should be enough to get everything right. After the adjustment is completed, it will be necessary to check that this task was performed correctly. That is, you will need to make sure that the steering wheel turns normally to any position all the way and there is no knocking. If the knock remains, then the adjustment continues.
A little theory: front suspension design
Before attempting to fix any problem, there is a tendency to look at the blueprints or repair manual. It is known that the VAZ-2192 parts catalog contains the following object:
This is what the steering rack looks like in the drawing
Whether the knock will remain in the steering rack of Kalina-2 depends on the following: how accurately element “14” is adjusted. The adjusting nut, marked “14”, looks almost invisible here. But first impressions are deceiving. In the catalog, by the way, the element is called “Stop Nut”.
It is important to know that the thrust nut has external threads. And it spins clockwise. And the words “tighten the rack” mean screwing in the specified nut, and nothing more.
Now let's move on to practice and see what the node in question looks like in reality:
If you remove the rail, it looks like this
The nut has a non-standard notch, and it can only be rotated with a special tool. By the way, the recess will be closed with a cap. In the catalog it is designated by the number “15”, and now, let’s look at the appearance of the special key:
Rack adjustment key
The thrust nut is turned at small angles. We are talking about values of 10-15 degrees. What happens if you overdo it with tightening the rack? The knocking noise will disappear, but the steering wheel will turn with difficulty. Therefore, if necessary, the nut can be pulled back.