- Granta sedan
- Granta liftback
- Granta hatchback
- Granta station wagon
- Granta Cross station wagon
- Granta Drive Active sports sedan version
The electrical circuits are almost the same, with some minor differences, that is, the circuits offered here are suitable for any modification of the Grant.
General diagram of electrical equipment 2190
1 — block headlight; 2 — windshield wiper gear motor; 3 - generator; 4 - battery; 5 - starter; 6 — sound signal; 7 — fuse box in the engine compartment; 8 — power window switch for the right front door; 9 — motor-reducer for window lifter of the right front door; 10 — right front door connector; 11 — connecting blocks of wires for connecting the right front speaker of the audio system; 12 — electric drive for locking the lock of the right front door; 13 — electric windshield washer pump; 14 — connecting block of the wiring harness for connection to the computer; 15 — electric fan of the engine cooling system; 16 — sensor of insufficient brake fluid level; 17 — left front door connector; 18 — central locking switch; 19 — interior lamp switch; 20 — connecting blocks of wires for connecting the left front speaker of the VAZ-2190 audio system; 21 — right front door power window switch (installed on the driver’s door); 22 — power window switch for the left front door; 23 — window lift motor of the right front door: 24 — airbag control unit; 25 — electrical equipment control unit; 26 — instrument panel; 27 — mounting block; 28 — right side turn signal; 29 — brake signal switch; 30 — seat belt unfastened sensor: 31 — ignition switch (lock); 32 — lighting control unit; 33 — steering column switches; 34 — left side direction indicator; 35 — connecting blocks of wires for connecting the left rear speaker of the audio system; 36 — electric drive for locking the left rear door; 37 — electric heater fan; 38 — additional heater resistor: 39 — heater switch: 40 — airbag module; 41 — hazard warning switch: 42 — trunk lock switch; 43 — rear window heating switch: 44 — connecting blocks of wires for connecting the right rear speaker of the audio system; 45 — electric drive for locking the right rear door; 46 — reverse light switch; 47 — parking brake warning lamp switch; 48 — cigarette lighter; 49 — connecting blocks of wires for connecting the head unit of the audio system: 50 — backlight lamps on the trim of the center console of the instrument panel: 51 — control unit for electric power steering; 52 — interior lamp; 53 — rear light; 54 — trunk lid lock; 55 — license plate lights; 56 — additional brake light; 57 — rear window heating element; 58 — luggage compartment lamp
Adjusting the angle of incidence of light from the headlights
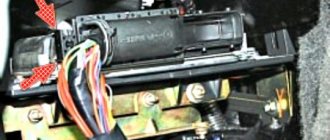
There is also a special switch for adjusting the headlight angle (marked with a red arrow in the figure). It has many positions and is very difficult to adjust (in theory, you don’t need to adjust it often; once you set it, you forget it).
When adjusting, I set the angle to the highest level so that there was more illuminated space. Although this may blind oncoming cars, other foreign cars have this setting that is even more insolent towards other drivers.
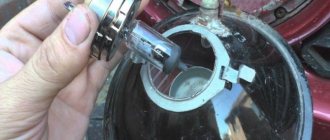
- We remove the faulty pusher from the headlight;
- After warming the tube for elasticity, remove the pusher from it;
- From the side of the tube we twist the self-tapping screw at an angle - the deeper, the more the rod will stick out;
- We adjust the length of the screw until the desired result is obtained.
- We remove the faulty pusher from the headlight;
- We warm the tube and carefully remove it from the pusher;
- We try to move the rod with pliers - the pusher does not work if there is little liquid in it and there is no required pressure;
- If the rod moves, use a syringe with a needle to pump antifreeze into the pusher and put the system back together.
- The rod does not move - pump a small amount of antifreeze into the pusher with a syringe, try to develop the rod. Add antifreeze to the desired level.
- The optimal fluid level in the pusher is determined experimentally or by comparison with a working corrector.
Lada Granta instrument panel diagram
1-block of the wiring harness of the wiring panel to the block of the front wiring harness; 2-block of the wiring harness of the wiring panel to the block of the front wiring harness; 3-block of the wiring harness of the wiring panel to the block of the rear wiring harness; 4-block of the wiring harness of the wiring panel to the block of the rear wiring harness; 5-lighting control module; 6-ignition switch VAZ-2190; 7-on-board computer mode switch; 8-wiper switch; 9-instrument cluster; 10-light signaling switch; 11-switch for trunk lock drive; 12-block diagnostics; 13-block of the instrument panel wiring harness to the block of the wiring harness of the air supply box; 14-rear window heating switch; 15-hazard switch; 16-brake signal switch; 17-block of the instrument panel wiring harness to the radio; 18-block of the instrument panel wiring harness to the radio; 19-rotating device; 20-module driver airbag; 22-mounting block; 23-electric power steering; 24-cigarette lighter; 25-lamp illumination of the heater control panel; 26-illuminator; 27-block of the instrument panel wiring harness to the block of the ignition system wiring harness; 28-controller; 29-clutch pedal position signal switch; 30-electronic accelerator pedal; 31-additional resistor; 32-heater electric motor; 33-heater motor switch; 34-door lock system control unit.
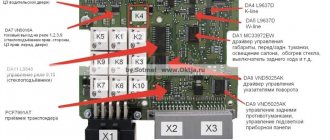
Relay:
K1-relay for the electric fan of the engine cooling system; K2-door lock activation relay; K3-additional starter relay; K4-additional relay Lada Granta; K5-relay-breaker for direction indicators and hazard warning lights; K6 wiper relay; K7-relay for turning on the high beam headlights; K8-horn relay; K9 relay for low beam headlights; K10-relay for turning on the heated rear window; K11-main relay VAZ-2190; K12 fuel pump relay.
see also
Comments 22
Does a single sweep of the wipers (when you press without locking) work on this switch? Otherwise I don’t have it, so I think it’s a marriage or that’s how it works
Works. Apparently something is wrong with you.
Good afternoon Is it difficult to change this switch? Approximately how long did it take?
Kind! Yes, everything is done quite simply and quickly. Unscrew the screws securing the plastic steering column casing, remove the casing, disconnect the connectors, and by pressing the 2 latches it can be easily removed from its seat.
I installed the new switch and did it in about 15 minutes. Tomorrow I'll put the casing back in place. It was already dark today...))
Tell me, can the right one control the rear wiper?
No, they're gathering dust
Why change the left switch? They are different?
The left switch differs only in shape. Otherwise, it was possible not to change it, of course, but it’s not pretty somehow.
Fashionista. I also installed a luxury 219050 instrument cluster and steering column switches on the sedan. If you have an 11186 or 21127 engine, everything you think will work out, you most likely won’t have to reflash the ECU. I did not succeed in my plan with cruise control and speed limiter due to the lack of ECU firmware for the Jatco automatic transmission. Therefore, after the sale of the sedan, I snatched one of the last such cars with these options. Good luck and waiting for the report. By the way, do the switches conflict with the old instrument cluster?
The engine is number 127 with a manual transmission. I think everything will be ok without flashing. The switches do not conflict. Everything is working. Lucky you with your purchase! These options have now been removed, which is a pity...
These options will be on the Lada Granta FL.
Fashionista. I also installed a luxury 219050 instrument cluster and steering column switches on the sedan. If you have an 11186 or 21127 engine, everything you think will work out, you most likely won’t have to reflash the ECU. I did not succeed in my plan with cruise control and speed limiter due to the lack of ECU firmware for the Jatco automatic transmission. Therefore, after the sale of the sedan, I snatched one of the last such cars with these options. Good luck and waiting for the report. By the way, do the switches conflict with the old instrument cluster?
Detailed diagrams of nodes and blocks
1 – right headlight; 2 – electric motor for washers; 3 – left headlight; 4 – VAZ-2190 starter; 5 – rechargeable battery; 6 – main fuse block; 7 – generator; 8 – sound signal; 9, 10, 11 – front wiring harness blocks to the instrument panel wiring harness blocks; 12 – reverse light switch; 13 – electric fan of the engine cooling system.
1 – oil pressure warning lamp sensor; 2 – generator; 3 – throttle pipe with electric drive; 4 – coolant temperature sensor; 5 – ignition system wiring harness block to the instrument panel wiring harness block; 6 – solenoid valve for purge of the adsorber; 7 – speed sensor VAZ-2190; 8 – mass air flow sensor; 9 – crankshaft position sensor; 10 – oxygen concentration sensor; 11 – controller; 12 – diagnostic oxygen concentration sensor; 13 – ignition coils; 14 – spark plugs; 15 – Lada Granta injectors; 16 – blocks of the wiring harness of the ignition system and the wiring harness of the injectors; 17 – knock sensor.
Electrical diagram of the Lada Granta lighting control module
1, 2 – rear wiring harness blocks to the instrument panel wiring harness blocks; 3 – right side direction indicator; 4 – left side direction indicator; 5 – hand brake sensor; 6 – rear window heating element; 7 – interior lamp; 8 – switch in the driver’s seat belt; 9 – trunk lighting; 10 – electric fuel pump module; 11 – right lamp; 12 – trunk locking motor; 13 – interior lamp switch; 14 – additional brake signal; 15 – left lamp; 16 – rear wiring harness block to rear left door wiring harness block; 17 – rear wiring harness block to rear right door wiring harness block; 18 – rear wiring harness block to the front right door wiring harness block; 19 – rear wiring harness block to the front left door wiring harness block; 20 – airbag control unit; 21 – rear wiring harness block to the wiring harness block for license plate lights.
Useful: VAZ speed sensor pinout and DS connection diagram
Front right door wiring harness connection diagram
1 – block of the wiring harness of the front right door to the block of the rear wiring harness; 2 – electric window lift motor; 3 – right front lock Lada Granta; 4 – power window switch; 5 – blocks of the wiring harness of the front right door to the front right loudspeaker.
Front left door wiring harness wiring diagram
1 – block of the wiring harness of the front left door to the block of the rear wiring harness; 2 – electric window lift motor; 3 – front left lock; 4 – switch block; 5 – blocks of the wiring harness of the front left door to the front left loudspeaker.
Wiring diagram for license plate lights wiring harness
1 – wiring harness block for license plate lights to the rear wiring harness block; 2 – license plate light for VAZ-2190; 3 – license plate light.
Let's summarize
- Adjusting the headlights of a Lada Granta requires five meters of space, a machine, a Phillips screwdriver and a tape measure;
- to turn on the light in the trunk, turn on the low light and open the trunk;
- You can repair the hydraulic corrector yourself, or you can buy a new one for up to a thousand rubles.
Even more articles about the repair and maintenance of Grants are here.
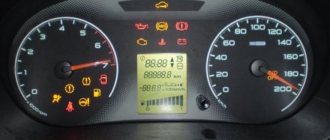
The main purpose of such a thing as the instrument panel in the Lada Granta model, as in any other car, is to provide control and management of a certain set of parameters important for the normal functioning of all on-board systems while driving. The instrument panel must be as informative and functional as possible, and also fit harmoniously into the interior, creating an individual charm for the cabin. To understand everything, the instructions will help.
On the Lada Granta, the so-called instrument panel does not fall into the category of “exceptions”, because it is capable of promptly and clearly displaying information about the performance of components by displaying various parameters. This complex ensures vehicle safety while driving, as it is equipped with warning functions about the occurrence of malfunctions. To understand everything, you will need instructions.
Relays and fuses Lada Granta
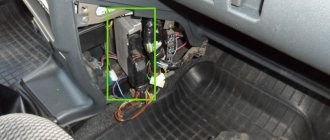
Fuse and relay box in the passenger compartment
To access the mounting block, pull the bottom left corner of the cover to release the left locking point 1, then release the middle bottom point 2 and the two right locking points 3 and 6, then release the top locking points 4, 5 and remove the cover.
Installation of the cover is carried out in the following order: first snap the right fastening elements of the cover at points 6 and 3, then snap the lower fastening elements of the cover at points 2 and 1, then the upper ones at points 4 and 5.
| № | A | Protected Circuits |
| F1 | 15 | Ignition coils Injectors Engine control system controller |
| F2 | 25 | Norma, Lux: Central body electronics unit Driver door module |
| F2 | 5 | Standard: Daytime running lights |
| F2 | 30 | Window lifters |
| F3 | 15 | Norma, Lux: Automatic gearbox control controller Automatic gearbox control drive |
| F3 | 10 | Standard: Hazard Alarm |
| F4 | 15 | Airbag system controller |
| F5 | 7.5 | Terminal 15 devices |
| F6 | 7.5 | Reversing light VAZ-2190 Turn indicators (Standard) Automatic gearbox control controller (Norma, Luxury) Safe parking system control unit (Norma, Luxury) |
| F7 | 7.5 | Canister purge valve Mass air flow sensor/pressure sensor Phase sensor Oxygen concentration sensors |
| F8 | 25 | Rear window heater Heated exterior mirrors (Normal, Lux) |
| F9 | 5 | Side lights on the starboard side |
| F10 | 5 | Side lights on the left side Illumination of instruments and keys License plate lights Luggage compartment light Glove box light |
| F11 | 5 | Rear fog lights |
| F12 | 7.5 10 | Low beam, right headlight Electrical corrector for right headlight |
| F13 | 7.5 10 | Low beam, left headlight Electrical corrector of the left headlight |
| F14 | 10 | High beam, right headlight |
| F15 | 10 | High beam, left headlight |
| F16 | 10 | Right fog lamp |
| F17 | 10 | Left fog lamp |
| F18 | 20 | Front seat heaters Cigarette lighter |
| F18 | 10 15 | Cigarette lighter |
| F18 | 15 | Front seat heaters |
| F19 | 5 | Norma, Lux: Anti-lock brake control unit |
| F19 | 20 | Standard: Door locking motors |
| F19 | 15 | ABS Lada Granta |
| F20 | 15 | Sound signal |
| F20 | 15 | Horn Trunk lock Gearbox Cigarette lighter Diagnostic connector |
| F21 | 15 | Fuel pump |
| F22 | 25 | Windshield washer Central body electronics unit Rear window washer Rear window wiper |
| F22 | 15 | central locking |
| F23 | 5 | Instrument cluster Diagnostic connector |
| F23 | 10 | Daytime Running Lights |
| F24 | 7.5 | Norma, Lux: Air conditioning compressor clutch Automatic climate control system controller |
| F25 | 7.5 | Brake lights Interior lighting (Standard) |
| F26 | 10 | Norma, Lux: Central body electronics unit |
| F26 | 25 | ABS/ESC |
| F27 F31 | 25 | Anti-lock brake control unit |
| F28 F32 | 30 | Electric heater fan Automatic climate control system controller Electric power steering3) |
| Relay | ||
| K1 | Radiator cooling fan relay | |
| K2 | Window lifter (standard version) Minimum cooling relay for cooling module (luxury version) | |
| K3 | Starter relay | |
| K4 | Ignition switch unloading relay | |
| K5 | Turn signal and hazard warning relay | |
| K6 | Windshield wiper relay (standard version) Seat heating relay (luxury version) | |
| K7 | High beam relay | |
| K8 | Horn relay | |
| K9 | Low beam relay | |
| K10 | Heated rear window relay | |
| K11 | ECM relay VAZ-2190 | |
| K12 | Fuel pump relay | |
| K13 | Additional alarm relay | |
| K14 | Additional alarm relay | |
| K15 | – | |
| K16 | – | |
| K17 | – | |
New mounting block
Fuse box in the engine compartment under the hood
| № | A | Protected Circuits |
| 1 | 50 | Heated windshield |
| 1 | 30 | Low beam |
| 2 | 60 | Generator |
| 3 | 60 | Generator |
| 4 | 30* 40 | Electric radiator cooling fan |
| 5 | 50 | Electromechanical power steering |
| 6 | 40 | Anti-lock brake control unit |
Please note that there are different variations of this block.
Connection option 1
- 30A Low beam headlights or main relay, circuits protected by fuses F1 and F21 of the mounting block in the passenger compartment 50A Windshield heater
- 60A Generator VAZ-2190
- 60A Generator
- 30/40A Heater fan (heater fuse grants)
- 50A Electromechanical power steering
- 60A ABS block
Connection option 2
- 60A Generator
- 60A Generator
- 30/40A Electric radiator cooling fan
- 40A ABS/ESP
- 25A ABS/ESP
- 50A Electric Power Steering Controller
Connection option 3
- 30A Low beam headlights or main relay, circuits protected by fuses F1 and F21 of the mounting block in the passenger compartment
- 60A Generator
- 60A Generator Lada Granta
- 30A Heater fan (heater fuse grants)
- 50A Electric power steering
see also
Comments 22
Does a single sweep of the wipers (when you press without locking) work on this switch? Otherwise I don’t have it, so I think it’s a marriage or that’s how it works
Works. Apparently something is wrong with you.
Good afternoon Is it difficult to change this switch? Approximately how long did it take?
Kind! Yes, everything is done quite simply and quickly. Unscrew the screws securing the plastic steering column casing, remove the casing, disconnect the connectors, and by pressing the 2 latches it can be easily removed from its seat.
I installed the new switch and did it in about 15 minutes. Tomorrow I'll put the casing back in place. It was already dark today...))
Tell me, can the right one control the rear wiper?
No, they're gathering dust
Why change the left switch? They are different?
The left switch differs only in shape. Otherwise, it was possible not to change it, of course, but it’s not pretty somehow.
Fashionista. I also installed a luxury 219050 instrument cluster and steering column switches on the sedan. If you have an 11186 or 21127 engine, everything you think will work out, you most likely won’t have to reflash the ECU. I did not succeed in my plan with cruise control and speed limiter due to the lack of ECU firmware for the Jatco automatic transmission. Therefore, after the sale of the sedan, I snatched one of the last such cars with these options. Good luck and waiting for the report. By the way, do the switches conflict with the old instrument cluster?
The engine is number 127 with a manual transmission. I think everything will be ok without flashing. The switches do not conflict. Everything is working. Lucky you with your purchase! These options have now been removed, which is a pity...
These options will be on the Lada Granta FL.
Fashionista. I also installed a luxury 219050 instrument cluster and steering column switches on the sedan. If you have an 11186 or 21127 engine, everything you think will work out, you most likely won’t have to reflash the ECU. I did not succeed in my plan with cruise control and speed limiter due to the lack of ECU firmware for the Jatco automatic transmission. Therefore, after the sale of the sedan, I snatched one of the last such cars with these options. Good luck and waiting for the report. By the way, do the switches conflict with the old instrument cluster?
Let's summarize
- Adjusting the headlights of a Lada Granta requires five meters of space, a machine, a Phillips screwdriver and a tape measure;
- to turn on the light in the trunk, turn on the low light and open the trunk;
- You can repair the hydraulic corrector yourself, or you can buy a new one for up to a thousand rubles.
Even more articles about the repair and maintenance of Grants are here.
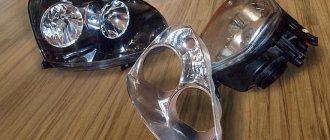
After I drove a VAZ2109 for 9 years and got used to its weak headlights (its high beam is like low beam for other models), I was surprised by the quality of the headlights on the Lada Granta. Most likely, it should be at this level, but I recently came out of the trees, so to speak, and for me this was a pleasant bonus for such an already good car.
