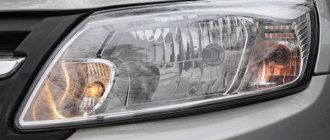
Lada Granta has become a popular car in Russia from the first days of sales. The automaker offers three configurations that drivers are happy to buy and use every day. Adjusting headlights on a Grant is rarely required; the procedure is carried out with special equipment in a car service center, as well as with your own hands using a minimum number of tools.
When using a special circuit and certain requirements, adjusting the Granta headlights will take 20-30 minutes.
Do-it-yourself adjustment of Lada Granta headlights
Let's look at what you need to quickly and step-by-step adjust the head light on a VAZ 2190:
- a room with a flat wall at a distance of at least five meters from the car;
- a Phillips screwdriver or a six-point hexagon;
- tape measure or long ruler;
- weight equal to yours to place on the driver’s seat (a person of your build or 2-3 bags of plaster - cement - the neighbor’s).
Step-by-step adjustment of low beam headlights on Grant
First , we park the car opposite a flat wall at a distance of 5 meters from the headlights to the wall. Only on a flat surface .
Your weight is in the driver's seat. The headlight hydraulic corrector is set to 0. The tires are inflated as required from the factory, the spare tire is in place.
The hydraulic corrector straightens the height of the light beam depending on how loaded the car is (on a scale from 0 to 5)
Second , we measure the height from the low beam bulbs to the ground. We mark it on the wall opposite each headlight - this is the upper limit of the light beam.
Third , we retreat down 35mm. and make another mark. For what - shown in the figure.
The headlight light on Grant falls in this shape. The upper edge of the beam has a kink: its upper edge should be equal to the height of your headlights to the ground. The lower edge of the fracture is at the same height minus 35 millimeters
Fourth , we close one headlight so that the light does not overlap the adjacent beam. We turn on the near one.
Fifth , use the light adjustment knob to adjust the height of the light. The goal is for the top edge to match our marks on the wall. An example in the picture above.
A long Phillips screwdriver is needed here. You can use a 6mm hexagon.
Access to adjusting the headlights on the Grant is not difficult. This connector only corrects the height of the light
Sixth – close the other headlight and adjust the second one.
Seventh - if you need to adjust the light from right to left, use long valves located on the headlights themselves.
Rotate these knobs to adjust the light horizontally - right/left
If the light is adjusted correctly horizontally, then the upper break lines of the light spot will be at the same distance as between the low beam lamps themselves.
An ideally positioned close fits this pattern.
Preparation and adjustment of headlights in accordance with GOST
- We first check the tire pressure, place a load (75.0 kg) on the front seat, squeeze the parking brake lever;
- On the wall (obstacle) we draw a horizontal line at a distance of 550 mm. from the earth. This will be the level of visibility of the driver’s pupils at a distance of three meters from the front bumper;
- We draw a line perpendicularly passing through the center of the light beam for each of the headlights: line 1 and 2.
- A vertical line is drawn down the center.
Adjusting and adjusting the headlight manually
- We measure the distance of lines 1 and 2, they should be equal. For the objectivity of the data, let’s rock the side of the car and check the accuracy of the beam accuracy restoration, simulating a road bump;
- Using the hydraulic corrector, we complete the headlight height adjustment. Initially, set the lever to position “0”. Experts recommend setting up each of the headlights separately, after covering the inactive one with an opaque material;
- Adjusting the low beam headlights on the Lada Granta is considered complete when the light spots on the wall completely coincide with the horizontal line;
- If necessary, repeat the setup process again.
When do you need to adjust headlights on a Grant?
The main motive for working with headlights is insufficient road lighting. There are many reasons for this:
- From the factory the car comes with a low beam adjusted for the driver's weight of 75 kg . This is a universal setting - if your weight is different, you need to adjust it immediately after purchase;
- the hydraulic corrector has failed - when it breaks, the headlights either shine crookedly or are not adjusted at all;
- Driving over bumps and potholes over time leads to changes in the settings of the light beam;
- buying a car second-hand - it is not known exactly how the lights were set up by the previous owner.
Preparation and adjustment of headlights in accordance with GOST
Adjustment scheme
- We first check the tire pressure, place a load (75.0 kg) on the front seat, squeeze the parking brake lever;
- On the wall (obstacle) we draw a horizontal line at a distance of 550 mm. from the earth. This will be the level of visibility of the driver’s pupils at a distance of three meters from the front bumper;
- We draw a line perpendicularly passing through the center of the light beam for each of the headlights: line 1 and 2.
- A vertical line is drawn down the center.
Adjusting and adjusting the headlight manually
- We measure the distance of lines 1 and 2, they should be equal. For the objectivity of the data, let’s rock the side of the car and check the accuracy of the beam accuracy restoration, simulating a road bump;
- Using the hydraulic corrector, we complete the headlight height adjustment. Initially, set the lever to position “0”. Experts recommend setting up each of the headlights separately, after covering the inactive one with an opaque material;
- Adjusting the low beam headlights on the Lada Granta is considered complete when the light spots on the wall completely coincide with the horizontal line;
- If necessary, repeat the setup process again.
How to turn on near or far
The light switch on the Grant is located below the left of the steering wheel - similar to the tenth family.
From the factory, Granta comes with DRL mode - daytime running lights. This means that when you start the car, your headlights come on.
Switching the handle clockwise gives the headlight and low beam modes.
To turn on the high beam:
- turn the light knob to the extreme right clockwise - the low beam will turn on;
- push the left steering column switch forward (the one that controls the turn signals);
- your high beam will light up - and a blue headlight icon will appear on the panel - keep an eye on it so as not to leave the car with high beam when it is no longer needed.
This icon indicates that the high beam is on.
Description and mechanism of head lighting fixtures
The headlights on Kalina, Priora and Grant have a similar system. One block contains a turn signal, a high beam lamp and daytime running lights. In addition to the cartridge for each block, there is a hydraulic cylinder for the corrector (3) and two adjusting hexagons. One is responsible for the horizontal (1), the second for the vertical (5) direction of the light flux.
Left headlight - rear view. 2, 4, 6 - cartridges for turn signals, high beams and running lights, respectively
What is a hydraulic corrector and how does it work?
The hydraulic headlight corrector is installed on the Grant from the factory. This device adjusts the headlights higher or lower depending on the vehicle's load.
You need to adjust it yourself - there is no automatic setting.
The corrector control is located under the light switch handle. Position 0 corresponds to a car with one person - the driver.
The more the machine is loaded, the higher the hydraulic corrector value should be.
Principle of operation:
- the handle controls the hydraulic corrector cylinder;
- the cylinder regulates the pressure in the flexible tubes that go to the pushers;
- pushers are installed in the headlights - the higher the pressure in the tubes, the stronger the liquid inside the pusher presses on the rod;
- the position of the rod deeper/further is responsible for adjusting the headlight higher/lower.
The operating principle of the hydraulic corrector is clearly shown below:
Visual representation of the headlight hydraulic adjustment system
What to do if the hydraulic corrector is broken
Have both or one headlight stopped responding to the hydraulic corrector? Most likely your pusher is broken .
According to the regulations, the entire hydraulic corrector mechanism is replaced as an assembly and cannot be repaired. Price from 400 to 1000 rubles. Order number: 21903718010.
If you want to fix the pusher, there are two ways .
Table 1 . Options for repairing the headlight range control pusher.
| Option 1 – barbaric. No further adjustment. |
|
| Option 2 – humane . We return the corrector to full working condition. |
|
Link to a detailed description of the second method with comments here.
A corrector kit costs about 700 rubles - it may be easier to replace it
How to replace a hydraulic corrector with an electromechanical one
Do you want to replace the hydro with an electric corrector (EMKF)? The process is simple, as there are ready-made solutions from the factory.
Article: EMKF-41. Price 2000-3000 rubles.
To replace, you only need straight hands - depending on the manufacturer of the EMKF:
- dismantle the old hydraulic corrector;
- We install a new corrector control unit in place of the cylinder - we run the wiring according to the instructions;
- we pull the wires through the elastic band along which the hydro pipes went;
- We put the regulators in their standard places in the headlights.
step by step from personal experience here.
We improve the quality of work done
In order to increase the efficiency of roadway lighting, we check body elements for defects, damage, and deformation. By ignoring the curvatures on the body, it is impossible to achieve maximum concentration of the light beam.
We check the integrity of the headlight glass and the tightness of the sealing elements. There is dust and dirt inside the optics module - a sign of poor sealing. Replace the rubber seal, update the silicone sealant.
Long-term operation of the machine on rough terrain or unpaved surfaces leads to damage and scratches on the optics. It is not at all necessary to change the headlights; it is enough to carefully polish them with special means.
If the reflector or mirror surface is damaged, unconditional replacement of the optics. Such a defect cannot be restored.
Installation of lamps strictly in accordance with catalog articles. Purchasing components other than factory ones does not guarantee the quality of lighting or service life.
Let's summarize
- Adjusting the headlights of a Lada Granta requires five meters of space, a machine, a Phillips screwdriver and a tape measure;
- to turn on the light in the trunk, turn on the low light and open the trunk;
- You can repair the hydraulic corrector yourself, or you can buy a new one for up to a thousand rubles.
Even more articles about the repair and maintenance of Grants are here.
In order to avoid the lurking danger of temporary blinding of a driver moving in oncoming traffic, the vehicle's head optics must be correctly configured. How should Lada Granta headlights be adjusted correctly? We'll talk about this in this article.
How to adjust the headlights on a Grant? There are several methods, as a result of which you can adjust the headlights in the Lada Granta, namely:
- manually adjusting headlights using manuals or video materials;
- contacting a specialized service, where this operation is performed using equipment.
If you set a goal to save money, then you can do this simple procedure yourself. The work is carried out in four steps.
Reviews
| № | Positive |
| 1. | Kirill , 33 years old: after buying the car from the dealership there were no problems with optics. Incorrect lighting began after a collision on the highway. I had to adjust it with hydraulic correctors. It’s not at all difficult to figure out the sizes and angles of lighting on your own. |
| 2. | Vitaly , 41 years old: recently replaced the standard lamps with halogen ones, the accuracy of the light beam has dissipated. The regulator in the cabin did not cope with the task, even in position “2”. I adjusted it using hydrocorrectors on each of the headlights. It turned out to be good light. |
| 3. | Vladlen , 33 years old: despite the fact that the body geometry was restored after the accident, the low beam lost its accuracy. Thanks to hydrocorretors, I restored the light beam. |
| 4. | Vasily , 38 years old: I work as a taxi driver, I often drive at night. In general, the lighting of the Lada Grant is good and accurate, but after the repair all the settings were lost. I had to restore it myself using standard hydraulic correctors. |
| 5. | Mikhail , 42 years old: I can say that the lighting quality of the Lada Grant is good, far from ideal, but better than that of the Priora and Vesta. Sufficient for daily needs, those who want to improve performance can install xenon. |
| 6. | Gennady , 44 years old: I work as an entrepreneur, I drive most of the time. The accuracy of the low beam light beam is enough for me; the road and the right side of the curb are illuminated. During all this time I only adjusted it with hydraulic correctors a couple of times. |
| 7. | Valentin , 42 years old: after a major overhaul of the car last year, I slightly adjusted the high beam. The violation may be related to the accident. In all other respects, no comments. |
| Negative | |
| 1. | Victor , 34 years old: I don’t like the standard head lighting, it’s weak and dim. The adjustment doesn't help much. After installing xenon there are no problems, the road and side of the road are always under control. |
| 2. | Alexander , 36 years old: bought the car second-hand, second owner, good condition. I replaced the head optics with xenon, I’m happy with the quality, the clearance is excellent. My advice to motorists. |
| 3. | Konstantin , 32 years old: Lada Granta has a problem with high beams, similar to Priora and Vesta. Nothing has been changed. I installed additional headlights myself. |
Conclusion As for the Lada Granta, a car in the mid-price segment, the lighting is good, it is quite enough for daily use. Anyone who wants to see the road a kilometer ahead should install additional lighting.
To complete the data, read the recommendations and operating instructions (https://www.lada.ru/cars/granta/sedan/manual.html). The adjustment mechanism is similar to the Vesta and Priora models.
Action plan
Summarizing all of the above, we organize the sequence of actions as follows:
- We choose the method of setting up the lighting fixtures (by ourselves, by a service station);
- We prepare the car, check the tire pressure (2.0 / 2.2 MPa), place the Lada Granta at a distance of three meters from the wall (notional obstacle), remove the plug from the back of the headlight;
- We draw the diagram according to GOST, parallel and perpendicular lines;
- We compare the light beam with actual points on the wall;
- We carry out adjustments using hydraulic correctors.
Why is the setting broken?
Small tilt adjustments get confusing for several reasons:
- after a mechanical shock during an accident;
- due to deep potholes, potholes, unevenness and uneven road junctions;
- due to the installation of low-quality lamps of questionable manufacture.
The angle of the light beam may be lost due to accidentally falling into a deep hole at high speed. Grant's suspension cannot completely absorb the force of a powerful impact of the wheel on the asphalt and inertia is transmitted through the body. The projector's spotlight speeds up or down suddenly, the adjustment screw jumps, and the light beam does not shine properly. In addition, frequent rolling over curbs or a high garage threshold can have this effect.
On the way, drivers find themselves in different traffic situations, accidentally flying into deep holes or crossing uneven roads at high speed. All this over time reduces the position of the adjusting screw in the headlight reflector. However, installing Chinese low beam or high beam lamps will affect the angle of the light beam. This parameter is affected by the position of the filament. If the bulb of the installed part is slightly offset vertically, the standard optics will not be able to correctly collect the light beam and transmit it to the roadway. In this case, you will also need to adjust the lighting angle or replace the lamps.
At the time of an accident, strong vibrations are transmitted to the body, which can not only disrupt the settings, but also damage the Grant hydraulic corrector. Also, after an accident, adjustment of the PTF may be required.
