- a series of short presses on the gas pedal will indicate one number;
there should be 6 digits, a long one between them;
Important: if you press the gas pedal for a long time before you start dialing the first digit, the old password is permanently deleted.
The main differences between a car alarm and an immobilizer are that the immobilizer performs its security functions independently - without unnecessary noise. The alarm notifies the entire area about the incident and awaits a final decision from its owner. Besides:
- car alarm has a large number of service capabilities;
- the alarm system can be hacked using anti-grabber scanning;
- car alarms have the ability to increase their potential with the help of additional modules;
- signaling is largely dependent on the amount and magnitude of radio interference;
- activation of the car alarm is not provided for by the technical specifications and becomes active when the car is armed;
- Satellite alarm options have online support.
And only the loss of stability of the encrypted communication equates a conventional car alarm with an immobilizer. In both cases, it is necessary to replace the batteries in the key fob or chip key. To summarize the above, it is necessary to confirm the effectiveness of the security functions of the immobilizer for the Lada Granta car. It does not in any way interfere with the installation of all types of alarms. Including remote start.
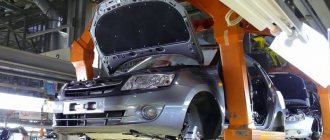
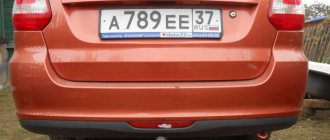
Two years ago I purchased a used 2014 Lada Granta. The car was equipped with front electric windows, electric power steering, body-colored bumpers and a driver's airbag. Over the course of these two years, I slowly made small improvements to increase driving comfort, which I will discuss in this article.
1) Installed the on-board computer “State X1”. Using the BC, I set the cooling fan to turn on at 98°C, so as not to overheat the engine in traffic jams.
2) Side mirrors from Granta Liftback. The original mirror broke along the folding part and hung on the adjustment cables; I temporarily secured it with self-tapping screws. Then I bought new mirrors from Granta Liftback, they fit like family. The visibility in the mirrors is good, and they also look good externally.
3) Installed new door closers and limiters. Now the doors are fixed in certain positions and there is a closer effect when closing the doors. To install such a door closer, you need to buy two additional nuts with 6 mm threads. It also has a drawback; it manifests itself when a door is opened near a neighboring car; the door itself can open to its extreme position. So passengers need to be warned to hold the doors when opening.
4) Fan windshield washer nozzles and windshield wiper relay with adjustable pause. To save washer, I installed fan nozzles, pressed once for a second and it’s enough to wash off the dirt from the glass. But in order for the glass to get wet, you need a pause before the wipers work. This pause is provided in the new windshield wiper relay, a pause of 0.5 seconds and the blades make 2 strokes. You can also adjust the intervals between single sweeps of the wipers up to 45 seconds in “intermittent mode.”
5) Electric headlight corrector. Since the standard hydraulic corrector was out of order, it was decided to install a modern electric headlight corrector. After installing the corrector, the headlights began to shine further. Using the electric corrector, you can adjust the headlights in 11 positions. Watch the video HERE for more details.
6) Sealing the rear lights. All owners of the Granta sedan know that the taillights fog up in winter and accumulate dirt in the summer. To avoid this problem, you need to seal the holes on the back of the lights. I sealed it with reinforced tape. This winter, the lanterns do not fog up and are clean inside.
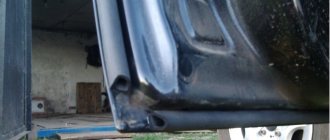
7) Rear gas-oil shock absorbers 2190-2915004-51 and springs from VAZ-2111. As you can see from the first photo of my article, the rear of the car looked sagging. I decided not to install spacers under the shock absorbers, but to make a stiffer rear suspension, since I often have to carry a lot of things in the trunk. I installed gas-oil shock absorbers and stiffer springs from the VAZ-2111. After installation, the rear part of the car rose, there was less swaying when driving, strong dives disappeared when braking, and when accelerating the car drove without sagging. I didn’t notice any downsides from the installation, only positive emotions.
We connect to the central locking in the driver's door according to the figure below.
We connect to the tachometer on the small connector of the electric power steering - brown/red wire.
In the left threshold we connect to the door and trunk limit switches, turns, and handbrake.
We connect to the hood terminal in the harness that goes under the hood behind the mounting block - white/black wire.
To block, you can use the fuel pump wire - the gray wire on the back of the mounting block.
To remotely unlock the trunk, connect the negative wire to the red/white wire on the trunk release connector.
basic information
Quite often, buyers decide to purchase cars from a domestic manufacturer. Naturally, this has its advantages, but there are also disadvantages. As a rule, domestic cars have a low cost and this is their main advantage. The presented fact even covers the fact that such a car will have less efficiency. So, the car that we will discuss today is precisely one of these budget cars. The most popular configuration of the Lada Granta car is the norm configuration. When choosing such a vehicle, the buyer naturally hopes that it is equipped with a standard alarm system, since, for example, the Lada Kalina is equipped with such an alarm system. But the Lada Granta is not equipped with an anti-theft system; the only thing the buyer can count on is an immobilizer. At a car dealership, the buyer will simply be given the keys to the car and wished a safe journey.
In this configuration, the alarm is triggered when the doors are opened, thus preventing unauthorized entry into the vehicle interior. When purchasing a luxury Lada Grant from a car dealership on credit, insurers will not require the installation of alarm systems. To activate the standard alarm, the vehicle owner will only need to drive up to the dealer. The standard alarm is considered part of the electronic system and is equipped with a remote control that is built into the ignition key.
But it is quite possible to install a more effective alarm system with auto start and two-way communication on a Lada Granta car. The engine auto-start function, which appears after the alarm installation has been completed, is especially convenient when used in the cold season, since in the cold the oil and engine need to be warmed up. The owners of such a system claim that it functions without any failures at a temperature of -35⁰C.
Installation of alarm system on Lada Granta
Two-way communication is also quite a useful thing, since there is absolutely no need to install a loud alarm, as well as an external signal, which can be easily turned off. If there is an attempt to break into the vehicle, the key fob on the ignition key will emit a fairly loud signal that will be heard throughout the apartment.
In addition to the electronic anti-theft system, it is also possible to install a mechanical alarm. Especially for the Lada Grant, a Garant lock was invented, installed on the steering shaft. The Garant lock is quite resistant to hacking, thanks to improved keys produced by Abloy.
How is the anti-theft system installed?
To install an anti-theft system we will need:
- Siren (for example, Alfa 12V);
- Alarm system (for example, StarLine B62);
- Connectors and limit switches for 3 doors;
- Universal electronic drive;
- The wire is of medium diameter and about 10 meters long.
Connecting an alarm system to Granta
Alarm establishment algorithm:
- Remove the instrument panel;
- Disconnect the battery;
- Place the main unit behind the instrument panel;
- Hook the main unit onto the air duct with plastic clamps;
- Connect the alarm to the door switches (red and green);
- Connect the signal outputs to the turn signals (blue and black);
- Remove the door trim;
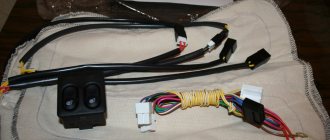
- Install an additional activator on the driver's door;
- Connect the connectors, and then put on the elastic band, leaving a loop of wire;
- Install limit switches at the bottom of the front pillars and rear fenders;
- Connect to the trailer for the trunk (to black and white);
- Replace the incandescent lamp for the luggage compartment illumination with an LED one;
- Connect the alarm power wire to the ignition switch;
- Pass the limit switch and siren wiring through the rubber of the engine shield;
- Attach the shock sensor with a clamp near the fuse box on a horizontal shelf. Attach a relay nearby to open the luggage compartment using the remote control. The relay must be connected in parallel to the standard trunk opening button;
- Remove the front glass pillar trim;
- Attach the antenna to the glass;
- Place the secret key in a random location.
Immobilizer and its location
An immobilizer is a standard car alarm system. Its purpose is to block the engine starting system if an attempt to start it is unauthorized.
The device blocks the main components that prevent the engine from starting.
Such a Lada alarm system will not be able to signal with a siren about illegal entry into the car, but it will block the engine, so the maximum that a potential thief can do is to “surround” the car’s interior (the author of the video is Ivan Sergeev).
Of course, in this case, the car owner may lose personal belongings, but you don’t have to worry about the safety of the vehicle.
The main immo block is located in a hard-to-reach place for obvious reasons, so that a hijacker cannot disable it. To get to the unit in your car, you need to partially disassemble the center console.
The unit itself is located behind the stove, and the immo control sensor is located in the ignition switch.
Characteristics of the standard alarm system Lada Granta
Writing about the Lada Grant's alarm system without saying a word about the other components of the car's security system would be completely wrong. The immobilizer does not live its own life - it is a reliable control body at the brain center (ECU) of the car. It is located in the central tunnel of the car near the driver’s right foot. Most often this is a model with the abbreviation APS-6. The components of the entire safety system of the Lada Granta are:
Failure of any of the components renders the entire security system inoperative. In this case, the movement of the Lada Granta car will be impossible.
Additional characteristics of the alarm system of this model are its functional capabilities from the comfortable series:
Functionally, the work of the activated Lada Grant immobilizer looks quite simple. The registered working key for the standard ignition switch is inserted into its hole. The chip built into the key generates an encrypted code on the turns of the transmitting and receiving antenna.
That, in turn, transmits the generated signal to the Lada Granta alarm system. The standard alarm compares the received signal with the signal registered in its memory. If they match, the car's ECU receives a signal to start the engine. Otherwise, the ignition and fuel supply systems are blocked.
Important: the ECU, immobilizer and registered chip key form a single security complex. It is not possible to replace any of them
However, when replacing a failed ECU with a new one, the latter stops responding to immobilizer commands and works independently. In this case, the security system no longer exists.
Reviews
| № | Positive |
| 1. | Victor: after purchasing the car, I immediately ordered the installation of an anti-theft device. The service recommended StarLine A93. Budget option, basic set of functions. It works properly, no complaints. |
| 2. | Kirill: I installed the alarm myself for the first time, everything worked out, it works. The process is not difficult, I advise you to try it. |
| 3. | Vladimir: I bought a security guard at a car store, the manager advised me to buy a budget assembly from StarLine A93. I've been using it for six months and it works well. |
| 4. | Vyacheslav: after buying the car I used the standard immobilizer. Two months ago I installed the StarLine A93 signaling system. The quality is good, the price is affordable, my recommendations. |
| 5. | Sergey: I installed a Pandora Deluxe 1870 security system on the car. Despite the budget price, the quality is quite decent. |
| Negative | |
| 1. | Kirill: I don’t recommend installing various types of budget alarms. Duration of operation is six months to a year, after which replacement and repair. It is better to choose more expensive models from American manufacturers. |
| 2. | Ivan: negative review about Pandora Deluxe. I installed it six months ago at a service center, but yesterday it broke down. I couldn’t get into the car, so I called a team of specialists. |
| 3. | Alexander: I don’t recommend anti-theft from StarLine. Budget model, service life only one year. I won’t install it again, I’ll buy it more expensive. |
Installing an alarm system on a Lada Granta Liftback with your own hands. Advice from the experts
To access the ignition switch connector, remove the steering shaft protective cover. To do this, first remove the plastic trim under the steering column (fastened with clips).
Remove the decorative trim (fastening with clips). Unscrew the two bolts and five self-tapping screws securing the steering shaft protective casing and remove it.
To access the wires of the LIN bus and the trunk limit switch, remove the driver's door threshold (fastened with five self-tapping screws).
We remove the Grant 2 instrument panel. To do this, you must first remove the decorative trim (fastening with three sockets), then unscrew the four fastening screws and remove the panel, disconnecting the connectors.
Finalization of the scheme
The installation or modification scheme will require special equipment to test the electrical circuit. The first place on the list of accessories is a tester and a soldering iron. You will also need a screwdriver, additional wires, electrical tape and a new sensor. When connected, the driver can use the button in the threshold or the door lock contacts.
To do this, you first need to open the sensor housing with a screwdriver and remove the element, remove the block with wires using a screwdriver. Then replace the wire and solder. Insulate the ends and assemble the structure in reverse order. The process is carried out in parallel so that the process involves elements that go to the working positions of the door.
The most common mistake
The most common error P0133 indicates the inability to fully accelerate
Please note that if the display shows error number P0133, we can conclude that the car has stopped accelerating well. This is due to the fact that the control oxygen sensor requires information about the concentration of the air-fuel mixture to be transmitted to the control unit
The sensor itself is located directly in the exhaust pipe, without touching the catalytic converter. The engine control unit is located behind the oxygen sensor when the closed-cycle operating time has passed. In addition, the composition of the air-fuel mixture itself is directly regulated by increasing or decreasing the pulses that occur when the injector opens.
Instrument cluster diagnostics
You can diagnose faults on your car. To do this, turn on the ignition while continuously pressing the Reset button. Next, the LCD is monitored and all segment positions are displayed on it. Now you need to activate the button closest to you on the control panel, after which the version of the firmware made should be displayed on the screen. Press any control button again. If there are errors in the Lada Granta, special digital symbols should be displayed on the first two lines of the screen, which, in turn, may indicate various malfunctions.
Presence of increased voltage in the on-board system. If within 20 seconds the on-board computer was unable to detect a malfunction in the Lada Granta, then three significant error signals may occur. The first in this case indicates an open circuit in the sensor responsible for reading the fuel level. The second reacts to an open circuit in the sensor circuit that responds to the coolant temperature. And the third detects errors when the outside temperature sensor circuit is broken, which is within minus levels.
Next come error signals that directly indicate that the engine has overheated, emergency oil pressure levels, a defect in the brake system, or a completely discharged battery.
Expert answer
Immobilizers APS-6, as well as APS-6.1 (Grant) do not turn off after activation. You can set an individual code to use later. First you set the code, then use it if you lose the key tag. There are no other options.
There is no secret sequence for disabling APS-6 (6.1). And if the code has not been set, then if the tags are damaged, starting the engine will not be possible.
First we set the code
- The ignition is turned on and off with the “red” (learning) key. The lamp flashes ;
- Within 6 seconds (the new option is 2 seconds), the “black key” is installed and the ignition is turned on. 3 beeps sound ;
- Two more signals sound, within 6 or 2 seconds the ignition is turned off, and the key is replaced with a training key. Turn on the ignition;
- Three signals will follow, then two more;
- Turn off the ignition and wait for a single signal. The lamp flash frequency will double ;
- Turn on the ignition. indicator should light up ;
- When the indicator goes off, go to step 8;
- Entering a number: first, short presses on the gas, then one long press. In total, you need to specify six digits (from 1 to 9);
- In the last step, when pressed for a long time, the Check indicator does not go off. Turn off the ignition - the entry is complete.
If in step 8 you immediately press the pedal for a long time (more than 5 seconds), the “old code” is erased and is no longer used. Be aware of this.
Training key - on the right
Engine starting
- Turn on the ignition without using the tag;
- Wait for the Check indicator to go out;
- Enter the code as discussed above (step 8).
Explanations: short press – no more than 3 seconds. And a long one - until the indicator goes out, although when you enter the 6th digit it does not go out. And if this is so, then everything was done correctly.
Diagnostics
To decipher the error codes that appear, it is necessary to diagnose the vehicle. The machine can be checked in several ways. We will talk about them further.
Diagnostics with a scanner
To check using a scanner, you need to connect the on-board computer “State X1” to the tester or laptop using a diagnostic cable. The scanner or laptop must be equipped with software designed specifically for diagnostics. In our article we will look at an example with the KWP_D program.
In addition to this utility, you will also need to find a specialized OBD-II adapter. It is necessary in order to transfer information from the bookmaker to the laptop via USB output. The diagnostic connector is located next to the gearbox selector, under the cover. You need to connect a scanner to it.
The Check lamp indicates possible breakdowns of the battery
When the program is installed, when you connect, you will see that a COM output with a specific number has appeared in the system. This number will need to be reassigned to any of the four - 1-4. When this is done, the laptop needs to be connected to the bk, then start the ignition and turn on the software.
As you know, any car engine has its own characteristics that determine its operation. If these characteristics differ from the standard ones, this means that there is something wrong with the engine.
The first point to pay attention to is the DTC characteristic. If malfunctions are detected in the BC system, then open the “Error codes” tab and find the number along with the decoding
Please note: everything will be fine with your Lada Granta if the measured characteristics do not differ from the standard ones by more than 20%.
Diagnostics without a scanner
Checking a car without a scanner is not a difficult task at all. The disadvantage of such diagnostics is that it does not always allow you to identify all errors in the operation of the car:
- On the instrument panel, press the button that resets the daily mileage. At the same time, turn the key and turn on the ignition, but do not start the engine. In this case, the instrument panel test mode starts, which will help determine whether all panel elements are functioning properly.
- Then press the button on the windshield wiper lever. Thus, the firmware version of the bookmaker “State X1” will first appear on the screen, and then you will see combinations of possible faults, if any.
Where is the ECU located on Grant?
The ECU has become an integral part of a modern car. The domestic Lada Granta model is equipped with such a device, labeled as “M74 CAN”. The module allows you to automate most processes occurring in nodes and systems. The control function of the ECU is achieved due to the presence in the units of various types of sensors that send signals to the “brain center” of the car.
Over the long period of operation of the Lada Grant, an annoying drawback of the ECU was identified - its insufficient sealing and sometimes the ECU pinout is required. Penetration of moisture inside the unit casing provokes burnout of the microcircuit, which subsequently ends in the need to replace the device.
The ECU is located at the bottom of the front panel (under the glove compartment) opposite the front passenger seat and is hidden from view by layers of sound-insulating material and upholstery on the inner surface of the bottom. Now you know where the ECU is located, all that remains is to find out other details.
Grant timing belt
What types of ECUs are available to Granta and what is the principle of their operation?
Sometimes the Lada Granta model is identified with an exclusive car. Why is she given such status? It's simple. "Lada" has a unique control unit, which is called "Itelma 11186-1411020-22" and cannot be combined with previous modifications of "VAZ". The primary difference of this module is the integrated “CAN bus”. Previously produced models used the “K-channel” to ensure the transmission of pulses. If you set out to experiment and replace the Itelma with a similar device with functionality in the K-channel, then in the end the devices on the panel will certainly “fall asleep”.
Where is the ECU located and what is its operating principle? It is based on a special type of algorithm, the formation of which occurs on the basis of software pre-integrated into memory. This allows the module to process signals from all sensors present in the ECM in real time.
The process associated with processing streaming information allows the control unit to subsequently carry out corrective actions regarding the functioning of such systems:
- nozzles;
- ignition system coils;
- throttle mechanism;
- sensor-regulator of idle modes, etc.
To be able to identify the type of device in a LADA Granta car and the firmware version of its software, a special marking code is applied to the body, which allows for the correct selection of an analogue if there is a need for replacement, and in some cases pinout of the ECU is required.
“Itelma 11186-1411020-222”: from stock firmware to chip tuning?
The dilemma associated with the rationality of performing firmware on the “native” software in the ECU excites the minds of many owners.
Here it is worth highlighting the optimized dynamic firmware version for the 1.6-liter 8-valve Lada Granta, which has the “M74” module and meets the toxicity standard according to “E2”.
What preferences does this firmware have? After performing a certain list of manipulations and returning the ECU to its rightful place, optimization of the parameters of fuel supply and ignition distribution is observed. Also, one of the purposes of the firmware is to ensure that the settings of the throttle assembly are adjusted.
Chip tuning allows you to physically disable the 2nd DC (“lambda”) in combination with the catalyst. The implementation of such firmware leads to an increase in the dynamic capabilities of LADA Granta.
The role of the stock firmware is to form the parameters characteristic of normal driving conditions. Let us remind you that the “native” version of the firmware is included in the warranty package. Self-correction of the firmware version without any alternative leads to the cancellation of warranty coverage.
Timing belt Lada Granta 8 valves https://vaz-lada-granta.com/dvigatel-korobka/zamena-remnya-grm-8-klapannoj.html
Today, so-called commercial versions of firmware software are available to the mass consumer, including the following:
- “AY_I484GG30”, the product is intended for the 1.6-liter 8-valve Granta modification with the present control module “M74 11186-1411020-22”;
- “I484GI06-STR”, software is offered for Grant with similar motors and blocks in version “11186-1411020-22”, plus compliance with the Euro-2 standard;
- “AY_484GP12”, the firmware is used with controller versions “M74 11186-1411020-22” and motors that comply with “E3/E2” regulations.
Tags: alarm, installation, grant
Comments 22
Tell me how to do autostart, I took the same whitefish, and I have chips in my family in 2 clubs. Immo. Grant standard
Well, there are 2 options. Either disable the immo or install an immobilizer bypass
I also did diagnostics using the tacho, but connected it to the wiring harness near the brains. If I'm not mistaken, it's a big feature. This is where the gray-black wire from the module comes, there is only one of this color there. Before connecting, I studied the grant scheme for a long time. Everything has been working well for 4 years. There is a blog entry.
I connected it according to your description with my modifications, autostart from the key fob on the Starline B9 does not work, can you help me? When it turns out normal, the engine handbrake works, I close it and it stalls. The SP on the key fob lets you start it, but it's all silence.
How did you do the engine control? what are the settings of the whitefish itself? what modifications did you make?
On the tachometer I connected a brown-red wire to the EUR
Whitefish original, or Chinese? I didn’t answer what settings. What modifications did you make?
China, modification of the relay for the trunk lock. Second table 1 minute turbo timer 20 minutes of operation after 5 hours at 10 degrees without turning on the security mode with the lights turned off with the locks turned on for 3.6 seconds according to the tachometer
Well, you can expect anything from China. Check if the limit switch is not working, all contacts. connection to the ignition switch. so difficult to determine from a distance
Everything works the same except starting from the key fob, the error occurs when the door is open.
Check the limit switches. Maybe the wire was mixed up when connecting
Red-green, I tear it up, the pointer in the panel goes out and the light goes out
I don’t remember what colors they are already. on whitefish, if my memory serves me correctly, there are two options for connecting doors. By plus and by weight. Check it out for yourself
Yes, I connected it to negative
Well then, go to an electrician. let him see what's wrong
Can you tell me where the central locks are caught?
There is no central locking on the standard; they installed the first whitefish in the salon and with it they installed activators on the doors. and clung to them
Let me add a little: the central locking function can be performed by a five-terminal actuator. If you need step-by-step door opening, we put it in the front passenger door, if not, in the driver’s door (for easy locking).
Well, now we will KNOW what security system is in THIS car))) A guide for car thieves...)))
It won’t work))) This car already has a completely different system, and this car already has a different owner)))
So that those who will bet for themselves. You could put it using my hint
Source
Dismantling Guide
It is necessary to remove the old alarm from the car when installing a new one. Removing the main car alarm unit may be necessary when updating the software or updating its settings so that it meets the security requirements of modern security systems. Sometimes it is necessary to dismantle parts of the anti-theft system for repair and replacement (video author - SpetsAvtoSystems).
Modern security systems reliably protect cars from theft and entry; they have an increased degree of protection against code reading and interception.
Tools and materials
It is difficult to dismantle the alarm system, since its elements are hidden as far as possible so that they are invisible. Many owners do not know where the car alarm is installed, so it is better to entrust the dismantling to specialists.
If you decide to dismantle the anti-theft system yourself, you will need a small set of tools:
In addition to tools, dismantling work will require patience.
Stages
Dismantling the anti-theft system consists of the following steps:
- First of all, you should turn off the power to the car by removing the negative terminal from the car battery.
- First you need to find the LED on the dashboard. A wire goes from it to the control unit. It is necessary to disconnect the connector with wires.
- Now you can disconnect the standard wiring from the electrical power system, and you also need to remove the immobilizer.
- The electrical circuit of the anti-theft system is connected to turn signals, side lights, hood, trunk, door switches, and engine blocking. When removing each element, it must be correctly disconnected from the car alarm.
- Next, you need to remove the shock and internal volume sensors, which are usually located under the handbrake lever.
- You should be very careful when disconnecting the contacts on the motor. Modern security alarms are equipped with locking mechanisms for the starter, fuel pump and ignition system.
- After disconnecting the contacts, you need to find and dismantle the Valet service button, as well as the siren, which is located in the engine compartment. After removing the fasteners, you need to remove the wiring coming from the interior.
- Now you can try to start the engine. If the alarm was correctly removed, the engine will start without problems.
If the anti-theft system is dismantled on your own, then the following consequences are possible if dismantling is incorrect:
- the integrity of the electrical wiring is compromised;
- malfunctions of electrical equipment;
- the decorative trim of the interior is damaged;
- engine starting is blocked for no reason;
- the removed element is damaged and can be reused;
- damage, the elimination of which can be costly.
Programming the duration of control pulses
Even if the alarm is connected correctly, it is not a fact that the owner will be able to control the locks from the key fob. The point is that it is necessary to correctly select the duration of the control pulse (for locking and for opening). There is no need to make it too large so as not to overheat the actuators.
Screenshot of Starline signaling instructions
See what exactly the manufacturer Starline offers. We can set the pulse duration to 0.7 s, which should be enough. The value “3.6” will be redundant at the same time.
The “Lux” package has the following property: after 15 minutes of inactivity, the electronics “fall asleep”. It may take an extra boost to wake her up. So, try to use the option that provides for a double pulse. The main thing is not to activate the “comfort” option, which uses a 30-second duration. To connect the signaling with “comfort”, you need to install an additional unit in Grants (AvtoVAZ does not produce it). We wish you success.
Connection points and alarm installation maps for Lada Granta
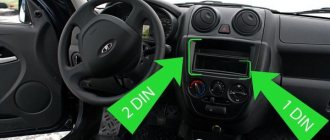
- Connection points for car alarms on Lada Granta, the cheapest equipment
- Photo report on connecting a car alarm to a Lada Granta Luxury package
- Photo report on installing a car alarm on Lada Granta 2011
- Car alarm connection points for Lada Granta 2012
- Car alarm connection points for Lada Granta 2022, equipped with one driver's limit switch
- Car alarm connection points for Lada Granta Liftback 2019, manual transmission with a new face, simple equipment
Connection points for car alarms on Lada Granta, the cheapest equipment
Ignition switch: +12 – brown ign1 – blue/black starter – red
Instrument panel: turns – blue and blue/black handbrake – brown/blue (diode breaks)
Driver's threshold: driver's limit switch - red/green, we connect the rest of the doors to it
Under the hood: Tahoe - white/black on the ignition module, the hood tip is in its normal place
Trunk limit switch – we install the connector on the trunk (the limit switch is already in the lock).
We install our own central locking.
Photo report on connecting a car alarm to a Lada Granta Luxury package
On the ignition switch: +12 - pink starter - red ignition - blue/black
We connect to the central locking in the driver's door according to the figure below.
We connect to the tachometer on the small connector of the electric power steering - brown/red wire.
In the left threshold we connect to the door and trunk limit switches, turns, and handbrake.
We connect to the hood terminal in the harness that goes under the hood behind the mounting block - white/black wire.
To block, you can use the fuel pump wire - the gray wire on the back of the mounting block.
To remotely unlock the trunk, connect the negative wire to the red/white wire on the trunk release connector.
Photo report on installing a car alarm on Lada Granta 2011
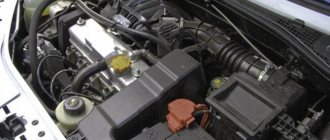
Photo 1. A mounting block is shown, which is very difficult to remove, since the power steering interferes with unscrewing the screw. But you won't need to do this for installation.
Photo 3. Ignition switch, traditionally VAZ.
Photo 4. Left threshold, in which we take: turns - blue and blue/black; handbrake - brown/blue; fuel pump - gray (there are two of them, don’t confuse them); driver's door - brown/green (and here's the ambush, there are no passenger limit switches and, what's more, having opened all the thresholds, I didn't even find the wiring for them).
Photo 5. The instrument panel, in which you can take the handbrake - brown/blue, and the driver's door, which is already red/green here. An alarm unit can be placed behind the shield; there is plenty of space.
Photo 6. The engine ECU is shown, it is located behind the glove box, from which (right connector) you can take the generator signal - brown / blue.
Photo 7. We attach it to the trunk end - white/black. We put a diode in the gap.
Photo 8. We install the “Eureka” limit switch in the engine compartment in its normal place.
Photo 9. A drive must be installed in the driver's door. The corrugation from the pillar to the door comes from Kalina, you need to disconnect the connector and drill a hole in both halves in the center with a 6mm drill and pull through the wires for the drive.
Car alarm connection points for Lada Granta 2012
Ignition switch: + 12V - pink IGN_1 - blue Start - red
Left threshold: Turns - blue and blue/black Fuel pump - gray Driver's limit switch - red/green Handbrake - brown/blue
Tidy: Driver's limit switch - red/green Handbrake - brown/blue
Central locking - install an electric drive in the driver's door, if there is no electric drive in the door Trunk - white/black; harness in the trunk (install a diode) Tachometer - brown/red; In the configuration, the standard can be taken on the electric power steering unit
If the car has painted bumpers (standard equipment), then there is no need to install an additional activator; we connect pins 2 and 7 on the door lock using a power circuit. The locks on the doors are Kalinovsky, the activator is built inside, but the wires are not routed.
There is only a driver's door switch. The rest need to be installed and connected to the driver's limit switch, i.e. to red/green in the threshold. The limit switches are the same as the engine compartment on the Priora. The limit switches will have to be taken with a connector and wiring.
Connecting the signaling to the central locking system
The alarm unit itself is equipped with two relays, which are designed specifically to connect them to the central locking system. One relay is a locking relay, the second is an opening relay. The contacts usually close for 0.8-1.2 seconds, which is enough to open or close the locks. The wiring of the signal connector is as follows:
In your case, the color designation may be different, but the essence is always the same - there will be 6 “important” wires.
Connection to Volkswagen central locker
So, you know where the control cord is located and where it is connected to the central lock control unit. The standard location is in the trunk where the compressor is installed, or under the rear seat, etc. The cord itself near the central locking control unit needs to be broken. Next, lay a cable (2 wires) running from the signaling unit to the break point. Each wire of the cable is connected to one of the halves of the cord, everything is simple.
Here is the signal connection diagram:
Please note the following:
- Wire “b” is connected to that half of the control cord that goes to the control unit;
- Wire “a” is connected to the other half of the control cord (you can’t mix it up!);
- Additionally, ground is connected to the relay contacts, as well as “+12 Volts”.
It is recommended to assemble an adapter that is connected directly to the signaling unit. Its circuit is shown above, and the adapter will have four outputs: ground, “+12 V”, “a”, “b”. That's all.
At the point of contact between the cord and the body, use a heat-resistant tube (can be replaced with green electrical tape), otherwise there will be a short circuit. In general, before installation, always disconnect the negative terminal of the battery. Before applying power, double check that the connections have been made correctly. The considered connection option has the following property: if no errors are made, damage to standard equipment cannot be caused.
Connection to the Siber central locker
As mentioned in the first chapter, Mazda and GAZ-GM use the following control principle:
- The “close” command corresponds to one value of resistance between the ground and the control cord;
- The “open” command corresponds to a different value of this resistance;
- When no commands are given, the cord is not connected to anything.
In order not to bore you with individual details, we immediately present the diagram (according to it, the signaling is connected to the central locking):
Note that the control cord does not break here. The wire coming from the alarm unit is simply connected to it
Compare this diagram with what was discussed in the previous chapter (there are also general tips there).
So, everyone has already understood that the “open” command corresponds to a resistance of “300 Ohms”. And blocking occurs when another resistor (1000 Ohm) is connected. Denominations may vary. For example, Mazda requires the following resistances to be included:
Problems when paying with bank cards
Sometimes difficulties may arise when paying with Visa/MasterCard bank cards. The most common of them:
- There is a restriction on the card for paying for online purchases
- A plastic card is not intended for making payments online.
- The plastic card is not activated for making payments online.
- There are not enough funds on the plastic card.
In order to solve these problems, you need to call or write to the technical support of the bank where you are served. Bank specialists will help you resolve them and make payments.
That's basically it. The entire process of paying for a book in PDF format on car repair on our website takes 1-2 minutes.
If you still have any questions, you can ask them using the feedback form, or write us an email at