Every motorist has encountered a problem when the engine is difficult to start or runs intermittently. This is all due to worn valves that require timely replacement. These devices cannot work indefinitely, so they need to be replaced from time to time. You need to purchase new ones in a specialized store.
How to properly replace valves on Lada Kalina
Many owners of the domestic Lada Kalina car are faced with the need to replace valves or pumps.
There are many reasons to do this, for example, the cylinder head gaskets have partially or completely burned out, or a breakdown has occurred due to the timing belt. In addition, the valve stem may become unusable or the plate may crack. It is also necessary to monitor the operation of the fuel filter. On machines with eight valves, replacement can be done without the help of a specialist, if, of course, you have some mechanical skills. So, in order to make the replacement, you will need the following tools:
- a very important device called a desiccant. With its help, crackers are removed;
- remover for caps, thanks to which oil is removed;
- key to “13” and knob.
After all the tools are prepared, we proceed directly to the task.
- The main cover is removed. After this you can see the camshaft.
- The gas distribution shaft is removed from the head.
- The pushers are dismantled.
- The desiccant device is fixed. Let us remind you that with its help “crackers” are removed from the valves.
All work must be carried out carefully and carefully, because if done incorrectly, the device can shoot out a “cracker”. In this case, it will be impossible to find it. After removal, you can begin to remove the spring with the plates. Note that they are dismantled very easily. Next you need to remove the valve. We recommend marking their location so that when assembling you do not make a mistake and put everything in its place. Use the points made with a punch as marks.
Car engine modernization
Tuning the Lada Kalina engine is carried out mainly by professional racers. And the Lada Kalina Sport model is more suitable for this. Although for the common man there is something to work on here. The term “modernization” would be more appropriate here. This refers to the installation of crankcase protection on the Lada Kalina. Not all trim levels will have such an option, and its importance is difficult to overestimate.
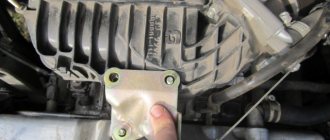
In addition, according to motorists, the factory engine protection is only decorative and can only protect against dust deposits. Therefore, all owners of Lada Kalina cars, regardless of the configuration, should install this element. You can buy engine protection for a price starting from 550 rubles, and you can install it yourself, in 15 minutes. It is worth noting that the sheet must be selected from 2 mm or thicker.
To install engine protection yourself, you will need: 8 and 10 sockets, a ratchet or wrench, and an extension cord. For ease of installation, it is better to drive the car into a pit or, in extreme cases, lift it from the front on two jacks. Holding the sheet with one hand, we begin to attach the bolts; we don’t need to screw them in all the way yet.
After all the bolts are installed, we tighten them. First, 4 bolts at the front with a size 8 wrench. Then the side bolts: 2 on the left and 3 on the right, including the attachment to the engine mudguard. Lastly, 2 rear ones, right and left, with a key of 10. That's all. Fast and easy. Three engine models are available for installation on the Lada Kalina.
The specifications, pros and cons of each have been discussed in detail, and all you have to do is choose the model that suits your needs and desires. A list of the main “chronic diseases” of each engine, as well as possible technical problems of each model, are presented in detail.
You should listen to advice on repairs and on preventing breakdowns of the power unit of your car. The approximate cost of a major overhaul will amount to a decent amount. The work you can do yourself is described above. All you have to do is make your choice, the correctness of which determines the performance of your car.
https://expertvaz.ru
Installing a new valve
Installation of a new valve occurs in the reverse order.
If an old valve is installed, it must be thoroughly cleaned. If it is new, just rub it in so that gasoline or air does not get out. Next we set the valve clearance. The process must be carried out on a cold engine with the valve covers removed. By the way, you can cool the engine with antifreeze. For dismantling you need:
- unscrew all fastening bolts;
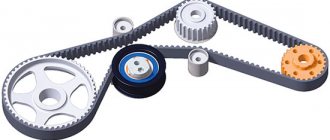
- then remove the cover that covers the timing belt. Note that it is not necessary to touch the alternator belt;
- Next, you need to remove all the candles for greater convenience. You can also completely remove the oil from the head. You can use any syringe for this. If the camshaft has worn cams, we recommend replacing it completely;
- a device is screwed into the place where the cover is attached, which recesses the valve;
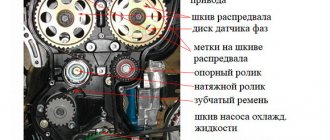
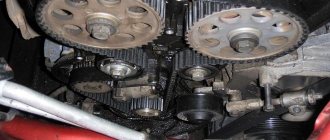
- then, using a special key, you need to turn the crankshaft until the marks on the pulley correspond to the marks on the belt cover;
- Finally, you still need to tighten it by 3 teeth. In this case, the piston reaches its dead center.
It is worth noting that an oil change is not required after this procedure. After this, it is recommended to check the valve clearances, as it may be necessary to change the washer somewhere. So, first you need to check the clearance on the first and then on the third cam. Check that the dipstick measures between 0.2 and 0.35 mm. If the stroke is large, you need to change the washer. All remaining elements are regulated according to this principle. If the valve was replaced correctly and using a special tool, then there will be no difficulties during operation. After the work done, the engine should run well. Note that after such work, the car owner can drive about 50,000 - 60,000 km without making adjustments.
Pros and cons of power units of different models of the family
Each Lada Kalina engine has its own immediate advantages and disadvantages. Positive aspects of model 11183:
- a time-tested engine (problems can be fixed at any car service center, spare parts are widely available);
- excellent traction, even when climbing uphill;
- A broken timing belt does not threaten the need to replace pistons and valves.
Negative aspects of model 11183:
- valve adjustment must be carried out with enviable regularity;
- the factory does not install air conditioners on this model;
- noise and vibration (hum, like from a diesel unit).
Motor with serial number 11194
Motor with serial number 11194. Pros:
- silent operation;
- the most economical gasoline consumption;
- there is no need to adjust valves, change oil and filters on schedule;
- good dynamics indicators.
Disadvantages of series 11194 motors:
- after 50,000 km the oil begins to be consumed;
- replacement of valves and pistons when the timing belt breaks (the piston system is quite scarce).
And finally, the last contender. Power unit number 21126. Advantages:
- silent operation;
- the best dynamics, the most powerful engine;
- There is no need to adjust the valves, only routine maintenance.
There is only one drawback: repair of valves and pistons in the event of a broken timing belt. Rarely is there continuity from the 11194 series in excessive oil consumption after 3-4 years of service.
Lada Kalina engine repair, valve grinding, cylinder head repair, pistons replacement
The mileage of the Lada Kalina car is 100 thousand km. in eight years. The car has an HBO. The viburnum engine has become less dynamic, the response is not the same.
And one more thing - I didn’t like the clattering noise in the viburnum engine.
Missing the third cylinder, trimming, Brains of HBO Alpha-S.
I decided to disassemble and evaluate the condition of the crank mechanism. We removed the cylinder head and pumped the pistons. It turns out they are very worn, but the rings are in good condition. So you need to repair the Lada Kalina engine
cylinder block 8 valve engine Lada Kalina 1118
Condition of the cylinder block between the first and second, as well as between the second and third cylinders
I immediately noticed a slight burnout (carbon deposits) on the cylinder head of the viburnum fret between the second and third combustion chambers of the cylinders. Most likely the cylinder head gasket is loose
cylinder head of 8 valve engine 1118
Piston sizes are different! .On one piston the inscription G-B2
.
As far as we know, this means group B
, and the “finger” marking is 2.
The connecting rods, bearings and valve guides were within normal limits. We bought a piston 2110 D=82mm E3 with rings and pins assembled. Group D was not found, so we took E. The fitting showed that everything fits perfectly.
What surprised me was the condition of the insides after using Lukoil oil 5w40 in winter and 10w40 in summer. I thought there would be a lot of soot and deposits, I expected to see a terrible picture. Alas, and for the better, my expectations were not met)))
The lid was also clean. The only thing was cleaning the mesh in the valve cover. But there she was a little under the weather. You could say it's clean
Let's compare gaskets: old factory ones and new ones from Prior. The holes match almost everywhere.
The only thing is that it is not clear why one cooling channel on each of the cylinders is plugged?
Tell me who is in the subject.
We lap the valves of the Lada Viburnum with a special tool and lapping paste. At night I put the head on its side and checked the tightness. Filled with kerosene. In the first cylinder, the intake valve allowed all the kerosene to pass through. Grind it in a little more and clean the entire head with carb cleaner. I ground the Kalina cylinder head manually on a large fine abrasive grinding wheel.
We assemble the piston frets of the viburnum. We arrived at the spare parts store and first weighed all the connecting rods with liners on electronic scales, then all the pistons with pins. Then we put together a connecting rod-piston-pin-liner set. I recorded the measurements on a piece of paper, but the notes were lost. The pistons fit perfectly.
Install the cylinder head gasket. Place the cylinder head on top and try to tighten it. I did not change the bolts; their length was within the normal range.
Technical Standards and Troubleshooting
All power units of the Lada Kalina are installed together with a 5-speed manual transmission. For the 8-valve Kalina engine, an oil change is provided after 15,000 km. The timing belt, according to technical documentation, should be replaced every 60,000 km. But in order not to run the risk of replacing the belt in the field, it is recommended to change it every 50,000 miles.
In general, chronic deficiencies do not need to be eliminated, but, as with any mechanism, breakdowns are inevitable. As practice shows, any part can fail. From the cylinder head to the offset of the liners. The 16-valve Kalina engine often has problems with the gearbox. Its technical capabilities reach zero after a mileage of about 100,000 km.
When passing the 25-30 thousand km mark, special attention should be paid to the clutch disc. More than 60% of owners replace it during this period. If your family budget allows it, then it is best to install an imported analogue. In 95% of cases, it will last much longer than its original VAZ.
If the Lada Kalina was purchased secondhand, then it is necessary to check the entire engine compartment. It is necessary to make sure that the compression is uniform in all cylinders in the Kalina engine. Otherwise, the protection of the power unit may be at risk. The steering rack should also be checked. This is Kalina’s weak point; such a “chronic disease” is inherent in cars produced before 2006.
One of the signals to seriously think about repairs (possibly overhaul) in the Kalina engine is the exponentially increasing oil consumption. This can happen either at 40 or 140 thousand km. More than half a liter of oil per 1000 km is a critical signal.
Be prepared that the cost of repairs may approach 20,000 rubles. The main elements that require replacement and repair may be: the piston camshaft (the clearance may already be critical), the cylinder block (boring will be required). Changing the engine oil yourself will help you save a lot of money. To do this you need to complete 6 steps.
- We warm up the engine to operating temperature, soot and sludge will be better washed out.
- We put the car on the handbrake and determine where the drain plug points.
- Drain the engine oil and replace the oil filter.
- Install a new filter.
- Pour in new oil and check the level.
- We make a test drive and check the level again.
The Lada Kalina engine is being assembled - the final part of the repair
Use a torque wrench to tighten the cylinder head bolts. The tightening torques are as follows: 1st step: 20.0 (2.0) 2nd step: 71.0–87.0 (7.1–8.7) 3rd step: tighten 90° 4- second method: turn it 90° again
They skipped the first appointment and started right away with the second. I borrowed a key from a good person, as well as a set of necessary tools.
Flushing the cooling system of the Viburnum fret
I removed the radiator. It has never been washed either outside or inside. Karcher is out of stock, so I cleaned it long and hard with water pressure and a brush. I blew it out with a compressor and at the same time picked out small pebbles from the radiator honeycomb.
The inside was also washed with water using citric acid. The stove was washed with running water without removal, on site with connection to the existing pipes in both directions.
Cooling radiator for Lada Kalina after 8 years of operation
There is a lot of dirt at the bottom of the expansion tank. I washed everything from the inside and wiped it with a cloth. It’s inconvenient, of course; an electrode was prescribed to help.
Later, when the engine was assembled, after a week of running-in, I finally bought a new expansion tank. The old one was quite torn apart and cracks appeared in the corners.
Comparison of the old expansion tank with the new one already installed on the car
Catalyst Lada Kalina. Condition after 8 years of use
There was an exhaust smell in the cabin while driving. This was probably the most annoying thing; even the clatter of the pistons seemed insignificant. Upon opening, the expectations were justified; the catalyst exhaust pipes from the 1st and 4th cylinders burst.
I bought an insert in advance to replace the 4-1 catalyst, because... the latter's condition was not known for certain.
On the catalyst outlet side, the condition of the honeycombs is good, there are no shed plates, let alone melts.
It was possible to take a snapshot of the state of the honeycomb at the catalyst inlet. True, I had to be more sophisticated and take a bunch of unsuccessful pictures. The most informative below
A look through a pipe - or the world inside out
I extended the oxygen sensor wire because... The standard length was not enough. The arrow indicates the previous location of the block. I lengthened the wiring by 2 times.
Improvements during the assembly process
The negative jumper from the battery to the body seemed thin. I re-soldered the terminals to a thicker wire and wrapped it with electrical tape and heat shrink.
The wire cross-section is about 16mm square.
We disassembled the tension roller, washed and lubricated it. There is no play.
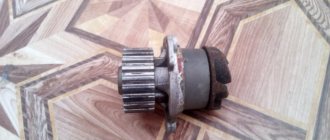
About the Lada Kalina pump. We installed a new pump on the KalinaTZA reinforced one. Later they replaced it with the old one in search of an incomprehensible whistle. The old one is still doing great. We left it that way for now.
We disassembled the tension roller of the generator belt, washed and lubricated it.
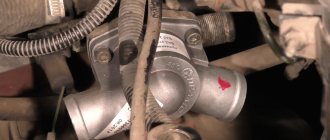
We replaced the thermostat to TZA 85 degrees. The thermostat has never been changed from the factory.
About installing insert 4-1 to replace the catalyst
Unscrewing the catalyst from the pipe turned out to be quite difficult, but quite doable. I read that bolts usually break off, so without worrying, I immediately sawed off one bolt with a grinder (here, of course, it got dull). You can't get to the other bolts with a grinder. I had to unscrew it. VD-shka to help and good keys.
Oddly enough, all the remaining nuts were unscrewed))) And I was amazed. They are still alive, let alone the gasket, which is all in ruins...
The bottom mount for insert 4-1 was missing, and on the old catalyst this mount is quite large. Whoever installed it knows.
As usually happens, I had to refine this bet with a file. You can't go anywhere without a Bulgarian wife.
Question: who attached it to the engine and how, in addition to standard bolts?
The readings from the factory mass air flow sensor were 1.016V according to diagnostics through the Opendiag program. I bought a new sensor and replaced it. Now the readings are about 0.970V. Consumption on the highway at constant speed in fifth gear at 80-90 km is about 5.5-6 l100 km
Result:
while the run-in is in progress. The clatter has disappeared. A strange whistling sound appeared, very similar to a belt rubbing.
I bought a crankshaft pulley, a key + a new timing belt, I will change it in the near future.
A characteristic roar appeared, audible after 2000 rpm. Conclusion: I will brew the catalyst and put it in place.
You will need to look at the condition of the muffler, which has also never been changed.
I purchased materials in advance:
TZA pump - reinforced (750 RUR) thermostat TZA 85 degrees - 450 RUR cylinder head gasket - metal, Priorovskaya (400 RUR) valve cover gasket - 50 RUR valve cover bushings - 40 RUR insert 4-1 to replace the catalyst with gasket - 1100 RUR exhaust gasket - 500 RUR rubber repair kit intake manifold - 80r. valve seals - were DMRV - 1950
Amount:
4700r.
later I bought more:
heater radiator hoses (2 pieces) — 250 RUR expansion tank — 110 RUR expansion tank plug (Euro part) — 30 RUR piston 2110 D=82mm E3 with rings and pins — 2100 RUR Lukoil oil 10w40 5 liters — 650 RUR antifreeze Felix G12 10 l — 700 RUR
Amount:
3840 RUR
Nitrous oxide is the first step to tuning the Lada Viburnum
Today, the use of nitrous oxide systems to instantly increase engine power is the only
Removing and disassembling the cylinder head
We remove the cylinder head to replace its gasket, valves, their guide bushings, repair the head, and also when completely disassembling the engine. The cylinder head can be removed assembled with the receiver, intake pipe, fuel rail and catalytic collector or by first dismantling these components. We show the removal of the cylinder head assembly with the above components. We carry out the work on an overpass or inspection ditch. Remove the engine screen. Relieve the fuel pressure in the power system (see “Replacing the fuel filter”). Disconnect the wire terminal from the negative terminal of the battery. Disconnect the fuel supply hose from the fuel rail tube (see “Checking the injectors, removing the fuel rail and injectors”). Drain the coolant from the engine (see “Checking the level and replacing the coolant”). Remove the air filter (see “Removing the air filter”). Remove the vacuum brake booster hose from the receiver pipe (see “Removing the receiver”). We disconnect the tips of the high-voltage wires from the spark plugs (see “Checking the condition and replacing the spark plugs”).
Price issue
Changing the head gasket yourself will be quite inexpensive, since its cost ranges from 220 (for 8-valve engines) to 550 rubles (for 16-valve engines). In addition to it, you will need a gasket between the exhaust pipe and the catalyst, which costs no more than 100 rubles, and 10 new head bolts, costing 40–50 rubles each. Often the manifold gasket is damaged, which in this case must be replaced. A new part costs about 750 rubles. The total cost of spare parts will not exceed 1,500 rubles. It must be remembered that when disassembling and troubleshooting the engine, other parts may appear that need to be replaced.
Performing such work at a service station depends on the territorial location and ranges from 4 thousand rubles in small cities (Tula, Bryansk) and up to 10 thousand rubles in large cities (Moscow, St. Petersburg).
Replacing Kalina valve stem seals
Tool:
- Driver for socket attachment
- Knob attachment 10 mm
- Knob attachment 17 mm
- Medium flat screwdriver
- Large hammer
- Mandrel according to the diameter of the camshaft oil seal
- Candle key
- Device for desiccation of valves
- Forceps
- High attachment for knob 12
- Soft metal mandrel
Parts and consumables:
- Engine oil
- Valve stem seals
1. We install the crankshaft to the TDC position of the pistons of the 1st and 4th cylinders, as described here. In this position of the shaft, we change the oil seals of the valves of the 1st and 4th cylinders. Remove the camshaft as described here. We remove the pusher with the adjusting washer from the cylinder head socket.
2. We unscrew the spark plug of the 1st cylinder and through the spark plug hole insert a soft metal rod (about 8 mm in diameter) between the piston bottom and the valve plate, on which we change the cap.
3. We install the valve strip on the cylinder head studs and fasten it with nuts to the outer studs.
4. We install the valve depressurizer. We rest the heel of the desiccant against the valve plate, and insert the hook lever into the groove located on the back side of the bar.
5. We press the desiccant lever and compress the springs.
6. Then remove the crackers with tweezers.
7. We take out the plate with springs.
8. Using special pliers (or a device for removing caps), remove the oil deflector cap from the valve guide.
9. Remove the cap from the tongs.
Note:
We carry out the operation of dismantling the oil seal carefully so as not to damage the fragile valve guide sleeve.
10. Apply a thin layer of engine oil to the working edge of the new cap and install the cap on the valve stem.
11. Using a mandrel, press the cap onto the valve guide. As a mandrel, you can use a high “12” head. We assemble the valve mechanism in the reverse order. Remove the rod from the spark plug hole.
12. After assembling the valve mechanism, we apply a light blow to the end of the valve with a hammer through a soft metal mandrel so that the crackers are securely fixed in the grooves of the valve stem.
13. Lubricate the valve pusher and adjusting washer with engine oil and install it into the cylinder head socket.
Why adjustment is needed
A properly performed operation depends on:
- excellent operation of the gas distribution system;
- finding the gaps within normal limits;
- engine operation (it is much quieter and much easier to start, and the camshaft sensor, which controls the entire operation of the car, will show the good condition of the mechanisms);
- reduction of fuel consumption;
- better performance of the pusher and camshaft;
- no carbon deposits (the combustion chamber will remain virtually clean).
Lada Kalina valve adjustment is usually carried out after the car has traveled more than 20 thousand km. There is no point in delaying this, because when gaps appear in the valves, the settings made at the factory are violated, the cylinders are left without a sufficient amount of fuel, and if the gas is incompletely burned, it is released prematurely.
We can safely say that if the valve malfunctions, the entire operation of the car is disrupted. And if the valves burn out, the cylinder head will suffer.
Those who purchased a car like the Lada Kalina 2 know that valve adjustment after a certain mileage is necessary.
This type of machine comes with several types of engines. The first model is 8-valve, with a displacement of 1.6 liters. Valves need to be adjusted periodically. Time passed, and a car appeared with a smaller volume - 1.4 liters, but with 16 valves. Virtually no valve adjustment is required.
But the designers did not think to rest on this; as a result of their creativity, a new Kalina car engine appeared with 8 valves and a volume of 1.6 liters, but with a lightweight piston system. The most prestigious Lada Kalina 2 is a 16-valve model with a volume of 1.6 liters. Adjustment is very rarely needed, but the valves can become bent if the belt breaks.
