Locks and handles of VAZ front doors. Catalog of spare parts with prices Priora 2170 (Priora)
You should first check all door gaps (bottom, top and sides). Most often, doors are difficult to open due to incorrect geometry, for example, the upper part of the rear door of the car fits too tightly to the body and drain. To adjust this gap:
- Lower the window completely.
- Close the door with one click.
- Pull the top of the door slightly towards you by the edge.
If there is a need to adjust the bottom of the door , then you will have to:
- Open the door.
- Close the doors by striking the bottom of the door with your palm.
To make the process more clear, we recommend watching a video that shows the process of fitting Renault doors at the Russian plant:
As a result, all gaps between the doors and the body must be equal, and the doors themselves must not protrude or fall into the body. The front doors are adjusted in the same way.
Attention!
When adjusting the door this way, do not use force, otherwise the door may be damaged!
Adjusting and replacing the lock on 2107
First, you need to identify the reason for the poor functioning of the lock. In some cases, the problem is sagging hinges. Because of this, the door sag and, accordingly, the lock does not coincide with the latch. You can check this by measuring the gaps between the door and the body. This figure can range from 3 to 7 millimeters. It is important that it is completely uniform. If the indicator is different, then you need to adjust the position of the loop. In some cases, this may save you from further manipulations with the lock.
The lock is adjusted in the following order:
- The position of the latch is outlined directly on the car. To do this, you can use a marker;
- If the door closes with just 1 click or just closes tightly. You need to unscrew the lock and move it to the sides of the outer part of the body;
- The door closes, but the gap remains, you need to loosen the latch, and then move it inside the body.
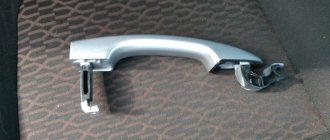
Sometimes, drivers experience problems opening the car from the inside. This occurs due to the door handle being misaligned. To fix it, you need to unscrew the screws securing the handle, move it to the optimal position and secure it.
Replacing a lock is also not a difficult task. This option is used when other methods no longer help. Installation of the new mechanism is carried out in the following order:
- First, remove the armrest, window regulator, dismantle the trim;
- Unscrew the button that turns off the lock. The manufacturer recommends using a slotted screwdriver to disconnect the switch rod from the locking mechanism, but in practice you can do without it;
- From the end of the door, unscrew two screws securing the groove;
- Remove the tongue from the groove, while the gutter moves away, this happens together with the seal;
- Unscrew the 2 screws securing the inner handle. It must be pushed inside the door;
- Unscrew 3 screws securing the locking mechanism to the door;
- All that remains is to remove the lock from the door. This is done together with the rod and the internal handle.
Reassembly should not be difficult for you. The hardest part is installing the inside handle. It should be installed together with the lock and rod. The difficulty lies in inserting the handle into the groove intended for it. Don't forget to lubricate the mechanism when installing it. This will extend its service life.
Adjusting doors on Priora
ADJUSTING DOORS ON PRIOR. The doors on the Priora are the same as on the VAZ 2110-12. The new Prioras have a fairly hard door seal (not crushed), so in most cases the doors on the Priora close tightly, poorly and not the first time. For example, on a two or three year old Priora, the doors close much easier due to a dented seal, since the seal, with frequent opening and closing of the door, becomes dented over time and the door closes much easier than on a new car. Try this option, you bought a new Priora, close all the doors and windows in the car and try to close, slam, for example, the right rear door or the left one, it doesn’t matter if the door closes with difficulty or does not close the first time, and now open any door or lower the glass any door, slam, the door will close or slam easier, since the air that captures the door when closing enters the interior of the car, with the doors tightly closed, the flow of forced air has nowhere to go (plus the new seal), and the door seems to be thrown back, as if it had nothing to do with it it prevents it from closing. The Priora, like imported cars, has a system for the exhaust of air forced when the door is slammed, these holes - “curtains” are located in the area of the rear bumper on the left and right sides. Often with strong bass, if the subwoofer is playing, you can hear the sound of slaps under the boom these "curtains".
Lada Priora trunk malfunctions
After a well-spent weekend, the happy owner of the Priora finally returns home. Behind are kilometers of kilometers wound on wheels. Wonderful nature and leisure. True, on the way back I was somewhat irritated by a strange noise in the trunk area. But when it started to rain, it became less audible. The trip was a success. Now just take the equipment out of the trunk and into the house. But what is it? Everything that was lying there was very wet! How could this happen? And there’s something wrong with the lid itself. Where is the problem? We need to figure it out.
Major breakdowns and inconsistencies in the Priora trunk
Technically, these faults only appear due to three main reasons:
- Mechanical damage to the trunk lid (door).
- Body corrosion.
- Wear of the Priora trunk lid seal.
We need to make a reservation right away. The first two reasons are not worth considering closely in this topic. These jobs are the responsibility of bodywork specialists and require not only special skills, but also many special tools and equipment, not to mention materials. Therefore, you should only contact them if corrosion or damage is detected.
Important! Repairing a faulty Priora body is a very specific and difficult job! You should not try to fix the problem yourself without the necessary experience. A separate issue is the problematic opening of the trunk.
There are two possible problems here:
A separate issue is the problematic opening of the trunk. There are two possibilities here:
- Poor adjustment or worn hinges.
- The lock is broken or the trunk lock is misaligned.
This malfunction (loops) can already be eliminated independently. Therefore, the issue will be briefly considered.
Priora trunk arrangement
The compartment at the back of the car is called the trunk. in the Priora with a sedan body, it is isolated from the passenger compartment. at the same time, on station wagon and hatchback bodies, the trunk is combined with the interior space.
however, this part, in the mentioned body models, is called not a lid, but a “door”. this is due to the fact that both the station wagon and the hatchback have a glazed window in this “door”. otherwise, all these cars have a similar device. this system includes:
- directly “door” (trunk lid).
- locking device.
- fastening loops.
- reclining springs (shock absorbers for station wagon and hatchback)
- wiring.
- electric lock activator.
- seal.
on a new car, all the parts fit perfectly, and therefore there are no questions about them. but over time, those same suspicious noises appear, and there is moisture on things left in the trunk.
Important! The trunk opening system is controlled electrically. there is a lot of wiring
therefore, the appearance of moisture in this place threatens the appearance of short circuits.
wear or misadjustment of hinges
This malfunction causes precisely the appearance of unpleasant sounds. the trunk rattles. It is the tight connection of the trunk surface to the Priora body that makes it possible to avoid rattling while driving. because at this moment, willy-nilly, the vibration intensifies. and accordingly, if the loops are weak, “beating” begins.
Determining the malfunction: open the lid and simply shake it on its hinges. the play will be immediately noticeable.
elimination: as a rule, in this case, faulty “prior” loops are simply replaced. the cover (door) is removed with hinges, and new ones are installed.
trunk lock and drive
With this malfunction, the luggage compartment usually does not close. but in the case of an electric activator it does not open. that is, if the mechanical part of the device is faulty, then when you try to close the compartment, the lid does not lock. and if the fault is in the electrical component, then when you press the activation button, automatic opening does not occur.
Well, there’s only one piece of advice. The easiest way is to go to the service center. or read a separate article - Priora trunk lock.
water in the trunk of a Priora
And here is the main question of the article. So, all the objects in the compartment are wet. What to do? First of all, carefully inspect the seal along the cut of the body. Its flaws will be noticeable upon simple inspection. These are breakthroughs or critical abrasions. You can also pour water on the closed compartment. And check to see if there are any fresh stains at the damage site.
We adjust the doors on the Lada Priora ourselves. Adjusting the doors on the Prior
Adjusting door locks on Priora, 2107, 2110 and 2112. Universal method »
Adjusting door locks on Priora, 2107, 2110 and 2112. Universal method
Quite often, drivers wonder how door locks are adjusted on Priora, 2107, 2110 and 2112. This is a fairly common job. The bodies of domestic cars have never been of particular quality. The problem arises due to misalignment of parts; wear of the elements of the lock itself can also affect it; this is usually observed on fairly old cars. In any case, adjustments will need to be made. Otherwise, the door will either open while moving or not close at all. This will, at a minimum, cause you inconvenience, and at a maximum, it may turn out to be unsafe.
Adjusting door locks on Priora, 2107, 2110 and 2112 does not require special skills. Even a beginner can handle this job. Such repairs do not require a large number of tools. Everything you need can be found in any garage.
Adjusting and replacing the lock on 2107
First, you need to identify the reason for the poor functioning of the lock. In some cases, the problem is sagging hinges. Because of this, the door sag and, accordingly, the lock does not coincide with the latch. You can check this by measuring the gaps between the door and the body. This figure can range from 3 to 7 millimeters. It is important that it is completely uniform. If the indicator is different, then you need to adjust the position of the loop. In some cases, this may save you from further manipulations with the lock.
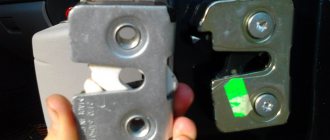
The lock is adjusted in the following order:
- The position of the latch is outlined directly on the car. To do this, you can use a marker;
- If the door closes with just 1 click or just closes tightly. You need to unscrew the lock and move it to the sides of the outer part of the body;
- The door closes, but the gap remains, you need to loosen the latch, and then move it inside the body.
We adjust the doors on the Lada Priora ourselves
By releasing it onto the market, both the manufacturer and the buyer felt the hope that a worthy representative among domestic passenger cars would finally appear, which would look no worse than foreign cars. Once again the dream was not destined to come true. This time the doors failed. If you want to prevent rumbling sounds from emanating from your car when driving, you will have to adjust the doors and locks.
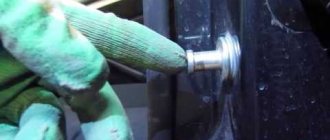
Adjusting the locks and replacing the door trim will help eliminate existing defects, so we remove both. To prevent the locks from rattling and the car to align with the Renault Duster, those locks made of metal levers must be pulled on top with rubber tubes of suitable diameter. This is from the inside, and the external handles will have to be replaced with reliable European ones. Two small modifications will immediately eliminate extraneous howling sounds, and the doors will open and close with a slight click. The locks themselves need to be adjusted. If the door closes with force, then the screws on the lock clamps need to be loosened and the clamp slightly moved inward. In the case when, when closing, there is a feeling that the door is lifting, move the latch in the opposite direction.
practical guide
The right and left front doors of the car are similar in design. The work is shown on the front left door. All right front door equipment is removed and installed in the same way. When removing the upholstery, there is a high probability of damage to the holders. Therefore, we recommend purchasing spare holders (8 pcs.) in advance.
We remove the limiter to replace it, as well as when repairing the door (straightening, painting).
To avoid damaging the door, do not swing it open after removing the door stop.
1. Remove the door trim and remove the plastic film.
2. Using light hammer blows through a drift, knock out the axial pin of the limiter rod upwards.
3. Using a 10 mm socket wrench, unscrew the two bolts securing the door opening limiter.
4. Remove the stopper from the door.
Installation
We install the door opening limiter in the reverse order and lubricate it with grease.
We remove the glass when repairing the door (straightening, painting).
1. Disconnect the door glass bracket from the window regulator. We lower the glass all the way.
2. Remove the lower edge of the upper glass seal from the door frame.
To remove the glass, the top seal does not need to be removed.
3. Through the hole in the door panel, use a slotted screwdriver to move the lower edge of the inner glass seal (disengaging it)
and remove the inner seal from the door.
4. Similarly, remove the lower outer glass seal.
5. Remove the glass from the door from the outside of the frame.
To remove the upper glass seal from the door, use a socket wrench to unscrew the bolt securing the glass guide.
We remove the seal from the door along with the guide.
Install the glass in the reverse order.
We remove the window regulator to replace it, as well as when repairing the door (straightening, painting).
1. Remove the door trim and remove the plastic film.
2. Remove the switch from the upholstery and connect it to the wiring harness block. Turning on the ignition, lower the door glass to a level that allows you to unscrew the two bolts securing the glass bracket to the window lifter guide.
3. Disconnect the power window motor gear block from the door wiring harness block.
4. Using a 10 mm socket wrench, unscrew the two bolts securing the glass bracket to the window lifter guide.
5. Move the glass all the way up by hand and fix it in the upper position with masking tape or wooden wedges inserted between the seal and the glass.
6. Using a 10 mm deep socket wrench, unscrew the three nuts securing the window lift drive.
7. Lower the glass along the guides and remove the upper pin of the window lifter guide from the hole in the door panel. Raise the glass and remove the window regulator from the door.
Install the window regulator in reverse order.
We remove the lock to replace it, as well as when repairing the door (straightening, painting).
The door lock consists of an internal and external part. If the outer part is faulty, it can be replaced without removing the door trim.
1. Remove the door trim and remove the plastic film.
2. Disconnect the wiring block of the lock gear motor from the wiring harness block
3. Remove the gear motor wires from the clamp.
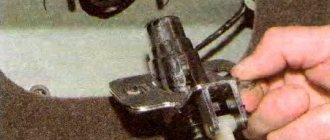
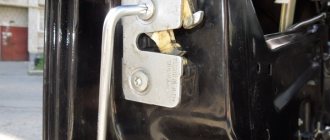
4. Using a slotted screwdriver, disconnect the plastic ends of the switch rods (cylinders) of lock 1 and the outer handle of lock 2 from the lock levers.
5. Using a TORX T40 key, unscrew the two screws securing the lock.
6. Remove the outer part of the lock.
VAZ 2109: adjusting the doors yourself
VAZ 2109 door adjustment - this procedure is sometimes very important and the motorist must be able to handle this matter independently. On a VAZ 2109, door adjustment is often necessary after the car gets into an accident, as a result of which the factory settings are shifted. It also happens that the owner decides to replace a door damaged during an accident, but the new one will not fit into place without gaps and distortions. In this case, proper door adjustment will help fix everything.
How to properly replace door hinges.
The repairs made, of course, depend on the cause of the sagging and the condition of the hinges. If the driver's door is sagging due to worn-out hinges, then you can replace the axle (if the hinges themselves are in good condition), but it is still safer to replace the entire set, since the entire structure is subject to wear.
To replace door hinges you need to do the following:
After the replacement has been made, it is very important to make adjustments following the algorithm:
After all the manipulations done, the car door should open and close without difficulty with a characteristic bang. The tightness of the bolts should be checked regularly. All locking mechanisms and hinges must be lubricated periodically.
To ensure the durability of your car door hinges, do not do the following:
Forget about fines from cameras! An absolutely legal new product - Traffic Police Camera Jammer, hides your license plates from the cameras that are installed in all cities. More details at the link.
Do-it-yourself modification of the VAZ 2110 door lock
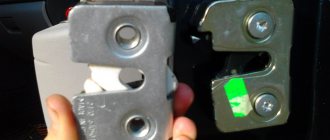
The basic VAZ door lock, in principle, is a fairly reliable system, but there may be prerequisites for its replacement. In this case, it is better to replace it with a silent door lock.
At the same time, for most drivers, updating the silent locks of the VAZ 2110 is a matter of principle, because they strive to make the lock not just quiet, but almost inaudible. But first things first.
Door lock mechanism
When to change the lock
So, the need to replace the standard factory lock with a modified one arises in the following cases:
- If you suspect that someone tried to steal your car. As a rule, inexperienced car thieves can only damage the lock, as evidenced by the following signs: • The front door lock began to dangle, which was not the case before; • The key turns with difficulty, naturally, the doors are not easy to open; • There is visually noticeable damage in the lock area and/or near it; • You cannot open the front door at all with your own key;
Door and trunk cylinders
Lock mechanism design
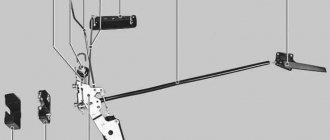
The door lock on the VAZ 2110 has the following device:
- The outer part that everyone sees from the outside of the door;
- Internal part (larva);
- Lever arm;
- Locking rods, as well as their tips;
- Retaining bracket;
- A latch with which the lock is adjusted;
- Handles - external and internal;
- Fastening screws.
Lock mechanism design
Removal
Replacing, adjusting or repairing a lock involves removing it, for which you should perform the following actions:
- Remove the upholstery from the front door where the lock is located;
- Disconnect from the lock lever: • External handle rod; • Lock cylinder rod;
- Disconnect the rod, remove the inner handle;
- Remove the outer lock by unscrewing the two screws securing it;
- Remove the internal lock along with two rods - the internal handle and the lock;
- After removing the plastic holder from the locking rod, it must be disconnected from the lever;
- After removing the locking bracket, disconnect the outer handle rod from the lever;
- If your repair involves replacing the rod end, then when unscrewing it, be sure to count, remember or write down the number of revolutions you made. You need to tighten the new ones by the same number of turns, since these tips are used to adjust the length of the rods;
- When installing a new lock, all work should be done in reverse order.
Installation details
Very often, even the so-called silent locks (which are usually installed instead of old, noisy ones) are further modified.
There are several methods, but it is important to install a gasket between the body and the mechanism, since there remains a gap that affects the penetration of air, dust, and also the volume of sound.
If it suddenly turns out that after installation the door does not latch, you can solve the problem in several ways:
- Strengthening the lower springs (better suited for an old, noisy mechanism);
- Installing a cube of foam rubber in place of the bullet spring;
- By installing one large spring from below.
A pattern that is the norm
The figure-of-eight design of locks is the norm in domestic car manufacturers. Priora was no exception to this rule and received figure-eight locks from the assembly line. What exactly is the pattern?
The pattern appears at the time of purchase of the above-mentioned silent locks, which also have a figure-eight design. The only difference is the smaller thread diameter of the bolts in the mating part of the mechanism.
All Ptimash bolts have a silicone seal, the color range of which cannot be predicted
It is worth paying attention to the fact that their color can be either transparent, which is the most popular, or any other. Thus, it is not realistic to match the color of your fingers to the color of the car, but the final high-quality result more than covers this shortcoming
