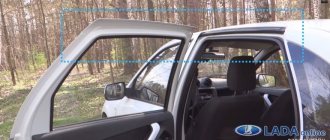
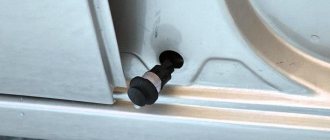
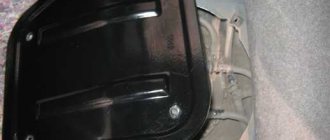
We carry out the work when replacing the lock, its cylinder mechanism and the outer door handle. Remove the front door trim (see “Removing the front door trim”).
Use a slotted screwdriver to disconnect the rod from the cylinder mechanism of the lock.
Use a slotted screwdriver to pry up the mounting bracket for the cylinder lock mechanism...
...and remove the bracket.
We take out the cylinder lock mechanism along with the rubber sealing ring. Disconnect the lock rod from the outside door handle.
Using a 10mm socket, unscrew the two nuts securing the outer door handle...
...and remove the handle.
Using a slotted screwdriver, unfasten the clamp securing the wiring harness of the electric locking drive.
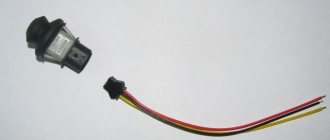
By pressing the latch... ...we disconnect the wiring harness blocks of the electric locking drive.
Using a Phillips screwdriver, unscrew the three screws securing the base of the inner handle...
We remove the internal lock of the front door with rods and an electric drive for locking the lock through the technological opening of the internal door panel.
Front door lock with electric locking, external and internal door handles
Use a slotted screwdriver to disconnect the rod end of the outer handle from the lock lever.
In the same way we disconnect the rod of the cylinder mechanism of the lock.
Using a slotted screwdriver, we open the spring bracket that secures the rod of the inner handle...
...and remove the bracket. There is a spring washer under the bracket; remove it, and then the rod.
Using a slotted screwdriver, press out the plastic locking rod lock of the lock button, turning the lock around its axis.
Removing the interior lock, lock cylinder and outer front door handle
We carry out the work when replacing the lock, its cylinder mechanism and the outer door handle.
Remove the front door trim (see “Removing the front door trim”). Use a slotted screwdriver to disconnect the rod from the cylinder mechanism of the lock.
Use a slotted screwdriver to pry up the mounting bracket for the cylinder lock mechanism...
...and remove the bracket.
We take out the cylinder lock mechanism along with the rubber sealing ring. Disconnect the lock rod from the outside door handle.
Using a 10mm socket, unscrew the two nuts securing the outer door handle...
...and remove the handle.
Using a slotted screwdriver, unfasten the clamp securing the wiring harness of the electric locking drive.
By pressing the latch... ...we disconnect the wiring harness blocks of the electric locking drive.
Using a Phillips screwdriver, unscrew the three screws securing the base of the inner handle...
...and the screw for securing the internal lock. We remove the external lock (see “Removing the external door lock”).
We remove the internal lock of the front door with rods and an electric drive for locking the lock through the technological opening of the internal door panel.
Front door lock with electric locking, external and internal door handles
Use a slotted screwdriver to disconnect the rod end of the outer handle from the lock lever.
In the same way we disconnect the rod of the cylinder mechanism of the lock.
Using a slotted screwdriver, we open the spring bracket that secures the rod of the inner handle...
...and remove the bracket. There is a spring washer under the bracket; remove it, and then the rod.
Using a slotted screwdriver, press out the plastic locking rod lock of the lock button, turning the lock around its axis.
In the same way we remove the locking electric drive rod.
Using a Phillips screwdriver, unscrew the two self-tapping screws securing the electric drive to the lock bracket and remove the electric drive.
We remove the rod from the hole in the electric drive rod of the lock.
Front door internal lock mechanism
We install the internal door lock, the lock cylinder mechanism and the external door handle in the reverse order.
Before installing the door trim, we check the functionality of the door lock mechanism. If the outer door handle or lock cylinder mechanism does not work correctly, the length of the rod should be adjusted by rotating the plastic tip of the rod.
Source: wiki.zr.ru
Removing and installing the front door lock of Lada Priora, VAZ 2170, VAZ 2171, VAZ 2172
Lock, drive rods and front door handles of the Lada Priora: 1 – lock switch rod; 2 – lock switch; 3 – lock button rod; 4 – rod of the outer handle; 5 – external handle; 6 – pull of the internal handle; 7 – internal handle; 8 – internal lock; 9 – external lock; 10 – external lock escutcheon
The lock, its drive rods and the front door handle. You will need flat and Phillips blade screwdrivers.
1. Disconnect the wire from the negative terminal of the battery.
2. Remove the front door trim of the Lada Priora (see “Removing and installing the front door trim of the Lada Priora”).
3. Squeeze the pad retainer...
4. ...and disconnect the wiring harness block of the door lock gearmotor.
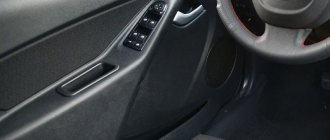
5. Remove the three screws securing the interior door handle of the Lada Priora.
6. Use a screwdriver to pry and disconnect the rod of the outer door handle from the lock.
7. Use a screwdriver to pry and disconnect the rod from the lock switch.
8. Remove the external lock escutcheon.
9. Using a Phillips screwdriver, remove the two screws securing the external lock...
10. ...and remove the external lock.
11. Remove the screw securing the internal lock of the VAZ 2170 Priora.
12. Remove the internal lock of the Lada Priora along with the internal door handle and rods.
13. Remove the plastic holder from the lock lock rod and disconnect it from the lever.
14. Remove the locking bracket and disconnect the inner handle rod from the lever.
15. The length of the rods is adjusted by unscrewing or wrapping the plastic tips. When replacing the rod end, unscrew it from the rod, counting the number of turns. Screw in the new tip the same number of turns, this will maintain the required length of pull.
16. Remove the locking bracket of the VAZ 2171 lock switch.
17. Remove the lock switch from the Lada Priora door.
18. Install the lock in the reverse order of removal, having first lubricated all rubbing parts with grease.
Prior door lock mechanism
We carry out the work when replacing the lock, its cylinder mechanism and the outer door handle. Remove the front door trim (see “Removing the front door trim”).
Use a slotted screwdriver to disconnect the rod from the cylinder mechanism of the lock.
Use a slotted screwdriver to pry up the mounting bracket for the cylinder lock mechanism...
...and remove the bracket.
We take out the cylinder lock mechanism along with the rubber sealing ring. Disconnect the lock rod from the outside door handle.
Using a 10mm socket, unscrew the two nuts securing the outer door handle...
...and remove the handle.
Using a slotted screwdriver, unfasten the clamp securing the wiring harness of the electric locking drive.
By pressing the latch... ...we disconnect the wiring harness blocks of the electric locking drive.
Using a Phillips screwdriver, unscrew the three screws securing the base of the inner handle...
...and the screw for securing the internal lock. We remove the external lock (see “Removing the external door lock”).
We remove the internal lock of the front door with rods and an electric drive for locking the lock through the technological opening of the internal door panel.
Front door lock with electric locking, external and internal door handles
Use a slotted screwdriver to disconnect the rod end of the outer handle from the lock lever.
In the same way we disconnect the rod of the cylinder mechanism of the lock.
Using a slotted screwdriver, we open the spring bracket that secures the rod of the inner handle...
...and remove the bracket. There is a spring washer under the bracket; remove it, and then the rod.
Using a slotted screwdriver, press out the plastic locking rod lock of the lock button, turning the lock around its axis.
In the same way we remove the locking electric drive rod.
Using a Phillips screwdriver, unscrew the two self-tapping screws securing the electric drive to the lock bracket and remove the electric drive.
We remove the rod from the hole in the electric drive rod of the lock.
Front door internal lock mechanism
We install the internal door lock, the lock cylinder mechanism and the external door handle in the reverse order.
Source: zinref.ru
Removing and installing the front door lock
You will need flat and Phillips blade screwdrivers.
Rice. 1. Lock, drive rods and front door handles
1. Disconnect the wire from the negative terminal of the battery.
2. Remove the front door trim.
3. Squeeze the pad retainer
4. Disconnect the door lock gear motor wiring harness connector.
5. Remove the three screws securing the interior door handle.
6. Use a screwdriver to pry and disconnect the rod of the outer door handle from the lock.
7. Use a screwdriver to pry and disconnect the rod from the lock switch.
8. Remove the external lock escutcheon.
9. Using a Phillips screwdriver, remove the two screws securing the external lock.
10. Remove the outer lock.
11. Remove the screw securing the internal lock.
12. Remove the interior lock along with the interior door handle and rods.
13. Remove the plastic holder from the lock lock rod and disconnect it from the lever.
14. Remove the locking bracket and disconnect the inner handle rod from the lever.
15. The length of the rods is adjusted by unscrewing or wrapping the plastic tips.
When replacing the rod end, unscrew it from the rod, counting the number of turns.
Screw in the new tip the same number of turns, this will maintain the required length of pull.
16. Remove the lock switch retaining bracket
17. Remove the lock switch from the door.
18. Install the lock in the reverse order of removal, having first lubricated all rubbing parts with grease.
Silent locks on Priora
Installation of silent locks on Priora is carried out in order to maximize the comfortable use of this car. The dull sound when closing the door is much more pleasant than the ringing sound that reverberates throughout the entire interior of the car, and also gives the feeling of a high-quality and well-made car.
The main cause of unpleasant clanging is the lock shackle penetrating the thread. Silent locks on Priora have a similar principle of operation, but are made of noise-reducing materials.
As for good production? It is worth noting that Priora, already at the time of sale, has locks with plastic inserts and silicone bolts located in the mating part, but with all this, the door slam is exclusively metallic in nature.
The installation of new silent locks should always be carried out in conjunction with the replacement or initial installation of a vertical door seal, which, in turn, reduces the noise level when closing the door, and also increases the overall level of sound insulation of the car.
Lock
The lock is designed to lock a car door; it is made according to a special design that ensures reliable engagement of the door with the car body.
When your car's door starts to close or open poorly, you should pay attention to the door lock.
Replacing this part is not a complicated process that even a person with no experience in car repairs can handle.
Its cost ranges from 100 to 200 rubles, depending on the type. There are several varieties of native and non-standard locks.
The original Priorov castles are “silent”, i.e. The lock tongue is covered with a plastic edging to ensure quieter closing of the door.
Non-standard locks have softer plastic, which ensures an even softer and more pleasant closing of the door. For example, Ptimash brand locks are quite high quality and inexpensive, and are a very good alternative to the original ones.
Silent castle "Ptimash"
A pattern that is the norm
The figure-of-eight design of locks is the norm in domestic car manufacturers. Priora was no exception to this rule and received figure-eight locks from the assembly line. What exactly is the pattern?
The pattern appears at the time of purchase of the above-mentioned silent locks, which also have a figure-eight design. The only difference is the smaller thread diameter of the bolts in the mating part of the mechanism.
All Ptimash bolts have a silicone seal, the color range of which cannot be predicted. It is worth paying attention to the fact that their color can be either transparent, which is the most popular, or any other. Thus, it is not realistic to match the color of your fingers to the color of the car, but the final high-quality result more than covers this shortcoming.
Pre-installation preparation of silent locks
The installation of external silent locks is carried out for a long operational period, during which they will be exposed to various natural phenomena: the sun; rain; dust, etc. In order to extend the operating period, as well as “smooth out” the process of operating the Priora, the locks are silent; all mechanisms must be treated with lock lubricant, for example Liqui Moly. Some of these mechanisms include:
• internal lock mechanisms; • children's castle; • door handle mechanisms; • loops; • limiters.
How to make silent locks on a Priora: manual installation of new silent locks on a Priora
You can use a pin during installation. Its use will allow you to hold the internal lock, the “failure” of which will require removing the door trim, and also significantly speed up the installation process.
The installation of the locks themselves occurs in several stages. In the first stage, the lock is threaded with the top part (hole) through the above-mentioned pin, resulting in the inner lock in place, and the lower bolt of the silent lock is already connected to the inner lock.
The inner and outer lock are fixed, meaning there is no need for further use of a pin. All that remains is to tighten the top part of the lock. Guided by these instructions, the locks are installed on the remaining three doors, and no additional questions should arise regarding how to make silent locks on the Priora.
After installing each of the locks, it is necessary to check their operation without taking into account the installation of the silent bolt. If excessive force is applied when opening/closing the door, the new lock requires adjustment. The lock is adjusted using the counter part of the silent lock mechanism.
Upon completion of the adjustment, if any, it is necessary to screw in the silent bolts from the set “Silent locks Ptimash 4 pcs. with anthers."
At this point, the installation process is almost complete, and all that remains is to put plastic covers on each of the locks. The result of the work carried out to replace standard Priora locks, although silent, with original silent Ptimash locks will not be long in coming. The ringing of doors completely disappears, and the opening/closing mechanism works like on a foreign car.
A more worthy result can only be obtained in conjunction with additional door noise, as well as the replacement/installation of vertical seals. Today, the price of silent locks on Priora allows you to replace them almost immediately after purchasing the car.
Replacement
The replacement process will take you no more than 10 minutes; the most difficult thing will be to unscrew the bolts securing the lock to the door. There is no need to adjust the lock after replacement, since the adjustment is made only on the hinge, and during operation the hinge will not unscrew and, therefore, will not change its position.
Tool
The only tool you need is a ratchet (driver) with a TORX T40 bit or a T40 wrench.
Step-by-step instruction
- Using a T40 socket wrench or a key, loosen the two bolts securing the lock to the door.
Attention: Under no circumstances unscrew both bolts at the same time; if you unscrew two bolts at once, the inner part of the lock (drive) will fall into the door and then you will have to remove the door trim to get it out.
- Unscrew one bolt and remove it
- Then unscrew the second bolt, but not all the way, pull the lock towards you and turn it to the side, or use a pin as shown in the picture.
- We screw the previously unscrewed bolt into an empty space and then unscrew the bolt securing the lock. This will prevent the lock drive from falling into the door.
We install the new lock in the reverse order, avoiding unscrewing both bolts at the same time.
How to make silent locks on Lada Priora
Not all owners of domestic cars like the unpleasant, loud clicking sound made by their locks when locked. Therefore, they often wonder: how to eliminate this annoying defect?
In this article we will tell you in detail how to make silent locks on a Priora with your own hands to ensure maximum comfort. The main reason for the clanging lies in the locking shackle, which is adjacent to the metal of the case. Silent mechanisms are assembled from elements made of polymers that do not vibrate.
It should be noted that Priora already leaves the assembly line with locks that use the main components with plastic inserts and bolts with silicone seals. However, despite all this, closing the door is still accompanied by a loud metallic click.
It is important to remember that installing or modifying a locking device is always accompanied by replacing the door seal with a better one. This allows you to simultaneously enhance the sound insulation of the cabin.
The rattling of the door and his painful search...
The problem of rattling in the driver's door has been bothering me almost since the moment I bought the car. Everything is according to the classics, at first the rattling was weak, then stronger and stronger. Eventually it started rattling even on a perfectly smooth road.
At first it seemed like the door card was rattling because it kept coming off the clips. You hit it with your fist, it sits down, then on the first bump it moves away again.
Then it seemed as if the glass was rattling. I tried to press it with my elbow and the sound actually became quieter. I noticed that even when lowering the glass, there was also less rattling. But over the past two weeks, the sound has become stronger and lowering the window no longer helps. In short, I was fed up with the fact that a woodpecker was pecking at my left ear, so I decided to sort this out.
After looking at the drive, I decided that I needed to glue another 10mm seal inside the standard seal. I degreased it and glued it in. The glass began to sit tighter, but the rattling, motherfucking leg, continued. By the way, I decided that later I would glue this seal into all the doors.
I decided to knock on the door card, when I knock on it, I hear this rattling sound, when I knock on the right card, nothing like that is observed.
Next I removed the door card. Well, when I took it off, it fell into my hands as soon as I unscrewed the screws. She kept her word of honor.
After knocking on the bare metal, I no longer heard this sound. What a bitch. I look at the card, everything is fine with it, it doesn’t make any sounds.
I decided to take a ride on the dirt road. I rolled around like this for about 20 minutes, feeling everything that was in the door. Result: the main rattling noise comes from the door stop. I decided that I would not invent a bicycle and would simply replace it, especially since the price was only 150 rubles. I removed the stop by knocking out the cotter pin (I had to tinker a little).
Also, while I was riding, I found a few more places where sounds could be coming from. I took an old Shumka, tore off pieces and stuck them in these places, having previously degreased them.
Then I went to the auto parts store. And my surprise, this damn sound didn’t disappear, but only became stronger. It turns out that the main rattle came from another part of the stop, which is in the door.
I stopped, unscrewed it and oh, a miracle. Perfect silence. I ran into the store, took new clips, a new door stop, and placed it all right next to the store. I’m driving, and the sound is still there, but it’s 2 times quieter. He stopped and began to look. It turned out that the bolts that hold the stop to the rack were unscrewed and the mount itself was moving slightly.
After tightening all these bolts there was absolute silence. I started putting the door card back together, replacing the clips with Kalinovskie ones for 5 rubles apiece.
The door fit like a glove. Now it doesn't come off the clips. I performed the same procedure with the rear right door, plus changing the lock actuator, because... the old one just died. The price of the actuator is 350 rubles.
I also bought a special lubricant for the hinges and a sealant. I sprayed all the hinges with a cloth until rust stopped flowing from them, then I poured lubricant into them, similarly with the locks.
As a result of the entire procedure, all sounds from the door almost disappeared. But sometimes you can still hear this rattling noise when driving over large bumps. I don't know what to do with this.
Source
Where to get a silent lock
These devices suitable for Priora are easy to purchase:
- in specialized online stores;
- at the car market;
- at specialized retail outlets.
Which ones are better to buy? To reduce the hassle of installation, we advise you to look for original locks made specifically for this model produced by the Volzhsky Automobile Plant.
How much do locking devices cost? In particular, a set of four mechanisms equipped with anthers will currently cost only 750 rubles.
This option is made quite well and is free from the main drawback - clanging.
What you should know
Domestic cars mainly have locks of the so-called figure-eight design. Actually, Priora is no exception. The above-mentioned products have one distinctive feature - in the mating part of the device, the diameter of the screws is smaller than on the original mechanism.
Each bolt is provided with a silicone gasket. Unfortunately, it is impossible to choose their color, since the manufacturer did not provide such an option. As practice shows, the most popular option is transparent seals. However, this is an insignificant problem that only pathological perfectionists will not be able to come to terms with.
Do purchased locks need to be modified? As a rule, no. But some car enthusiasts replace the springs in the mechanism because they believe that the original ones are not tight enough. In addition, the bolt is often equipped with an additional noise-absorbing pad made from a heat-shrinkable tube of suitable diameter. However, many admit that such an improvement is not particularly effective.
Preparing for installation
It is worth understanding that a lock is a mechanism designed to perform basic functions for a long time without fail and reliably protect the car from unauthorized entry. In addition, the specific nature of the placement makes it quite vulnerable to a number of negative factors. This means:
- high humidity;
- heat;
- freezing;
- dust, etc.
Therefore, before inserting the lock into the door, it must be thoroughly lubricated with a special compound. Along the way, it’s also worth processing:
- door handles;
- limiters;
- loops;
- internal constipation.
Lock installation
To install a new locking mechanism, you will need to remove the trim from the car door. This will take a lot of time, but it will be possible to carry out a preventive inspection of other systems located in it.
In addition, you can use a knitting needle or a hairpin of sufficient length if you don’t want to bother with the sheathing. Then the inner part of the mechanism, put on it, will not fall inward when the outer one is dismantled.
The new element is installed in place. To do this, it is strung on a stud and secured with a bolt from below. Then the knitting needle is lifted and the upper fastener is screwed in. The rest of the locking devices on other doors are installed in the same way.
As you can understand, this procedure is not at all complicated - almost any car enthusiast with minimal skills can handle it.
If necessary, upon completion of installation, adjust the mechanism. The last thing required is to replace the protective plastic housing.
Repair of the driver's door interior handle. There is an exit!
Suddenly, Priora began to throw useful content onto the Drive2 pages.
The inside handle of the driver's door is broken. It would seem like a trifle, but getting out of the car seemed like a whole quest. In order to get out, you had to open the glass and reach for the outside handle. I am not as flexible as Alina Kabaeva (although lately I think that she herself has already lost her plasticity) to perform this procedure several times a day, so the decision was made to repair the handle. I took the card off the door.
Unscrewed the inner handle. I saw the hero of the occasion.
Since the path to the lock mechanism is open, I decided to completely dismantle it and clean it of dirt.
Prepared a brush, container, and cleaner. I began to actively remove a layer of dirt from the mechanism.
While working, I saw that one rod fell. Picked it up. I started to put it in place and realized that the retaining ring was missing.
Unpleasant. I definitely don’t have a second stopper like this. I started climbing on my knees, carefully studying every centimeter of the ground, presumably where the stopper could fall.
This is fisco! After grieving a little, I remembered the folk remedy magnet. The most powerful magnet, of course, is the magnet from the speaker. Somewhere I had Magnat Classic 216 (the first speakers that came with the car). I walked along a given square with a speaker magnet. Miracle. Among the smallest pieces of metal on the magnet I found my retaining ring.
We continue to work. Lubricate the lock mechanism with grease. I put it in place and began studying ways to restore the traction mechanism.
Scotch tape and glue are not our option. That's why the idea came. Through trial and error, the central part was removed from the electrical wire clamp.
I selected a bolt of the required diameter and realized that the best option would be to install a nut for fixation. No sooner said than done. To prevent the screw (M4 thread) from dangling in the hole in the door handle lever, I placed a piece of silicone tube of suitable diameter. I thought there was a thread on the rod pin itself. I was wrong! It turned out to be not a carving. I had to cut it.
When assembling, I put heat shrink on the rod. I smeared it with lithol. Screw on the nut to secure it.
I thought a little and screwed on another one to stop the first nut.
Source
Other nuances
Knowledgeable people answer the question “Which are the best locks to take?” They answer that the quality of the purchased ones is not much better than the original ones, and they advise installing mechanisms from the Gazelle. True, here you will need to sharpen your tongue a little. But reviews indicate that the result in this case is simply wonderful.
To modify your original castle, you will need:
- install a foam rubber gasket between its mechanism and the door;
- cover the drive pin that opens the lock with heat-shrinkable tubing;
- fill the voids on the back of the mechanism - any sealant will do;
- the lower edge of the door is equipped with a seal (ideal option - RKI-19).
How to replace a door lock cylinder on a Lada Priora
The doors on the Lada Priora have a similar design as in the VAZ family of models 2110, 2111, 2112. The new Priora have a fairly hard (not crushed) door seal. Consequently, the doors in the Lada Priora generally close quite tightly, and also poorly and often have to be slammed several times. For example, on a 2- or 3-year-old car, the doors close much easier due to a dented seal, since the latter gets crushed after a while during frequent opening/closing, and, accordingly, the door slams much easier than on a new car.
Note. The well-known Vaseline is a good remedy for lock freezing in winter. It is worth using it as a lubricant, and your door will open freely with the key.
You can try the following option. You have purchased a new Lada Priora car. Close the windows and doors in it, then you need to close, for example, the rear right or left door (it doesn’t matter whether the door slams tightly or does not close the first time). Next, you need to open any door or lower the auto glass on the door (any) and you can slam it. The door should close much easier, since the air that enters the door during closing penetrates into the interior of the car. With the doors tightly locked, the flow of forced air cannot escape anywhere (in addition, a new seal). So, the door seems to be thrown back, as if something is preventing it from closing. Meanwhile, the Lada Priora, as well as foreign cars, has an air exhaust system. The latter catches up when the door is closed.
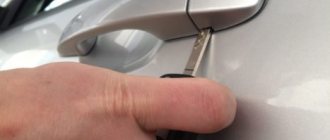
Sometimes the lock cylinder gets damaged, and then you have to replace it. On the Lada Priora, the larvae are changed in rare cases, since the majority of car owners almost never resort to closing the door mechanically. Mostly Prior owners use a standard key fob that locks and/or unlocks the door lock. However, situations cannot be ruled out when the key fob does not work, the driver has lost it, etc. In such a case, the owner of a Lada Priora is forced to use the cylinder in the door. If this part fails, to replace it you will need:
- pliers or long-nose pliers;
- a screwdriver with a flat blade;
- own new cylinder and keys.
Doors don't open well
Priora inherited the same locks on the doors, which were installed on two-wheelers and tens (which cannot be said about Kalina, where the door locking system was thought out). Of my four doors, only one could be opened without effort, and the trunk also did not want to remain open, trying to crush its owner. Therefore, after waiting for warm spring days, it’s time to change something. I forgot to tell you about one more thing, maybe someone has come across it. When you open the driver's door, the central locking is activated and all doors lock spontaneously, and if you forget to slam the driver's door and leave the key in the ignition, you will have to go get a second set. It was very difficult for me to remove the casing; this is not the first time I have performed this procedure. Once again I want to note that the door trim is not comparable to previous VAZ models, everything is clear and thought out, the clips do not break, everything is done by a carpenter. Although the AvtoVAZ team added a bit of ointment, for which, when removing a simple trim, you need to stock up on a trox star wrench, which you need to unscrew two screws. What prevented me from installing the screw under the Phillips head screwdriver. So, friends, stock up on a set of such keys; Priora now has such fasteners everywhere.
The main signs of a broken lock
- The key does not want to be inserted into the lock or is inserted with force.
- The key is inserted into the lock, but does not turn or turns with difficulty.
- The key turns to the right and left, but the Priora does not react in any way, therefore, closing and opening does not occur.
Any car owner must understand: failure of the central locking system or a dead battery is considered quite normal, especially in winter. It is precisely in such circumstances that you should resort to a mechanical lock provided by the manufacturer.


