You have a Priora, you are driving, but the car pulls to the right, it’s a mess, go out and look at the tread of the wheels, and they are worn on the sides - that’s it, you need to do a wheel alignment. The rubber is eaten up, and this could have been avoided if the angles were adjusted in time. Adjusting the angles of the front wheels on the Lada Priora, often called wheel alignment, is a regular procedure necessary for every car after repairing the suspension, or falling into a hole. You can do it yourself in the garage or at a service station. The cost of working on a wheel alignment for a Priora car is not high, from 600 rubles. You should not neglect the procedure, because incorrect toe angles affect the suspension and tires, and then later you will have to pay more than just for the adjustment. This procedure is easy to do on many machines yourself. This article will tell you how to do a wheel alignment on a Priora VAZ-2170 with your own hands, accurately and quickly. Angle settings. What tools are needed to carry out the procedure.
The alignment looks like this:
Three options for constructing the longitudinal axis of a car
There are three different methods to choose from that can be used to create a “baseline” line when calculating individual wheel alignment angles:
- The longitudinal axis can be taken as a horizontal line that passes through the axis of symmetry of the body. It can be easily constructed by marking their midpoints on the front and rear bumpers.
- The second option is the longitudinal axis of the chassis. This line is lined up along points that are located at the centers of the distances between the wheel hubs.
- Quite often, the trust line is used as the longitudinal axis. It is laid strictly in the direction of movement of the rear axle of the car. This vector does not always coincide with the longitudinal lines built along the body or chassis, as in previous versions. A similar phenomenon is typical for cars in which the rear axle is turned slightly to the side. At the same time, the car drives sideways, which is often observed on old Zhiguli, Gazelles, etc.
Longitudinal axis and trust line on a car.
The angle between the “trast line” and the central longitudinal axis of the machine should ideally tend to zero. But in some cases, rear suspension defects cannot always be eliminated. Therefore, when diagnosing alignment and camber, measurements are taken based specifically on the “trast line”.
How and what to measure
Caster angle cannot be measured. Decreasing it leads to the inability to take a turn at speed, and increasing it leads to a “heavier” steering wheel. Usually 2-3 degrees is considered a “sporty” option. This is what we need to build on.
To measure toe and camber angles, it is enough to place a thread and a weight. Zero camber corresponds to the fact that the values of A and B are equal (Fig. 52).
Measuring with a thread
“Zero toe” is also easy to check: measure distance B (Fig. 51), knowing that the track of the front and rear wheels differs by 30 mm. The rear wheel is “recessed” inward compared to the front.
To accurately measure the toe angle, you will need equipment: a sliding ruler or a chain with a dynamometer. Only one thing is used.
Measuring the toe angle
The “measuring device” itself is brought in front and behind, then the obtained values are compared. For zero degrees, the two digits should not be different.
The car must be placed on a surface whose inclination angle is zero! In practice, to take measurements, plates are placed under the wheels. The steering wheel must be turned to the “0 degrees” position - this is also important.
Camber angles
The stability of the car and the contact area of the tire tread with the road depend on the camber setting. This angle is adjusted by turning the upper bolt securing the shock absorber strut to the steering knuckle. The angle change is ensured by an eccentric belt and a washer of the adjusting bolt.
The optimal angles of the front wheels, calculated during the development of the suspension, ensuring the correct behavior of the car, are indicated by the manufacturer in the vehicle documentation. For Lada Priora, the camber value should be 0±30'; with normal suspension settings, the wheels are vertical, parallel to each other.
Other wheel parameters
In addition to toe-in, there are two more important parameters - caster and camber, all together they position the wheel in three mutually perpendicular planes.
What is camber
Camber characterizes the degree of deviation of the wheel from the vertical in a straight-line driving position and can be positive (the tops of the wheels outward of the body) or negative (the tops of the wheels inward).
What is caster
The wheels turn right and left around an imaginary line passing through the shock absorber axis and the center of the steering knuckle ball joint. Which can be set vertically or offset, forming an angle to the surface of the road surface. The conventional point on the bottom of the tread around which the rotation is made can:
- coincide with the fulcrum of the wheel;
- to be ahead of her;
- be behind.
Caster when adjusting wheels
The angle formed by the conventional axis of rotation of the wheel and the normal to the road surface is called caster. This adjustment is used to maintain a given direction of travel. The change in camber angle when turning is also the merit of the caster.
Priora - wheel alignment: correct angle settings
You have a Priora, you are driving, but the car pulls to the right, it’s a mess, go out and look at the tread of the wheels, and they are worn on the sides - that’s it, you need to do a wheel alignment. The rubber is eaten up, and this could have been avoided if the angles were adjusted in time. Adjusting the angles of the front wheels on the Lada Priora, often called wheel alignment, is a regular procedure necessary for every car after repairing the suspension, or falling into a hole. You can do it yourself in the garage or at a service station. The cost of working on a wheel alignment for a Priora car is not high, from 600 rubles. You should not neglect the procedure, because incorrect toe angles affect the suspension and tires, and then later you will have to pay more than just for the adjustment. This procedure is easy to do on many machines yourself. This article will tell you how to do a wheel alignment on a Priora VAZ-2170 with your own hands, accurately and quickly. Angle settings. What tools are needed to carry out the procedure.
First maintenance of Lada Vesta
What kind of work does the first maintenance for the Lada Vesta sedan consist of? This includes replacing the oil, air and cabin filters, changing the engine oil, checking the condition of the brake pads, as well as diagnosing the engine control unit using a special scanner. At the official service station of the Lada brand in Kazakhstan, German synthetic oil Rowe 5W40 was poured into the Lada Vesta of automotive journalists. It was chosen because it is officially supplied to the car showrooms of this dealer network in Kazakhstan. The Lada Vesta engine control unit was checked for errors using a special scanner, which had an interface similar to the Windows 8 operating system. This equipment is certified for the Lada Vesta model car. According to specialists from the official Lada service station in Kazakhstan, this device costs about 300,000 rubles. Fortunately, this device did not show errors in the Lada Vesta engine control unit.
How to adjust your wheel alignment yourself
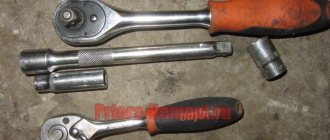
In most cases, wheel alignment is adjusted on special stands with computer calculation of these angles. However, it is possible to perform a wheel alignment in a garage, but to do this you will need to know how to perform the installation correctly, as well as have the equipment to perform this procedure. To adjust the angles you will need:
- A set of keys;
- Special measuring ruler;
- Chalk;
- Cord with weight;
- Ruler (regular):
Wheel camber adjustment
When adjusting wheel alignment with your own hands, the first thing to do is measure the camber of the wheels. Although this angle is measured in degrees, it can be converted into a millimeter value. The sequence of actions for calculating camber is as follows:
- The car is placed on a flat surface. It is advisable to carry out the test in a garage with an inspection hole. In this case, there must be space to move the car, which will be needed during measurements.
- After installing the car on the site, you need to align the wheels so that they “look” straight. After aligning the wheels, you need to put small marks on the wheel with chalk. Marks are placed at the top and bottom of the wheel.
- Next, take a cord with a weight. It must be attached to the fender of the car so that the cord has a strictly parallel position relative to the applied marks. For convenience, the cord can be glued to the wing with tape.
- A regular ruler with millimeter divisions measures the distance from the wheel to the cord at the top and bottom. To avoid error, this distance is measured not from the tire, but from the wheel rim.
- Afterwards, the car needs to be rolled forward so that the applied marks rotate 90 degrees. Two more marks are applied to the wheel again at the top and bottom parallel to the cord and the distance between the cord and the rim in its upper and lower parts is again measured.
- Then the car is rolled again, but this time so that the wheels turn 180 degrees. That is, the last two marks should change location. The top one will move down, and the bottom one will move up and measurements are taken again.
- The difference in the three measurements should not be significantly different. Also, with a normal camber angle, the difference between the distances in the upper and lower parts of the wheel for all three measurements should be 1 mm for a car with front-wheel drive, and 1-3 mm for a rear-wheel drive model.
- If the indicators differ, adjustments need to be made. To do this, the car is jacked up and the wheel is removed.
- After removing the wheel, you will need to disconnect the strut bracket from the steering knuckle. To do this, you will need to use a prepared set of keys.
- By turning the eccentric bolt on the steering knuckle, it moves in one direction or another, thereby making adjustments. Early measurements will tell you how much you need to move the steering knuckle.
- After this, the strut bracket is connected to the fist and the car wheel is put in place. After installing the wheel camber, you will need to take measurements again to make sure the adjustment is correct.
Adjusting the wheel toe angle
Having finished with the camber, you can move on to checking and adjusting the second angle - toe.
The sequence of checking and adjusting this angle is as follows:
The car is placed on the platform, the wheels are aligned. Two marks are applied on the inside of the wheels in the front part; they need to be applied closer to the rim. A telescopic ruler for measuring toe-in is prepared by creating a preload on it. The ends of the ruler need to rest against the existing marks. The moving scale of the ruler must be moved so that it coincides with the fixed pointer. After installing the ruler, the car needs to be rolled forward so that the ruler is at the rear of the wheel.
When rolling, it is important to make sure that the ruler does not catch on anything. Next you need to see if there is a deviation on the scale and by how much. For front-wheel drive cars, the toe value should be “0/+-1”
If the ruler readings are like this, then no adjustment is needed. If the readings are greater, then the toe-in is adjusted. This operation is performed by changing the length of the steering rods. You need to loosen the lock nut on the rod and, depending on whether you need to lengthen it or shorten it, you need to either unscrew it a little or screw it in. Then tighten the locknut again. Having finished with the adjustment, you need to take measurements again.
Angle adjustment
It should be understood that diagnostic and adjustment work can only be carried out on a special diagnostic stand, since especially on modern cars, tolerances are determined in minutes and have a range of no more than half a degree, which is almost impossible to determine by eye.
At the moment, there are several types of diagnostic stands:
- light;
- laser;
- computer.
The most accurate are computer stands that have four diagnostic reading heads installed on each wheel, the bottom of which is displayed on the monitor and shows a complete real picture of the position of all four wheels
This is especially important for diagnosing cars with fully independent suspension, which have toe-in and camber adjustment units located on the rear axle.
Often it is on such stands that the misalignment of the transverse axes and the deformation of the rear beam or axle stock are easily determined, which is very difficult to do on a light or laser stand, and it is almost impossible to determine the axial misalignment of the car.
It is worth noting that the adjustment is carried out only on a technically sound vehicle, the chassis of which does not have any backlash. Tire pressure must be set in accordance with the manufacturer's technical requirements.
Rear wheel camber adjustment plates (1 g) SS20 2108-2110, Kalina, Priora, Granta
Cost: 550 rub.
Applies to: VAZ 2108-099
Manufacturer provides 1 year warranty
Description
Advantages of camber plates (wheel alignment spacers) SS20
- increases camber to -1°;
- improves high-speed cornering;
- improves vehicle stability when exposed to lateral loads;
- improves vehicle grip on the road;
- reduces tire wear.
Measuring the longitudinal and transverse angle of inclination of the axis of rotation
Of greatest interest is the measurement of the tilt parameters of the rotary axes. Their position is determined by two key characteristics: lateral inclination and longitudinal (caster).
A short video (2 min) about what a caster is
If the wheels of a car could turn 90 degrees and stand across the body, these parameters could be easily calculated using an inclinometer. But in real conditions this is impossible to do, so you need to limit yourself to a rotation of 20 degrees in both directions relative to the zero position. The difference in the obtained angles must be multiplied by an additional factor of 1.5 - this is necessary to compensate for errors that are allowed during the measurement process.
To determine caster, you first need to turn each wheel 20 degrees in front of the steering axis: right to left, and left to right. In this case, you need to set the inclinometer to zero or write down the results. Next, the wheels are turned behind the turning axis: right to the right, left to the left. If the angle measured behind the steering axis is greater than the angle measured in front of the steering axis, then the caster is positive. If it's the other way around, then the caster is negative. The protractor should show a slight difference of a few degrees. This difference should be multiplied by the same factor of 1.5. For example, if the protractor showed a value of +2 degrees, then the caster value should be taken as +3 degrees.
The transverse inclination is calculated in a similar way, but the protractor is installed in a slightly different position. For additional convenience, you can use a smartphone, on which you should install in advance an application that simulates two mutually perpendicular bubble levels. An ordinary building level, preferably with a rotating bubble, will also work for these purposes.
If the task is not to measure specific numerical values of slopes, but only to compare them (they are not adjustable on most cars anyway), then the results do not need to be multiplied by a correction factor of 1.5. The main thing is to make sure that the angles are equal on both axes (right and left).
In the process of self-measurements, it is not necessary to strictly observe the rotation of the wheels exactly 20 degrees, especially when there are no appropriate tools to determine these angles (for example, graduated turntables). You can turn the steering wheel about 3/4 of a turn. It is necessary to ensure that when turning left and right, the steering wheel is locked in symmetrical positions. To do this, you can put some marks on the bottom of the steering wheel. When the steering wheel is in zero position, the line connecting the marks must run strictly horizontally.
Another way to get accurate results is to draw corners on the asphalt near the wheels using a protractor. If you don't have this tool, you can use a square sheet of paper with equal sides. Folding it diagonally, we get an angle of 45 degrees. Then one corner is folded in half again, resulting in an angle of about 22.5 degrees, which is close to the standard 20. Next, you need to attach the sheet to the wheel and outline its edge with chalk, thereby creating the necessary marks on the asphalt.
Numbers you need to know
To set the wheels at the correct angles, you need to know these angles, everything is logical.
Definitions for front wheels
What is CASTER
The standard value is 6 degrees.
Thanks to this angle, wheel alignment is ensured due to speed. The CAMBER angle (aka CAMBER) determines the correct lateral inclination of the wheel.
Thanks to the correctly set CAMBER angle, the wheels are aligned due to the weight of the vehicle.
Making a wheel alignment for a VAZ 2110 with your own hands
If you carry out car repairs yourself, then in this case you can save not only money, but also carry out high-quality repair work. And you can even do a wheel alignment of a VAZ 2110 with your own hands, the main thing is to have ideas and a certain set of tools.
Since the concepts of alignment and camber have already been discussed, it is now worth considering what castor is. When a car moves, it is strongly affected by the castor - this is the angle between the represented plane and the rotation of the wheels when the steering wheel is turned. The castor can be either positive or negative; it will determine how the drive axle will immediately return to its place. That is, with such values, the car should move in a normal position. Thus, the camber and toe angles should be checked periodically, but the caster is set by the manufacturers at the factory, and is not changed in the future. Now it’s worth figuring out how to do a wheel alignment on a VAZ 2110 yourself.
Tools for work
In order to make a wheel alignment yourself in your garage, you will need a small set of tools that I have listed below.
| A set of keys | Level | Roulette |
| Ruler | Plumb | Special ruler for determining angles |
Adjusting the camber angle of the VAZ 2110
So we have come close to the question of how to set the wheel alignment yourself on a VAZ 2110.
Most often, data on angle degrees is indicated in the operating instructions for the VAZ 2110 car, and they are presented in 0 degrees.
Before you do the wheel alignment yourself on a VAZ 2110, you need to wet all the fasteners in advance, this is necessary so that all the nuts can be easily unscrewed. To measure the angle of inclination, use a building level.
Camber adjustment:
- On the wheel rim, using chalk, place two marks on the top and bottom.
- The plumb line is fixed on the car fender, and then the distance between the marks is measured; the readings should not differ by more than 1 mm.
- Ideally, the wheel geometry is not accurate; in this case, the car is rolled back so that the risks move 90 degrees, and readings are taken again.
- After this, the wheels are turned again, but by 180° and measured again.
- Now remove one of the wheels using a wheel wrench, then unscrew the bracket on the shock absorber a little.
- then the steering knuckle is moved to the required distance, all this will help make more accurate camber measurements.
- Now you can put the wheel in place and rock the car a little with a little pressure on the wheel and take measurements again.
- All these procedures are carried out until the desired measurement figure is reached.
If we talk about the VAZ 2110, then the readings should have a difference of 1 mm.
Toe adjustment
Most often, ordinary threads are used to carry out such measurements, but in some cases a special ruler is used. To carry out such work, it is necessary to drive the car into a pit and set the steering wheel straight.
And now carry out the work in a certain sequence:
Draw two marks on the tires next to the rims. Next, the ruler is installed so that its ends coincide with the marked marks. You can also use special equipment with a scale here; it should be set to 0. If such equipment is used, then several measurements should be taken with a ruler. The car is moved forward a little so that the marks move and the ruler moves along with the wheel. and at this time monitor the readings of the ruler. readings may be different on the rear and front wheels, although this should not be the case
In this case, it will be necessary to adjust the steering rods. the locking nuts are unscrewed using a 27 wrench. Then, using a 24 wrench, the length of the steering rod is changed; work is carried out only with the coupling. Next, the scale of the ruler must be set so that you can adjust the toe to 0 and you will have to move the car a little back. if the readings agree with the desired value, then the alignment is complete, but it is better to double-check and again move the car forward a little. It is also worth paying attention to the steering wheel; if it is misaligned, it will immediately be clear that the traction is not set correctly. In this case, you need to check which traction is broken, and it will have to be increased.
Adjusting wheel alignment on passenger cars
Let's start with the fact that wheel alignment angles on different brands of cars can differ significantly. This is due both to the design features of the car’s suspension and directly to its purpose. For example, racing cars for drifting have negative camber, which gives them a small contact patch on a straight line (reduces rolling resistance), but when cornering, the contact patch has a maximum value, which allows you to corner at maximum speed. And camber naturally changes the values of the toe angles.
This “geometry” is common for drifting
Due to the above, I suggest you get acquainted with the methodology for setting wheel alignment angles using the example of a VAZ 2110 car, and then, if you wish, you can successfully apply it directly on your car.
Tools and prerequisites
- Set of keys, heads;
- Construction plumb or level;
- A roll of wire or strong twine;
- Tape measure or telescopic ruler;
- Two even bars 60 centimeters long;
- Two sliding supports for adjustable wheels;
- Inspection pit with a flat platform.
Camber
Preparation
We install the car on sliding supports (pancakes), checking that they are on the same level, since the curvature of the floor greatly affects the accuracy of measurements.
I understand your dumb question about the presence of support “pancakes”; I propose to make them from four sheets of metal, having previously lubricated each pair with grease for better sliding.
I draw your attention to this, since when adjusting the wheel alignment angle of one of the wheels, the second one must be stationary.
Diagnostics
At this stage, we have a choice in the method of taking the wheel position values: using a plumb line or a building level.
In order for all measurements to be correct, we need to align the wheels strictly along the line corresponding to linear movement;
Having attached a plumb line to the wing (for example, with a magnet with a cloth placed under it), measure the distance “A” and “B” on the left and right wheels (the reference point is the wheel rim!), and write down the result;
This is how a vertical plumb line is used
We roll the car so that the measurement line rotates 90°, and take new readings. We repeat the operation again and average the obtained values, thereby leveling out the measurement error associated with the runout of the wheel disk. For front-wheel drive cars, the average values of camber angles are considered to be 0 ± 1 mm; for rear-wheel drive, the norm is considered to be +1 ± 3 mm (by the way, for wheels of sizes 13 and 14 inches, 1 millimeter of camber is equal to approximately 10 angular minutes).
In our case, the manufacturer recommends setting the camber angle to 0 ± 30′, which is approximately 2…2.5 mm. Which type of camber is preferable to you depends on the load of your car - the greater the gross weight, the greater the negative camber angle in dynamics...
Example of weight distribution on MacPherson type suspension
...and depending on the driving style - the more aggressive the cornering, the more the wheel tends towards positive camber.
The camber angle is very high
We're a little distracted, let's continue.
On the car in question, it was decided to install negative camber and, to facilitate the process, a plate 2.52 millimeters thick was pre-attached to the level.
The measuring plate will help in the work
Why do they do a wheel alignment on a VAZ 2110?
In order for everything to function correctly, this procedure must be carried out every 30 thousand km; this is the recommendation of specialists for foreign-made cars. But wheel alignment is often carried out in unforeseen situations:
- When the disk is compressed, this happens when you fly into a large hole at high speed.
- After repairing the chassis.
- When the car's clearance changed.
- In some cases, the car drifts to the side while driving.
- Heavy wear on the tires on the car.
- The steering wheel does not turn when cornering.
What are the benefits of undergoing this procedure?
- The car has good handling. This occurs when driving on a straight road, that is, there is no displacement.
- The rubber will not wear out much and thus fuel consumption can be reduced.
Option 1
The master shifts the angles of the longitudinal inclination of the racks as much as possible, taking them to the “minus”. We seem to be moving the front wheels back towards the mudguards of the wheel arches. A situation that quite often occurs on old and heavily used cars or after installing spacers that raise the rear of the car. The result: light steering, quick responses to its slightest deviations. However, “Samara” has become overly nervous and fidgety, which is especially noticeable at speeds after 80-90 km/h and above. The car has unstable responses when entering a turn (not necessarily fast), tends to venture to the side, requiring the driver to constantly steer. The situation becomes more complicated when performing the “rearrangement” maneuver.
Wheel alignment - what is it?
Wheel camber is the angle between the center plane and the plane of the road, all of which will affect traction, as well as the ability to control the car. Of course, if everything is configured correctly, then the car will perform maneuvers correctly.
Wheel alignment - what is it?
Alignment is the difference between the points of the rear and front wheels, most often measured in degrees or millimeters. The wear of the tires will depend on this parameter, and if it is not there, the tires will wear out quickly.
That is why they carry out the do-it-yourself wheel alignment procedure on a VAZ 2110, that is, adjusting all the presented parameters so that the car has good handling. Most often today, wheel alignment is carried out on special stands.
Option 3
Excessively “positive” camber. It is undesirable to change it without toe correction, therefore positive toe is also introduced. The steering wheel became lighter again, the responses when entering a turn became lazier, and the lateral movement of the body increased. But there is no catastrophic deterioration in character. However, when simulating an extreme situation, the “steering feel” is lost. With the advent of slips, unexpectedly early it becomes difficult to get into the given corridor at the “rearrangement” and the car begins to slide too early. In fast corners, the strongest slip of the front axle dominates.
Operating instructions
Below are step-by-step works for adjustment at home, using the old-fashioned method.
To adjust the camber you need:
- Loosen the bolts securing the shock absorber strut to the steering knuckle;
- Hang the plumb line in the center of the axis. The weight of the plumb line is lowered into a container with oil so that it does not swing;
- Using a caliper, measure the distance between the thread and the edge of the wheel disk from above and below relative to the axle;
- Achieve the same distance from the thread to the wheel at these points by turning the upper eccentric bolt of the shock absorber strut;
- Tighten the nuts of the bolts connecting the fist to the stand when the measured distance from the thread to the disk becomes the same.
To adjust toe you need to:
- Pull the thread from the front wheel to the rear at the level of the centers of the hubs.
- Place small objects between the parts of the tires closest to the edges of the car and the thread, so that the thread is exactly parallel to the rear rim, to eliminate the difference in track width. Parallelism control is performed using a caliper. Loosen the tie rod end bolts.
- Place the wheel parallel to the tensioned thread by rotating the steering rod bushing.
Preparatory work and tools
To check the suspension settings, the car must be placed on a perfectly flat surface, for example, using stand boards. They need to be aligned in one plane using a level, after first placing them in the places where the car wheels are supposed to be located. For ease of adjustment, you will need access from below, so it is better to immediately place the machine above the inspection hole, or on an overpass. The steering wheel must be set exactly straight and, if possible, secured to prevent accidental turning.
Before taking measurements, it is necessary to check and, if necessary, adjust:
- Tire air pressure;
- Wheel rim runout;
- Play in the steering wheel, wheel bearings;
- General condition of suspension parts.
Immediately before diagnostics, you need to “squeeze” the suspension by pressing with a force of about 50 kg, first on the rear, then the front bumper.
To adjust the wheel alignment, you will need the following devices:
- Strong thread.
- Small hooks (for example, bent nails) to secure the thread.
- Two sets of lightweight objects that allow a difference in thickness of 15 mm to be established, for example, three boxes of matches.
- Calipers.
- Plumb line (it’s easy to do it yourself by tying a weight to a thread).
- A mug with machine oil, suitable for working off.
- Wrenches sizes 13, 17, 19, 22.
Checking parameters and vehicle condition
Checking or adjusting any of these parameters should only be carried out on a fully functional suspension in the following cases:
- replacement of any elements of the steering or chassis system, with the exception of wheel bearings;
- replacing wheel rims;
- increased fuel consumption;
- rapid tire wear;
- incorrect behavior of the car when turning;
- the car pulls to the side on a flat road;
- getting into even a minor accident involving wheels hitting obstacles.
The check will not take much time, but will allow you to detect and eliminate the malfunction in time.
How to make a wheel alignment with your own hands
Correctly set camber and toe angles are one of the key conditions for the normal operation of a car’s suspension. If these parameters deviate from the norm, a number of problems arise: uneven tire wear occurs, the vehicle’s handling and directional stability deteriorate, the steering wheel moves from the zero position when driving in a straight line. The load on shock absorber rods, silent blocks, CV joints, and steering system elements also increases.
Measuring the toe-in and camber angles should be performed at certain intervals, on average 1-2 times a year. Checking the position of wheels in specialized car services is an expensive service, especially when using computer methods. Frequent visits to workshops are expensive, so many car owners are looking for ways to carry out such work in a garage. We invite you to familiarize yourself with a simple, but accurate and effective method for independently determining the alignment and camber parameters.
Conservatism or modern approach, which is better?
But such a conservative approach is more suitable for old Ladas, Muscovites, Volgas, Cossacks, as well as ancient foreign cars.
On modern cars, it is, of course, better to carry out such work at a service station, where, with the help of modern laser and computer equipment, everything will be done at a high level without any errors. And we all know that even a small error in this matter can lead to rapid tire wear.
A service station is certainly good, they will do everything quickly and accurately. But there is always a BUT. Firstly , no matter what modern equipment is in a car service center, without a good specialist it is a pile of scrap metal. And here problems can arise:
1. How much do you trust this specialist;
2. How accurately will the work be carried out (when the equipment was checked for compliance with metrological standards) and whether such accuracy is worth the money;
3. What guarantees will you be given for the work performed? Secondly, depending on the condition of the roads in your region, where you generally drive and the intensity of your trips, the period of work on wheel alignment may vary.
As a rule, it can vary from one month to six months. And some drivers generally visit the service station only once a year. If a driver has to visit a service station once every 1–3 months, then these are significant expenses and here many should think about saving money. Of course, if you have an expensive foreign car, then you will have to come to terms with such expenses, but if you have our domestic car, then you can do the wheel alignment of the car yourself without any problems. Thirdly, after any intervention in the chassis and steering of the car, be it replacing steering rods, replacing power steering, replacing shock absorbers, changing summer tires to winter tires and vice versa, or carrying out any other work, it is imperative to carry out control measurements of wheel alignment and the need to make appropriate adjustments. Fourthly, there may not be a good service station in your region, or just at the most inopportune moment the equipment failed, and you noticed that the outer or inner edge of the tire began to wear out heavily, and this is a clear sign of incorrect wheel alignment. This list could go on for a long time, but let's get down to business. What needs to be done To carry out the relevant work, you will need certain knowledge, which we will now give you, and a special ruler, with the help of which the correct toe and camber angles of the car wheels are set.
What is “wheel alignment”
The wheels of the car must be positioned relative to the horizontal plane at a certain angle (camber), the same applies to the vertical plane (toe). This is required to achieve better tire traction and acceptable vehicle handling.
Correct setting of camber and toe angles ensures stable handling and stability of the vehicle
Convergence
This value can be either “plus” (when imaginary lines running parallel to the drive wheels will have an intersection point in front of the “nose” of the vehicle) or “minus” (when the intersection point is located behind). You need to understand that the closer the toe angle is to zero, the less resistance the vehicle has to the rolling effect.
A negative toe angle is bad. In this case, poor handling and poor response when turning the steering wheel will be observed. In addition, this will lead to the car yaw during travel (especially at high speed). The risk of an uncontrolled skid will increase significantly.
With “positive” toe-in of the front wheels, the vehicle is more responsive in handling, and it will be easier for the car enthusiast to take turns. It is also recommended to install the wheels of the rear axle with a positive toe value, then the car will become as stable as possible when driving straight.
If the convergence angles strongly differ from the factory settings, increased tire wear is observed:
- If positive - on its outer part;
- When negative – internal surfaces.
Therefore, it is not recommended to experiment with this angle.
Camber
Camber is the angle between an imaginary vertical plane and the lateral plane of the wheel. If the upper parts of the wheels “look” towards the center of the car, the camber angle is considered negative, and if outward, then positive. A significant discrepancy between the camber angles and the parameters set by the manufacturer will lead to rapid tire wear. Moreover, the car will begin to “drag” towards the wheel that has the maximum camber angle.
Custer
The behavior of a vehicle while driving is influenced by caster - the angle between an imaginary vertical and the axis of rotation of the wheels while turning the steering wheel.
Its meaning can have both positive and negative meanings. Because of this angle, the drive wheels will invariably return to their original (neutral) position. Its value determines the change in wheel camber when turning the steering wheel and the stabilization of the car while moving along an arc trajectory. The higher this value, the greater the stabilizing effect.
Caster angle - deviation of the angle of the longitudinal axis from an imaginary vertical lineThe camber and toe angles should be constantly monitored, but the caster is set by the manufacturer during the development of the vehicle, and in most cases there is no need to change it.
It is important that the angles are the same on both sides of the vehicle. Otherwise, the car may behave unpredictably on the road - the car will “steer” to one side
Factory settings are 1 degree 30 minutes (plus/minus 30 minutes).
Roll-in treatment
Roll shoulder is the shortest distance between the middle of the tire and the steering axis of the wheel. If the axis of rotation of the wheel and the middle of the wheel coincide, then the value is considered zero. With a negative value, the rotation axis will move outward of the wheel, and with a positive value, it will move inward. For rear-wheel drive vehicles, a run-in shoulder with a zero or negative value is recommended. But in practice, due to the design of the car, this is very difficult to do, because the mechanism does not fit inside the wheel. So the end result is a car with a positive roll-in shoulder, which behaves unpredictably: the steering wheel can be torn out of your hands when driving over uneven surfaces; when driving around corners, a noticeable moment is created that prevents uniform movement. To combat the positive roll shoulder, experts tilted the steering axis in the transverse direction and made a positive camber of the wheels. Although this reduced the car's roll-in leverage, it had a bad effect on the car's control when turning.
Advantages of the method
The technology discussed below is widely used by both beginners and experienced motorists. Among its main advantages it is worth highlighting the following:
- High accuracy. According to this criterion, this method is not inferior to the computer method. The technology makes it possible to measure almost all angular and linear indicators, which are determined using electronic equipment. Even the slope of the site on which the machine is located can be taken into account when measuring wheel alignment and camber.
- Body parameters are taken into account. With computer diagnostics, these characteristics are not determined by the equipment; at best, computer stands can calculate the clearance value. The method discussed in the article allows you to see the natural axis of symmetry of the body and determine the location of the chassis relative to it. This will help you understand why, after wheel alignment and camber adjustments, some wheels protrude from the arches more than others.
- Disc failure does not affect the results. The parameters of the wheel rims can be important when adjusting the angles on a computer. Therefore, some craftsmen working in specialized services refuse to carry out work if the car has wheels with different offsets on the front and rear axles. The method under consideration, in turn, makes it possible to measure alignment and camber, even if different disks are on the same axis.