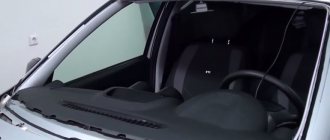
The condition of roads in Russia has dropped below zero. This is the reason for frequent accidents on the road, car breakdowns every two years, as well as cracking glass. One small pebble thrown out from under the wheels of an oncoming car, and you already need to go to a car service center.
Replacing a windshield on a VAZ 2110 at a car service center will cost from 1,500 to 6,000 rubles. The price practically does not depend on the model; the costs of installing the shield on a VAZ 2112 do not differ significantly. Few people want to spend that amount twice a year, so car owners prefer to replace the damaged part themselves.
Necessary tool
To ensure that the replacement of the VAZ 2110 windshield goes smoothly, you should get a gluing kit. When purchased through an online store, the TEROSON PU kit will cost approximately 1,150 rubles, but it will quickly pay for itself. Its composition:
- adhesive-sealant 8596;
- cartridge nozzle;
- primer;
- applicator;
- surface cleaning cloth;
- cutting string;
- instructions for use.
In addition, you need to have other devices on hand:
- a set of flat screwdrivers and spatulas;
- several stationery knives;
- solvent for nitro paint;
- new consumable.
With an assistant, changing a part is easier and faster.
Price is not a guarantee of quality! But you shouldn’t take the cheapest materials either: fakes are not uncommon.
Replacing the windshield with your own hands on a VAZ 2110-2112
So, before you start replacing, of course, you need to cut off the old one. There are special kits for this, which were described above. They consist of strings, holders and an awl.
Before you start cutting, you need to remove the side pillar trims from the interior side, and also unscrew and slightly move the front part of the headliner. This is necessary in order not to damage the upholstery with the string.
After this, from the outside we remove the rubber seal along the entire length. The frill, of course, also needs to be removed.
After this, we thread the string from the inside to the outside using a special awl.
Now we thread the string into the holders and you can start cutting. Of course, it is most convenient to do this together, but even alone you can cope with this.
When the glass on a VAZ 2110 is cut off along the entire perimeter, it must be carefully removed from the car, using special suction-pullers for this. If these are not available, then you can do everything by hand, but very carefully.
As for installing new glass, everything should also be done carefully and slowly. Before installing a new windshield, it is necessary to remove the remnants of old glue, remove dust and rust particles so that the contact area is clean and even.
After this, we put on a new seal and, using suction cups, install the glass in the body opening, having previously applied glue to it.
But here, of course, it is advisable to work as an assistant:
To temporarily fix the glass in a stationary state, you can use tape. Also, it is worth keeping in mind that after installing a new windshield on a VAZ 2110, you should not open and close the doors, creating vibrations in the body or excessive air flow in the car. This can lead to the glass coming away from the glue and having to do everything all over again.
In order for the glass to be securely fixed in the body opening, you should wait at least 12 hours before starting operation, and preferably at least 24 hours! If you are not confident in your abilities, it is better to entrust this repair to professionals.
The price of new glass for VAZ 2110, 2111 and 2112 can range from 1800 to 3800 rubles. The cost depends on the manufacturer, as well as on the number of layers of protection (double or triple thermal). Our auto glass manufacturer BOR can be considered the highest quality glass.
Types of damage
The structure of the windshield is triplex - an impact-resistant material in which there are two layers of glass and a thin film in the middle. This allows the spare part not to crumble upon impact.
Masters divide damage into two types:
- Chips. Only the top layer was damaged. No immediate replacement is needed.
- Cracks. In this case, supply new material as quickly as possible. The film holds the fragments, but not as firmly as before, and in case of potholes, which are not uncommon on our roads, they will fly apart. This will lead to an accident.
If you can’t change it soon, you can resort to several tricks:
- Make perpendicular cuts along the edges of the “web”.
- Drill holes with a diameter of 5 mm along the edges of the crack.
- “Brew” the damage.
All measures will give a temporary effect, and the spare part will still need to be replaced.
Instructions for replacing the windshield and rear glass on a VAZ 2110, 2112
The condition of roads in Russia has dropped below zero. This is the reason for frequent accidents on the road, car breakdowns every two years, as well as cracking glass. One small pebble thrown out from under the wheels of an oncoming car, and you already need to go to a car service center.
Replacing a windshield on a VAZ 2110 at a car service center will cost from 1,500 to 6,000 rubles. The price practically does not depend on the model; the costs of installing the shield on a VAZ 2112 do not differ significantly. Few people want to spend that amount twice a year, so car owners prefer to replace the damaged part themselves.
How to remove and install
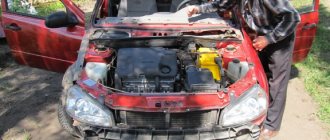
We have everything we need, we can get to work. We remove everything unnecessary: wipers, trims, etc. Accessories will interfere with the dismantling of damaged material.
Windshield
We start removing the windshield from the top. From any angle, carefully squeeze it out along with the rubber bands. From inside the passenger compartment we pry up the seal with a screwdriver - this makes it easier to dismantle the front glass on the VAZ 2110.
We work with gloves! If the glass shatters, you will need to remove the shards manually. Take precautions!
We clean the grooves from dirt and small fragments. We put a rubber seal on the new glass. If it has dried out and cracked in places, it is better to buy another one.
Replacing the windshield of VAZ 2110, 2111 and 2112
The windshield is the most vulnerable glass in a car and has to be replaced most often. This has to be done for various reasons:
- getting into an accident when the impact causes cracks that are unacceptable for normal operation
- hit by stones, gravel, spikes from winter tires when overtaking other cars or from oncoming traffic
- the car getting into strong potholes and pits on the road, as a result of which a crack may form due to the fact that the body has shifted
- chips, cracks, all kinds of abrasions that interfere with everyday use
If earlier, on old VAZ cars of the “classic” family, the windshield could be replaced without any problems, because it sat on a rubber seal and that’s it, now everything is not so simple. In order to replace glass on a VAZ 2110, 2111 and 2112, you will need to perform at least the following steps:
- prepare the necessary tools for cutting and gluing
- cut off old damaged glass
- glue in a new windshield
- wait a few hours until the glue dries and properly fixes the windshield in the body
How to replace the windshield on a VAZ 2170-VAZ 2172?
Note! Before buying new glass, look at the markings on your old windshield, they should match, also keep in mind that all glass comes with tints, if it is too dark (And this is a violation of traffic rules), then do not buy it, look for a lighter one, all the nuances before when purchasing, also take into account that if the windshield is of high quality and made by a good company (And not in the basement), then the marking (which is located in the corner) should not be erased if you rub it with a cloth soaked in alcohol, keep this in mind!
Removal: 1) First, lower the front windows of the car and then sit in the passenger compartment and remove their trim from the front pillars (see photo below), these trims are held in place by the plastic clips inside, to disconnect them, you will need to pry them off with a screwdriver, clips some will most likely break, replace all broken fasteners with new ones after disconnecting the facings.
2) Now you will need to remove the windshield trim from the windshield frame, it is secured with screws, but you will also have to remove the brushes, because they simply won’t allow the trim to be removed from the car otherwise (How to do this, read the article: “Replacing the cabin filter on a car") and by the way, if the cabin filter has not been changed for a long time, you can also replace it with a new one, so that after a very short time you do not have to climb under the trim again, it is better to do everything right away.
3) Next, remove all the rubber bands that interfere with the removal of the windshield, namely, remove the side trims (One of them is indicated by a red arrow), prying them off with a screwdriver, but for this you will have to open the door and also disconnect the door seals in the same place where the trims go, you will have to ensure that they do not interfere and you can easily get to the side trims with a screwdriver, and remove the seal itself that goes along the edges of the windshield (see small photo), you will need to clean it from dirt, and if it is damaged (torn, the rubber will no longer be elastic, and so on), then instead of it, when installing the windshield, install a new seal.
4) Next, remove two adjusting wedges, one is shown in photo 1 for clarity, and prying the windshield (Where is convenient for you), pierce it with an awl and insert a string into this hole (see photo 2) and you can start sawing the old glue, but just be be very careful not to damage the paintwork, otherwise the car will begin to rot; otherwise, to make sawing convenient, take a second person with you (sit in the cabin yourself) and attach screwdrivers to the ends of the cable (see photo 3) and move to the rear in Before (Like a saw) cut the glue in a circle and remove the windshield from the car.
Note! If you no longer need the glass and it will be disposed of later, then you can use another method, but you just need to do everything carefully, in general you will need to sit in the cabin, and an assistant should stand outside (For safety, lay a thick blanket on the hood so that it does not scratch), then lean two feet against the windshield (In different places) and with a sharp movement, push it out (Windshields are encased in films and therefore the glass will not crumble when you remove it in this way, but it can easily fall on the hood, but it all depends on the second assistant)!
Features of the technology
For 3-4 hours, when the glue has just begun to dry, but polymerization has not yet begun, it is prohibited to move the car in any way. Opening and closing doors is also prohibited. The glue will gain its maximum strength only 5-6 days after the installation operation.
Replacement should be performed at air temperatures of 15 degrees or higher. If the values are lower, then the hardening process will take longer.
Replacing the windshield on a VAZ 2110, VAZ 2111, VAZ 2112
Welcome! The windshield has been changed on any car at least once, there are practically no cars (the exception is new ones) in which the glass would not be damaged during the entire operation, and the glass is very easy to damage, especially on the highway, a speed of 80 km will be enough / h and an oncoming car and a small pebble, which will make a crack on the windshield.
Note! To replace the windshield, you will need to use: Special. a set of tools that is needed specifically for the work of replacing glass on cars where the glass is glued (This set is shown in the photo below), after purchasing the set, read the instructions that come with it and act in accordance with it, because the sets are different and the glue that It is used in them for gluing glass, it may have a certain drying time and they definitely need to be used, and also, in addition to special ones, the kit will have to have. syringe with glue included, special tip for this syringe, and it will also have to consist of an activator/cleaner and primer, and some sets also include a string for cutting the glue, if you don’t have it in the set, then purchase it separately!
Summary:
When should you replace your windshield? Basically, before buying a car, people change the glass for a new one, or even if it is badly cracked and it is clear that the glass is about to burst; in all other cases, they generally don’t even touch the glass, people just get used to it and drive without paying attention to it. cracks and scratches, but we want to please you, the glass does not always need to be replaced, sometimes it can be repaired and if the crack is not large (the bottom layer is not affected) then it can easily be done using special equipment. You can hide funds, it’s better to do it on special. stations, because the first times always turn out poorly and not everyone manages to seal the cracks well, there’s a special thing for all this. equipment is needed, but if you decide to do it yourself, then watch the video below, which clearly shows all this.
Replacing the windshield of a VAZ 2110 with your own hands
Author: ides · Published 07/12/2016 · Updated 07/12/2016
According to search engine statistics, the question “how to replace a windshield” is asked monthly by thousands of Russian-speaking Internet users. In principle, this is not surprising, given the quality of our roads and the quality of the glass that is produced here. Today I want to tell you about how to independently replace a windshield using the example of a VAZ 2110 at home using improvised means.
To do this job you will need an assistant, as well as:
- Set for gluing glass.
- Windshield.
- String with two handles.
- Primer and activator.
- White Spirit.
I don’t recommend saving on windshield or materials. The imaginary savings will definitely backfire a few years after installation in the form of chips, cracks, leaks during rain, and other troubles. In addition, high-quality glue plays a very important role; a lot depends on its properties and quality. In my experiments I used dinitrol, terosol, sicaflex - any of the three options will provide you with reliability and a long service life, in short, you will not have any problems with them.Replacing the windshield of a VAZ 2110 - preparation
Before replacing the windshield with a new one, you need to prepare the surface for installation and gluing. To do this, choose a spacious, good place with good lighting and a temperature of at least +15°, remove everything that may interfere with you during the process.
Removing old glass
- Remove the wipers and dismantle the frill.
- Remove the plugs and unscrew the mounting screws.
- On both edges of the frill, there are two nuts at “10”, they are located under the hood, they also need to be unscrewed.
- In the engine compartment, you need to remove the rubber seal, then unscrew the screws that connect the sound insulation and the frill.
- The frill is secured with a latch located in the center; pull it out along with the frill, holding it with both hands closer to the center.
- Having lifted the frill, you need to cut the clamp and the washer hose; it is better to do this in some inconspicuous place, but it should be easily accessible so that after all the repair work is completed, the adapter can be installed there without any problems.
- If everything is unscrewed and the frill does not hold anything, remove it.
- Now you need to take out the molding, to do this - hook it to the edge and bottom of the glass, take out two rubber gaskets in the shape of a triangle.
Replacing a windshield begins with dismantling the old one; in order to remove the old windshield, it must be cut out. Read on to find out how to do this.In order to cut out the windshield, the string mentioned earlier will be useful. There are two types of sawing string - round twisted and square, the first, as a rule, is used for cutting, and the second for sawing.
The principle of operation is simple and resembles a regular two-handle: one end of the string is inserted inside the cabin, and the other remains outside. The assistant's task is to pull one end of the string from the outside or from the inside (whichever is more convenient for him).
Attention! Watch the angle of the string; it should move exclusively along the edge of the glass.
conclusions
At this point the work can be considered completed. Now you will know how to install a windshield on a VAZ-2112.
We glue glass when replacing it, losing the tightness of the adhesive seam, or straightening a damaged body. Cutting and gluing all glass is done in the same way, so we will consider in detail only the operation of replacing the rear window.
...or make a cut with a string in the lower corner of the glass.
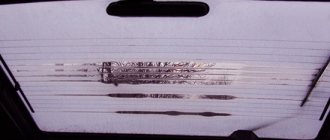
When subjected to a strong impact, the tempered rear window shatters into small fragments (for example, as a result of an accident). In this case, before gluing in the new glass, you need to clean the opening from fragments and cut off the old adhesive seam with the remaining glass.
To glue glass, you need a kit that includes a tube with glue, a degreaser and a primer (primer), as well as a “gun” for squeezing the glue out of the tube.
Polymerization of the glue continues for two to three hours. At this time, you cannot move the car, close the door windows or slam the doors, because An increase in air pressure inside the car can cause the glass to break off. It is advisable to operate the car no earlier than 24 hours after gluing the glass.
Replacing the windshield is carried out in the same way.
Copyright © 2007-2019 All rights reserved. All trademarks are property of their respective owners.
1200 rub. for the photo report
We pay for photo reports on car repairs. Earnings from 10,000 rubles/month.
Write:
To replace the windshield of a VAZ 2110, 2111, 2112 you will need: a string, a knitting needle or an awl, glue, sandpaper and a primer to clean up possible body corrosion. To dismantle the old windshield, you need to remove the rubber seal and break through the adhesive with an awl. A string is threaded through the resulting hole and the glass is cut off. It’s better if someone helps you - this way all the work will take less time and installing the glass will be much more convenient.
Before installing new glass, carry out preventive maintenance and eliminate body corrosion. A rubber seal is placed on the new windshield and glue is applied at the junction with the body. The joint surface must be clean and dry. The replacement of the windshield of a VAZ 2110, VAZ 2111, VAZ 2112 is shown in the photo more clearly.
Replacing the windshield of VAZ 2110, 2111 and 2112
The windshield is the most vulnerable glass in a car and has to be replaced most often. This has to be done for various reasons:
hit by stones, gravel, spikes from winter tires when overtaking other cars or from oncoming traffic
If earlier, on old VAZ cars of the “classic” family, the windshield could be replaced without any problems, because it sat on a rubber seal and that’s it, now everything is not so simple. In order to replace glass on a VAZ 2110, 2111 and 2112, you will need to perform at least the following steps:
- prepare the necessary tools for cutting and gluing
- cut off old damaged glass
- glue in a new windshield
- wait a few hours until the glue dries and properly fixes the windshield in the body
Preparatory work before installing glass
After dismantling, the opening should be prepared. To do this, remove any remaining glue. It is not recommended to completely remove the glue. It is better to leave a minimal layer, which will facilitate better adhesion of the new glue to the glass. If rust is present, it should be cleaned off and the treated area primed.
The remaining thin layer of glue and the edge of the glass are degreased with white spirit. After drying, you can apply the activator. This will allow the parts to stick together better. We recommend warming up the glue a little before applying. This will allow you to apply the substance in a thin layer, and it will adhere better to the surface.
Then the glass is prepared for installation. Wipe the transparent dust shield. After this, the molding is put on. If it does not fit tightly to the glass, it can be fixed with tape. The edges to which the activator is applied should be degreased. The places where the glue will be applied are marked along the entire surface.
