On the VAZ 2110, as on other car models, brake lights play an important function in warning other road users about braking or reducing speed. If the brake lights on a VAZ 2110 are not lit, this reduces the safety of using the car and can lead to an emergency. In this case, you should not immediately take the car to a workshop, because most often you can find the cause of such a breakdown and fix it yourself. To cope with such a problem on your own, it is important to understand how the brake lights on the VAZ 2110 work.
Scheme of operation of stop lights
The stops on VAZ cars work according to the same, fairly simple scheme. The main element of this unit is the sensor responsible for turning on the brake light. When the sensor is triggered, the brake lights in the rear of the car light up. When braking stops, the lamp stops lighting. If the brake lights on a VAZ 2110 do not light up, the first thing you need to do is make sure that the lamps have not burned out. The brake light circuit works as follows: voltage from the battery is sent to the brake switch, which, when closed, allows current to flow through the filament of the lamps connected to each other. Voltage is then sent to the negative of the battery, allowing the lights to light up.
On most older VAZ cars, the brake light sensor is located in the area of the brake system line. In this case, the process of closing the contacts was carried out by increasing the air or liquid pressure in the system. The main disadvantage of this connection was that the brake lights came on along with the brake pads when the car began to slow down. On modern models, such as the VAZ 2110, the stop sensor is connected to the brake pedal. This made it possible to turn on the lamp exactly at the moment the driver presses the brake. This design connects the brake lights at the moment the brake pedal free travel is selected, before deceleration begins.
Reasons for a non-working brake light
If the brake light on a VAZ 2110 does not light up, the first thing you need to do is check whether the fuse responsible for protecting the signal lamp circuit has blown. Then we take a test lamp and check whether there is power to the stop sensor. If during such a test the indicator lamp does not light up, it means that the fuse has failed or the wire leading to the brake light switch from the fuse has broken. When performing this test, it is important to ensure that power is being supplied to and routed from the fuse. If necessary, we replace broken or burnt wires and eliminate broken contacts in the connecting circuit leading to the sensor or fuse. If power is present at one of the terminals, you can remove both wires and connect them with copper wire. In this case, the warning lights will light up.
If the lamps light up during the test, then we can talk about a sensor malfunction. This spare part cannot be repaired, so it must be replaced. If it turns out that the sensor is working, then you need to look for a break in the wiring or a malfunction of the lamps. At the same time, we take a test lamp and check whether there is power at the plug responsible for the operation of the rear lights. If power is supplied, it is most likely that the brake lights on the VAZ 2110 do not work due to faulty lamps. If there is no power, you need to find an open circuit or poor contact in the system between the stop switch and the warning light. It happens that a new fuse is installed, but it immediately blows. In this case, we can talk about the presence of a short circuit that needs to be found and eliminated.
Standard version of the brake light operating diagram
Power is supplied to fuse F17 from the battery, then the current goes to limit switch contact 11, and then, if the limit switch is closed, a circuit is formed with the filament of lamps 7. But note: part of the circuit is relay K1, more precisely, its contacts 5 and 4.
Basic network diagram
If the brake lights do not light up, on the VAZ-2112, as on all Tens, check one fuse. It is called F17 and is located in the mounting block to the left of the driver.
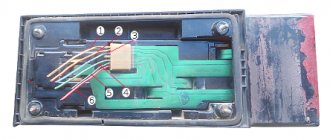
Main mounting block
It is important to know: voltage is always present at one of the fuse terminals. Check it out!
A few words about the “serviceability relay”
The lamp health relay is called K1, and it is the largest in the mounting block. If you remove this relay, then when you press the pedal you can dial the voltage at terminal 5 (but not 4). Look at the diagram again, and it will become clear what we are talking about.
The largest relay in the block
All relay contacts are numbered. Check the voltage at the block terminals:
- 6 – “mass” potential;
- 2 – voltage “+12”, but only after turning on the ignition;
- 5 – “+12” by pressing the pedal;
- 4 – the terminal rings like a ground tap.
If the potential “0” is not generated at terminal “4,” it means that the lamp filaments are burnt out or there is a break in the wiring. Now consider something else: the ground potential has been detected, but the lamps do not light. This is where suspicions of a short circuit arise.
Causes of malfunction
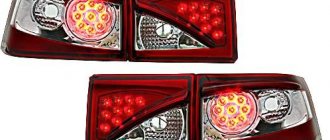
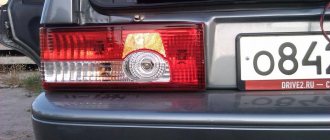
Bulbs for the rear lights of the VAZ 2110
There may be several reasons why the lighting does not work. Each malfunction requires an individual approach and implies its own troubleshooting methods. Causes of the malfunction and methods for eliminating them (if some lamps of flashlights and headlights do not work):
- burnt fuses - replace them (see VAZ 2110: how to replace fuses);
- lamp filaments are burnt out - change the lamps;
- contacts on relays or switches have oxidized - clean them;
- the wires are damaged, their tips are oxidized or the connections are loose - replace the faulty wires, clean the tips;
- The contact jumpers at the location of the lamp control relay have oxidized - clean them.
We turn on the brake lights forcibly
Relay K1 is successfully replaced with a pad with jumpers. In Fig. 1 just shows its diagram. If there is no such platform, you can temporarily close contacts 4-5. First, check everything mentioned above.
Have an observer watch what happens to the lamps. Press the pedal with one touch and release it. If the lamps do not turn on, check that the fuse is working properly. It's burned out, which means you're looking for a short circuit.
How to and how not to check the “0 Volt” potential
Let’s agree right away that we only work with a voltmeter. Voltage “+12” is caused by connecting one probe to ground. The presence of potential “zero” is checked differently: any of the probes is connected to a terminal with positive voltage, and then the second probe is connected to the wire being tested.
How to connect a voltmeter
Consider the error: one probe is connected to ground, the second to the terminal being tested, and vol. Here they conclude that there is a “mass” potential, but this is wrong! If the contact with ground is broken, the device will also show “0”. That is, the number “0” does not contain information.
How to remove the mounting block - all steps in one video
Left: If the turn signals work properly but the hazard warning lights do not turn on, the cause is usually a faulty hazard warning light switch. If you press the switch firmly several times, most often it will start working normally. If this does not happen, then remove the switch (2), squeezing its locking tabs and removing it from the groove, check the contacts of the pin connection (1). Right: When installing the brake light switch (2), it must be pressed against the pedal support (3) so that the switch pin also presses the switch when the pedal (4) is released. For perfect operation, the pin block (1) must be correctly connected.
Wiring test for non-working brake lights (ground test)
Let's look at the basic diagram: the brake lights and the reversing lamps have a common ground pin. If contact with this pin is broken, the reverse lamps will not turn on. Well, brake lights too.
Connector for connecting “internal” lights
On the left side there is a connector through which the wiring goes to the fifth door. The connector has black and red wires. Check the voltages on them. Most often the ground on the black wire does not ring. But maybe the connector itself needs to be cleaned.
Usually, if the ground breaks, another pin is used - the one that is connected to the glass heating coil.
If the “plus” does not come to the red wire, we check the “frog”. It's simple here:
- Disconnect the connector with two wires from the limit switch;
- Using 17mm wrenches, loosen the two nuts: holding the lower nut, rotate the upper one;
Removing the frog brake
Electric sema VAZ 21102
| 1 — block headlight | 35 — instrument lighting switch |
| 2 - front brake pad wear sensors | 36 - ignition switch |
| 3 - reverse light switch | 37 - mounting block |
| 4 — electric motor of the engine cooling system fan | 38 - recirculation valve switch |
| 5 - sound signal | 39 — heater controller |
| 6 — gear motor for locking the right front door lock | 40 - hazard warning switch |
| 7 - power window relay | 41 — lamp illuminating the heater control levers |
| 8 - 8 A fuse | 42 — glove box lighting lamp |
| 9 - starter | 43 - glove compartment light switch |
| 10 - accumulator battery | 44 - cigarette lighter |
| 11 - generator | 45 — display unit of the on-board control system |
| 12 - windshield washer motor | 46 - ashtray lighting lamp |
| 13 — washer fluid level sensor | 47 — brake light switch |
| 14 — gear motor for locking the left front door lock | 48 — gear motor for locking the left rear door lock |
| 15 - left front door power window switch | 49 - left rear door power window switch |
| 16 — coolant level sensor | 50 — electric window motor of the left rear door |
| 17 - windshield wiper motor | 51 — socket for a portable lamp |
| 18 - recirculation valve | 52 - watch |
| 19 — micromotor gearbox for heater damper drive | 53 — electric window motor gearbox of the right rear door |
| 20 — electric heater motor | 54 — right rear door power window switch |
| 21 — trunk lock switch | 55 — gear motor for locking the right rear door lock |
| 22 - right front door power window switch | 56 - side turn signal |
| 23 — electric window motor reducer of the right front door | 57 - parking brake warning lamp switch |
| 24 — control unit for the door lock system | 58 — driver's seat belt sensor |
| 25 — additional resistor for the heater motor | 59 - directional lamp |
| 26 — brake fluid level sensor | 60 - interior lamp |
| 27 — electric window motor reducer of the left front door | 61 — cabin air temperature sensor |
| 28 - outdoor lighting switch | 62 — switch in the front door pillar |
| 29 — instrument cluster | 63 — switch in the rear door pillar |
| 30 - rear fog light switch | 64 — external rear light |
| 31 — fog light indicator lamp | 65 - internal rear light |
| 32 — indicator lamp for heated rear window | 66 — license plate lights |
| 33 — rear window heating switch | 67 - trunk light |
| 34 - Understeering's shifter |
Removing and installing rear lights on a VAZ 2110-2112
I think there is no need to explain once again that the rear lights are located in blocks, one of which is located in the wing, and the second in the trunk lid, so we will consider the removal procedure separately.
Removing the parking light and turn signal
So, first of all, open the trunk lid and open the “window” with Velcro in the place shown in the picture below:
As you can see, there is one nut that needs to be unscrewed. After this, you need to unscrew the self-tapping screw from the side with a screwdriver, with which the casing is attached. It is enough to do this in one place, as shown in the photo below:
And we move it back slightly to gain access to the remaining nuts securing the rear lights.
Now you can start unscrewing the two nuts that secure the lamp:
And then from the back side, you can carefully, without making excessive efforts, pull the lantern so that it comes out:
Since at first we did not disconnect the block with wires, we can do this now:
At this point we can consider half the work done. Now let's move on.
Removing the reverse light and brake light
First, with the trunk open, remove the power plug from the board, as is clearly demonstrated below:
Now all that remains is to unscrew the two nuts, which are clearly visible in the picture below:
And also, as was done in the previous description, we take out the flashlight from the back side. The central pad may be slightly in the way, but you don’t have to remove it if you act carefully:
If necessary, we replace it, and installation proceeds in the reverse order. What can we say about the cost: at the moment, a set of rear lights for a VAZ 2110-2112 is about 2000 rubles, but all this can be bought separately in blocks, that is, two right and two left blocks.
On all cars of the Tenth Family, the power lines for the lights contain many elements. There are lamp health relays, switches and fuses. Therefore, if the brake lights on a VAZ-2112 do not light up, you need to check the entire chain. But the reason may look simple: sometimes the lamps do not turn on because the socket does not contact ground. Circuits are easy to analyze, but finding the cause of a breakdown is difficult. Let's look into the details.
If one of the lamps does not light, it is simply replaced. See the example in the video - you need a P21 W
Replacing a headlight bulb - how it is done
Light bulb for rear light of VAZ 2110
To change the headlight bulb in the headlight, you need to perform the following steps:
- remove the battery;
- holding the lamp from behind, separate the wires in the block directly from the lamp;
- remove the rubber cover;
- remove the end of the spring retainer with the hook from engagement, move the retainer to the side;
- remove the light bulb from the headlight housing;
- install a new lamp, performing the reverse sequence of actions.
Note. If the side light bulb in the headlight turns out to be faulty, it must be replaced on site. Otherwise, you need to drive to where the repairs will be carried out with the headlight lamp turned off.
Standard version of the brake light operating diagram
Power is supplied to fuse F17 from the battery, then the current goes to limit switch contact 11, and then, if the limit switch is closed, a circuit is formed with the filament of lamps 7. But note: part of the circuit is relay K1, more precisely, its contacts 5 and 4.
A complete electrical diagram with explanations of the VAZ-2112 car is here.
If the brake lights do not light up, on the VAZ-2112, as on all Tens, check one fuse. It is called F17 and is located in the mounting block to the left of the driver.
It is important to know: voltage is always present at one of the fuse terminals. Check it out!
A few words about the “serviceability relay”
The lamp health relay is called K1, and it is the largest in the mounting block. If you remove this relay, then when you press the pedal you can dial the voltage at terminal 5 (but not 4). Look at the diagram again, and it will become clear what we are talking about.
All relay contacts are numbered. Check the voltage at the block terminals:
- 6 — “mass” potential;
- 2 — voltage “+12”, but only after turning on the ignition;
- 5 — “+12” by pressing the pedal;
- 4 — the terminal rings like a ground tap.
LED lamps - why they are better
Many foreign cars these days are equipped with LED lamps instead of the usual incandescent lamps. Such lamps are installed in rear lights as brake lights, side lights, and turn indicators. This is no coincidence. This light gives the driver behind him additional time to make decisions and make maneuvers. Advantages of LED lamps:
- longer service life, higher light output;
- The LED lights up many times faster than a conventional lamp. This is an additional 5-6 m at a speed of 100 km/h.
- Incandescent lamps fail earlier most often due to strong vibration, especially considering the quality of Russian roads. In terms of this indicator, LEDs are much more durable and vibration is not a problem for them.
We turn on the brake lights forcibly
Relay K1 is successfully replaced with a pad with jumpers. In Fig. 1 just shows its diagram. If there is no such platform, you can temporarily close contacts 4-5. First, check everything mentioned above.
Have an observer watch what happens to the lamps. Press the pedal with one touch and release it. If the lamps do not turn on, check that the fuse is working properly. It's burned out, which means you're looking for a short circuit.
How to and how not to check the “0 Volt” potential
Let’s agree right away that we only work with a voltmeter. Voltage “+12” is caused by connecting one probe to ground. The presence of potential “zero” is checked differently: any of the probes is connected to a terminal with positive voltage, and then the second probe is connected to the wire being tested.
Consider the error: one probe is connected to ground, the second to the terminal being tested, and vol. Here they conclude that there is a “mass” potential, but this is wrong! If the contact with ground is broken, the device will also show “0”. That is, the number “0” does not contain information.
Wiring test for non-working brake lights (ground test)
Let's look at the basic diagram: the brake lights and the reversing lamps have a common ground pin. If contact with this pin is broken, the reverse lamps will not turn on. Well, brake lights too.
On the left side there is a connector through which the wiring goes to the fifth door. The connector has black and red wires. Check the voltages on them. Most often the ground on the black wire does not ring. But maybe the connector itself needs to be cleaned.
Usually, if the ground breaks, another pin is used - the one that is connected to the glass heating coil.
If the “plus” does not come to the red wire, we check the “frog”. It's simple here:
- Disconnect the connector with two wires from the limit switch;
- Using 17mm wrenches, loosen the two nuts: holding the lower nut, rotate the upper one;
- The end switch is removed as an assembly and checked with an ohmmeter.
By the way, one of the connector terminals receives a voltage of “12 Volts”. Check it!
If all the steps do not lead to results, there is only one thing left: contact a qualified electrician. We wish you success.
Price list
- Special offers
- KAMAZ spare parts
- Spare parts KAMAZ-5490
- Spare parts MAZ, YaMZ
- ZIL spare parts
- Spare parts ZMZ, for GAZ vehicles
- Spare parts for Volzhanki cars
- Spare parts for Gazelists
- Spare parts for trucks Lawns
- Spare parts for GAZ-71 caterpillar
- Spare parts UAZ, UMZ
- Spare parts KrAZ, BelAZ
- Spare parts URAL
- Spare parts BUSES
- AMAZ spare parts
- IKARUS spare parts
- KAVZ spare parts
- LAZ spare parts
- LIAZ spare parts
- NEFAZ spare parts
- PAZ spare parts
- Other buses
- Tractors, computer equipment, attachments
- Tractors and walk-behind tractors
- Municipal vehicles
- Attachments and trailed equipment
- Spare parts for TRACTORS and SPECIAL EQUIPMENT
- JCB – spare parts for special equipment
- Truck crane (KS-3577, KS-4517, etc.)
- AMZ (A-01, A-41, D-440, D-442, D-447, D-461, D-467)
- Amkodor (TO-18, TO-28, TO-30, etc.)
- ATZ (T-4A, TT-4M)
- VgTZ (DT-75)
- VMTZ (D-120, D-144, D-130, D-145T)
- VTZ (T-25, T30A-80, VTZ-2048)
- LTZ (T-40, LTZ-55, LTZ-60)
- MKSM, UNC, DETVAN
- MTZ – spare parts for tractors
- OTZ (TDT-55)
- PTZ (K-700/701/702/703/704)
- KhTZ (T-150, MT-LB)
- ChTZ (T-130, T-170, B-10, B-12, B-170, T-10M, DET-250)
- YuMZ – spare parts for tractors
- Other special equipment and tractors
- RVD – high pressure hoses and hoses
- MMZ spare parts and engines
- Spare parts for MMZ engines
- MMZ engines: D-242, D-243, D-245, D-246, D-260
- VAZ spare parts
- Spare parts OKA VAZ 1111
- Spare parts VAZ classic 2101 – 2107
- Spare parts VAZ front wheel drive
- Spare parts VAZ Granta and Largus
- NIVA spare parts and all-wheel drive
- Spare parts Moskvich, IZH
- Spare parts for Korean trucks
- Spare parts for Starex, H-1
- Spare parts for Porter, H-100
- Spare parts for HD65,72,78, County
- Spare parts for HD120, AeroTown
- Spare parts for HD160,170, . ,700,1000
- Spare parts for HYUNDAI, KIA buses
- Spare parts for Korean passenger cars
- Spare parts DAEWOO, CHEVROLET
- FOREIGN CAR spare parts more
- BMW spare parts
- DAF spare parts
- FIAT spare parts
- FORD spare parts
- Spare parts HONDA, ACURA
- IVECO spare parts
- MAN spare parts
- MAZDA parts
- MERCEDES spare parts
- MITSUBISHI spare parts
- Spare parts NISSAN, INFINITI
- OPEL spare parts
- Spare parts PEUGEOT, CITROEN
- RENAULT spare parts
- SCANIA spare parts
- SHAANXI spare parts
- SSANGYONG spare parts
- SUZUKI parts
- Spare parts TOYOTA, LEXUS
- VAG spare parts: VW, AUDI, SEAT, SKODA
- VOLVO spare parts
- Other foreign cars
- Trailers and semi-trailers
- SEMI TRAILERS foreign
- Domestic SEMI-TRAILERS
- TRACTOR TRAILERS
- Passenger TRAILERS
- Towbars and spare parts for passenger trailers
- Car audio and navigation
- Antennas
- DVRs
- Automotive video equipment
- Memory cards, flash drives
- Speakers, subwoofers, acoustics
- Accessories
- Radio tape recorders
- FM modulators, MP3 players
- Navigation, parking systems
- Radar detectors, antiradars
- Radio stations and accessories for them
- Sound amplifiers
- Auto chemical goods, filters
- Car cosmetics, paints, care products
- Auto chemicals, liquids, additives, antifreeze
- Household chemicals, gas
- Oil
- Lubricants, liquid wrenches
- Other means and fuels and lubricants
- Filters and elements
- Rechargeable batteries
- Batteries for motorcycles (up to 30 A/h)
- Batteries for cars (up to 125 A/h)
- Batteries for trucks (from 125 A/h)
- Accessories and tuning
- AvtoLady – products for women
- Breathalyzers
- First aid kits, fire extinguishers, emergency signs
- Car racks
- Gas equipment
- Car mirrors and elements for them
- Air ionizers
- Carpets, trunk mats
- Steering wheels, covers and gear knobs
- Compressors, pumps, hoses
- Seats, cushions, belt adapters
- Literature, catalogs
- Organizers, luggage securing
- Alarms, blockers, sirens
- External tuning
- Tuning internal
- Car refrigerators
- Anti-skid chains
- Seat covers, headrests
- Windshield wiper blades and strips
- Velo, moto, quad bikes
- Bicycles
- ATVs, all-terrain vehicles
- Motorcycles, mopeds, scooters
- Scooters and skateboards
- Accessories for bicycles and motorcycles
- Spare parts, tools for bicycles, motorcycles
- Suits and protection
- Tires, tubes, bicycles, motorcycles
- Helmets and visors
- Electrics for bicycles, motorcycles
- Nuts, bolts, fasteners
- Engines, cabins, frames
- Cylinder blocks
- Engines
- Cabins and bodies
- Platforms and add-ons
- Frames and semi-frames
- Tool, keys
- Chainsaws, generators
- Diagnostics, measurements
- Drills, machines, power tools
- Brushes, rollers, paint sprayers
- Keys, screwdrivers, tools
- Compressor equipment
- Shovels, axes, jacks, cables
- Sinks, vacuum cleaners, brushes
- Grease pumps, syringes, funnels
- Heaters, hair dryers, heat guns
- Pneumatic tools
- Cutting and abrasive tools
- Welding, soldering, gas equipment
- Service equipment
- Construction and finishing equipment
- Tool boxes
- Bearings
- Household goods, souvenirs