Niva instrument panel: description of indicator lamps
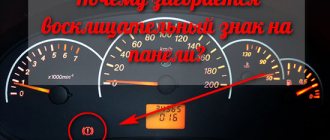
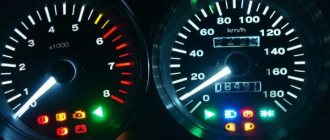
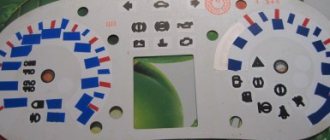
For the fullest description, we took the shield from the most common version of the VAZ 21213.
| Number | Description |
| 3/4 | The turn indicators turn on simultaneously when the hazard warning lights are activated. |
| 7 | Insufficient fuel level in the gas tank. |
| 8 | The vehicle's side lighting is on. |
| 9 | Emergency situation in the brake system. |
| 10 | The long-range illumination of the head optics is activated. |
| 12 | Vehicle mileage monitor. |
| 13 | Check engine light. If the indicator lights up, you need to carefully check the power plant. |
| 14 | Hazard warning light. |
| 15 | Clock display. |
| 16 | If the lamp lights up, you need to check the generator and battery charging. |
| 17 | Handbrake activated |
| 18 | The engine oil level has dropped critically. |
| 19 | Most configurations include a backup lamp. |
You should also highlight the colors of the car's indicators. They can be divided into three parts.
- Green/blue – indicators of these colors indicate normal operation of machine components.
- Orange/yellow - tells the driver that a certain unit requires attention or service.
- Red is the most dangerous color. If a lamp of this color lights up on the dashboard, the car must be urgently shown to a mechanic.
Exclamation mark on the Niva panel
Indicates that the fluid level in the brake system has decreased. You will need to open the expansion tank cap and add brake fluid to the required level. It is recommended to check the line for leaks and pad wear.
What is a torpedo
All cars have a dashboard (board), which is located in front of the passenger compartment. In a Niva Chevrolet car, it is a plastic covering on which almost all vehicle control elements are located. Although the panel is not a necessary part for driving a car, without it driving turns into complete dissatisfaction. Under the socket there are parts that can fail from time to time. And sometimes, to get to them, it is necessary, as they say, to disassemble half the car. Let's take a closer look at the stages of removing a torpedo from a Niva Chevrolet car.
Steps for removing the instrument panel
The reason for removing the panel may be not only the breakdown of parts located under the panel, but also the following points:
- Car interior modernization;
- Insulation and noise reduction of the interior;
- Cleaning the car heater;
- Replacement with a new, improved one.
Removing the Niva Chevrolet dashboard is carried out in stages. You need to arm yourself with a simple set of tools and get started.
- Stage 1. The car is disconnected from the battery. This is necessary, because there is a huge amount of wiring on the instrument panel, which can accidentally be shorted during removal. To do this, simply disconnect the negative terminal from the battery.
- Stage 2. First of all, the part of the casing located under the steering wheel is removed. The five fastening screws are unscrewed with a screwdriver, and this casing, consisting of two parts, is removed.
- Stage 3. The steering wheel and the switches located on the side are removed. The steering wheel is removed by unscrewing the nut located inside the steering wheel. Remove the steering column shaft. How to remove the steering wheel and its parts can be found in the relevant sections.
- Stage 4. The car radio and its installation location are removed from the passenger compartment. Let's start removing the floor covering. To remove the A-pillar trim, you need to unscrew four screws. The ignition switch is also removed.
- Stage 5. We proceed to disconnecting the wires. The blocks with wires located at the bottom near the gas and brake pedals are disconnected and marked with a marker. The wires supplying the car's anti-theft system are disconnected. The power supply of the instrument board consists of three blocks, which are also detachable.
- Stage 6. The ground wire of the car is unscrewed from the stud. Under the hood, you need to remove the filter, which is designed to filter the air entering the cabin.
- Stage 7. Most of the liquid is drained from the expander, and the clamps suitable for the heater radiator are disconnected.
- Stage 8. Work is carried out with a wrench inside the car. The bolts securing the panel to the stand and the stand to the bracket are unscrewed. The cross member strut is removed. A cross member of the instrument panel is attached to the steering shaft bracket, which can be removed by unscrewing four bolts.
- Stage 9. All visible and invisible bolts securing the instrument panel are unscrewed. These fasteners are located on top near the glass and on the side. The front air duct, which is designed to supply cold and warm air into the cabin, is removed.
- Step 10. You can remove the dashboard. It is best to do this together, so that one person observes the removal processes from inside the panel. Otherwise, any power wire or part may be damaged or broken.
Shield Niva 21213
A transitional link between the classical and modern systems. The dial indicators and indicators are similar to the dashboard of the VAZ 2105, which many car enthusiasts do not like, and they want to change it.
Which panel is suitable for Niva 21213
Users often install panels from a VAZ 2114 or 2110 car. A minimum number of alterations and modifications will be required here. Contact groups and wiring terminals are reinstalled under the required pins. Refinement of plastic and seat will be required.
Illumination of devices, lock, heater, etc.
Reg.: 03/19/2010 Messages: 204 From: Samara Age: 44 Car: Niva 1984 Cerato2009
Reg.: 03.26.2009 Threads / Messages: 4 / 897 From: Moscow region. Kolomna district Age: 48 Car: VW Passat B5 1998 TDI automatic transmission - exchanged for C-MAX 1.8 on the handle 2008, VAZ21213 2002 carburetor + MPSZ on D
Reg.: 07/13/2010 Messages: 11 From: Nizhny Novgorod Age: 43 Car: 21213 98
Reg.: 01/27/2010 Threads / Messages: 1 / 50 From: Volgograd Age: 68 Auto09.
Reg.: 03.20.2006 Topics / Messages: 1 / 41 From: Moscow Age: 61 Car: NIVA 21214 i, 2004
Reg.: 12/06/2004 Threads / Messages: 4024 / 23169 From: Moscow Age: 67 Car: 21214M, 2013
Alexey aka ALER.
Reg.: 03.20.2006 Topics / Messages: 1 / 41 From: Moscow Age: 61 Car: NIVA 21214 i, 2004
Reg.: 03/08/2011 Messages: 1 From: Russia, Pyatigorsk Age: 41 Car: LADA212140
Reg.: 10/24/2010 Messages: 14 From: Moscow Age: 36 Car: VAZ-2131 2015
I installed a device from a VAZ-2115, although it didn’t sit straight, but oh well. I really don’t like its green backlight, so I decided to change it to blue LED. The type is like in the photo.
I also want to make sure that when turned on, the backlight does not light up abruptly, but smoothly and also goes out. I found a diagram to do this. Do you think it will work out well?
Reg.: 11/13/2012 Messages: 5 From: Smolensk Age: 31 Car: VAZ 2121 1986
Reg.: 09.26.2011 Topics / Messages: 3 / 982 From: Mytishchi Age: 33 Car: VAZ 21214M October 2011, Hyundai IX35 4WD Travel 2013, Hyundai i30 1.6MT Active 2015
Reg.: 11/13/2012 Messages: 5 From: Smolensk Age: 31 Car: VAZ 2121 1986
Reg.: 09.26.2011 Topics / Messages: 3 / 982 From: Mytishchi Age: 33 Car: VAZ 21214M October 2011, Hyundai IX35 4WD Travel 2013, Hyundai i30 1.6MT Active 2015
Reg.: 06.14.2011 Threads / Messages: 5 / 750 From: Russia, (Moscow, Shatura) Age: 38 Car: Niva 4x4 2131 1.7i BOSCH MP 7.0. 2005 UPGRADE 2012-13 Sergey
Source
Shield Niva 21214
In the version where the injector is installed, the manufacturer installs a relatively modern device with a small display. The partially digitized version is easier to read and has a new indicator - a seat belt light.
Which panel is suitable for Niva 21214
On this version, users rarely change the device. The native panel is informative and only overexposure may be required here. If the driver decides to make a replacement, he needs to choose from a Lada tenth series car.
Design Features
What can the instrument panel tell us? “Chevrolet Niva” is designed in such a way that its panel unites all the control devices of the car. It includes:
- speedometer;
- odometer (counter of kilometers traveled);
- tachometer (crankshaft revolution counter);
- coolant and ambient temperature indicators;
- fuel level indicator;
- 12 control (signal) lamps.
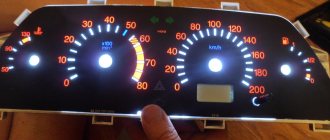
In order for the driver to monitor instrument readings at night, the panel is illuminated when the side lights are turned on. How bright is the instrument panel backlight? “Chevrolet Niva” has the function of adjusting the level of illumination of the dashboard. It is provided by six special light bulbs.
Important: the shield has an electronic design and cannot be repaired if it fails! Spare parts in the form of individual panel units are not available for sale. The only exceptions are signal and lighting lamps. In other words, if at least one indicator fails, you will have to buy an assembled panel.
The device on the Niva failed - the reason
For most classic versions, problems exist.
- The corresponding fuse has blown. This is usually insert F2.
- There are problems with the wiring. Such problems are not uncommon in classic car models. Here you should check the wires for damage to the insulation, loosening, oxidation of contact groups, breaks.
- Damage to the device. Here you should check the device circuit for breakdowns and burns.
If we are talking about modern modifications with an ECU, it is easier to find the problem using computer diagnostics. The BC standard errors will accurately indicate the location of the fault.
Niva instrument panel does not light up
The backlight of the shield is checked in the same way. If the panel periodically blinks or only some of the indicators go off, check the wiring. This is where the contact groups are usually oxidized. It is also possible that the integrity of the insulation may be compromised and individual light bulbs may burn out. If the backlight goes out completely, check the lighting fuse.
Malfunctions
The PCB is an electronic unit and therefore may fail in the event of a short circuit or open circuit in the power supply. If you encounter one of the problems, then the first thing you should pay attention to is what signs appeared:
- The engine starts and runs, but the panel shows no signs of life. In this situation, there may be no contact on the device connectors. This can be corrected in the following way: you need to disconnect the pads and clean the contacts; this problem can arise when there is an increased level of moisture, for example in winter.
- The tachometer and speedometer stopped working. This may also appear if there is a break in the power supply or if there are problems with the operation of the temperature and fuel level sensor.
- The light bulbs have stopped burning, but all the elements are working as expected, in this case there may be problems in the power wires or in the lamps themselves
Tuning options
For those who want to bring something new to the interior of the cabin, there are special offers in the form of electronic panels such as Gamma GF 825, GF 826, GF 610 SL, FLASH-I, etc. They look great and are installed without problems.
If you decide to carry out such tuning of the instrument panel, the Chevrolet Niva will immediately be transformed for the better. You just have to pay from 9 to 20 thousand rubles for this. But for this money you will additionally receive:
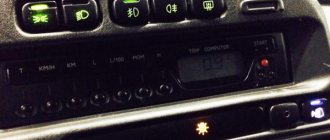
- multifunctional trip computer;
- digital and analogue vehicle speed indicators;
- LED warning lamps with two-level alarm;
- on-board network voltage indication;
- "Autolight" system;
- integrated diagnostic tester for electronic engine management system;
- ability to select and adjust the backlight (color, brightness).
Well, if you don’t have the opportunity to spend that kind of money, you can modernize the panel using special tuning kits. They include overlays for instruments and indicators (of different colors) and lighting elements. Such sets cost 500-800 rubles.
