The parking brake is a recoil system for fixing a car at stops and parking places, as well as an integral part of the components and assemblies of the car. If you frequently and unreasonably tighten the handbrake lever, problems may arise with the cable, which begins to stretch over time.
This leads to a decrease in the braking efficiency of the vehicle. It is not necessary to visit a service station to troubleshoot the problem. You can tighten or change the part yourself.
Causes of malfunction
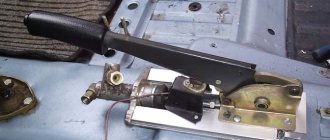
Handbrake lever VAZ 2110 in a leather case
Let's consider the principle of operation of the parking brake (handbrake) on a VAZ 2110 car.
It's pretty simple. One of its main elements is a special cable. When the driver pulls the parking brake handle, this cable is tensioned, which evenly distributes its effect on the brake pads of each wheel of the car. During operation, the rear brake pad linings wear out, the cable stretches, and as a result, there is a need to adjust or repair the handbrake. Also, very often drivers, especially beginners, drive with the handbrake raised, which leads to premature wear of the handbrake cable. If the driver does not carry out preventive maintenance or repair of this mechanism in a timely manner, the car may independently start moving from a standstill or will slow down, even stopping, on an uphill slope.
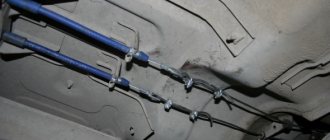
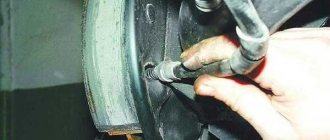
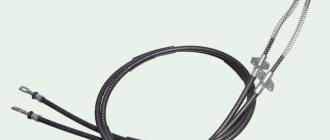
External view of the parking brake cable on a VAZ 2110 car
You can adjust the handbrake not only in a car service center, but also with your own hands at home. But first you need to familiarize yourself with the manual parking brake diagram in order to know its main elements for setting up this system.
Handbrake diagram for VAZ 2110
In this diagram the following elements are indicated by numbers:
1 - button that fixes the handbrake lever; 2 — hand brake lever; 3 — protective cover; 4 — handbrake rod; 5 — cable equalizer; 6 — adjusting nut; 7 - lock nut; 8 - cable; 9 — protective sheath of the cable
How to replace the parking brake
If after adjustment the parking brake does not work, it barely holds, and the cable is tightened to the maximum until it stops, then it’s time to make a replacement.
To replace the main cable or those extending to the wheels, you must also put the car in an inspection hole.
From the interior, remove the decorative trim at the base of the handbrake and unscrew the nut with which the adjustment was made. For auxiliary cables, the equalizers must be disconnected by turning 90 degrees.
Remove the brake drum, brake pads, and use a screwdriver to pull the cable tip out of the groove on the release lever. Using pliers (pliers), we open the spring retainer and remove it from the shield.
Lubricant for hand brake cable
It is better to lubricate the cable with a grease that has good performance characteristics: a high maximum melting point and resistant to oxidation.
Litol 24 cable lubricant is excellent. You can also use its foreign analogues.
Used or flushing oil is not suitable for cable lubrication. Such oils do not have preservative properties and contain sulfur with water, resulting in oxidation.
First adjustment steps
To begin adjusting the handbrake, you need to make sure that one of three elements is present and accessible: a lift, an inspection hole or an overpass.
An overpass is a type of engineering structure that is intended to lay a road or communications above the ground.
Homemade overpass for adjusting the handbrake on a VAZ 2110
At home, most often only the inspection hole is accessible. If you cannot take advantage of any of the above conditions, then you can make do with a kind of support trestles, which are a rigid structure installed under the rear part of the body after it has been lifted with a jack. In addition, you need to prepare two wrenches size “13”, as well as pliers.
Now you need:
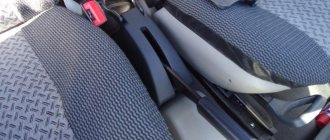
- lower the parking brake lever to its lowest position;
One of the adjustment stages is to lower the handbrake lever
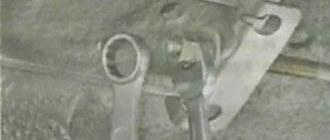
- using one key set to “13” you need to loosen the lock nut, while holding the adjusting nut with the second key;
Loosen the locknut and loosen the adjusting nut
- start tightening the adjusting nut and continue until the handbrake cable tightens or loosens slightly if it is too tight;
- While tightening the adjusting nut, you need to hold the rod in the handbrake mechanism with pliers.
That's not all, as there are a few steps left to complete the complete handbrake setup.
Replacing the handbrake cable on VAZ 2109 and 2110. We can do without a service station
- Jack;
- New handbrake cable;
- New repair kit for rubber bushings;
- Drum type brake pads for rear wheels;
- Automotive tool set;
- Shoes for ramp wedges.
- It is necessary to have an overpass or inspection hole, since without them we will not be able to get under the bottom of the car;
- We put the car in neutral, carefully wedge the front wheels from possible spinning;
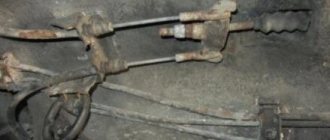
- We make sure that the handbrake is lowered to the “off” position, climb under the bottom of the car and, using a cape, unscrew the central rod - the handbrake cable tensioner, which is located in the rear of the transmission. A characteristic distinguishing feature is a lever with two tensioners at the ends;
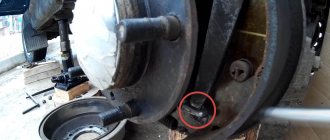
- After the cable is lowered from the front tensioner, we proceed to the rear part. To do this, jack up the rear wheels one by one, tear off the mounting bolts and remove the wheels;
- This frees up access to the brake block and cylinder. Using a Phillips screwdriver, unscrew the 3 screws and remove the brake module cover. We see in front of us two pads and a brake cylinder with a cable tensioner;
- Considering that we previously weakened the central rod, using pliers we disconnect the lower cable arm from the brake pad, having first removed the spring;
- Having removed the handbrake cable from one side, you can proceed to the other, having first put a new cable in place of the old one. Next, we install a modular brake complex. If necessary, the pads need to be replaced, otherwise you will have to do this only after a couple of thousand km;
- Having processed the second wheel in a similar way, all we have to do is place the second ends on the central tensioner and tighten it to the appropriate level with a nut;
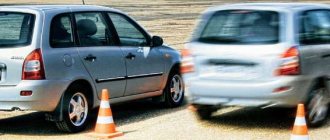
- The performance test is carried out as follows: the car is placed on a slope of at least 25% with the handbrake. The number of fixations should not exceed the limits from 2 to 7;
- Next, you should get out of the car and try to move the car down using physical effort, if this does not work, then you did everything correctly, otherwise you need to tighten the handbrake cable a little;
- Fulfillment of all conditions may indicate that you can continue further and you are not afraid of any technical inspection.
AutoFlit.ru
The following two tabs change content below.
- Bio
- Latest Posts
admin1
I am a professional in the field of Auto Electrics and Auto Diagnostics. Work experience more than 10 years. I will identify and eliminate faults of any complexity. (Even with cars that Dealers and services cannot handle, as it were, of the highest class). We carry out all types of work on the installation of additional electrical equipment (xenon, multimedia system, special signals, etc.)
Final Setup Steps
- continue rotating the adjusting nut until we are sure that the brake lever has a full stroke of approximately 3 clicks (this operation is convenient to perform with two people - one person rotates the nut, and the second checks the handbrake);
- after checking the working stroke, you need to tighten the locknut while holding the adjusting nut with a wrench;
- now you need to check whether the handbrake cable is not too tight: the parking brake lever goes down, the rear wheels are jacked up and turned by hand - they should rotate evenly, without delays;
- if the lever travel is still large, then we continue to tighten the adjusting nut (or unscrew it if the cable is too tight) and regularly check the handbrake travel until it reaches 3 clicks and the brake pads do not interfere with the rotation of the wheels.
After adjusting the system, you should check its operation. To do this, the driver needs to place his car on a section of the road with a slope of 23% and raise the parking brake lever. If the car is securely fixed on the road and does not move, this means that the work was carried out correctly.
Worn brake pads
Many people believe that it is possible to drive on worn brake pads and nothing bad will happen.
After all, in fact, the car will be able to brake at the right moment, although not as quickly as we would like. This concerns the wear of the front pads. They are part of the hydraulic brake system. And if the pads are not worn down to a critical level, the car will actually be able to brake when you press the brake pedal. The service life of the front pads is approximately 10 thousand km. But under certain factors, wear may occur earlier. If you do not change the pads for a long time, they can wear out completely, and then the brake system may simply not work at one point. Their minimum thickness should be 1.5 mm. Otherwise, sudden braking may damage the brake cylinder. and this is an extremely dangerous situation.
At such moments, only the serviceability of the hand brake can save the situation. Its pads take about twice as long to wear out. But replacing them if necessary is much more difficult than in the case of a hydraulic brake. That is why the wear of the handbrake pads is eliminated by drivers when they are almost completely worn out.
You can only imagine what will happen if the front and rear parts wear out at the same time. After all, if the hydraulics fail, you can raise the handbrake and the car will slow down. If not, you will have to rely only on luck.