Cars admin26.02.2020
Part 1. Introduction
Flushing the fuel system, which will be the subject of today’s post, is not the first in the history of the car. Her first procedure was performed more than two years ago, in April 2013. Then the operation was carried out at a service station, respectively, using specialized equipment. The chemical used was a liquid from Liqui Moly, namely Benzin-System-Reiniger. The advantages of chemistry, in comparison with the popular Wynn's, included a much more careful attitude towards rubber products, as well as the absence of the need to change the oil after flushing the system.
Recently the moment came when I decided to delve into this topic again. This time I wanted to do everything myself, without the help of people with equipment. Doing everything yourself next to your own garage is much more pleasant for many reasons.
I was also extremely curious to see what the result would be after cleaning the fuel, taking into account that there was not a single refueling without the use of the Castrol TBE additive. In other words, this can indirectly confirm or refute the advisability of using an additive or flushing the fuel in cars that, from birth, or after extreme cleaning of the fuel, have been running on fuel with the addition of this additive.
Part 2. Preparation
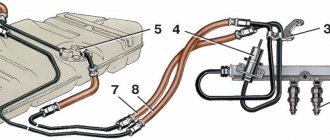
Thanks to the many entries on this topic, the list of necessary elements for assembling the device is extremely clear: • VAZ fuel hose • Fine fuel filter for carburetor modifications of the VAZ • 2x Valve for tubeless passenger wheels • 4x Clamp • Plastic bottle, volume of at least 1 liter
This list should include a compressor with a pressure gauge, without which nothing will work. The volume of the bottle depends solely on human comfort - the larger the container, the less often you will have to pay attention to the pressure gauge and compressor to maintain pressure in the container. I took 6 clamps in case of unforeseen circumstances.
If with the equipment everything is extremely clear, then with the chemistry that will be such a delicate operation, everything is not so clear: I would not trust the ordinary “Solvent”, Wynn’s is also dismissed because of its aggressive effect, which is not denied by anyone and has been confirmed by many , as it turned out during the study of this topic. I would like to find and purchase chemicals from Liqui Moly similar to those used previously, but I was unable to do so - no matter where I asked, they were not available anywhere. To be fair, I note that I looked only in my city and only in those stores that have at least some trust.
In one of the establishments I was offered two options as an alternative - the same Wynn's and the product of the Russian company LAVR, namely LAVR ML-101. Previously, I had heard good reviews about products from the latter manufacturer, but I had never personally encountered or delved into the search for negativity, especially for this particular product. Next, the Internet, Drive2 and studying the results of a search query for LAVR ML-101. And to my surprise, I didn’t find any negativity; on the contrary, they talked about the advantages in the form of careful handling of rubber products, no need to change oil and spark plugs, as well as convincing efficiency. Seeing no alternative, I chose the option from LAVR.
As a result, the following set was drawn:
Part 3. Assembly
Perhaps I’ll start the description of the assembly by dividing the fuel hose in two. A fuel filter is inserted into the resulting gap and secured with clamps. Next, a hole is made in the lid of the selected container, into which a valve is inserted with force, from which the nipple was previously removed. Part with a thread, the valve is inserted into the fuel hose and secured with a clamp - you should pay attention to the position of the fuel filter so that the arrow on it points in the direction from the valve. A similar hole is made in the bottom of the bottle, into which a valve is also inserted, but with a nipple.
At this stage, the preliminary assembly can be considered complete.
Part 4. Process
First, before starting to work on the car, you should turn off the fuel pump so that you don’t have to watch a fountain of 98-grade gasoline gush in the engine compartment at a pressure of 380–400 kPa (3.8–4.0 kgf/cm2). This can be done in two ways: • Raise the back seat, open the hatch to access the fuel pump and remove the chip. • Unscrew one screw at the front passenger’s feet, remove the plastic element and, just below the ECU, remove the 15A fuel pump fuse - this is the option I chose.
Holding the nut on the fuel hose with a wrench, that is, the one that is closer to the left side of the car, we turn the nut adjacent to the fuel pipe and the ramp, that is, the one that is closer to the engine. The nut on the hose is static relative to the hose itself, so there is no need to twist it.
Having successfully released the connection, carefully remove the small rubber ring-seal from the tube and put it aside so as not to lose it.
Part 5. Description of the behavior of the car during washing
When first started using flushing chemicals, the car engine started up absolutely calmly, without any deviations. Throughout the first 15 minutes there were no changes, the speed remained as usual stable, the exhaust was also unremarkable.
When starting up, after 15 minutes of inactivity, the car started up a little less willingly, if only because I poured in an additional amount of chemical by briefly turning on the injectors. Although it is worth noting that the launch was successful the first time, after the first or second revolution of the crankshaft. For the first couple of seconds, the revs were below normal levels, and the exhaust had a blue tint and an unpleasant, pungent odor. Then the speed leveled off, but the exhaust remained unusual, slowly returning to normal with each new increase in speed.
At the end of the washing, the first start on gasoline differed from the usual only in a new portion of bluish acrid smoke. It seemed to me that its volume was even greater than when starting up for washing after a 15-minute downtime. After several presses of the gas pedal, the exhaust returned to normal.
Part 6. Impressions
In addition to the Priora, the fuel system of the Ford Focus II 1.6L 115HP was simultaneously flushed, which is described in the full version of the entry on the BZ pages. Both cars are operated on AI98 with the addition of Castrol TBE additive. The Focus ran for at least 10tkm on this mixture; the fuel had not been flushed before. Priora also uses AI98 with the addition of the Castrol TBE additive; the additive began to be used even before cleaning the fuel, which was carried out 50 tkm ago, and there was not a single refueling without it, and therefore I think it is possible to judge its effectiveness based on the results of the work performed. Also, both cars run on iridium spark plugs, Priora on Denso iQ20, Focus on NGK, the model of which I no longer remember.
General principle of operation of Lada Priora injectors
Gasoline is pumped into the fuel rail using a gasoline pump, to which the injectors are connected. Based on a signal from the electronic control unit (ECU), an electric current is supplied to the injector coils, their cores are drawn inward, opening the fuel channels. Gasoline is sprayed into the combustion chambers and ignites under the influence of enormous pressure created by the upward pistons.
The design of Lada Priora injectors is quite complex
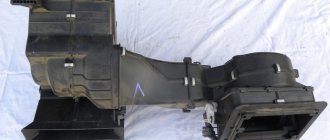
Main elements of the fuel system of an injection engine
The injector is a complex mechanism for supplying fuel to the cylinders. The entire fuel supply process is controlled by the engine's electronic control unit (ECU). The fuel supply system also uses a parallel air supply.
Fuel pump glass
The fuel pump cup is a collection of the main elements of the fuel system assembled on one site.
The fuel pump glass includes:
- Gasoline pump
- Coarse filter
- Fuel level sensor
- Fuel pressure regulator (only in 1.6 liter engine versions)
Gasoline pump
It is one of the main elements of the fuel system. Serves to supply fuel to the cylinder block under pressure. A fuel pump is a kind of electric motor. Its operation is based on the principle of centrifugal force. Under the influence of the magnetic field formed in the stator of an electric motor, its armature is given rotation. A pump volute is installed on the anchor shaft, which directly pumps pressure into the fuel system.
The gasoline pump is very capricious and picky about the purity of the fuel consumed. Most often, the fuel pump fails due to low-quality fuel or its lack in the tank. In order for the gas pump to last as long as possible, it is necessary to refuel at proven gas stations and keep at least 25% of the tank volume in the car’s tank. If you drive with the fuel light on, the fuel pump will most likely fail much faster, since if there are bumps, the gasoline in the tank will squish from side to side and the fuel pump will suck in air.
Injectors and fuel rail
The fuel rail serves as a kind of case for the injectors; it is in it that they are installed.
Fuel rail with injectors
The injectors of an injection engine are also one of the most important elements of the fuel system. Designed to supply fuel to the engine cylinder block under pressure. The injector sprays fuel into small droplets for better and easier ignition in the cylinder.
Injectors
The injector is installed directly on the car engine, namely in the cylinder head. The number of injectors depends on the number of cylinders of the car. Lada cars have 4 cylinders, therefore there will also be 4 injectors.
Injectors are also very sensitive to fuel, but are less susceptible to damage since the fuel supplied to them is filtered through 2 filters: a coarse filter and a fine filter. But more about them a little later.
Fuel pressure control
Fuel pressure regulator for 1.5 liter engine
The fuel pressure regulator (FPR) is a sensor installed on the fuel rail in 1.5-liter engine versions and installed in the tank on the fuel pump cup in 1.6-liter engine versions. It serves to ensure the required fuel pressure in the system and regulates the fuel pressure by releasing excess fuel pressure into the return line.
The RTD is a very reliable element and fails extremely rarely. The cause of its breakdown may also be poor quality fuel or the aging factor.
Fuel line
Dismantled fuel line The fuel line is a set of fuel pipes designed to transport fuel from the tank to the internal combustion engine. The highway in Lada is located under the bottom of the car and is protected by plastic covers.
Fuel level sensor
The fuel level sensor is installed in the tank on the fuel pump glass. Serves to indicate the volume of fuel in the tank, displaying information on the instrument panel.
Injectors installed on Priora
The Lada Priora car is equipped with imported injectors manufactured by the German company BOSCH. These devices are highly reliable. Their service life can reach 160 thousand kilometers. However, car service specialists strongly recommend changing injectors every 120 thousand km.
Almost all Prioras are equipped with German injectors from BOSCH
Injectors for 8 and 16 valve engines
You should know that the injectors of the 8-valve Priora engine are no different in appearance from the injectors of the 16-valve engine. These are all the same devices from BOSCH, consisting of a housing, a coil, a diffuser and a fuel grid. When choosing injectors for a Priora, you need to think not about the number of valves in the engine, but about its volume. Because the markings of injectors for 1.5 liter engines are different from the markings of injectors for 1.6 liter engines. In the first case, the BOSCH injector should be marked 0-280-158-110, in the second - 0-280-158-502. You can clarify the markings in the car’s operating instructions, at the end of which there is a summary table with digital designations of all BOSCH injectors depending on engine size.
Table of applicability of injectors for VAZ cars
LADA PRIORA 21723
Assignment of contacts of the instrument cluster block
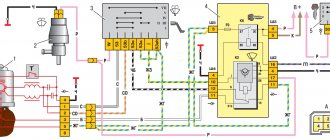
1 To the electric power steering 2 To the hazard warning lamp 3 To the emergency oil pressure sensor 4 To the parking brake switch 5 To the immobilizer control unit 6 To the airbag control unit 7 To the exterior lighting switch 8 To the turn signal switch (starboard side) 9 To the indicator switch turn (left side) 10 To the fuel injection system control unit 11 To the front passenger airbag deactivation sensor 12 To the seat belt sensor not fastened 13 To the control unit of the electronic brake force distributor 14 To the “RESET” button on the steering column switch (-) 15 To the level sensor brake fluid 16 To the anti-lock brake system control sensor 17 To the headlight high beam switch 18 To the instrument cluster lighting switch 19 Housing 20 To terminal “30” of the battery 21 To terminal “15” of the ignition switch 22 To the fuel consumption sensor 23 To the function switching mode key trip computer in a ring forward and changing the minutes (-) 24 To the mode key for switching the functions of the trip computer in a ring back and setting the clock (-) 25 To the outside temperature sensor (-) 26 To the outside temperature sensor (+) 27 To the fuel level sensor 28 To speed sensor 29 To coolant temperature sensor 30 Low-voltage tachometer input 31 Diagnostics during production of instrument cluster 32 To terminal “L” of generator relay regulator
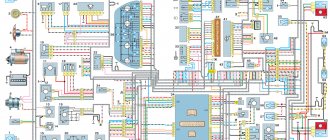
List of elements of the electrical connection diagram of the rear wiring harness of LADA PRIORA
1 – rear wiring harness block to the instrument panel wiring harness block; 2 – rear wiring harness block to additional wiring harness block 2 (left rear door); 3 – rear wiring harness block to side door wiring harness block (right front door); 4 – left side direction indicator; 5 – electrical package controller; 6 – right side direction indicator; 7 – interior lighting unit; 8 – handbrake warning lamp switch; 9 – left lamp; 10 – right lamp; 11 – interior air temperature sensor; 12 – interior lamp switch in the driver’s door pillar; 13 – switch for the interior lighting in the pillar of the right front door; 14 – switch for the interior lighting in the pillar of the right rear door; 15 – interior light switch in the left rear door pillar; 16 – block of the rear wiring harness to the block of the wiring harness of the side doors 2 (left front door); 17 – block of the rear wiring harness to the block of the additional wiring harness (right rear door); 18 – blocks of the rear wiring harness to the rear right loudspeaker; 19 – blocks of the rear wiring harness to the rear left loudspeaker; 20 – cigarette lighter; 21 – electric fuel pump module; 22, 23 – rear wiring harness blocks to instrument panel wiring harness blocks 2,3; 24 – trunk lighting; 25 – additional brake signal; 26 – trunk lock drive switch; 27 – interior lamp; 28 – rear wiring harness block to the front wiring harness block; 29 – left rear speed sensor; 30 – right rear speed sensor; 31 – sensor for automatic glass cleaning system (rain sensor); 32 – rain sensor sensitivity regulator; 33 – rear wiring harness block to instrument panel wiring harness block 4; 34 – block of the rear wiring harness to the block of the wiring harness of the parking system sensors; 35 – alarm unit for safe parking system; 36 – driver’s seat belt pretensioner; 37 – passenger seat belt pretensioner; 38 – rear wiring harness block to side door wiring harness block 3 (right front door); 39 – airbag control unit; 40 – parking system control unit; 41 – block of the rear wiring harness to the block of the rear additional wiring harness (tailgate); 42 – rear wiring harness block to rear additional wiring harness block 2 (tailgate); 43 – left seat heater; 44 – switch for electric seat heaters; 45 – right seat heater. 46 – rear wiring harness block to the parking system switch.
Checking Lada Priora injectors
As mentioned above, both the fuel system ECU and the injector itself can fail. To carry out a complete diagnosis of the ECU, special software is required, which the average motorist simply does not have. Therefore, the only option is to diagnose the machine at a service center. The program, connected to special equipment, will quickly detect ECU errors and correct them.
A full check of Priora injectors is possible only on a special stand
And if problems arise in the mechanical part of the injector, then the diagnostic program will be useless. The maximum that it can do is indicate which cylinder is not working correctly. After this, the car owner can only replace the failed injector on the specified cylinder, since these devices cannot be repaired.
In order to clean the injectors in VAZ 2114/2115 cars, it is recommended to read this material: https://vazweb.ru/desyatka/pitanie/zamena-forsunok-vaz-2114.html
How to check and adjust the pressure of the Priora fuel pump
Normal pressure of the Priora fuel pump is necessary for the process of supplying the combustible mixture to the carburetor and its normal spraying through the nozzles. The slightest disruption in the operation of this system leads to the fact that either an excessively saturated or lean mixture is supplied to the combustion chamber, which is why the engine operates abnormally. How to check the fuel pump pressure, and what should be done if it is abnormal?
Checking the fuel pump pressure
The first thing to do is to specifically check the operation of the pump. To do this, just turn the ignition key not to the extreme position and listen to whether the electric fuel pump turns on (and this is exactly the variation that is installed in the Lada Priora car). If you hear a noise for a few seconds, followed by a click, everything is fine.
Using a pressure gauge, the check is performed on the ramp - this is where the protective valve cap is hidden, which does not allow air to get in, but presses the fuel out with pressure. The first step is to unscrew the cap and check whether the rubber in it is broken - this may be the main reason for the inoperability of the fuel pump. If it is damaged, it is better to completely replace it; fortunately, it is cheap. Then the spool is twisted. Next, a pressure gauge is connected to the outlet of the safety valve from the pump. Normal pressure is in the range of 380-400 kPa. If it is lower, then either the pump has failed or there is a blockage in the system. If it is more, then it is quite possible that the internal pressure gauge of the fuel pump is faulty and it is simply pumping fuel excessively to the carburetor. Replacing it is easy.
Naturally, before checking the pressure, the ignition is turned on, but the engine itself is not. The pump itself will equalize the pressure to the desired parameter. If this is not done, then the pressure will be at the level of 1 atmosphere with a slight deviation, because pumping is not performed.
It should also be taken into account that all manipulations are carried out at reduced fuel pump pressure. To do this you will need:
- remove the rear seat and gain access to the pump (by removing several screws on the rubberized cover);
- release the lock and let the fuel run out completely (the engine will be in neutral gear and will stall literally after a few seconds);
- Next, you need to turn on the ignition and equalize the pressure;
- It is also recommended to turn on the starter for 2-3 seconds and immediately reset the ignition key to its original position (turn off the ignition).
What happens if the pressure deviates from the norm?
If the pressure in the fuel pump is too high, too much fuel will be supplied to the carburetor.
The air will mix with it through the filter and burn in the cylinder. But if there is a lot of fuel and not enough oxygen, the mixture will not burn completely. At the same time, black smoke comes out of the exhaust pipe, and fuel drips from its end (may even be mixed with soot).
If the pressure in the system is very low, the mixture will be lean. There is too much oxygen. At the same time, the engine power is radically reduced; at idle speed the engine simply stalls, and the choke, of course, will not help, since it only regulates the operation of the throttle valve in the carburetor.
It is interesting that the on-board computer will not report a breakdown of the fuel pump - this is truly a huge mistake by VAZ engineers. In Priora, you can only read indicators when you connect a computer to the EMU unit, but not everyone can do this. And the indicators may not be true if the on-board computer itself is damaged. That's why checking with a pressure gauge on the ramp is the best option for checking pressure.
https://www.youtube.com/watch?v=QaJwthsYi3Q
Replacing injectors on a Lada Priora car
Before we move on to describing the process of removing the injectors, you need to select everything you need for the job. Here is a list of tools and consumables:
- Phillips screwdriver;
- set of hex keys;
- set of open-end wrenches;
- pliers;
- wrench and set of socket heads;
- flat screwdriver.
Sequence of work
- The block to which the wires of the Priora injectors are connected is manually disconnected and removed.
The block with wires on the Priora fuel rail is removed manually
The mounting fuel rail on the Priora can only be unscrewed with a Phillips screwdriver
The Priora fuel fitting should be unscrewed with only two keys
The O-rings from the Priora ramp should be removed so as not to lose them
The Priora ventilation hose can only be removed after loosening the clamp
It is convenient to loosen the Priora brake hose clamp with pliers
The Priora intake pipeline is held on top by only two nuts
After unscrewing the fasteners, you can simply pull the Priora pipeline towards you
Characteristics of the VAZ 2110 injector 8 valves with a working volume of 1.5 and 1.6 liters.
• Engine VAZ 2111 1.5 l. 8-valve injector ➤ Displacement – 1499 cm3 ➤ Number of cylinders – 4 ➤ Number of valves – 8 ➤ Cylinder diameter – 82 mm ➤ Piston stroke – 71 mm ➤ Power – 76 hp (56 kW) at 5600 rpm ➤ Torque - 115 Nm at 3800 rpm ➤ Compression ratio - 9.9 ➤ Power system - distributed injection ➤ Acceleration to 100 km/h - 14 seconds ➤ Maximum speed - 167 kilometers per hour ➤ Average fuel consumption – 7.2 liters • Engine VAZ 21114 1.6 l. 8-valve injector ➤ Displacement – 1596 cm3 ➤ Number of cylinders – 4 ➤ Number of valves – 8 ➤ Cylinder diameter – 82 mm ➤ Piston stroke – 75.6 mm ➤ Power – 81.6 hp (60 kW) at 5600 rpm ➤ Torque - 115 Nm at 3800 rpm ➤ Compression ratio - 9.6 ➤ Power system - distributed injection ➤ Acceleration to 100 km/h - 13.5 seconds ➤ Maximum speed - 170 kilometers per hour ➤ Average fuel consumption – 7.6 liters
Basic faults
The main malfunction characteristic of the VAZ 2110 is the appearance of the engine tripping effect. Malfunctions can occur for various reasons. Let's consider the factors that cause unstable engine operation, as well as methods of elimination. If the stove doesn't heat up, look here, and about replacing the valves here.
Poor quality fuel
The first thing you need to check is how high-quality the fuel was poured into the vehicle. If the gasoline was of poor quality, then most likely one of the elements of the fuel system was forgotten. So, the motorist will have to find out what the fuel supply scheme is and find parts that could have failed. So, the first element that comes under scrutiny is the spray nozzles. Malfunctions of the injectors can cause unstable operation of the engine, which will lead to tripping. A special stand is used to diagnose and clean the unit, but many motorists carry out the process themselves, using carburetor cleaning fluid. Also, unstable engine operation may be caused by clogged fuel filters. One is located under the rear right wheel, and the second is in the fuel pump. There is a filter mesh on the fuel pump intake that needs to be replaced. The process is quite complicated, since you have to remove the rear seats and remove the fuel supply element. But the fuel filter under the wheel can be changed quickly and without any problems.
Ignition system
Damage to spark plugs or high-voltage wires can also cause tripping. So, it is necessary to check all the elements using a tester, as well as visually inspect them. If there is damage, it is recommended to replace the entire set.
Sensors and ECU
Another major reason for engine tripping is the failure of one of the engine sensors, as well as a malfunction in the electronic control unit. To carry out diagnostics you need to connect to the “brains”. Next, based on the errors shown, find the faulty meter and replace it. If this does not help and the error in the ECU remains, then it is recommended to reset, and in some cases flash the control element.
Maintenance
Engine maintenance is carried out every 10-12 thousand kilometers. The schematic map is available from official representatives of the manufacturer. But, as practice shows, it all comes down to changing the oil and oil filter. Many car enthusiasts ask the question - what is the best engine oil to pour into the VAZ 2110 8-valve power unit? The best option remains semi-synthetic motor oil of domestic or foreign production labeled 10W-30 or 10W-40.
Engine chip tuning circuit
Not many car enthusiasts can boast of a powerful 2110 engine. Thus, to improve the power characteristics of the engine, it is necessary to carry out chip tuning of the VAZ 2110. To do this, they usually turn to specialists, but more and more vehicle owners are doing the process themselves.
The chip tuning scheme is quite simple. To perform the operation yourself, you will need an OBD II cable (USB-Auto), a laptop computer and software. It is worth remembering that there are three options for modifying the power unit: for power (but this will increase consumption), for reducing consumption (leading to a loss of power) and balanced (balance between the optimal indicators of consumption and power). Typically, chip tuning of a VAZ 2110 is done with the aim of reducing fuel consumption, therefore, if the owner of the car decides to do it himself, then it is necessary to select the appropriate software. But, it is recommended not to take risks and turn to professionals for help.
Cleaning Priora injectors
There are two options for washing injectors: with and without removing them from the car. The removed injectors are washed on special stands using ultrasound, under the influence of which even the oldest contaminants disappear. Ordinary drivers do not have such stands, so below we will consider a more popular option for washing injectors without removing them from the Priora. Here's what you'll need for this:
- liter of special flushing fluid;
- two automobile nipples;
- automobile fuel filter;
- a pair of metal clamps;
- a meter piece of rubber hose with a diameter of 12 mm;
- drill with 13 mm drill bit;
- electric pump;
- two liter plastic bottle.
Flushing sequence
- The bottom and cap are drilled into the plastic bottle. This is done with a “13” drill. Automotive nipples are inserted into the holes.
Ordinary car nipples are inserted into the holes of a plastic bottle
Priora injectors are washed using a filter and a plastic bottle
The green button is clearly visible on the Priora fuel hose
The main fuel hose of the Priora is connected to the fuel filter for flushing
The device for washing Priora injectors is assembled and ready for use
A car water pump plays an important role in the operation of a car engine. It is possible to recognize its malfunctions using the following article: https://vazweb.ru/desyatka/pitanie/zamena-forsunok-vaz-2114.html
How to check the fuel pressure regulator
The fuel pressure regulator is a purely mechanical element, so it is impossible to check its performance using electrical instruments. In addition, it is worth noting the fact that the RTD is not a collapsible element
, therefore, if faults are detected in it, the only option is replacement. Such a repair will not hurt your wallet - the regulators are quite cheap, and repairs (if it were possible) would cost much more.
To bring the car back to normal condition, it is necessary to check the RTD for functionality. There are several simple methods that allow you to independently determine the causes of problems and eliminate them without resorting to the expensive services of specialists.
The first way is visual. It can only be used on carburetor engines, so today this method is practically not used. This check consists of the following: it is necessary to clamp or disconnect the valve and observe the flow of fuel. The intensity of the fuel jet determines the malfunction. The method is far from the most effective; it is not able to provide the required accuracy, so its use is not recommended.
The second method gives an accurate result and allows us to speak with confidence about a malfunction of the RTD.
To check, you will need a pressure gauge, which must be installed in the gap between the fitting and the fuel supply hose, disconnecting the vacuum hose. When checking, the pressure should increase from 0.3 to 0.7 Bar. The absence of an increase in pressure during such a check does not mean anything, and the operation must be repeated with another vacuum hose. If in this case the regulator does not produce pressure, then it is clearly faulty and requires replacement.
When connecting a pressure gauge to the fuel system, you can use another test method: simply pinch the hose that returns unused fuel to the tank. The pressure gauge needle will have to respond to such treatment. Naturally, this method is not suitable for testing fuel systems that use metal tubes or hoses that are too short.
The same method allows you to identify a problem with the RTD without using a pressure gauge if the engine does not develop normal speed. Having clamped the return line while the engine is running, you need to track the speed and listen to the engine - if its operation has leveled off, then the problem lies in a faulty regulator valve, and it needs to be changed.
Repairing engine 21126 VAZ 2170 Priora after timing belt break
Today we brought one of the old clients to the Priora, as it turned out, the jammed pump broke the belt and, as a result, the valves were bent.
But progress at AvtoVAZ does not stand still, and if on the engines of the tenth family the valves were simply bent, then on the Priora 126s the connecting rods also lose alignment and, if they are not changed, there is a high probability that the engine will begin to eat oil and, accordingly, your money. Glory to the designers of AvtoVAZ!
But every cloud has a silver lining, there are sets of pistons for 126 engines with grooves that do not bend the valves. In this article we will describe the procedure for repairing the cylinder head after a broken timing belt, as well as replacing the piston. Removing and installing the timing belt is described in this article, so we will not dwell on it in detail.
To perform this procedure, torque wrenches are required!
Purification process
Cleaning the nozzles itself should be done on a clean surface - for this you can cover the working surface with a piece of cloth.
Prepare a hose and a can for cleaning the carburetor. To flush, secure a plastic hose clamp at the inlet of the nozzle (make sure the length is at least 20 cm). The nozzle will need to be turned on, and the end of the hose itself will need to be lowered into the liquid that is used to flush the carburetor. Cleaning can be carried out by any of the proposed ones - RunWay, Liqui Moly or Hi-Gear.
But there is no need to add cleaning additives advertised on the market to the fuel: it very often happens that they harm the engine. The acidified dirt itself after such cleaning can create a blockage that will prevent normal access to the fuel-air mixture. Otherwise, fuel access may be blocked.
Cleaning is complete. Now do the installation in reverse order.
I decided to start cleaning the injectors on my car. The car ran no less, but so to speak, I decided to do preventive maintenance on cleaning the injectors on my car. The whole purchase began with Wynn's injector flushing fluid 1
Wynn's flushing liquids are used for washing injector nozzles without dismantling, cleaning the cylinder-piston group (partial removal of carbon deposits from the cylinder walls and sealing rings) as well as the exhaust system without harming the catalytic converter.
And since I did not want to remove the injectors from the engine, this was the flushing fluid that suited me as a flush. I once found information on the Internet about cleaning injectors in this way and decided to do the same operation without removing the injectors on my car. In general, for this I needed to buy some things that were necessary for this DIY flushing device. For this I needed:
For this I needed. 1. Flushing liquid 1l. 2. Fuel filter. 3. Clamps 2 pcs. 4. Two nipples. 5. Hose 12mm -1 meter. 6. Two liter bottle. 7. Drill 13 8. Compression pump
Flushing liquid 1l