I am glad to welcome everyone to the website dedicated to domestically produced cars, VAZ Repair. Today in the “VAZ 2114 Repair” section we will talk about problems associated with the battery. You will learn about why the battery light is on, the reasons why this happens, and how to solve this problem.
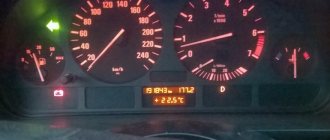
Anyone who has at least some idea of what a battery is and has minimal observation skills has probably noticed that after the key in the ignition is turned, various indicators in the form of pictograms and inscriptions light up on the instrument panel (battery light, indicator "Check Engine", oil pressure lamp, handbrake, etc...). You may also have noticed that after you turn the key again and the engine starts, almost all of these lights go out until the next time the engine is started or until the “brains” detect a breakdown.
If, after starting the engine, any of the above indicators continues to light up or lights up while the engine is running, this is a sign that something is wrong with this unit. In our case, if the battery light is on on the panel, it is necessary to take measures to identify problems, up to completely eliminating the malfunction.
A burning battery light may indicate problems with battery voltage or a complete lack of it.
The battery on the Lada Kalina (VAZ 1118) car is not charging
The Lada Kalina car has two power sources - a battery and a generator.
The battery is used to start the engine and to supply 12 V electric current to the starter and other consumers when the engine is not running. When the engine is running, the main source of current, the generator, provides electric current to all consumers, including the ignition system, and charges the battery. If the red low battery warning light is on on the instrument panel, it means that current is not flowing from the generator to the on-board network and the battery's energy reserves are being consumed. Operating a Lada Kalina car with the battery discharge warning light on is unacceptable, since sometimes the reason for the battery charging lamp to light up can be a short circuit in the wiring, leading to a fire in the engine compartment of the Lada Kalina car. Stop the car, turn off the engine and determine what malfunction caused the battery charging lamp to light up. If the cause of the malfunction is not a short circuit, and the battery is fully charged, you can drive to the garage without a generator, but it is better to try to fix the malfunction on the spot. Checking electrical equipment on a Lada Kalina VAZ 1118 car
1. Check whether the generator drive belt is broken. If a break occurs, replace the belt and adjust its tension (see “Checking the tension of the generator drive belt and replacing it”). 2. If the belt is intact, check and, if necessary, adjust its tension (see “Checking the tension of the generator drive belt and replacing it”).
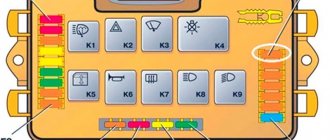
fuse F1 in the fuse and relay mounting block. If the fuse is blown, replace it, start the engine and check to see if the battery charging lamp goes out. If the battery charging lamp on the instrument panel goes out, you can continue driving.
WARNING Do not install fuses with a higher rated current. This may cause damage to electrical equipment and even cause a fire.
If, after taking the measures, the battery charging warning light continues to light up while the engine is running, then perhaps the cause of the malfunction lies in the generator itself. There may be several reasons; it is better to eliminate them in specialized car repair shops or a garage, and you just have to hope that the energy reserve in the battery is enough to get to them. Checking the voltage regulator
on a Lada Kalina VAZ 1118 car. To check the voltage regulator you will need: flat-blade and Phillips-blade screwdrivers, a 12-point wrench (two), a DC voltmeter, a megohmmeter.
1. Remove the rubber boot and connect the “+” wire to the “B+” terminal of the generator, and the “-” wire to the generator housing.
2. Start the Lada Kalina engine and turn on the headlights. 3. After 15 minutes of engine operation at medium speed, measure the voltage; it should be in the range of 14.4-15.1 V. If the battery is undercharging or overcharging (the voltage does not fall within the specified limits), replace the voltage regulator. useful tips for motorists
Improve contact
If the wiring from the generator to the battery is damaged, it is necessary to inspect it and, if necessary, replace the wire with a new one. In parallel with this, it is imperative to clean all contacts, both on the generator and on the battery (terminals). It is necessary to clean the contacts of the diode bridge on the generator and its positive output contact.
If the contact areas of the generator brushes have become oxidized, then they must be cleaned at the same time. At the same time, pay attention to ensure that the graphite does not spread from the brushes to other elements of the generator. If the brushes are worn out, they need to be replaced with new ones. Sometimes it is enough to improve the “chocolate” contact.
The battery light on the instrument panel is on: what should the driver do?
The dashboard of a modern car has a large number of different icons and symbols. At the same time, the icons on the instrument panel, taking into account their interpretation, are often divided into three groups: informational, warning and emergency.
If we talk about common problems, car owners often encounter a situation where the battery icon on the instrument panel is lit. As a rule, if the battery light comes on, this may indicate a malfunction of the battery or generator, as well as the on-board network.
The sensor itself, which is responsible for the fact that the battery lights up on the instrument panel when certain failures and breakdowns occur, may also be faulty. Next, we will look at the reasons why the battery check light is on, as well as what needs to be checked as part of the search for a particular malfunction.
Wiring
Often the cause of incorrect operation of the battery lamp is damaged wiring. For example, when a lamp burns at half intensity or even dimmer, and in a variety of situations. Often the wiring is to blame. For example, a wire going from the battery to the generator. In particular, there are cases when, with a damaged wire (fracture, damage to the insulation), the lamp begins to glow a little even with a slight load on the battery.
New Lada: Lada Kalina error codes with decoding
Similarly, the battery lamp may burn at half incandescence due to poor contact on the voltage regulator (the so-called “chocolate bar”). Poor contact may be due to corrosion or mechanical damage.
The battery light comes on: why does the battery light on the panel light up?
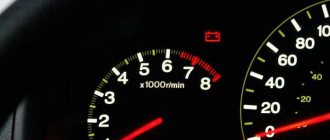
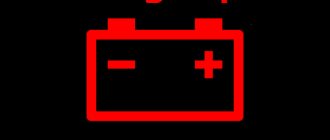
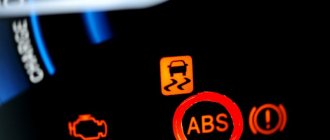
Let's start with the fact that every driver, when starting the engine, paid attention to the red battery icon that appears when the key is turned in the ignition. In this case, the battery indicator lights up until the engine starts. In other words, normally the battery icon goes out after the engine starts.
In other words, the circuit is such that after turning on the ignition, voltage is supplied through the fuse to the battery warning lamp (battery charge lamp) on the instrument panel.
The voltage then passes through the diodes, relay regulator, brushes, slip ring and winding. After starting the engine, the voltage at the terminals of the battery light is equalized, and the light goes out. At the same time, the battery is being charged. If the battery on the panel lights up constantly or such an icon lights up periodically, then this indicates a malfunction.
So, to understand why the battery light is on, you need to look at the reasons why the battery light may come on. Let us immediately note that this indicator monitors the connection between the battery and the generator. Let's figure it out.
The battery charging light is on: possible causes of the malfunction
As you know, a car battery is closely connected to the generator. To start the engine, electricity from the battery is supplied to the starter, but after the internal combustion engine starts working, the current is generated by a generator that spins from the running engine.
In this case, the battery is in recharging mode from the generator. Moreover, if the engine speed increases, then the voltage produced by the generator also increases. To prevent overcharging the battery or supplying too high voltage, there is a relay regulator on the generator.
The main task of the device is to ensure that the current from the generator to the battery is always optimal, that is, the voltage does not depend on engine speed. This makes it possible to constantly obtain and maintain the required voltage.
As a rule, the list of frequent breakdowns includes:
- problems with the relay regulator;
- failure of the diode bridge;
- the alternator belt is broken, poorly tensioned or slipping;
- severe play in generator bearings and wedging;
- blown fuses;
- poor contacts at the battery terminals, at the generator output, on the ground wire;
- generator circuit open;
- wear of generator brushes or brush holders;
- there may be problems with the ignition switch;
Place in the chain
There are only two sources of electromotive force (hereinafter EMF) in a car: a generator and a battery. The main purpose of the battery is to start the engine. After startup, the generator is switched on, which is designed not only to replenish the lost energy reserve of the battery, but also to ensure the constant functioning of the electrical consumers of the machine.
To put it simply, the indicator on the dashboard serves to indicate the EMF source that powers the vehicle’s network.
Operating principle of the display
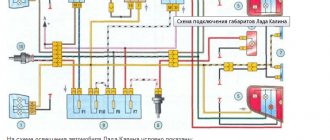
First, let's look at the fundamental elements of the circuit, which will subsequently help to logically exclude the possibility of malfunction of certain elements. Otherwise, you will not be able to understand why the “no charging” icon on the instrument panel lights up.
- 1 – Generator;
- 5 – indicator (sensor);
- 6 – dashboard;
- 8 – relay battery charging regulator;
- 10 – ignition switch relay;
- 11 – ignition switch.
When the driver turns the ignition switch to position 3 (On), the battery powers the electrical network, and with it the charging icon on the dashboard. This happens due to a potential difference, since one terminal of the light bulb is connected to the “+” of the battery, and the second to the generator, which, in turn, is connected to the ground of the car through the primary excitation winding. Thus, the circuit is closed and the light bulb lights up.
As soon as the generator is switched on via a belt drive, it begins to produce a voltage greater than what is available at the battery terminals. Otherwise, there will be no potential difference and the current will not “flow” through the circuit. Now on one of the terminals of the light bulb there will be “+” from the battery, and on the other “+” from the generator. Since there is no potential difference in such circumstances, the indicator stops glowing. Now you know when the battery charging light comes on.
What to do if the battery light is on or the light is off but there is no charging: diagnostics
In a situation where the battery light is on while the engine is running, you need to check the voltage at the battery terminals with a multimeter. This can be done quickly, and the voltage itself should normally be 13.5-14.3V. When there is no charging, the voltage will be about 12V.
To check the charging status in more detail, you need to prepare a pair of screwdrivers (flat and Phillips), a 12V test lamp, a multimeter, a knife and pliers, as well as fine sandpaper. Now let's look at the main problems when the battery light comes on.
- First, the generator is charging, the tester at the battery terminals shows a voltage of 12V, and the battery itself is discharged. In such a situation, stripping of the terminals and wires will be required. After cleaning, the voltage on the battery is measured again.
- Secondly, the battery is discharged, and the voltage on the battery is 14V, but it drops under load. In this case, the cause may be poor tension of the generator belt, problems with the pulley, failure or wear of the generator bearings.
You also need to check the diode bridge and stator winding, since a breakdown of one diode can lead to insufficient charging. To believe this, you need to turn off the ignition, then check the generator, its diodes and other elements with a multimeter. At the same time, the generator brushes are also checked (if their length is less than 5 mm, the generator brushes need to be replaced).
Another situation where the battery is not charging may be due to a blown fuse. Usually this is an F10 fuse with a rating of 10 A. In some cases, replacing it can solve the problem. There may also be a problem with the ignition switch or relay. To determine, a ring with a multimeter is required.
- Note that it also happens that after turning the key there is no charge in the lock, but the devices work. To check, you need to remove the wire from the generator terminal, and then connect it to negative or to the body. If the control lamp lights up, then the generator excitation winding has failed.
Often the culprit may be a bad contact in the connector to the battery lamp itself. To eliminate this problem, you need to clean all contacts and connectors. If the problem is with the light bulb (it does not burn brightly, intermittently or does not light), then attention should be paid to other icons. If the lights are dim, then the problem is not with the lamp. If the other indicators glow brightly, then the battery light itself or its contacts may be faulty.
If all of the above checks did not produce results, then you need to move on to how to check the relay regulator. To do this, voltage is applied to the contacts. The voltage on the brushes is also checked. When the voltage is 12V, the relay works normally. If not, then it will need to be replaced.
If you broke down on the way
In recent years, the production of Lada Kalina cars (ECU) of domestic production was replaced with Korean ones. The kind they put on Hyundai cars. After that, power steering failures became significantly less frequent. But they started installing Korean blocks on new cars.
Electric power steering for modern cars has already become an integral part of them. On the Russian market it was first installed on the Lada Kalina (VAZ 1118). The electric booster added both a lot of positive emotions and a lot of negative ones.
The situation is quite typical: the client complains that the electric power steering sometimes turns off and the electric power steering warning light comes on
This situation is very annoying, because not only the owner uses the car, but also his wife. It is much more problematic for a woman to turn the steering wheel without electric power assistance.
We start the car, and the electric power steering fault light actually lights up and it becomes quite difficult to turn the steering wheel. It is imperative to deal with this problem.
https://www.youtube.com/watch?v=jvriHcxOJxE
We connect the diagnostic scanner and connect to the EMUR control unit.
On the monitor screen we see the following error: C1044 – incorrect sequence of the rotor position sensor. What is a rotor position sensor and where is it located?
Let's take a break from our malfunction for a moment and touch on a little theory. Let's understand the EMUR device and what main parts it consists of. Let's consider all its parts separately.
Design EMUR Kalina 11186-3450008-00
- Steering shaft
- Electric motor
- Electronic control unit
- Torque sensor
- Rotor position sensor
We remove the EMUR. On the nameplate (Fig. 7) there is article number 11186-3450008-00 manufactured by Aviaagregat, Makhachkala.
Remove the steering wheel, steering column switches and ignition switch. To get to the torque sensor, you must first remove the electric motor. We unscrew the bracket with 4 bolts, the cardan shaft, the lock nut and the 3 bolts securing the electric motor.
This is what we got (Fig. 12)
New Lada: Generator Lada Granta: removal, installation, repair and maintenance
New Lada: Spare parts catalog VAZ-2194 Kalina 2 - station wagon with prices
Next we pull out the shaft.
We take out the torque sensor winding (Fig. 17), having previously unsoldered the wires from the board (Fig. 16).
Design of an inductive torque sensor.
The inductive sensor consists of two concentric cylinders with holes (perforation slots), which are fixed to the shaft and rotate with it. And two concentric coils with primary and secondary windings, fixedly inserted into the EMUR housing.
We will not go into various terminology, but let’s put it simply: an alternating current with a frequency of 20 kHz is supplied to the primary winding, and if we apply force to the shaft (that is, we begin to rotate the steering wheel), then a voltage “” or “-” appears on the secondary winding depending on the direction of rotation, and the magnitude of this voltage is directly proportional to the applied torque (force). Thus, the electronic control unit (ECU) determines with what force you rotate the steering wheel in one direction or another.
So, we’ve dealt with the torque sensor, let’s move on to the next one, namely the rotor position sensor (Fig. 20), which is located on the back cover of the electric motor.
The EMUR of the Lada "Kalina" uses a 3-phase switched inductor (brushless) motor. In order for it to start rotating in one direction or another, the electronics must understand what position the rotor is currently in and, after determining the position, apply voltage to certain stator windings at the right moments. To determine the position, a rotor position sensor (RPS) is used.
Diagram and design of an optical rotor position sensor.
3 optocouplers located at an angle of 120 degrees - LED (LED a,b,c) and photodiode (PD a,b,c), correspond to the location of the motor stator windings phases A, B, C. A disk is installed on the motor rotor, and when it rotates Photodiode a, b or c is triggered. In this way, the electronics determines the current position of the rotor.
Next, let’s look at the electronic control unit EMUR (Fig. 23), we won’t say anything special about it, we’ll just look at the photo of the board itself.
New Lada: Best price for Lada Kalina Model - super discounts for Lada Kalina Model. Lada Kalina Model: top manufacturers from all over the world in the AliExpress application on p. 1
Well, we have sorted out the EMUR device, let’s return to our malfunction, with which the owner of the Kalina car came to us. What needs to be done to make everything work as it should? A fairly common malfunction with this modification of the EMUR is poor soldering of the optocouplers on the rotor position sensor board. It is enough to simply solder all the contacts of the optocouplers (Fig. 24) to revive the EMUR, which we hastened to do.
After soldering the board, we assemble everything in the reverse order and start the car. Hurray. The EMUR fault light went out and the steering wheel began to rotate very easily.
We have a scanner to check parameters and read fault codes, but what should a simple motorist who does not have this equipment do? How to count errors without a special scanner? It's quite simple.
In order to read the self-diagnosis codes of the Kalina EUR you need to:
1) With the ignition off, short the 6th contact of connector X2 of the EMUR control unit to ground, or short-circuit contacts 6 and 7 (Fig. 26). There is no 6th pin in connector X2, so we installed a piece of white wire there and connected it to the 7th pin (ground).
Let's look at the EMUR circuit for a more detailed understanding.
Let's sum it up
As you can see, there are many reasons why problems arise with battery charging. In this case, the battery icon on the panel may often light up constantly, blink, or, conversely, not light up. To detect the cause, it is necessary to check individual elements step by step as discussed above.
If the battery is normal, there are no other hidden reasons for its discharge, then often the culprit is the generator, relay - regulator or bad contact. Moreover, after conducting qualified diagnostics, it is possible to identify, localize and efficiently eliminate the malfunction.
Why does the “check engine” light on the instrument panel light up: the main reasons. What should a driver do if the check light is on in the car? Useful tips and tricks.
Icons on the dashboard: symbols and explanation of car instrument panel icons. Types of icons and indicators, what do the lights on the panel mean.
Why does the check light light up on the dashboard? Is it possible to continue driving a car if the check engine light is on? What should you check first?
An exclamation mark on the dashboard lights up: what does an exclamation mark on a yellow background mean, an exclamation mark on a red background, diagnostics.
Why the starter may not work after turning the key in the ignition. The main causes of starter malfunctions: bendix, traction relay, brushes, winding.
Why the oil pressure light comes on after the engine warms up: the main reasons. What should a driver do if the oil pressure comes on when the engine is warm.
How to determine the cause
Self-diagnosis of a malfunction requires basic knowledge in auto electrics, and the failed unit is searched for by the elimination method.
We will need the following set of tools:
- multimeter;
- indicator light (car 12 V);
- a pair of flat-head and Phillips-head screwdrivers;
- pliers;
- fine-grained sandpaper.
We begin diagnostics by testing the battery. It is necessary to evaluate the condition of the terminals, cover and housing for dirt, oxidation or mechanical damage, and check the voltage at the terminal terminals using a multimeter.
If the battery is charged, the meter should show 12.7 V or more.
Dirty or oxidized terminals are cleaned with sandpaper; after wiping dry, it is recommended to treat the terminals with an anti-corrosion agent.
If the voltage is less than 12 V, most likely the battery no longer holds a charge and its further use does not make sense.
After the battery, we move on to inspecting the wiring. If there is no visible damage, it is worth checking the integrity of the wires using the device.
After this, you can begin checking the functionality of the generator, which is performed at idle engine speed. First, we check the voltage at the generator terminals with the consumers turned off; it should be in the range of 14.0–14.7 V. If this is the case, turn on the air conditioner and low beam headlights, that is, a serious load. The readings on the device should drop, but if the multimeter shows less than 13.5 V, then we can conclude that there is something wrong with the generator.
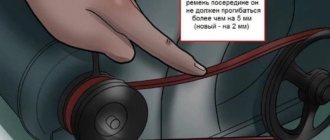
Checking the condition of the drive belt is carried out with the engine turned off. If there is no visible damage (cracks, delaminations), it is necessary to check the belt tension by simply pressing on it. A deflection of more than 15 mm is considered a significant deviation from the norm, and if there are mechanical defects, the belt must be unconditionally replaced.
The functionality of the voltage regulator is checked at speeds of about 3600–4000, while the voltage level at the output contacts of the regulator should not exceed 14.5 V.
If you have established that the relay regulator is working, and the Lada Kalina battery icon continues to light up, we proceed to testing all sections of the electrical circuit going to or from the generator (to the battery, fuse box, ignition switch). The check is carried out by ringing using a test light.
The fuse can be checked at any stage. If the jumper is intact, you need to make sure that the fuse is in tight contact with the socket - sometimes it weakens and causes a circuit break.
It is very rare, but there is a situation when the battery lack of charge light comes on on the dashboard, but in fact it is charging. Typically, such a malfunction of the ECU occurs in severe frosts or if the battery is 80–90% discharged. To reset this error, just turn off the ignition for 30 seconds and then turn it on again.
"Check Engine" - the show of intuition begins
Many Kalinovites, when the check signal comes on, begin to panic and immediately go to a car service center. But not everything is as bad as it seems at first glance, and the reason may lie on the surface. So, let's look at why the check engine light is on on the Lada Kalina and the reasons for the mysterious effect:
- Failure of one of the power unit sensors.
- Throttle.
- Injectors.
- Fuel pump and filter.
- Air filter.
- Spark plugs and high-voltage wires.
- Petrol.
- ECU.
The need for a voltage regulator
Each generator has two required windings: on the stator and on the rotor. The excitation winding is a rotor winding, because it is from the moving magnetic field that electricity is generated. To form a magnetic field, voltage will need to be applied to the rotor turns.
The installed voltage regulator in the power circuit of the excitation winding fulfills its mission, although at first glance it may seem that it is more necessary for the stationary part. However, the output voltage depends on the magnitude of the magnetic field. In such a situation, it is possible to stabilize the power supply in the rotor winding circuit and thereby get rid of possible output fluctuations.
Troubleshooting methods
Now that all the causes have been identified, we can begin to consider troubleshooting. But, before we begin, it is worth noting that a car enthusiast needs to have an idea of the design features of the engine if he wants to fix the problem himself. Otherwise, go directly to a car service center, in order to avoid other problems that, due to lack of experience, car enthusiasts usually create for themselves.
Sensors
Often, the reason why the check light on Kalina may come on is the failure of one of the sensors. Possible ones that are worth checking right away include: mass air flow sensor, idle speed control, crankshaft position sensor, oxygen sensor and coolant temperature sensor.
You can determine the cause by going through each sensor separately and using a tester to check their functionality.
But, there is a simpler and more effective way to determine the malfunction of a particular sensor, namely connecting to the electronic engine control unit. Here you can look at the errors and, by deciphering them, determine where the problem is.
Throttle
A clogged throttle valve can often cause the check engine light to come on because not enough air is supplied to the power unit. The solution to the problem is cleaning. This process can be carried out using carburetor cleaning fluid or VD-40 fluid.
The part is removed from the car and cleaned, after which it is installed in place. It is also recommended to check the throttle position sensor, which may have failed.
Injectors
One of the common reasons for the “check” icon to appear on the dashboard is a malfunction of one or more injectors that do not spray the fuel mixture properly. So, it is worth dismantling all the elements and checking them using a special stand.
If there is none, then you can use the traditional method by pouring flushing fluid into the fuel supply pipes and activating the injectors using the battery. This way it will be clear which injector is not working well. But, experienced auto mechanics recommend cleaning and checking the nozzles on a stand, since the effectiveness of the procedure is higher.
Fuel pump and filter
Another cause of the malfunction may be a malfunction of the gasoline pump or its filter. Lack of power or contamination of the filter elements leads to the fact that an insufficient amount of fuel will enter the power unit to form an air-fuel mixture.
This can also cause such a well-known automotive effect as engine tripping.
The malfunction can be cured by checking the functionality of the gasoline pump, as well as by replacing the filter inside the gasoline pump. It is also worth looking at the fuel filter, which could become clogged when pouring low-quality gasoline.
Air filter
A clogged air filter can cause insufficient air in the combustion chambers. So, to check this element, it must be dismantled, which is done quite simply. By inspecting the filter element, you can find out how dirty it is and whether the product needs to be replaced. So, after replacement, the check signal from the dashboard may disappear.
Spark plugs and high voltage wires
Wiring is also often the reason why the check icon lights up on the panel. This happens when the spark plug is inoperative or there is a breakdown in one of the high-voltage wires.
It is recommended to check spark plugs on a special spark plug stand. But, if there is none, then you can use the generally accepted “old-fashioned” methods. But high-voltage wires are checked using a conventional multimeter, where the resistance along each wire should be about 5 ohms. If a broken part is found, it must be replaced.
Petrol
But, in addition to the above reasons, the problem may lie on the surface. Thus, ordinary low-quality gasoline can cause the “Check Engine” icon to appear on the car’s dashboard. To eliminate the breakdown, it is necessary to drain the low-quality fuel and flush the fuel supply system. But, if you drive for a long time on such fuel, the batteries may fail, which should also be checked when flushing.
The last reason is the accumulation of errors or “failed” firmware of the electronic engine control unit. To fix this problem, it is recommended to contact a professional car service center. Also, with the help of “brain” errors, you can determine why the check engine light came on. But where can I get the codes deciphered? Let's look at what code that means:
- 0102 Low signal level of the mass air flow sensor
- 0103 High signal level of the mass air flow sensor
- 0112 Low level of intake air temperature sensor
- 0113 Intake air temperature sensor high level
- 0115 Incorrect coolant temperature sensor signal
- 0116 Incorrect coolant temperature sensor signal
- 0117 Coolant temperature sensor signal low
- 0118 High signal level of the coolant temperature sensor
- 0122 Low signal level of the throttle position sensor
- 0123 Throttle position sensor signal high
- 0130 Incorrect signal from oxygen sensor 1
- 0131 Low signal level of oxygen sensor 1
- 0132 Crankshaft sensor 1 signal high
- 0133 Slow response of oxygen sensor 1
- 0134 No signal from oxygen sensor 1
- 0135 Oxygen sensor 1 heater fault
- 0136 Oxygen sensor 2 short to ground
- 0137 Low signal level of oxygen sensor 2
- 0138 High signal level of oxygen sensor 2
- 0140 Oxygen sensor 2 break
- 0141 Oxygen sensor 2 heater fault
- 0171 Mixture too lean
- 0172 Mixture too rich
- 0201 Open injector 1 control circuit
- 0202 Open injector 2 control circuit
- 0203 Open injector 3 control circuit
- 0204 Open injector 4 control circuit
- 0261 Short to ground injector 1 circuit
- 0264 Short to ground injector 2 circuit
- 0267 Short to ground in injector 3 circuit
- 0270 Short to ground in injector 4 circuit
- 0262 Short circuit to +12V injector 1 circuit
- 0265 Short to +12V injector 2 circuit
- 0268 Short to +12V injector 3 circuit
- 0271 Short circuit to +12V injector 4 circuit
- 0300 Many misfires
- 0301 Misfire in cylinder 1
- 0302 Misfire in cylinder 2
- 0303 Misfire in cylinder 3
- 0304 Misfire in cylinder 4
- 0325 Open circuit of the knock sensor
- 0327 Low signal level of the knock sensor
- 0328 High signal level of the knock sensor
- 0335 Incorrect crankshaft position sensor signal
- 0336 Crankshaft position sensor signal error
- 0340 Phase sensor error
- 0342 Low phase sensor signal
- 0343 Phase sensor signal high
- 0422 Low neutralizer efficiency
- 0443 Canister purge valve circuit malfunction
- 0444 Short circuit or break in the adsorber purge valve
- 0445 Short to ground of the canister purge valve
- 0480 Cooling fan 1 circuit malfunction
- 0500 Invalid speed sensor signal
- 0501 Invalid speed sensor signal
- 0503 Speed sensor signal interruption
- 0505 Idle air control error
- 0506 Low idle speed
- 0507 High idle speed
- 0560 Incorrect on-board voltage
- 0562 Low voltage on-board network
- 0563 High voltage on-board network
- 0601 ROM error
- 0603 External RAM error
- 0604 Internal RAM error
- 0607 Detonation channel malfunction
- 1102 Oxygen sensor heater resistance low
- 1115 Faulty oxygen sensor heating circuit
- 1123 Rich mixture at idle
- 1124 Lean mixture at idle
- 1127 Rich mixture in Partial Load mode
- 1128 Lean mixture in Partial Load mode
- 1135 Oxygen sensor heater circuit 1 open, short circuit
- 1136 Rich mixture in Light Load mode
- 1137 Lean mixture in Low Load mode
- 1140 Measured load differs from calculation
- 1171 Low level CO potentiometer
- 1172 High level CO potentiometer
- 1386 Detonation channel test error
- 1410 Canister purge valve control circuit short circuit to +12V
- 1425 Canister purge valve control circuit short circuit to ground
- 1426 Canister purge valve control circuit open
- 1500 Open circuit in the fuel pump relay control circuit
- 1501 Short circuit to ground of the fuel pump relay control circuit
- 1502 Short circuit to +12V fuel pump relay control circuit
- 1509 Overload of the idle speed regulator control circuit
- 1513 Idle air control circuit short circuit to ground
- 1514 Idle air control circuit short circuit to +12V, open
- 1541 Fuel pump relay control circuit open
- 1570 Invalid APS signal
- 1600 No connection with APS
- 1602 Loss of on-board voltage to the ECU
- 1603 EEPROM error
- 1606 Rough road sensor incorrect signal
- 1616 Rough road sensor low signal
- 1612 ECU reset error
- 1617 Rough road sensor high signal
- 1620 EPROM error
- 1621 RAM error
- 1622 EEPROM error
- 1640 EEPROM Test Error
- 1689 Invalid error codes
- 0337 Crankshaft position sensor, short to ground
- 0338 Crankshaft position sensor, open circuit
- 0441 Air flow through the valve is incorrect
- 0481 Cooling fan 2 circuit malfunction
- 0615 Starter relay circuit open
- 0616 Starter relay circuit short circuit to ground
- 0617 Starter relay circuit short circuit to +12V
- 1141 Faulty oxygen sensor heater 1 after the converter
- 230 Fuel pump relay circuit malfunction
- 263 Injector driver fault 1
- 266 Faulty injector driver 2
- 269 Injector 3 driver fault
- 272 Faulty injector driver 4
- 650 Check Engine Lamp Circuit Malfunction
Conclusion
As you can see, there are quite a few reasons why the “Check Engine” icon appears on the dashboard of the Lada Kalina. But, all of them can actually be fixed with your own hands, except for breakdowns associated with injectors and the electronic engine control unit. When carrying out diagnostics, decoding error codes, which is presented in the article, is very helpful.
The charging system is a key link in the operation of the vehicle's electrical devices. If the battery icon on the instrument panel lights up after starting the engine, you should take immediate action. Let's talk about what to do if the battery charging icon lights up or blinks.
