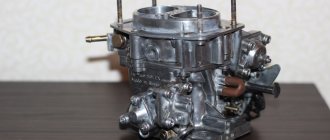
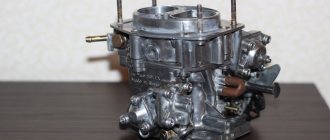
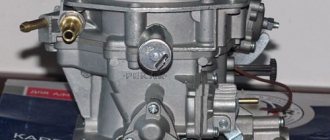
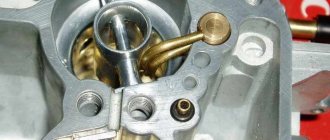
As a rule, they select the types of jets for the Solex 21073 carburetor while adjusting it on the engine. Some drivers sometimes think that if a dream has come true, and Solex is finally installed on the car, then all problems will be resolved at once. But it was not there! The main work only begins after installation. Solex, designed to save you money on fuel resources, in order for it to function correctly, it also needs to be finely tuned.
It’s good if you know a carburetor mechanic. And if not? You can try to make the adjustment yourself, but for this procedure you need to know at least more information about the carburetor itself.
Selecting the types of jets for the Solex 21073 carburetor is one of the components of its configuration for the most reasonable further operation. And before replacing one with another, you need to fundamentally understand: why, and what kind of detail is this?
Checking and adjusting the fuel level in the float chamber of the 21073 Solex carburetor
Necessary tools and equipment
— Medium Phillips screwdriver
— Slotted mid-size screwdriver
Preparatory work
— Place the car on a level surface
— Remove the car engine air filter housing
The procedure for checking the fuel level in the float chamber of the carburetor 21073-1107010 Solex
For normal operation of the 21073 carburetor, a certain position of the elements of its float chamber is necessary. Therefore, we check two parameters: the first is the fuel level itself in the float chamber and the second is the position of the floats.
Let's carry out work on checking and adjusting the fuel level in the float chamber using the example of a Solex 21073-1107010 carburetor just removed from the 1.7 liter Niva 21213 engine, the operation of which began to cause small dips when pressing the gas pedal. The carburetor has never been independently adjusted, so all dimensions are original (factory).
— Start the car engine and let it run for 3-5 minutes
In this case, the float chamber will automatically fill with fuel to the verified operating level.
— Remove the top part (cover) of the carburetor
Unscrew the five screws securing the cover using a Phillips screwdriver.
— We measure the distance from the edge of the float chamber to the fuel mirror (we measure the fuel level)
We use a ruler. The distance from the edge of the float chamber to the fuel “mirror”, if the fuel level is normal, should be 25-26 mm. See photo above.
If the fuel level is normal, further measurements need not be taken. But just in case, let’s check the position of the floats, in case one of them touches the walls of the float chamber.
— We measure the distance between the protrusions on the bottom surface of the floats and the cardboard gasket of the lid
To do this, turn the carburetor cover over with the floats facing up and place it on a horizontal surface. We insert a drill with a diameter of 2 mm between the protrusion on the bottom of the float and the cardboard gasket (it should be pressed tightly against the lid). The drill should go in with a slight pinch. We check for the second float. At a fuel level of 25-26 mm, the distance between the floats and the gasket should be 2 mm. These are interdependent quantities. If the distance is greater or less, then using a slotted screwdriver and pliers we slightly bend the upper tongue on the float levers. Let's check again.
On our test carburetor 21073 Solex, a 2 mm drill bit fit freely between the gasket and the edge of the float. If you slightly squeeze the cardboard spacer, a drill with a diameter of 2.5 mm will fit in with a slight pinching (I repeat once again that the carburetor has never been adjusted and all its settings and dimensions are “factory”).
— Check the position of the floats relative to the walls of the float chamber
We look from above at the horizontally installed carburetor cover. The floats should be parallel to the print lines on the cardboard lid liner. If not, bend the float arms.
Place the lid vertically. We look at the stamping line on the side of the float. It should be parallel to the plane of the lid. We check the second float in the same way. In this case, the tongue on the levers should slightly recess the shut-off valve needle ball. If there is no parallelism, bend the float levers and (or) the tongue.
— We adjust the full stroke of the floats
Place the lid horizontally. Using a ruler, measure the distance from the lower corners of each float to the plane of the cardboard lid gasket. Let's remember the number.
We raise the floats up, simulating their descent to the bottom of the float chamber when the fuel level in it drops. Using a ruler, measure the distance from the bottom corners of the floats to the cardboard spacer. It should be: the first memorized digit plus 15 mm. For example, 3 mm plus 15 mm equals 18 mm. If the distance does not correspond to the required one, then we achieve its compliance by bending the rear tongue on the float levers and checking again.
That’s it, checking and adjusting the level in the float chamber of the carburetor 21073-1107010 Solex is completely done, it’s time to install it on the engine and check whether the “dip” in engine operation has disappeared when you press the gas pedal.
Notes and additions
— If the fuel level in the carburetor float chamber is set correctly, but there are still problems with the engine, it is necessary to check the tightness of the float chamber shut-off valve and the presence of “suction” of foreign air into the carburetor.
More articles on adjusting and tuning the carburetor 21073-1107010 Solex
— Adjusting the carburetor air damper drive 21073-1107010 Solex
Comparative test repair
source
Adjustment, adjustment and cleaning
It is very undesirable to make changes to the calibration of the Solex carburetor, since this is a very accurate and balanced device with well-chosen characteristics.
All adjustments are of an operational nature and rarely change, but they must be checked preventively and adjusted if necessary:
- Adjusting the composition of the idle mixture is carried out using a gas analyzer, since the carburetor has great capabilities for ensuring minimal CO and CH emissions; it comes down to setting the permissible level of harmful gases with the “quality” screw at the nominal idle speed.
- The starting device is adjusted by changing the position of the cable sheath on the bracket so that the damper is fully open and closed in the extreme positions of the choke button.
- The fuel level in the float chamber is set so that when the top part of the carburetor is inverted and installed horizontally, the gap between the floats and the gasket is approximately 2 mm. After which the level can be checked by attaching the cap, starting the engine, turning off and removing the cap, the distance from the gasoline to the flange should be approximately 24 mm.
More subtle settings are available only to a qualified specialist, since changing some of them leads to disruption of others, so you can quickly bring the device to an inoperative state.
The same can be said about cleaning the carburetor. The use of a rough metal tool will lead to changes in the cross-sections of channels and jets. It is only allowed to wash the parts and channels of the housing with special aerosol carburetor cleaners after complete disassembly.
It should be remembered that in old carburetors the formation of aluminum oxides begins in the channels, which cannot be cleaned, therefore it is recommended to replace the carburetor with a new one every 5-7 years; the fuel savings will justify the costs.
Replacement in every detail
Adjusting screws for the Solex carburetor 2108
Having selected the Solex carburetor jets by numbers, you can begin to replace them; unlike boring, it is quite possible to carry out this operation yourself at home. By the way, the reason is not always an incorrectly selected element; very often during operation, these parts wear out and become clogged, which leads to a change in the diameter and composition of the mixture with all the ensuing consequences. In addition, car owners in this way increase the power of their “iron horse” or, conversely, reduce gasoline consumption. In general, replacing jets is quite suitable in the category of vehicle tuning.
To remove the Solex jets, you will have to dismantle the engine and, of course, disassemble it. Before removing the power unit, be sure to disconnect the negative cable from the battery, and then remove the air filter housing. Prepare a clean rag and a solvent, such as white spirit, in advance to clean the surface of the motor from dirt. Now you need to find the place where the drive cable is attached to the air damper and slightly loosen the screw securing these parts. Do the same with the bolt securing the cable sheath. An open-end wrench is perfect for this purpose. After disconnecting the cable from the carburetor, remove the crankcase gas supply hose from the pipe.
Removing jets from Solex
To disconnect the fuel hose from the fitting, in addition to a wrench, you will also need a Phillips screwdriver. First, loosen the fastening clamp, then remove the hose and use an M8 bolt to plug the hole in the latter. It is necessary to remove the vacuum regulator hose. The wire terminal is also disconnected from the solenoid valve terminal. We take a flat-head screwdriver and use it to press out the end of the throttle linkage, and then remove it. Now it is possible to remove the return spring.
To remove the carburetor you need to prepare a spanner and open-end wrench set to “13”. The first to unscrew are 3 nuts, through which the part is attached to the inlet pipeline, and the second is the fastening nut. Take this opportunity to inspect the carburetor gasket; perhaps it could use replacement. If the unit will be removed for a long time, be sure to plug the inlet pipe with a rag. To replace the jets in the carburetor, it remains to remove the cover from it. Take a flathead screwdriver and unscrew these parts. First we remove the fuel jets, then the air jets. In the rings of the last parts you will find emulsion tubes; to pull them out, you should pry them off with a file.
Replacing the carburetor gasket
The main fuel element of the secondary chamber is designated by the letter “A”, and the primary one by “B”. Then we proceed to removing the air jets, marked “B” and “D” for the secondary and primary chambers, respectively.
Replacement should not be done blindly. Visually assess the condition of the jets. The presence of marks, scratches and irregularities on their inner surface is unacceptable, since these defects reduce throughput. Contamination of parts with resins also has a negative impact. Before installing new jets, it is advisable to check them on a special stand, so you can see how well the specified throughput of the elements corresponds to real indicators.
Installation of new Solex parts
If you have already started disassembling the carburetor, then it would be a good idea to study the condition of its other parts; perhaps replacing the jets is not the only need for this unit. We unscrew the accelerator pump screw and remove the latter along with the valve and o-rings. Then we remove the rings and diffusers of both chambers from their original location. To remove the channel from the accelerator pump, you need to unscrew the fixing screw.
Next, remove the fuel nozzle along with the housing and take it out. You can dismantle the diaphragm after you open its cover and remove the spring. Having unscrewed the bolted connections, we disconnect the carburetor body and the throttle valve. Now you have access to the thermal insulation element and cardboard spacers. Remove the cover along with the adjusting screw, then remove the latter with the sealing ring. All parts with defects must be replaced; the remaining parts are thoroughly washed in a special product. We blow out the jets and other holes with compressed air. Reassemble in reverse order.
Operating principle
Solex carburetor float chamber ventilation system
Solex 21073 works as follows. Gasoline will enter the float chamber using the inlet fitting - the fuel also passes through the filter mesh, where it is cleaned, and goes through the needle valve. The chamber with the float is two-sectional, and the sections are connected to each other. They will contain the same amount of gasoline. This design makes it possible to significantly reduce the effect of body tilt on the fuel level in this chamber.
This ensures more stable engine operation. As the chamber fills, the float, pressing part of the needle valve, blocks the access of fuel to the chamber. This maintains a constant level of gasoline in the mechanism. Next, from the float chamber, gasoline flows through the jets into the mixing wells. Air enters these same wells through special holes in the emulsion tubes or air jets. Next, gasoline and air are mixed in them. As a result, a fuel mixture is formed. It will get into the small as well as large diffusers of the device. This is the main dosing chamber. Depending on the operating mode of the engine, certain mechanisms and systems can be started in the carburetor. When the owner tries to start the engine “cold” in order to enrich the fuel mixture, the starting device comes into play. The driver starts it from the passenger compartment - this is a choke.
When the handle is pulled out to its maximum, the air damper of the first chamber is completely closed. At the same time, the throttle valve in the first chamber opens to the distance of the starting gap. It is adjusted using the adjusting screw on the Solex carburetor. Adjusting the gap will allow you to adjust the idle speed.
How to check the result of the work?
Without a proper check, if some error suddenly occurs, everything will have to be repeated again - all operations. Therefore, before reassembling, the carburetor cover is placed vertically. The ball should be sunk with a tongue on the float, and the stamping line should be parallel to the cover. If the conditions are not met, you will have to repeat the second stage, since you need to set the fuel level in the Solex carburetor as accurately as possible. And after the check has been completed, you can assemble the assembly as it was, in its original position.
Checking and adjusting the idle speed of an engine with a 21073 Solex carburetor
Design, removal, repair and adjustment of the carburetor on an Oka car
— The car engine is warmed up to an operating temperature of 80-90º
— The carburetor air damper is completely open (“the choke” is recessed all the way)
— The throttle valves of the first and second chambers are completely closed
— The air filter housing with the filter element is not dismantled
Checking the idle speed of an engine with a 21073 Solex carburetor
The idle speed of an engine with a Solex carburetor 21073-1107010 should be in the range of 750-800 rpm (for a Niva car). Checked using a standard or connected external tachometer. At idle, the engine should run smoothly without interruption. When you sharply press the gas pedal, the engine speed at idle increases without “dips”, and when you release the gas, they decrease without stalling the engine.
If the picture does not correspond to the required one, we adjust the idle speed.
The most basic adjustment of the idle speed of a car engine with a 21073-1107010 Solex carburetor comes down to rotating the screw for adjusting the “amount” of the fuel mixture. Clockwise - the speed increases, counter - decreases. The “quantity” screw with its tip moves the throttle lever of the first chamber and it slightly opens or, conversely, closes the throttle valve. This regulates the amount of fuel mixture entering the engine cylinders (See “The principle of operation of the Solex carburetor idle system”).
Full adjustment of the idle speed of a car engine with carburetor 21073 Solex
— We connect the tachometer or use the standard one in the instrument panel
— Start the engine
We press the gas pedal several times, bringing the speed to 2500-3000 rpm before starting the adjustment.
— Use the “quantity” screw to set the minimum stable idle speed
At the same time, the tip of the screw lightly presses the throttle lever and opens it slightly. There should be no vacuum in the tube from the vacuum advance regulator.
— Use the “quality” screw to increase them to the maximum possible value
Using a slotted screwdriver with a thin blade, we rotate the “quality” screw in different directions, achieving the maximum speed of the crankshaft (we use the tachometer as a guide).
When the screw is tightened, the amount of fuel emulsion entering the fuel mixture decreases and it becomes lean; when unscrewed, the fuel mixture, on the contrary, becomes richer.
Initial position of the “quality” screw: 1-1.5 turns from the fully tightened state.
— Use the “quantity” screw to set the speed within 950 rpm
We also focus on the tachometer. We tighten the screw - the throttle valve opens slightly - the speed increases.
— Use the “quality” screw to set the XX speed within 750-800 rpm
Screw it clockwise using a slotted screwdriver.
We check the operation of the engine (see above).
If necessary, repeat the adjustment.
Notes and additions
If the idle speed of an engine with a Solex 21073 carburetor cannot be adjusted, or after adjustment the engine still runs intermittently and stalls, you should pay attention to the following points:
— Correct installation and serviceability of the carburetor solenoid valve
— “Sucking” excess air into the carburetor (ring on the EMC, gasket under the carburetor, etc.)
— Contamination of the idle system (see “Cleaning the idle system of the Solex carburetor”)
— Correct setting of the ignition timing (see “Setting the ignition timing on a Niva carburetor engine”)
— Engine serviceability (valve clearance)
— Serviceability of the ignition system (spark plugs, armored wires, distributor cover, slider, resistor)
You can adjust the idle speed of a car engine by ear, but this requires some experience in car repair and maintenance.
More articles on Solex carburetor 21073-1107010
source
Jets and accelerator pump
Owners of carburetor cars know that jets change, but they do not always understand why jets are needed and how their size affects the operation of the carburetor. Let's start with the fact that the engine sucks in air through a special hole made in a large diffuser. At the same time, a certain amount of fuel is drawn through the fuel nozzle. The engine displacement directly affects how much air the engine will draw through the diffuser in a certain time, as well as the amount of gasoline sucked in parallel with the air.
It is for this reason that large-volume engines have carburetors with small jets. Installing such a carburetor on an engine with a smaller volume will mean that the “original” jets in this carburetor will produce a mixture that is too lean for normal engine operation. To solve this problem, you should find jets from a carburetor, which was initially designed for a specific internal combustion engine volume or as close as possible to it. You need to select jets starting with the fuel jet, then select the air jet under the fuel jet. The selection is made from a group of jets for the first chamber, the second chamber is adjusted only after the first.
Now let's talk about the accelerator pump. The accelerator pump delivers additional fuel when the throttle valve opens, allowing for more efficient acceleration. The pump is activated using a special cam. On engines with a Solex carburetor installed, the indicated accelerator pump cam must be set to the largest one.
You should also pay attention to the so-called “spout” of the accelerator pump. When the valves are opened, fuel should flow in a clear stream and not drip even with a slight throttle opening. It is also important what position the nose occupies. The stream of gasoline must fall exactly into the area between the diffuser wall and the throttle valve, that is, the fuel is jetted directly into the manifold. The jet must not hit the diffuser or damper. If this happens, then after sharply pressing the accelerator pedal the car will not accelerate immediately, and a failure will occur. Self-refinement of the carburetor involves installing two spouts in the chambers to obtain better performance from the engine, or only one spout in the first chamber of the carburetor for a more economical mode.
Selection Basics
If we install, for example, Solex 21041 (volume 1.8) on a 1.5 engine. This carburetor has a 24x26 diffuser, fuel volume is 102.5, which is not enough for a 1.5 engine. We are looking for a match between the chambers and the diffuser. We find the closest option: Solex 21073. It has a 24x24 diffuser and a TJ - 107.5. And the first cameras are almost identical. By the way, if the diffusers are almost the same, and the engine volume is smaller, then the intake of gasoline will be less (the jet is rather poor). This means that we need fuel jets (fuel jets) from 110. Let’s get a few.
Next you need to decide
, what do you want to get: economical slowness or costly acceleration. Depending on the decision, we also select a fuel mixture: to adjust the enrichment or leanness of the air-fuel mixture (a lean mixture will lead to gasoline savings, but will affect the acceleration dynamics of the car).
Idle system
This unit is necessary in order to supply the combustion chambers with a combustible mixture at the lowest speeds. Thanks to this system, the power unit will not stall when there is no load. Fuel will enter the system through the main jet into the first chamber. Through the XX jet, where it is then mixed with oxygen, the fuel enters the system through the air valve. This mechanism allows you to ensure stable engine operation at idle speed without load.
Next, the combustible mixture will enter the first chamber through a special channel located under the throttle valve. The fuel mechanism leading to the XX exhaust port is closed with a quality screw. This is an adjusting screw that can be used to adjust and change the characteristics of the carburetor. The operation of the engine in idle mode on the Solex 21073 mechanism is also adjusted with this element. Due to it, the gap value of the throttle valve of the first chamber in XX mode is determined.
Main dosing chamber - operating principle
During engine operation, the cylinders create a vacuum, which draws air from the air filter and supplies it to the diffusers - these are the main metering systems. After this, all the oxygen leaves through the cross-section of the damper of the first chamber and the jets of the Solex 21073 carburetor. Thanks to the throttle jets of the second chamber and the reduced diameter of the diffuser of the first chamber, the air flow speed increases, and in the spray zone it reaches maximum values.
Subsequently, after passing through the air jet of the throttle valve of the first chamber, the air is mixed with fuel and sucked into the channels of the intake manifold, which distributes the mass of the fuel mixture among the engine cylinders. To increase efficiency, distribution occurs in those cylinders where the intake valve is open and there is the required vacuum. This principle of operation ensures a reduction in fuel consumption and the elimination of contamination of the timing belt.
Purpose and design of Solex carburetors
The production of licensed Solex carburetors began with the entry of front-wheel drive small cars into the domestic market.
On turns, steep climbs and maximum accelerations, previous models could not provide an engine located perpendicular to the direction of travel with a fuel-air mixture.
Features of Solex carburetors
Carburetors of the Solex family are not interchangeable with other models of DAAZ carburetors.
But within the family, various modifications are very similar to each other, differing slightly in the size of the metering elements and the shape of the control levers.
Various Solex modifications differ in the size of the dosing elements and the shape of the control levers
Thus, carburetors 21083 engines with a volume of 1.5 liters differ from carburetors 21081 engines with a volume of 1.1 liters, the diameters of the starting gaps of the dampers are increased by fractions of a millimeter.
In addition, some 21083 models have additional components and functions.
Table: features of various carburetor models
| Carburetor model | Peculiarities | Automobile model | Engine capacity, l |
| DAAZ 2108–1107010 |
| 1,3 | |
| DAAZ-21081–1107010 |
| 1,1 | |
| DAAZ-21083–1107010 |
| 1,5 | |
| DAAZ-21083–1107010–31 | semi-automatic starting device |
| 1,5 |
| DAAZ-21083–1107010–35 | two-stage starting device |
| 1,5 |
| DAAZ-21083–1107010–62 | electronic fuel mixture control |
| 1,5 |
| DAAZ-21083–1107010–05 | for engines with microprocessor ignition | VAZ-2109 | 1,5 |
| DAAZ-21412–1107010 | without drain fitting | AZLK-2141–01 | 1,5 |
| DAAZ-21412–1107010–30 | without drain fitting, for engines with microprocessor ignition | AZLK-2141–23 | 1,8 |
| DAAZ-1111–1107010 | inertial mixture enricher |
|
|
| DAAZ-21051–1107010 | traction drive of throttle valves, without drain fitting |
|
|
| DAAZ-21053–1107010 | traction drive of throttle valves, without drain fitting |
| 1,6 |
| DAAZ-21051–1107010–30 | traction drive of throttle valves, without drain fitting |
| 1,5 |
| DAAZ-21053–110701–62 | semi-automatic air damper drive |
|
|
| DAAZ-21073–1107010 | one accelerator pump nozzle |
|
|
Design and operating principle
A carburetor is an attachment that mixes air with gasoline in the optimal proportion for efficient engine operation.
Carburetor malfunctions make it difficult to start the engine, increase fuel consumption, reduce power and worsen vehicle dynamics.
Air and gasoline are mixed in a special chamber. Solex carburetors have two such chambers.
Usually only the first is used, and the second is connected only at high speeds.
The fuel pump delivers fuel to the float chamber through a needle valve.
If there is excess fuel, the floats rise, press the tongue on the needle and stop the flow of gasoline.
Excess fuel is returned to the tank through the return fitting.
The fuel is then mixed with air. To prevent excessive enrichment of the mixture, the fuel flow is slowed down by jets and emulsion tubes.
All these elements - a float with a needle valve, air and fuel nozzles, emulsion tubes and mixing chambers with dampers - form the main metering system.
In the carburetor, air is mixed with gasoline in the optimal proportion for efficient engine operation.
In addition to it, the carburetor includes:
- starting device;
- idle system;
- forced idle economizer (EFH);
- transition systems of mixing chambers;
- accelerator pump;
- power mode economizer (EMR);
- econostat;
- locking mechanism.
Wire screw quantity
The surprise of many car enthusiasts is the wire with a connector protruding from the carburetor.
This wire belongs to the forced idle economizer.
If the engine is standing without load, a signal from the carburetor is sent through this wire, and the EPHH shuts off the fuel supply.
A signal from the carburetor is received through the quantity screw wire and the EPHH stops the supply of gasoline
This system works as follows. When the driver releases the accelerator pedal, the flap blocks the air flow, the control lever returns to its original position and rests against the quantity adjusting screw.
The wire is connected to this screw. Touching the propeller lever is the signal sent to the EPH to stop the fuel supply.
Advantages and disadvantages of tuning
The Solex carburetor is assembled from standard parts and assemblies from various manufacturers and is not subject to individual adjustment. But the cast body, made of aluminum alloy, diffusers, damper jets, as well as fasteners have unprocessed burrs, protrusions, and roughness. The task of tuning is to remove all obstacles to the movement of the air-fuel mixture by grinding, polishing channels and parts with which the fuel flow comes into contact, as well as modifying diffusers and adjusting jets in accordance with the individual requirements of the car enthusiast.
To perform the above work, it is necessary to remove the carburetor from the engine intake manifold and remove the cover. It is necessary to achieve complete alignment of all holes of adjacent removable parts. This is done using a scraper or file.
You need to remove the air damper and replace its round head screws with flat head screws. Then drill out the holes a little to “recess” the protruding parts of the fasteners. This will reduce hydrodynamic resistance during the passage of the air-fuel mixture. It is advisable to replace the needle valve with a valve with a rubber tip to prevent gasoline overflow.
All carburetor diffusers need to be polished, the technological ebbs on the bridges must be cut down and given a more streamlined shape. The flow rate of the fuel mixture in the mixing chamber reaches 120 meters per second, and any roughness will impede the flow of air.
Tuning the carburetor not only affects the throttle response of the engine, increases its power, but also significantly increases fuel consumption. Before assembling the mechanism after modification, it is recommended to wash all its parts with a special liquid for cleaning the carburetor, and then blow out the holes with compressed air.
The Solex carburetor is one of the best engineering developments successfully used on Russian Niva SUVs. Carburetor engines are repairable, easy to maintain and reliable. Tuning can significantly improve engine performance and increase its efficiency.
Equipment adjustment
Before adjusting the carburetor, you must set the ignition to make sure the system is in full working order. It often happens that it is the incorrect operation of the unit that causes many breakdowns.
So, final modification of the carburetor is possible when the ignition is normal, the engine is warmed up to the minimum permissible temperature of 40 degrees, the high-voltage wires and braids are intact and in good working order.
- turn the mixture quality screw counterclockwise until the power unit reaches maximum speed;
- We also add the mixture quantity screw until the engine reaches the maximum speed mark;
- Now we are fine-tuning the quality of the mixture, but at the same time keeping the speed indicator at no more than 800 - 850 rpm.
This completes the idle speed adjustment. Experienced craftsmen can determine the speed by ear.
The next stage: adjusting the dampers and their drive.
Troubleshooting
Car components do not last forever, and sometimes the installed Solex 21073 carburetor on the Niva fails. Repairing it must begin with diagnostics. It may be possible to get by with a simple adjustment. So, during operation, solid particles can enter the carburetor, which ultimately causes clogging of the jets. Low-quality gasoline leads to the formation of deposits on the walls of the channels in the device. This significantly reduces their cross section. Failure of carburetor systems can be diagnosed by the following symptoms:
- Increased fuel consumption.
- Difficulties in starting the engine. Reduced power and dynamic performance.
- Unstable operation at idle.
In this case, it is necessary to clean the installed Solex 21073 carburetor on the Niva. The adjustments that will be made after this will allow the device to work as it should again.
Selection of types of jets for Solex 21073 carburetor. Everything you need to know
It’s good if you know a carburetor mechanic. And if not? You can try to make the adjustment yourself, but for this procedure you need to know at least more information about the carburetor itself.
Selection of types of jets for the Colex 21073 carburetor
– one of the components of its configuration for the most reasonable further operation. And before replacing one with another, you need to fundamentally understand: why, and what kind of detail is this?
Therefore, we can say that it all starts with the fuel nozzle - its selection and settings. Afterwards, for the second time, you need to pick up an air one for it. Start strictly with the first camera until you have set it up; it is not recommended to work on the second one under any circumstances.
Rule:
We select the jets according to the engine volume. And before starting the setup, it’s best to find a factory Solex that matches the volume of the unit on your car, and rearrange (or install the same) jets from it.
Next you need to decide
, what do you want to get: economical slowness or costly acceleration. Depending on the decision, we also select a fuel mixture: to adjust the enrichment or leanness of the air-fuel mixture (a lean mixture will lead to gasoline savings, but will affect the acceleration dynamics of the car).
Engine 1.5 D
. carb - Solex 21073. In the first - TZh 115th, VZh - 155 ZD. In the second - TZh 115, VZh 135 ZC. XX - 41st. Gasoline AI 80. Consumption – highway 10, city 12.
In general, in addition to the selection of jets, there are a lot of useful and interesting nuances of setting up the Solex, so that it works correctly and is combined with the engine of your carburetor car.
You should always start by setting the levels in the chambers. They are installed manually according to the positions of the floats themselves, depending on the unit cover (everything is done using special templates). And in vain you think, like many gullible Solex users, that everything is already on display from the factory. To avoid overflow and stress on the needle, we make the appropriate adjustments by bending the float tongues.
After setting the levels, you can start idling. It depends on the position of the screws for the quality and quantity of the mixture (torsion should be performed with the suction removed).
Results
Of course, it is clear that there is no limit to improvements. Sometimes they can even go to excess: drilling, for example, a throttle valve, polishing an MD, soldering epulsion tubes on a carburetor. But, as they say, what is in excess is unhealthy. But such a procedure, fascinating in its own way, like selecting the types of jets for a Solex 21073 carburetor, for example, is something quite necessary for the correct setup of the unit and its complete compatibility with the engine compartment. As a result, you get an economical car that responds well to gas.
The most common are Solex carburetors modifications 21053, 21083, 21073, 21041. They differ in calibration data, i.e. cross-section of large diffusers (BD), value and type of jets and other giblets, and are designed for a certain engine size and type.
21083 – “basic” modification of the carburetor with the smallest diffuser cross-section 21x23, designed for a transversely mounted “chisel” engine with a volume of 1.5 liters. It is especially popular because it can be used to make a Solex of any modification, as well as a unique one, machined to suit any value of diffusers, and so on. It is undesirable to install it on an engine with a volume of more than 1.5 liters - at high speeds it will choke the engine due to the small cross-section of the OBD. It is worth noting that 21083 prepares a lean mixture (due to the characteristics of the 2108 motor) and to obtain good dynamics on the UZAM engine, it is advisable to change the jets.
Scheme and principle of operation
The types and modifications of carburetors for a given car can be very different, but the principle of operation remains the same.
When starting the engine cold, the driver closes the choke to limit the flow of air and increase the amount of gasoline. This makes it easier to start and brings the speed necessary for stable operation.
Carburetor 21073 DaAZ device and principle of operation: diagram of the design and operation of the carburetor I - first chamber; II - second chamber; 1 — accelerator pump drive lever; 2 — adjusting screw of the starting device: 3 — diaphragm of the starting device; 4 — air channel of the starting device; 5 - solenoid shut-off valve; 6 — idle fuel jet; 7 — main air jet of the first chamber; 8 — idle air jet; 9 — air damper; 10 — sprayer of the main dosing system of the first chamber; 11 — accelerator pump nozzle; 12 — nozzle of the main dosing system of the second chamber: 13 — econostat nozzle: 14 — main air jet of the second chamber; 15 — air jet of the transition system of the second chamber; 16 — channel for balancing the float chamber; 17 - float chamber; 18 — needle valve; 19 — calibrated hole for fuel bypass into the tank; 20 — carburetor fuel filter; 21 — fuel supply fitting; 22 — power mode economizer diaphragm; 23 - fuel jet of the power mode economizer; 24 — ball valve of the power mode economizer; 25 - float; 26 — econostat fuel jet with tube; 27 — fuel nozzle of the transition system of the second chamber with a tube; 28 — emulsion tube of the second chamber: 29 — main fuel jet of the second chamber; 30 - outlet of the transition system of the second chamber; 31, 33 — throttle valves: 32 — slit of the transition system of the first chamber; 34 — outlet of the idle system; 35 — carburetor heating block; 30 - adjusting screw for the composition of the idle mixture; 37 — engine crankcase ventilation fitting; 38 - fitting for supplying vacuum to the vacuum ignition regulator; 39 — vacuum selection fittings for the recirculation system; 40 — main fuel jet of the first chamber; 41 — emulsion tube of the first chamber; 42 - ball valve of the accelerator pump; 43 — accelerator pump diaphragm.
During the warm-up process, air intake is increased to reduce speed and eliminate interruptions. Thus, the air damper opens completely and the amount of gasoline is reduced. Other methods of warming up are not provided for by the design.
Gasoline is supplied through the fuel filter to the float chamber, and then to the main metering system of the mixing chamber. The scheme for pumping air and mixing it with gasoline in the diffuser occurs due to the vacuum that occurs during the operation of the valve mechanism and pistons, compressing and pushing out the working mixture.
The second chamber system is designed to increase air flow to the nozzle when the engine is running under heavy load, when the speed is high.
To ensure that the engine runs stably at idle, and at low speeds to prevent it from stalling and eliminate interruptions, an idle system is provided. And to maintain the level of fuel used in the Solex 21073 carburetor, there is a whole scheme for the operation of the float system. Let's consider the operation of each system separately.
Carburetor DAAZ 21073 - device
The device of the Dimitrovgrad Automotive Aggregate Plant is designed for mixing fuel and air and consists of two main components:
- Frame;
- Top cover.
The device is also based on a float chamber for balancing the level of fuel supplied to the diffuser, an accelerator pump, a forced idle economizer and an econostat. The top cover contains: an emulsion tube or emulsion wells, fittings designed for atomizing fuel in the diffuser, as well as an air damper necessary for cold starting of the power unit. The Solex 21073 carburetor on the Niva is installed and configured from the factory, and its design and calibration data provide good dynamic performance with minimal fuel consumption.
Calibration data
| Name | 21073 stock | 21073 mine | 21053-*** | 21053- | ***-20 | |||
| 1st camera | 2nd camera | 1st camera | 2nd camera | 1st camera | 2nd camera | 1st camera | 2nd camera | |
| Engine capacity | 1700 | 1500 | 1500 | 1600 | ||||
| Main diffuser | 24 | 24 | 24 | 24 | 23 | 24 | 23 | 24 |
| gtzh | 107,5 | 115 | 115 | 115 | 102,5 | 115 | 107,5 | 110 |
| GVZh | 150 | 135 | 150 | 135 | 150 | 135 | 140 | 165 |
| TJ XX and move on. System 1 | 39 | — | 42 | — | 39 | — | 40 | — |
| TJUN | 45 | — | 35 | 40 | 35 | 40 | 45 | 40 |
| Kulachek UN | 4 | 7 | 4 | 5 | ||||
| TJ EMR | 40 | — | 40 | — | 40 | — | 40 | — |
| Choke cam | 6 | — | 6 | — | 7 | — | 3 | — |
| T/W ratio | 0,717 | 0,852 | 0,767 | 0,852 | 0,683 | 0,852 | 0,768 | 0,667 |
| Total t/v ratio | 0,781 | 0,807 | 0,763 | 0,713 | ||||
Carburetor calibration data 21073-1107010 | ||
| Options | first camera | second camera |
| Mixing chamber diameter, mm | 32 | 32 |
| Diffuser diameter, mm | 24 | 24 |
| Main dosing system: fuel jet marking air jet marking | 107,5 117,5 | 150 135 |
| Emulsion tube type | ZD | ZC |
| Idle system and transition system of the first chamber: fuel jet marking air jet marking | 39 140 | |
| Second chamber transition system: fuel jet marking air jet marking | — — | 70 140 |
| Power mode economizer: | — | 70 |
| Econostat: conditional fuel jet flow rate fuel jet marking spring compression force at a length of 9.5 mm, N | — 40 1,5±10% | — |
| Accelerator pump: nozzle marking, fuel supply in 10 cycles. sm3 cam marking | 14 — 4 | — — |
| Starting clearances: air damper, mm throttle, mm | 3,0 | — |
| Marking of the choke control lever | 6 | — |
| Hole diameter for vacuum corrector, mm | 1,2 | 1,2 |
| Needle valve hole diameter, mm | 1,8 | 1,8 |
| Diameter of the fuel bypass hole into the tank, mm | 0,70 | 0,70 |
| Engine crankcase ventilation hole diameter, mm | 1,5 | — |
Float mechanism
The Solex 21073 carburetor, installed on the Niva, has a float chamber of two sections. They are located on both sides of the main cameras of the device. The system consists of two ebonite floats, which are mounted on a lever.
The latter swings on an axis pressed into the bosses of the device cover. There is a tongue on the bracket. The element presses the needle valve needle through a special ball. The float mechanism serves to adjust the level of fuel required for normal operation of the carburetor. The needle valve is a non-separable type. It is not being repaired. The valve body is mounted on a thread in the carburetor cap. The ball protects the needle from shock when the machine moves. If the chamber is empty (for example, if the driver is using LPG), then the floats will knock.
Carburetor cleaning
As you know, the VAZ-21213 was equipped with either a Solex 21073-1107010 or Ozone carburetor. Both of them require periodic cleaning. The first one seems to be technically more advanced, advanced and gentle. Ozone is for mud climbers. I also have a Niva for dirt, but with Solex, and I will only change it to an injector if it comes to that. Recently, my carburetor began to act up in the classic way for a VAZ Solex - it stopped running on the first chamber, and only when the throttle was fully pressed. Those. when the second chamber opened. The reason for this phenomenon is discussed in Nail Poroshin’s video “The Eternal Solex Carburetor,” and how I solved it is discussed below.
