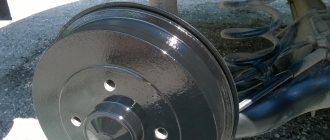
The service life of the rear brake drum is over 100 - 120 thousand km. Usually the part wears out faster and braking efficiency decreases.
The process of self-replacement is simple, but requires compliance with the algorithm. Let's look at the process of replacing the drum step by step.
How to remove the drum on a Lada Vesta: step-by-step instructions
- We install the machine within the perimeter of the repair area.
- Jack up the left (right) side.
- We remove the wheel.
- Unscrew the two bolts.
- We press out the element together with the bearing.
After carrying out maintenance and troubleshooting, we install the parts in the reverse order.
Sequence of actions when replacing a brake drum on a Lada Vesta yourself
Necessary tools, materials:
- wheel wrench;
- rags;
- two-fingered puller;
- additional lighting;
- Phillips head screwdriver;
- new rear drum.
Step by step guide:
- Lower the parking brake lever.
- We hang the car with a lifting mechanism.
- “Rip off” the bolts and remove the wheel.
- We press out the drum, inside of which the bearing is installed.
- After carrying out maintenance (replacement), we reassemble the structure.
Related link:
Cruise control on a Lada Vesta car
Replacing rear pads
To replace the rear pads with your own hands, without resorting to the help of specialists, you will need about two hours of free time and a minimum set of tools: a hammer, a screwdriver, pliers and a 36 mm socket. All actions are performed in the following order:
- using a jack, the rear part of the car is raised - the wheel bolts are first loosened, and a stop is placed under the front wheel - and the wheel is removed;
- if the car is in a stable position, the handbrake goes down to its extreme position - you will need to loosen the handbrake cable;
- Using a screwdriver and a hammer, you need to remove the cap covering the hub nut;
- use a 36 mm wrench or socket to unscrew the hub nut;
- the brake drum is removed;
- Using a screwdriver, remove the handbrake cable from the shoe lever;
- springs are disconnected;
- use pliers to remove the spring clip;
- the support is removed from the opposite part in the same way;
- the spacer bar and the block in front are removed;
- the rear block is removed;
- the tip of the parking brake cable, which is attached to the lever from the rear side, is disconnected;
- By disengaging the adjustment mechanism is removed.
Before reassembling the unit in the reverse order, it is necessary to thoroughly clean all parts from dust and rust and lubricate the drum with a special lubricant.
Review of Manufacturer Prices
| Name/article | Price in rubles |
| TB bearing with ABS LADA Vesta432008333R | From 6000 |
| Pads 8450006850 | From 3500 |
| Rear disk 8450031131 on IVS drum | From 1400 |
| Drum size for Lada Vesta 203.2 mm | |
| *prices are as of 04/08/2019 | |
Conclusion
You can replace the rear brake element yourself within ten minutes. It is not necessary for a repairman to have special skills, but it is desirable.
The market offers components for the brake system of domestically produced cars. The workmanship is no worse than European analogues, the price is affordable. Service station technicians recommend replacing brake tires in pairs to increase braking efficiency and reduce the risk of an emergency.
Work progress
For the right and left wheels the algorithm of actions is the same. Before you start replacing the rear brake pads of a Lada Vesta yourself, you need to drive the car onto an overpass, and then remove the sedan from the parking brake.
Next, the rear wheel is removed, and a support must be placed under the car.
To dismantle the drum, the pads must first be brought together. This is done with a regular screwdriver - it is inserted into the threaded holes in the drum itself, and it rotates a special ratcheting nut for automatically adjusting the gap between the surface of the brake drum and the pads. This will allow you to shorten the bar (spacer).
The photo below shows the entire mechanism with the drum removed. The nut rotates with the screwdriver up, in the direction indicated by the red arrow.
When this is done, you need to remove the drum bearing cap. It fits quite tightly, and therefore a chisel and a hammer are used for the work.
After the cap is removed, access to the hub bearing nut will open, which needs to be unscrewed using a 30 mm wrench and a socket.
After unscrewing the nut, you need to remove the brake drum (it is dismantled along with the bearing).
When the drum is removed, you must work carefully so as not to touch the ABS system sensor, marked with a red arrow in the figure.
Using a screwdriver, pry up and remove the spring (pressure) of the rear pad, as well as the support post. The support post of the second block is dismantled in the same way.
Then you need to remove the hook of the tension spring (lower) from engagement with the brake pad, after which the spring itself is removed.
The next step is to move the pad subassembly (rear) away from the brake shield
You need to work carefully, as there is a risk of damaging the brake cylinder seals.
The upper tension spring is removed in the same way.
When this is done, you can remove the spacer bar, and then the front block. You must first disconnect the end of the handbrake cable from the rear block, and then remove it too.
The mechanism for automatically adjusting the gap between the rear brake pads of the Lada Vesta is a spacer bar (composite).
When you press the brake pedal, the pads move apart and are pressed against the surface of the drum. This occurs due to the work of the wheel cylinder pistons. As for the protrusion of the lever, it moves in the opening between the teeth of the nut (ratchet).
As the pads wear, the nut rotates 1 tooth under the influence of the adjuster. This lengthens the bar (spacer) and moves the pads closer to the surface of the brake drum. Thanks to this complex, there is no need to adjust the handbrake.
The spacer bar itself has a complex design, and therefore if rust appears on it or if it is damaged, it is recommended to install a new part. If the condition is normal, it is better to wash the bar and lubricate it with a plastic compound.
Before starting assembly, you need to reduce the length of the bar as much as possible by screwing in its rear end.
Installation of the rear brake pads of the Lada Vesta is carried out in the reverse order.
Before installing the brake drum, its working area must be thoroughly cleaned with a wire brush. But when working, you must be extremely careful so as not to catch the ABS master ring.
The drum is secured with a hub bearing nut, which must be tightened to a force of 175 Nm. It is also strongly recommended to install a lock nut, this is especially true for the left wheel.
Self-replacement of the rear brake pads of a Lada Vesta on the second wheel is carried out in the same way.
When the work is completed, you need to check the brake fluid level in the reservoir. If it is insufficient, add liquid.
To adjust the brake pads, you need to press the brake pedal several times. Then, pressing the pedal, raise and lower the handbrake, while keeping the button on the handbrake constantly pressed. At this time, soft clicks will be heard from the rear wheels as the auto-adjustment mechanism operates. The handbrake needs to be raised and lowered until they stop coming.
If the need arises, you can additionally adjust the hand brake, which is done with a 10 key - there is a nut under the lever that should be tightened.
This completes the independent replacement of the rear brake pads of the Lada Vesta.
Reviews
| № | Positive |
| 1. | Semyon (www.zr.ru): the car is three years old, the TB has not been changed, wear is no more than 30%. |
| 2. | Andrey (autobann.su): fourth maintenance, the master said that the car was in good condition, there were no critical comments. |
| 3. | Georgy (lada-vesta.net): I won’t slander the car, it’s good, without any special defects. I fix minor damage myself. |
| 4. | Stepan (otzovik.com): several times I tapped the TB, visited a service station, and the technician tightened the fasteners. The car is under warranty, no comments. |
| 5. | Vladimir (www.zr.ru): positive review, no comments. I plan to replace the front and rear pads after next winter. |
| 6. | Alexander (autobann.su): during three years of active operation of the machine, I replaced the right bearing once. Fortunately, the car was under warranty and the cost was minor. |
| 7. | Mikhalych (https://forumvesta.ru): comrades recommend installing imported ones from Renault instead of native ones. They say that the workmanship and service life of the latter are much better. |
| 8. | Vitaly (lada-vesta.net): I won’t criticize it, the car is good, there are no complaints about the engine, chassis, brakes, suspension. |
| 9. | Timofey (otzovik.com): after purchasing the car at the dealership, he immediately re-wrapped the car, lubricated it in places, and replaced the rubber boots with new, imported ones. Now it works like a clock. |
| 10. | Stanislav (www.zr.ru): I’ve heard negative reviews about the Lada Vesta, but I can’t confirm it. The car is solid, there are no special complaints about it. |
| 11. | Gennady (autobann.su): mileage 80,000 km, TB with minor wear, will last the same amount. My comrades advised me to buy drums from an imported company, but I’m still in thought. |
| 12. | Alexey (https://forumvesta.ru): I regularly get serviced at a service station, buy original consumables, have no complaints about the car. |
| Negative | |
| 13. | Konstantin (www.zr.ru): the friction linings at the rear wore out at 50,000 km, the left TB cracked at 100,000 km. I heard that drums from foreign cars fit Vesta, in particular Opel Astra. |
| 14. | Vitaly (otzovik.com): the bearing in the rear brake drum failed at 75,000 km, although it should have lasted longer. |
| 15. | Grigory (autobann.su): after purchasing the car, it needs to be reupholstered, seals and bushings replaced. The manufacturing quality of Russian spare parts is still far from perfect. |
| 16. | Kirill (lada-vesta.net): externally the car turned out to be beautiful, aerodynamic, but the filling is old, with defects from previous generations. I heard that they are coming to Vesta from Renault. |
Related link:
Lada Vesta Sport – owner reviews
Durability
Drum brakes are more durable than disc brakes. Their safety is almost unaffected by different weather conditions: rain, temperature changes, etc. Nor can they become icy in winter.
VAZ regulations: pads in drums must be changed every 60 thousand km, and inspection is carried out every 15 thousand. The pads on the discs are changed as needed, and according to reviews, VAZ pads “live” 30-45 thousand km. By the way, they would live less on the rear axle.
Vesta drums are equipped with TRW pads from the factory - there are no complaints about VAZ here. At the same time, everyone knows that drum brakes are less effective at speed, and they do not withstand prolonged loads (they overheat). Let the reader draw his own conclusion.
Main differences between disc and drum
The braking mechanism consists of several parts and differs in two types of design.
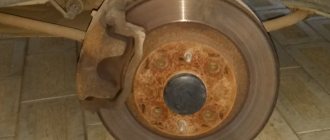
The disk unit has an open design, allowing the device to operate for a long time without overheating. When you press the brake pedal, the brake pads are pressed against the disc mounted inside the wheel rim using a caliper. The degree of compression of the disc by the calipers is very high, which allows the car to brake more efficiently. As a result of heavy loads, the mechanism has a relatively short resource.
The drum mechanism has a closed cylindrical body, which prevents the entry of dirt and dust and has a long working life. The brake pads are pressed against the inner surface of the drum, causing the car to stop. The pressing force of the elements is comparatively lower than that of analogues with a disk, therefore such mechanisms are considered less effective.
The combination of front discs and rear drums is optimal in terms of efficiency and durability. This version of the Lada Vesta justifies itself with its reasonable price and reliability.
Electronics
Previously, a special unit, referred to among car enthusiasts as a “sorcerer,” was responsible for the distribution of braking force between the axles. This knot was quite capricious, which is why it constantly required attention. Its malfunction or incorrect calibration led to problems when braking.
However, Lada Vesta and other AvtoVAZ models are now equipped with electronic control units, since they are equipped with an ABS complex. Electronics are much more reliable, and therefore problems such as with the “sorcerer” are not observed.
