Home » Repair tips » Windshield creaks - what to do 404
Perhaps no one likes it when the windshield squeaks. Why does this happen, what are the reasons for the squeaking that is annoying. The causes of squeaking, methods of elimination and possibilities for self-repair during a trip will be discussed below.
Reasons for glass rattling in interior doors
The problem is relevant not only for old structures, but also for new doors.
- Outdated doors do not have putty to hold the glass in place. This function is performed by glazing beads. Over time, the wood dries out, and the glass begins to shake and rattle. Repairs to dilapidated structures are carried out carefully. Outdated platbands and glazing beads crumble when pressed lightly.
- Modern interior doors can also have this problem. This is due to low-cost production technologies. The width of the glass is smaller than the groove, there is no fixing seal. Or the door leaf consists of several parts. Prefabricated models are assembled like a construction kit, without gluing parts.
Attention! Operating doors with a rattling defect is hazardous to health. When slammed, the glass will fall out and break. The problem must be resolved in a timely manner.
Creaking seats
The most common sources: fasteners, headrest, seat adjustment parts, plastic cladding elements, leather upholstery.
Elimination of squeaks in the car interior is carried out on an individual basis, depending on the location of extraneous sounds. For example, the creaking of leather upholstery can be removed using felt tape or a specialized lubricant produced by Mercedes-Benz.
Repair tools and materials
The reason for the rattling is the hollow space between the glass and the groove. To fix it, you will need silicone sealant or acrylic putty, but they are difficult to apply accurately due to the narrow gap. There are several secrets to replacing sealant with other materials. You will need:
- silicone tube from a dropper;
- paper knife;
- toothpicks or matches;
- glazing beads;
- acrylic putty;
- scotch;
- flat screwdriver;
- technical jam;
- glue;
- rubber gloves with a non-slip base.
The listed tools are easily accessible. They are intended to provide several methods to resolve the problem. Let's look at popular and simple ones.
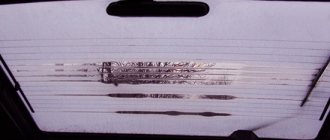
Causes of a squeaking windshield
There may be several reasons why a windshield creaks:
- Rarely, there is a distortion caused by a manufacturing defect.
- Most often, a skip occurs after a certain period of use of the car: the rubber seals wear out.
- In the cold season, creaking occurs when the seal contracts. It loses its elastic properties in the cold.
- A squeaking windshield may occur after it has been replaced. Most often, the drying time of the adhesive materials is not maintained, therefore, the seal is not sufficient: the fixation is not complete.
- After a repair (road accident), when aligning the body, even the slightest misalignment can cause the problem in question.
If the windshield creaks, effective measures are needed to eliminate the problem. More on this below.
Ways to fix the situation
First of all, you need to remove the glazing beads, press them more tightly to the glass and nail them again. The method is effective, but not durable. The rattling will return over time. For an experienced person this work is simple. This can be done without removing the door from its hinges. If the door has been in use for a long time, then the glazing beads are also old. They may break in the process. It is worth purchasing spare parts in advance.
Important! If the glazing beads have already been removed, it is better to immediately fix the glass with transparent silicone. Pre-clean the grooves from dust and debris.
The sealant can be replaced with a tube from a dropper:
- Lay out and stretch the tube on a convenient surface. Unnecessary laminate boards will do.
- Using a utility knife, cut the tube along its entire length.
- Place the resulting halves in the gap between the glass and the wooden frame.
- It is convenient to push the tube with the end of a flat screwdriver.
- If the width of the groove allows, then do the procedure on both sides.
- Continue until all gaps are filled.
The method completely eliminates rattling. It eliminates contamination and does not require drying time as is the case with sealants.
For the following method you will need a technical cork and transparent glue, but not quick-drying one:
- Cut small blocks from cork material. They should fit into the gap between the glass and the frame.
- Lubricate them with glue on both sides and place them in each corner or on the top and bottom of the glass cell. The fixed glass sheet will no longer “walk” along the groove. You can leave it at this stage, but it is more advisable to fill the gap with putty.
Liquid silicone sealing is a long-lasting sealing method that requires experience and skill.
- Cover the perimeter of the glass with paper tape. It acts as protection against dirt. Excess silicone will get on it.
- Insert matches (toothpicks) into the gaps at a distance of 7-10 cm from each other. This will press the glass and make room for the sealant.
- It is better to fill the space with silicone using a “gun”. Remove excess material with a rag or paper towel.
- Leave to dry for a day, then take out the matches and remove the tape.
Reference! To properly fill the gap with sealant, you need to increase the distance between the groove and the glass. This can be achieved using matches or toothpicks. Transparent silicone sealant can be replaced with acrylic putty.
Knocks, clunks or how I deal with noise... (Front and rear door trims)
Good day, Drivers! I don’t promise an opus, but I’ll say a few words about the noise of the door cards... Not long ago, the trim began to rustle, first at the front, then at the back... I decided not to wait for next summer and slowly get rid of them and other removable plastic, and in the summer the noise of the doors, etc.
I took off the trim, glued the anthers in place, in the right front door they were lying crumpled in the door, I’ll immediately note that the standard anthers are a rare squalor and ring no worse than a piece of iron in the cold... When I started the car with the anthers, the ringing was so loud that I was scared, why is that? there he wants to fall into the door :)))). But the doors are not noisy, so I decided to leave the anthers on for now, and later to seal the technological holes properly, to be honest, I shouldn’t have decided so :))), I had to close it with a cheap vibrator, for example STP Aero - 230 rubles. per sheet, up to 115 rub. on the door, but in the cold I wouldn’t be surprised at the appearance of new sounds, because in the cold the anthers squeal and jingle on the contacting parts, in particular, the glass in the driver’s door began to sound, but oh well, we’ll win as soon as it gets warmer...
I tightened all the wires into bitoplast, the photo was taken before... I took the casing home, warmed it up and off we went:
-Remove the top plastic cover (under the skin), check all the screw attachment points. I wrapped the broken or cracked holes with thread and dropped cyanoacrylate (aka superglue)…
-We pull out all the screws and glue the vibration. For 4 skins it took 3 sheets - STP Silver - 3mm.
He heated the vibra with an ordinary hairdryer, rolled it with a utility knife (round side) and an adjustable plumbing wrench.
-We glue Bitoplast onto the overlay, but it’s worth mentioning that in the photo the Bitoplast is not glued to the very bottom, this is the final version of the fit so that the overlay does not stick out - what I mean is that if someone decides to do the same, do not try to glue the entire surface: (
After installation on the casing, the overlay becomes one with it and sounds disappear into the void when tapped.
-We glue the casing over the vibra with hermeton, it’s a little expensive, about 500 rubles per sheet, but when choosing between bitoplast and it in the store, the sealant won, it seemed more interesting to me...
This completes the noise of the casings. On the door, if you look closely in the first photo, you can see that the contour of the fit of the trim on the door is pasted over with a strip of modelin, so on all four doors, and therefore I did not glue any anti-creaking agent on the trim itself. The result is that the casings have become heavier, the ringing and creaking noises have gone away, at least for now (they drive for six months and are silent). There was a small jamb with the front trims, I tightened the cards into sealant along with foam inserts and when I put the cards on the doors, they did not latch, in fact, after fiddling with them a little, I removed them, for those who will glue the cards, I advise you to immediately remove them and not soar your brain :). Well, as I said at the beginning, I was a little dissatisfied with the fact that I left the standard anthers on the front doors and, having learned from bitter experience, I closed the rear technological windows with STP Aero...
I'm pleased with the result, the trim became silent, and there was almost no sound from the doors.
Thank you everyone and good luck on the roads!
When is a complete glass replacement required?
The glass in an interior door will have to be replaced if it has cracks, chips, has lost its transparency or is broken.
Even a small crack in the glass sheet poses a threat. It has lost its strength and will crumble if there is a draft or a sharp slam of the door. You can change the glass yourself if you have similar experience or an economy class door with simple fastenings in the form of glazing beads. Be sure to seal the new glass cell with sealant to avoid rattling in the future.
Simple door designs do not require special skills. In some models, the glass is easily inserted into the frame. But for laminated models it is difficult to find and break the glazing beads. Independent work in this case will lead to replacing the door.
It is problematic to repair doors in which the glass “enters” from the ends. You will have to remove it from the hinges, open the end frame, “pull out” the glass and fill the grooves with putty or silicone.
Mr. Fetr: professional elimination of squeaks in the car interior
Are you seriously thinking about how to remove crickets from inside your car? Auto repair shop Mr. Fetr offers professional assistance in improving your comfort level. We are open every day and are located in Moscow.
We work with foreign cars of any class, including luxury cars: Lexus, Mercedes-Benz, RangeRover, Maybach, etc.
We carry out all types of work to eliminate crickets in the car. Among them:
- elimination of squeaks in doors: trim, hinges, seals, locks;
- elimination of crickets in plastic parts;
- debugging seat adjustment mechanisms, upholstery processing;
- elimination of crickets in the area of the rear shelf;
- eliminating squeaks from the ceiling upholstery.
Our specialists work as quickly as possible. As a rule, all orders are processed on the same day. The work is guaranteed for 6 months.
Our arsenal contains premium materials, the use of which guarantees perfect results. The work is performed by experienced craftsmen who are responsible for the safety of your car’s interior.
Creaking of car parts is a problem that, with a professional approach, can be solved quickly and effectively. The main thing is to contact reliable specialists.
Auto repair shop Mr. Fetr is what you need!
In what cases is it better to contact a professional?
- Experts do not recommend eliminating glass rattling yourself if the door has a complex structure, the shape of the glass is unusual, or voluminous baguettes or stucco molding are used as a frame.
- Prefabricated interior doors confuse even experienced carpenters. Working with such models requires removing them from their hinges and going through all the parts, which not everyone can do.
- Designer and stained glass doors with an abundance of decorative elements also require professional intervention from the people who carried out the installation.
- Glass of non-standard shape (zigzag, oval) may become cracked or crumble due to being pinched. The specialist will first take measurements and make a template in case the decorative part breaks during the work.
- At home, you cannot adjust or change the triplex. These are 2 glasses with film sizing. It is a safe type because it does not crumble, but becomes covered with cracks. Such glazing is practically not prone to rattling, but any work with it requires a professional approach.
Important! It is necessary to clarify with the potential master whether he is familiar with the design of a particular interior door. Otherwise you will have to pay twice.
If the doors were ordered at the factory, then the contract contains the model name and service conditions. You just need to call a specialist.
Work in the garage in the summer
In summer, dust and sand often get under the rubber band. As a result of friction, unpleasant scrap occurs. You can get rid of it by washing the glass well and bending the seal with water pressure. You don't need to go to a car wash for this. It’s trivial, but a children’s water pistol or an ordinary pear will do the job.
Winter and problem
In winter, the situation may appear when the car warms up or while driving. Most likely, the reason is the wear of the sealing joint: the rubber freezes to the glass, elasticity is lost. If you cannot cope with the problem on your own, it is recommended to seek help from a car service station.
What happens if the problem is ignored?
The rattling of glass in interior doors is not a global problem.
But there is no point in pretending that everything is normal. Ignoring the problem entails:
- unpleasant rumble during operation;
- lack of sound insulation in the premises;
- cracks in glass;
- threat of serious glass damage;
- replacement of an individual element or door.
The main danger is getting hurt by a crack or broken glass. You cannot turn a blind eye to the problem, especially if there are children, elderly people or disabled people living in the house. Large pets are also at risk. They know how to open doors, which provokes a sharp slamming of doors and falling of glass from the cell.
How to eliminate crickets in the cabin: general technology
There are different ways to remove crickets from your interior. Some people choose the method of self-gluing problem areas with sealants, but most often this gives short-term results.
Professional removal of crickets from inside a car involves performing the following stages of work:
- identifying the source of extraneous sounds;
- dismantling the element that caused the creaking in the cabin;
- assessment of the seized element and the place of its attachment for the most accurate determination of materials and methods for eliminating the problem;
- organizing sound insulation, straightening damaged parts;
- careful installation of structural elements in place.
Our specialists work with professional materials and deep-penetrating lubricants, thanks to which we are able to remove squeaks in the cabin quickly, efficiently and as efficiently as possible. The compositions used do not spread over the surface of the repaired area and do not emit unpleasant odors.
Eliminating noise inside a car takes from several hours to a couple of days, depending on the number of noise sources, the make and degree of wear of the vehicle.
Other problems with extraneous sounds
In addition to the rattling of glass, interior doors make other unpleasant sounds:
- It's not just old structures that creak. A new door frame can also “sound” unpleasant for no apparent reason. This is due to improper fastening of the hinges. Then an extraneous sound appears immediately after installation. In this case, you need to redo the work. If dismantling and installation exactly according to the instructions did not help, then there may be defective parts. They need to be replaced by the manufacturer.
- The creaking appeared after a while, which means the hinges need to be tightened and lubricated. First, clean the units and parts from debris. It often causes squeaking.
- If the kit does not include bearings, the parts will begin to rub against each other and creak. It is necessary to purchase the missing elements.
- Long-term use of the interior door will lead to sagging. The canvas rubs against the box and makes extraneous sounds. Lubricating the parts helps in this case, but for a short period. The entire structure will have to be changed.
- Involuntary slamming is another problem with interior doors. This happens when the canvas hits the frame due to a draft, even when the door is closed. A sealant will help remove the defect, but it is better to apply it during installation.
Repairing interior doors is not a reason for sadness. This is a good reason to refresh the interior. It’s not easy to eliminate annoying rattling, but to replace old glass with tinted, mirrored or frosted options.
The rattling of the door and his painful search...
The problem of rattling in the driver's door has been bothering me almost since the moment I bought the car. Everything is according to the classics, at first the rattling was weak, then stronger and stronger. Eventually it started rattling even on a perfectly smooth road.
At first it seemed like the door card was rattling because it kept coming off the clips. You hit it with your fist, it sits down, then on the first bump it moves away again.
Then it seemed as if the glass was rattling. I tried to press it with my elbow and the sound actually became quieter. I noticed that even when lowering the glass, there was also less rattling. But over the past two weeks, the sound has become stronger and lowering the window no longer helps. In short, I was fed up with the fact that a woodpecker was pecking at my left ear, so I decided to sort this out.
After looking at the drive, I decided that I needed to glue another 10mm seal inside the standard seal. I degreased it and glued it in. The glass began to sit tighter, but the rattling, motherfucking leg, continued. By the way, I decided that later I would glue this seal into all the doors.
I decided to knock on the door card, when I knock on it, I hear this rattling sound, when I knock on the right card, nothing like that is observed.
Next I removed the door card. Well, when I took it off, it fell into my hands as soon as I unscrewed the screws. She kept her word of honor.
After knocking on the bare metal, I no longer heard this sound. What a bitch. I look at the card, everything is fine with it, it doesn’t make any sounds.
I decided to take a ride on the dirt road. I rolled around like this for about 20 minutes, feeling everything that was in the door. Result: the main rattling noise comes from the door stop. I decided that I would not invent a bicycle and would simply replace it, especially since the price was only 150 rubles. I removed the stop by knocking out the cotter pin (I had to tinker a little).
Also, while I was riding, I found a few more places where sounds could be coming from. I took an old Shumka, tore off pieces and stuck them in these places, having previously degreased them.
Then I went to the auto parts store. And my surprise, this damn sound didn’t disappear, but only became stronger. It turns out that the main rattle came from another part of the stop, which is in the door.
I stopped, unscrewed it and oh, a miracle. Perfect silence. I ran into the store, took new clips, a new door stop, and placed it all right next to the store. I’m driving, and the sound is still there, but it’s 2 times quieter. He stopped and began to look. It turned out that the bolts that hold the stop to the rack were unscrewed and the mount itself was moving slightly.
After tightening all these bolts there was absolute silence. I started putting the door card back together, replacing the clips with Kalinovskie ones for 5 rubles apiece.
The door fit like a glove. Now it doesn't come off the clips. I performed the same procedure with the rear right door, plus changing the lock actuator, because... the old one just died. The price of the actuator is 350 rubles.
I also bought a special lubricant for the hinges and a sealant. I sprayed all the hinges with a cloth until rust stopped flowing from them, then I poured lubricant into them, similarly with the locks.
As a result of the entire procedure, all sounds from the door almost disappeared. But sometimes you can still hear this rattling noise when driving over large bumps. I don't know what to do with this.
Source
Dashboard
This is the most problematic area of most used cars. To understand where exactly the “play” is, you need to try pressing the plastic panels one by one while driving and listen to see if the sound has disappeared (therefore, it is better if there is an assistant in the car). You can also try to insert an unnecessary plastic card into the cracks that cause the most suspicion. If the grinding noise has disappeared, then the “cricket” has been found. All that's left is to get rid of him.
Healthy! To determine exactly at which joint the unpleasant sound occurs, it is enough to inspect the surfaces. As a rule, abrasions appear in such places.
There are two options for how to do this - simpler and more complicated:
- We completely dismantle the dashboard and put Modelin (one sheet of sound insulation will cost 760 rubles), Bitoplast (a sheet will cost 250 rubles) or so-called mushrooms (plates with small “outgrowths” that make the joints even tighter) into the joints. Particular attention should be paid to the panel's hinged elements (glove box lid, fuse box, clock, etc.).
Healthy! Some people glue the joints with special tape or regular adhesive tape from the pharmacy.
- Pour silicone grease into the cracks (a can of WD-40 with a spout will cost about 250 rubles) and wipe off the excess with a napkin.
Silicone grease is the fastest and cheaper option. But you shouldn’t expect it to work for a long time, so the procedure will have to be repeated periodically. Fortunately, this composition is not conductive, so you don’t have to worry about “shorting” the dashboard.
Healthy! If the dashboard of a car consists of many parts (such as in the Chevrolet Lacetti), which are attached with self-tapping screws, then one disassembly is enough for extraneous sounds to begin to appear in the car. If this element is a monolith (as in Renault Logan), then even a used car will not have problems with “crickets” in this area.
How to prevent squeaks from appearing
There are several tips to prevent unwanted noise:
- Since the greatest wear of door seals occurs in winter, before the onset of frost it is worth treating them with aerosol silicone lubricants (if you don’t want to spend money, you can replace them with regular glycerin, which can be bought at a pharmacy for 20-30 rubles). Preference should be given to cans with long spouts. Thanks to them, you can deliver the product to hard-to-reach areas.
- Cover all joints of plastic elements with a special film, for example, “Anti-creak” or adhesive rubber seals. It is a sheet with an adhesive layer, which is cut into the necessary pieces. The material contains polyesters, so it is durable. Anti-creak is also often used for sound insulation.
Healthy! Many people prefer Anti-Squeak, as it is available in several colors, so you can choose a film that will best match the dashboard and dashboard.
- Periodically inspect joints for moisture. If it constantly accumulates, it will lead to the formation of corrosion. As a result, the elements will be more fragile and will begin to wear out faster.