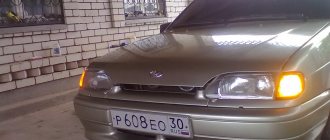
As you know, various problems can occur during the operation of a car. Moreover, in addition to mechanical problems, many breakdowns can be associated with the electrical part. One of these malfunctions, which can significantly complicate the operation of the vehicle, is the failure of the direction indicators (turn signals).
In fact, if the turn signals do not work, this problem can pose a certain danger, since the driver needs to maneuver and constantly indicate to other road users the direction of his movement. It turns out that if the turn signal does not work, you need to constantly remember this when driving in the usual mode.
Moreover, a driver with faulty turn signals may be fined by the traffic police. Next, we will look at what to do if the turn signals do not work, how to determine the cause of the malfunction, and also how this malfunction can be eliminated.
Why turn signals on a car don't work
So, if the turn signals fail while on the road, this can be determined by the absence of clicks; the turn signal indication on the dashboard may also disappear. The direction indicators on the panel may also flash too often, stay on constantly, etc.
In such a situation, there can be two options: only the turn signals do not work or the emergency lights do not work. This needs to be checked immediately, because if the direction indicators do not work, but the hazard warning lights are in order, in this case you should try to turn on the hazard lights immediately. This is necessary in order to attract the attention of other road users and identify the vehicle as faulty.
Next, having reduced the speed, you should make sure that there are no obstacles and change lanes with caution, since it is not known for certain whether the emergency lights are working or not (even if, after turning on, clicks are heard and the turn indicators on the instrument panel blink).
The next step is to get out of the car and check whether the hazard lights are working/not working. The performance of the turn signals and turn signal repeaters themselves is also assessed. In any case, it is better to additionally set up a reflective triangle. Then you can proceed directly to trying to solve the problem.
Of course, you can continue driving to the nearest service station, but in this case you need to be prepared for the fact that you will need to give signals to inform other drivers and road users while simultaneously driving the car. Of course, this method is not suitable for everyone. You can also use an on-site repair service, but such a service can be prohibitively expensive.
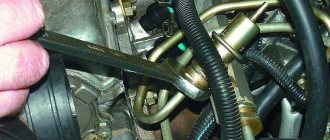
- In this situation, it is better to try to fix the breakdown right on the spot. To do this, you need to start checking with the turn signal and hazard warning relays. The main difficulties may be related to the fact that the specified turn relay on different cars can be located both under the hood and in the cabin (in the area of the steering column or under the instrument panel).
To accurately determine the installation location of the turn signal relay, it is advisable to study the manual or use a smartphone/tablet (provided you are connected to the Internet). Typically the turn signal relay is located on the steering column or in the fuse box under the instrument panel.
Please note that on some cars the turn signal relay is located in the emergency button. In any case, these locations are due to the fact that the driver should be able to hear the operation of the relay. Also, some cars may have a buzzer to duplicate the turn indicators.
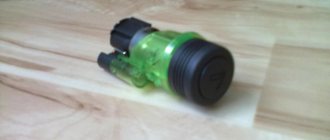
Having found the relay, you will need to disconnect the wires from it. Again, often the relay simply “sticks”, that is, turning it off and turning it off again allows you to return the device to normal. Cleaning the contacts also helps. If this does not solve the problem, then repair or replacement of this element will be required.
- By the way, if we consider the repair of the turn relay, the possibility of such repair will depend on its type. For example, a VAZ turn relay with a bimetallic plate is simple and easy to repair. The turn relay circuit includes a main element - a bimetallic plate, which is integrated into the circuit for passing current through the turn lamps.
When the hazard lights or turns are on, the plate is cold and closes the signal light circuit. Further, during the process of heating the bimetallic plate with current, the plate bends. Bending causes the relay contact to open, no current flows and the lamps turn off.
So, if the lamp burns out, the voltage is higher, the plate heats up more slowly and the blinking period will increase. If there is a short circuit in the circuit, the lamps will flash quickly. However, despite all its simplicity, today a combination relay is also actively used, which is equipped with an additional electronic circuit. These relays are less reliable and fail more often. These relays are usually not repaired.
Is it possible to challenge a fine?
You can try to appeal any fine within 10 days after the decision is made. However, the question is, will it be successful?
If a motorist is detained by a traffic police officer, in most cases, appealing the fine is practically useless. Moreover, in the absence of evidence of innocence in the form of a video recorder.
A camera fine should be contested if you are confident that there was an error in the system and no offense was committed. You can find out about received fines in advance through the inspection website or on the State Services portal.
In order to challenge a fine, you must submit an application to the Road Safety Inspectorate. This can be done at the department whose employee stopped you, on the official website of the traffic police, or via mail by sending a registered letter with a statement and evidence indicating innocence. You can also contact the video recording center directly, which will forward the complaint to traffic police officers. The period of 60 days, which is given to pay the fine, will be postponed while the case is being considered.
If the traffic police rejects the complaint, it can be sent to a higher authority - the court. You should go there only if you have a video recorder, where you can clearly see that the driver is driving through a green traffic light. You can also bring to court a witness who confirmed that he was driving at the time the offense was committed - in this case, liability from the car owner will be removed. And, of course, if you receive a fine for the first time, then it is easier to pay it than to get involved in bureaucratic games.
Other turn signal malfunctions
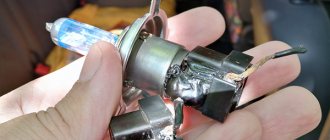
As for other problems, in addition to the relay, we can highlight: burnout of lamps, both main and turn signal indicators, malfunction of LED “strips,” malfunction of the turn switch on the steering column, malfunction of indicator lamps on the instrument panel, problems with the hazard warning switch, exit from building control blocks, etc.
The main symptoms that allow you to localize the malfunction:
- if the hazard warning lights are working but the turn signals are not active, then there is a high probability of a malfunction of the turn switch;
- The turn signals work, but the hazard warning lights do not turn on, this may be due to a malfunction of the hazard warning light button;
- The turn signals and emergency lights do not work - the turn signal relay is faulty, poor contact, blown fuses, etc.;
- The turn indicators flash on the panel more often than usual - there is a short circuit in the wiring or the turn lights;
- indicators on the instrument panel blink with less frequency - there has been a break in the wiring leading to the turn signal lamps, the lamps themselves have burned out, problems with contact in the area where the lamps are installed or in the connectors, failure of the LEDs, etc.
It is not difficult to guess that there can also be many reasons, starting from damage to the wiring and ending with moisture. However, in practice, the turn switch on the steering column often turns out to be problematic. To replace it, you will need to remove the plastic steering column cover.
If we look at the light bulbs and wiring, difficulties may arise with the fact that this system on many cars is also responsible for the side lights. This means that the wiring is routed throughout the cabin, and the lamps are on the trunk lid.
We also recommend reading the article about what an immobilizer is. From this article you will learn what functions an immobilizer performs on a car, what advantages this solution has, and also what type of immobilizer is better to choose.
In fact, you need to look at the wires under the sills, as well as where the wiring passes from the body to the trunk lid. It is also necessary to inspect the wiring in the headlight connectors. Usually, if one lamp does not light, it is necessary to “ring” the lamp and check the contacts. If there are diodes on the car, it is better to change them immediately.
We also add that the hazard warning switch may also require special attention. It often happens that when you turn on a left or right turn, all the lamps flash at once. The cause may be either a faulty turn switch on the steering column or the hazard warning switch.
Also in the list of problems, when the turn signals do not light up, a failure of the control unit is noted. This unit is installed on modern cars of certain brands.
The advantage of the system is constant monitoring; if lamps burn out or fail, the unit records an error and notifies the driver. However, repairing such a system is more difficult and expensive. Computer diagnostics, error decoding, etc. are required.
You can also highlight the blown fuses of the turn signal and hazard warning system. In this case, it may seem that replacing the fuse is sufficient. In fact, fuses rarely blow without reason, which means in-depth diagnostics are still necessary. Otherwise, the turn signals may fail again at the most inopportune moment.
Body
- Replace bumper Chevrolet TrailBlazer
- Change the glove compartment of a Chevrolet TrailBlazer
- Change the washer reservoir of a Chevrolet TrailBlazer
- Removing the gas tank of a Chevrolet TrailBlazer
- Replace Chevrolet TrailBlazer side mirror
- Installing a Chevrolet TrailBlazer heater fan yourself
- Repair of Chevrolet TrailBlazer wipers
- Where to install a Chevrolet TrailBlazer jack with your own hands
- Remove the rear fender of a Chevrolet TrailBlazer
- How to remove the back seat of a Chevrolet TrailBlazer
- How to replace the rear window of a Chevrolet TrailBlazer
- Removing the rear door trim of a Chevrolet TrailBlazer with your own hands
- Chevrolet TrailBlazer engine protection repair
- Installing crankcase protection Chevrolet TrailBlazer
- Chevrolet TrailBlazer rear view mirror repair
- How to remove the gas cap on a Chevrolet TrailBlazer
- How to replace a Chevrolet TrailBlazer lock cylinder
- DIY Chevrolet TrailBlazer windshield repair
- Remove the Chevrolet TrailBlazer fuel filler door
- Remove the trunk trim of a Chevrolet TrailBlazer with your own hands
- Remove the driver's door trim on a Chevrolet TrailBlazer
- How to remove the headliner on a Chevrolet TrailBlazer
- Remove the interior trim of a Chevrolet TrailBlazer
- Remove Chevrolet TrailBlazer Seat Trim
- Remove the dashboard of a Chevrolet TrailBlazer with your own hands
- Remove the Chevrolet TrailBlazer front fender
- Do-it-yourself Chevrolet TrailBlazer front seat removal
- Remove the front door trim of a Chevrolet TrailBlazer
- Removing Chevrolet TrailBlazer Head Restraints
- Removing the Chevrolet TrailBlazer airbag
- Removing the Chevrolet TrailBlazer Dashboard
- Replace the rubber bands on the wipers of a Chevrolet TrailBlazer with your own hands
- Replace Chevrolet TrailBlazer seat belt
- Removing the Chevrolet TrailBlazer Radiator Grille
- Removing the window handle for Chevrolet TrailBlazer
- Chevrolet TrailBlazer Window Lifter Removal
- Change the door seal on a Chevrolet TrailBlazer
- Replacing the Chevrolet TrailBlazer washer nozzle
- DIY Chevrolet TrailBlazer wiper blade repair
What's the result?
First of all, before each trip it is advisable to check the vehicle's lighting equipment. Once signs and symptoms of a malfunctioning turn signal and hazard warning system are identified (for example, the turn signal blinks frequently or does not light up), it is necessary to accurately determine the cause and correct the problem.
We also recommend reading the article on how to install DRLs on a car with your own hands. From this article you will learn how to properly install daytime running lights, how to connect DRLs, and what you should pay attention to when performing such work.
Also, in order not to experience difficulties on a long journey, it is advisable to keep in stock and always have on hand spare turn signal and turn signal lamps, brake lamps, headlight lamps, as well as a multimeter for checking, spare fuses, relays, connectors and wires. Even when driving, you should pay attention to how the indicators on the instrument panel work, what is the frequency of their operation, etc.
As a summary, we note that the serviceability of the vehicle’s equipment is a prerequisite for continued operation. For this reason, every driver needs to not only carry out routine checks and diagnostics, but also be prepared for an emergency when one or another element unexpectedly fails.
Transmission
- Remove the Chevrolet TrailBlazer clutch fork
- Installing a Chevrolet TrailBlazer Air Filter
- How to replace the speed sensor on a Chevrolet TrailBlazer
- Replace clutch disc Chevrolet TrailBlazer
- Replace Chevrolet TrailBlazer transmission
- Installing the driveshaft spider on a Chevrolet TrailBlazer
- Change the oil in the Chevrolet TrailBlazer gearbox yourself
- How to change the oil filter on a Chevrolet TrailBlazer with your own hands
- Chevrolet TrailBlazer exterior grenade repair
- Remove the clutch pedal Chevrolet TrailBlazer
- How to replace the speedometer drive of a Chevrolet TrailBlazer with your own hands
- Change the inner CV joint boot on a Chevrolet TrailBlazer
- Do-it-yourself installation of anther on a Chevrolet TrailBlazer grenade
- Change the boot of the outer CV joint of a Chevrolet TrailBlazer with your own hands
- Chevrolet TrailBlazer Gear Shift Lever Repair
- Chevrolet TrailBlazer cabin filter repair
- Chevrolet TrailBlazer rear axle oil seal repair
- Do-it-yourself replacement of a Chevrolet TrailBlazer gearbox seal
- Replacing the Chevrolet TrailBlazer gearbox seal with your own hands
- Change the axle seal on a Chevrolet TrailBlazer
- Do-it-yourself installation of the Chevrolet TrailBlazer drive oil seal
- How to change the gearbox seal on a Chevrolet TrailBlazer
- Change the fuel filter on a Chevrolet TrailBlazer yourself
- Replacing the clutch cable Chevrolet TrailBlazer
- Replace the Chevrolet TrailBlazer automatic transmission filter yourself
- How to Replace a Chevrolet TrailBlazer Engine Filter
- Replace the air conditioner filter on a Chevrolet TrailBlazer yourself
- DIY Chevrolet TrailBlazer Clutch Cylinder Removal
Brake system
- Replacing the Chevrolet TrailBlazer brake fluid reservoir with your own hands
- Installing an abs unit on a Chevrolet TrailBlazer
- Do-it-yourself repair of the Chevrolet TrailBlazer abs sensor
- Replace the rear brake discs of a Chevrolet TrailBlazer with your own hands
- Installing rear brake pads on a Chevrolet TrailBlazer
- How to change the handbrake pads of a Chevrolet TrailBlazer with your own hands
- Repair of front brake discs Chevrolet TrailBlazer
- Replace the front brake pads of a Chevrolet TrailBlazer yourself
- Replace the Chevrolet TrailBlazer handbrake yourself
- Do-it-yourself Chevrolet TrailBlazer brake cylinder repair
- Do-it-yourself Chevrolet TrailBlazer brake fluid replacement
- Replacing brake lines on a Chevrolet TrailBlazer
- Replacing brake hoses on a Chevrolet TrailBlazer
- How to replace the handbrake cable on a Chevrolet TrailBlazer
- Change the hand brake cable on a Chevrolet TrailBlazer
Content
In most cases, the whole issue is in the relay, which is responsible for this segment of the electrical system. Therefore, it is advisable to start checking with him. Water may get into the relay, or a contact may break off somewhere. You can fix it by replacing the spare part itself. It’s good if you have a spare one in stock for this case (some experienced VAZ owners always carry one with them).
If not, you will have to go to the nearest auto store, since it is not recommended to drive a car without direction indicators (or ask a friend with a car to go get the part). After replacing the relay, as a rule, everything starts to function.
Accident while overtaking a person turning
A²Ã°ÃÂøàüþöõàòþ÷ýøúýÃÂÃÂÃÂ, õÃÂÃȈ ôòð ðòÃÂþüþñøûàôòøöÃÂÃÂÃÂàÿ þ þôýþù ÿþûþÃÂõ. The › òðõàýðûõòþ. ÃÂþôøÃÂõûÃÂ, õôÃÂÃÂøù ÃÂ÷ðôø, ò ÃÂÃÂàA ýøõ ÃÂþòõÃÂÃÂøÃÂàþñóþý. ãÃÂðÃÂÃÂýøúø ÃÂâàÿÃÂø ÿþòþÃÂþÃÂõ ýðûõòþ òøôÃÂàÃÂøÃÂÃÂðÃÂøàÿþ-ÃÂÃ°à ·Ã½Ã¾Ã¼ÃÂ. ÃÂþôøÃÂõûÃÂ, öõûðÃÂÃÂøù ÿþòõÃÂýà ÂÃÂÃÂ, ÷ðüõôûÃÂõÃÂÃÂÃÂ, ÃÂÃÂþñàÃÂþòõÃÂÃÂà ¸ÃÂàüðýÃÂòÃÂ. ÃÂý ýõ ÷ýðõÃÂ, ÃÂÃÂþ üðÃÂøýð, ýðÃÂþ ôÃÂÃÂðÃÂÃÂàÿþ÷ðôø, ÃÂöõ ñûø÷úþ. ÃÂÃÂþÃÂþù óÃÂðöôðýøý ýõ ÷ýðõàÿÃÂøÃÂøý ÷ðüõôûõýøàýðÃÂþôÃÂàVALUE ±Ã¸Ã»ÃÂ. çõûþòõú ÃÂÃÂøÃÂðõÃÂ, ÃÂÃÂþ ÃÂÃ½Ã¸Ã¶Ãµà › ÃÂþ ÃÂðú, ø ÃÂõÃÂðõàòÃÂÿþûýøÃÂàþà±Ã³Ã¾Ã½. ðñð ðòÃÂþûÃÂñøÃÂõûàýðÃÂøýðÃÂàÃÂà ¾Ã²ÃµÃÂÃÂðÃÂàüðýõòÃÂ. òþ÷ýøúðõàÃÂâÃÂ.
ÃÂÃÂûø òþôøÃÂõûø ýõ ÃÂþÃÂÃÂàþúðà·Ã°ÃÂÃÂÃÂàò ÃÂâàÿÃÂø ÿþòþÃÂþÃÂõ Ã½Ã°Ã»à µÃ²Ã¾, ÃÂúÃÂÿõÃÂÃÂàÃÂþòõÃÂÃÂÃÂàÿþôðò ð ÃÂàÃÂøóýðû þ ÿûðýøÃÂÃÂõüþü Ã¼Ã°à ½ÃµÃ²ÃÂõ ÷ðÃÂðýõõ. çõûþòõú, ôòøöÃÂÃÂøùÃÂàÿþ÷ðà´Ã¸, ôþûöõý ÿþýøüðÃÂÃÂ, ÃÂÃÂþ ÷ðüÃàµÃ´ÃÂ" õýøõ üþöõàñÃÂÃÂàòÃÂÿþûýõýþ ýõ ÿÃÂþÃÂÃÂþ ÃÂðú.
Video “Budget option for repairing a steering column switch”
The video below presents an inexpensive option for repairing the steering column switch in a Peugeot car (the author of the video is the EzjikOnline channel).
Traffic rules regulate the use of emergency signals and turn signals. If the light signals fail, the driver must indicate the maneuver with hand signals, continuing to move to the parking or repair site.
p, blockquote 1,0,0,0,0 —>
p, blockquote 2,0,0,0,0 —>
Thus, if the emergency lights and turn signals stop working, then such a malfunction of the systems is critical; further operation of the car is impossible without eliminating it.
p, blockquote 3,0,0,0,0 —>
p, blockquote 4,0,0,0,0 —>
Continue checking
Next, what to do if the turn signals and emergency lights do not work? If the relay with the connector and button is exactly the same (as we were convinced of during the checks), you can look for other causes of problems. For example, pay attention to the turn switch on the steering wheel. It happens that there is no voltage contact there. The test is carried out without the participation of a switch on the relay connectors: using a piece of wire you can close the corresponding contacts.
If the turn signals work, then it means that this particular steering switch is faulty (no current is supplied to it for some reason). Here, without proper preparation, it will be quite difficult to replace or repair the part yourself, since you will have to remove the steering wheel and the switch itself. In this case, it is better to contact the services of an electrician at a service station.
Emergency button and connector
Having studied the theory, we move on to practice. From the diagram above you can see that it all starts with the emergency button. It receives current from the ignition. Therefore, you should first check whether voltage is being supplied to the connector. Perhaps the contact wire has come loose, or perhaps, by the way, the fuse has blown (look in the instruction manual to see which one is responsible for this section, and try to replace it with a spare one).
You can use a multimeter to check the input readings: the orange wire supplies power from the lock. In black - it goes to the relay. There is also a red one - the on-board network, there should always be voltage there (after all, the emergency lights can work even when the ignition is turned off).
Let's check the insertion of the corresponding wires into the connector; perhaps something has come loose or frayed. If you don't have electrical meters on hand, you can use a small piece of wire to check the integrity of the wiring diagram.
To do this, disconnect the hazard warning button itself from its connector. We get a socket with several outputs, hanging on wires of different colors. Using a piece of wire inserted into the corresponding connectors (jumpers), you can simulate the operation of both the power button itself and the turn signals in order to understand that the corresponding sockets are working.
Connection diagram
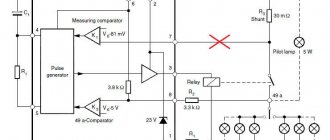
In fact, in order to understand the causes of a malfunction with turn signals and emergency lights, you need to know what the electrical diagram of their connection and connection looks like in a car. Because if manipulations with the relay do not help, then you will have to ring the entire circuit, and for this it is advisable to imagine what it consists of. Let's look at the example of the VAZ "classic" (although in the imported version it is unlikely to differ significantly).
The system has several main parts. Relay, usually on 4 wires. Emergency button. Turn switch. They are connected to each other by wires. In the normal position of the emergency button, the contact is closed from the ignition and goes (along the black wire) to the relay. There is now voltage on it, which is supplied to the turn switch. When turned left/right, the contact closes and the corresponding light comes on.
When the emergency button is turned on, the network is connected directly to the right/left turn lamps simultaneously. That's the whole scheme, if we tell it in a simplified way.