Introduction
Owners of domestic vehicles, such as, for example, the VAZ-2103, quite often try to fix the car with their own hands. Despite the fact that modern service stations are located on almost every corner and by turning to qualified specialists one could avoid wasting one’s own time, many are in no hurry to solve their problems in this way. Some self-taught craftsmen independently carry out such complex operations, which include adjusting the VAZ-2103 carburetor. Of course, in order to do something like this with your own hands, you need not only free time and patience, but also important and useful knowledge regarding the design features of the device in question.
To adjust the VAZ-2103 carburetor, free time, patience and knowledge are required
In the material below, we will consider the principle of the design of the carburetor of the domestic VAZ-2103, its configuration and adjustment.
What problems in the operation of the VAZ-2105 may indicate the need to adjust its carburetor
The design solution of the carburetor on the VAZ-2105 is aimed at ensuring continuous operation of its engine. However, some circumstances can cause the device to malfunction:
- poor quality fuel;
- incorrect operation of the components of the mechanism;
- natural aging of parts, components and materials from which they are made.
The following malfunctions, which many VAZ-2105 owners may encounter, clearly signal that something is wrong with the carburetor. And it needs adjustment or even repair.
- The car, idling, suddenly stalls.
- The next time you press the gas pedal, acceleration does not occur immediately, but with a delay. Over time, isolated situations “enter” the system with a gradual increase in the interval between applying the gas and increasing the speed of the car.
- Intermittent engine operation, which becomes more noticeable in high gears.
- Increased consumption.
- It is difficult to start the engine after a long period of parking.
In all situations, experienced mechanics begin by removing the device to flush, clean, and purge jet clearances. Low-quality gasoline and failure of filters often cause clogging of the holes. Through them, the fuel mixture incorrectly enters the system, causing various problems.
The smell of fuel in the cabin or flooding of spark plugs may indicate that the carburetor of your VAZ-2105 is not working correctly and needs not just cleaning and purging, but adjustment. For beginners, it is better to turn to specialists who will competently perform all types of work. Experienced car owners do the adjustments themselves.
Restoring the functions of the power unit
To eliminate identified malfunctions and repair the VAZ 2103 engine, you must perform the following operations:
- Remove obstacles blocking the passage of fuel. To do this, the tubes through which the fuel passes and the fuel filter are washed or purged.
- If necessary, you need to replace the fuel filter with a new one.
- Clean or completely replace the fuel pump.
- Inspect and diagnose electrical wiring, make sure its integrity.
- Adjust the idle speed.
- The jets and channels located in the carburetor also need to be cleaned.
- Remove the diaphragm from the carburetor starting device and install a new sample.
- Adjust the gaps in the gas distribution mechanism.
- To reduce oil consumption, you need to replace leaky oil seals and worn gaskets.
- Replacement of deformed pistons and oil seals.
- Cylinder boring.
The VAZ 2103 valves are adjusted in accordance with the instructions; the diagram and description are in the vehicle documentation. Failure to make adjustments can lead to increased fuel consumption, reduced power of the power unit and complete burnout of the valves.
Qualified technicians at special stands and using modern equipment will accurately determine the causes of engine failure and carry out high-quality repairs of the 2103 engine.
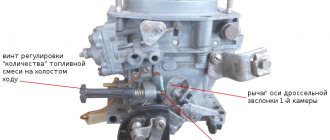
Idle speed adjustment
The idle system in the carburetor is the most unstable. Therefore, it needs to be adjusted from time to time. The idle speed control elements are 2 screws, one of which determines the composition of the mixture, and the second regulates its quantity.
The stroke adjustment must be carried out on a previously warmed-up engine and with adjusted gaps, which are located in the gas distribution mechanism. You should also check that the ignition timing is set correctly.
Step by step steps:
- Using screw 1, you need to set the crankshaft rotation speed to 820-900 min-1 using the stand tachometer.
- Using screw 2, it is necessary to achieve the CO concentration in the exhaust gases without going beyond 0.5-1.2%.
- Use screw 1 to restore the shaft speed to 820-900 min-1.
- Screw 2 needs to restore the CO concentration to 0.5-1.2%.
- To complete, press limit marks (plastic bushings) onto these screws and orient the slots of these bushings relative to the mounting lugs.
Problems that may arise when setting idle speed:
- There is no reaction from the engine to tightening the propeller (during tightening, the engine should gradually slow down and eventually stall). This sometimes happens if there is an excess of gasoline in the idle speed indicator. The reasons may be:
- very large jet XX;
- the solenoid valve or plug is not screwed in properly;
- The seat of the XX jet has a deformation in its structure or the jet itself is damaged.
Ways out of the situation are presented below. So, with the engine running smoothly at idle, remove the wire from the solenoid valve. When this action is performed, the engine will stop immediately. If this is exactly what happened, then most likely the XX jet is too large and does not suit you. The solution here is very easy - purchase and install a smaller one.
- If the engine continues to run, then most likely gasoline does not enter the XX nozzle, but goes by. You need to carry out the following manipulations, namely, unscrew the plug (solenoid valve) and examine your XX jet to see if it is damaged. If deformations are detected, there is no other way but to buy a new carburetor cover. If no deformations were found during your examination, put the jet on the valve, lubricate the O-ring with oil and tighten it with a wrench (tighten without much effort, it is advisable to tighten with a wrench using only one finger).
Adjustment and design of the carburetor on the VAZ 2101
The carburetor on the VAZ 2101 requires periodic tuning and adjustment. Otherwise, the engine will not operate stably at idle or during acceleration. Starting difficulties may also occur. Setting up a carburetor requires some knowledge. However, knowing the technology of how the VAZ 2101 carburetor is adjusted, or as it is popularly called “Kopeyki”, you can perform the entire procedure with your own hands.
Maintenance schedule
The official manual explains the design of the internal combustion engine and the timing of replacing consumables when servicing the engine:
| Maintenance object | Time or mileage (whichever comes first) |
| Timing belt | replacement after 100,000 km |
| Battery | 1 year/20000 |
| Valve clearance | 2 years/20000 |
| Crankcase ventilation | 2 years/20000 |
| Belts that drive attachments | 2 years/20000 |
| Fuel line and tank cap | 2 years/40000 |
| Motor oil | 1 year/10000 |
| Oil filter | 1 year/10000 |
| Air filter | 1 – 2 years/40000 |
| Fuel filter | 4 years/40000 |
| Heating/Cooling Fittings and Hoses | 2 years/40000 |
| Coolant | 2 years/40000 |
| Oxygen sensor | 100000 |
| Spark plug | 1 – 2 years/20000 |
| Exhaust manifold | 1 year |
Thanks to its simple design, oil changes and even major repairs can be done yourself. In Soviet times, car enthusiasts practiced engine modernization, the options for which are discussed below.
Adjusting the VAZ 2101 carburetor - Do-it-yourself VAZ repair
Adjusting the VAZ 2101 carburetor is a very important procedure, without which any car, and even more so, one as old as a “penny”, will not be able to function normally.
It is important to note that carburetor adjustments have been taught for more than one year, and there is even such a profession as a carburetor technician, but we firmly believe that with a certain package of knowledge and without fear of “getting your hands dirty,” absolutely every car owner can handle it.
It is for this reason that we decided to compile quite detailed instructions for you so that you can save your money and continue to enjoy trips on real domestic classics.
If you are tired of tuning and repairing the carburetor, as well as the solid fuel consumption of your penny, you should pay attention to the eleventh generation Corolla cars at toyota-ua.com/models/new-corolla. The 2013 Toyota Corolla delivers significant fuel economy thanks to fuel injector, which delivers consistent, efficient engine performance and lower emissions.
Adjusting the throttle position
The first step in adjusting the carburetor on a “penny” is to set the correct throttle position. To do this job correctly, you must perform the following simple manipulations:
Step 1: In manual mode, rotate the throttle control lever counterclockwise until the throttle valve is fully open.
Step 2: measure the distance to the primary chamber, it should be between 12.5 and 13.5 millimeters. If this is not the case, correct it by bending the rod tendril.
Step 3: measure the maximum throttle opening, it should be between 14.5 and 15.5 millimeters. If this is not the case, then you should correct it by tightening the pneumatic actuator rod.
Correcting the starting device
At the second stage, adjusting the VAZ 2101 carburetor involves adjusting the starting device. As in the previous case, we will provide step-by-step instructions that will help you complete the task easily and simply.
Step 1: In manual mode, turn the secondary throttle lever counterclockwise until it closes.
Step 2: Check that the tip of the thrust lever is firmly attached to the primary throttle shaft and is located at the very end of the trigger rod. If you find that this is not the case, then you will need to correct its position by bending the rod.
Important! You need to bend the rod very carefully, as too much pressure can break it off.
Adjusting the performance of the pump accelerator
The third stage of adjusting the operation of the carburetor on the VAZ 2101 is to control and debug the pump accelerator.
You need to start working with it by checking its functionality. To do this, you must collect the fuel in a beaker that will be generated in 10 full cycles of operating the throttle control lever.
You should get between 5.25 and 8.75 cubic centimeters of fuel. If this is not the case, then you will need to fully bleed the pump 9-10 times, and then measure again.
If this does not help, then you will have to completely change the fuel pump accelerator.
Setting the correct idle speed for the car engine
Adjusting the VAZ 2101 carburetor at the final stage involves setting the correct engine idle speed. To do this, you must follow these simple steps.
Step 1: Warm up the engine for 10-15 minutes.
Step 2: Stop the engine and close the quality screw and quantity screw all the way.
Step 3: Loosen the quantity screw 3 turns and the quality screw 5 turns.
Step 4: Start the engine and use the speed screw to set the engine speed to 800 rpm.
Step 5: Begin to slowly tighten the quality screw, thereby reducing the richness of the fuel mixture. This must be done until the revolutions begin to drop.
Throttle valve adjustment
Adjusting the VAZ-2101 carburetor begins with adjusting the throttle valve. This is a simple procedure. It can be done in three stages. Manually turn the damper control lever counterclockwise. It opens completely.
The distance to the primary chamber is measured. The carburetor design suggests that this figure is 12.5-13.5 mm. If the result is different, you need to bend the rod antennae. Throttle adjustment involves determining the opening value of the throttle valve. It should be 14.5-15.5 mm. Otherwise, you will need to tighten the pneumatic drive rod.
We adjust the speed on the VAZ 2101-VAZ 2107
Check out the photo below:
Note! The photo shows the screws that carry out the adjustment. They are located deep in the carburetor throttle body, so the screw under the number “1” is not visible in the image. On some cars, bushings are pressed onto both screws, thanks to which the screws can only be turned half a turn. If the bushings prevent the idle speed screw from turning properly, remove the screws and break the bushing heads. Wipe off the remaining broken bushings and screw the screws in their place.
Gas analyzer to the rescue!
First, start the car and let it warm up to operating temperature of “90-95 ° C”. Afterwards, using a screwdriver, start rotating the screw under the number “2”, rotate it until the crankshaft speed reaches “750-800 min”.
Note! Tightening the screw leads to a decrease in the crankshaft speed, and unscrewing it leads to an increase!
Now smoothly proceed to adjusting the “CO” content in the exhaust gases: turn screw number “1” in the photo above. When tightening the screw, the “CO” in the exhaust gases will gradually decrease, and unscrewing it will increase accordingly.
Note! It is required to regulate the CO content in the exhaust in accordance with GOST today. There is no need to lower “CO” below the norm, otherwise the content of unburned hydrocarbons “CH” may increase sharply. By the way, adjusting screw “1” changes the crankshaft speed.
Finally, turn screw “2”, bringing the crankshaft rotation speed back to normal. Check the amount of CO in the exhaust using the device. Adjust the screws until engine operation and CO emissions into the atmosphere reach normal levels.
Note! After all the manipulations, get into the car, sharply press the gas pedal and release. Make sure that the engine runs smoothly, and when you release the pedal, the car engine should not stall. Is it stalling? – increase the crankshaft speed to “800 rpm” with screw No. 2.
Adjusting the throttle drive
The figures below show the positions of the air damper with the choke recessed and extended.
Adjusting the air damper of the carburetor VAZ 2104, 2105, 2106 and 2107 is as follows:
- We recess the suction.
- Using a slotted screwdriver, unscrew the screw securing the rod (the spring sets it vertically).
- Tighten the screw.
- We check the movement of the air damper.
If you feel that the engine response is extremely low, and the acceleration dynamics leave much to be desired, then we recommend that you pay attention to adjusting the throttle valve drive, in other words, the “gas” drive. It is better to use a partner in this adjustment.
The tools we need are a screwdriver, a flashlight, a caliper and a 8mm wrench.
- Turn down the choke completely or close the air damper.
- Next, the partner must fully depress the gas pedal all the way to the floor. In this case, the air damper should open completely, as shown in the figure below. After releasing the gas pedal, the damper should close completely without any residual gaps.
- Using a caliper, we measure the length of the rod - it should be eight centimeters. For traction, it is adjusted by rotating the tips, having previously unscrewed the lock nuts.
- We put the rod in place and re-check the degree of opening of the air damper using the gas pedal.
In this article, we described to you how to independently adjust the carburetor of a VAZ 2104, 2105, 2106, 2107. We hope that our article was useful to you.
If you don't take care of the drive, the car may stall. To do this, you will need a simple Phillips screwdriver and a 7 mm open-end wrench.
The positions of the damper are shown above with the “suction” extended and recessed.
To adjust the drive, do the following:
- drown the “suction”;
- Unscrew the rod fixing screw with a screwdriver (the spring will push it out vertically)
- Tighten the screw;
- Check the valve stroke.
If this drive is incorrectly configured, the car's engine response drops and acceleration dynamics deteriorate. The setup is done with an assistant.
You will need the following tools: a screwdriver, an 8-mm open-end wrench, a flashlight, a ruler or a caliper.
- Turn down the “choke” (air damper drive) completely.
- Have your assistant press the gas pedal all the way to the floor. The throttle valve will open completely, as shown in the picture below, you can shine a flashlight into the first chamber. When you release the pedal, the damper should completely close the first chamber without any gaps. If there are gaps, then proceed to the next step.
- Next, we measure the length of the rod with a caliper; it should be exactly 8 cm. To adjust the length of the rod to the required size, rotate the tips by unscrewing the lock nuts.
After all these operations have been completed, put the rod in place and repeat the check. Nowadays, rods are made of low-quality plastic, which shrinks over time. Therefore, you need to check the operation of the traction after a week or two.
We looked at all the ways to adjust the carburetor yourself. We hope this article helped you, if you have any questions, ask them in the comments and we will definitely answer.
Purpose of an important node
Many motorists who have no idea how to adjust the carburetor on a VAZ-2103 simply do not understand the principle of operation and design of this device. The function of any carburetor is to mix gasoline and air together. Thanks to this simple device, a special mixture appears in the car at the moment the power unit is activated, transported into the engine cylinders. In fact, how efficiently the vehicle itself operates depends on how well the engine is supplied with gasoline.
Among other components of the device in question, it is worth noting such elements as air and throttle valves, mixing chambers and idle air valve. Of course, these are not all the components of the VAZ-2103 carburetor; in the material below we will consider in detail the operation and principle of setting each individual unit.
The function of the VAZ-2103 carburetor is to mix gasoline and air together
The functionality of any power unit that interacts with a carburetor depends on several important criteria:
- starting and warming up the engine;
- idle devices;
- design responsible for controlling the amount of fuel;
- accelerator pump (how quickly the car can accelerate depends on it);
- the performance of the elements located in the central dosing chamber;
- econostat (located in one of the internal combustion chambers of the engine).
Engine tuning 2103
The potential of the VAZ 2103 engine is so high that it is difficult to resist the temptation to squeeze more out of it. There are craftsmen who squeeze up to 200 horsepower out of a car. This kind of tuning of the VAZ 2103 engine is extreme in nature and is not recommended for everyday driving on regular roads.
There are many options for boosting an engine. One way to increase engine power and improve other performance characteristics is to convert the engine into a VAZ 2106 engine. To do this, you need to bore the cylinders to a diameter of 79 mm and replace the piston group with parts from a six. The remaining elements remain the same, the units are unified in all parts. Assembly of the VAZ 2103 engine after such tuning is carried out without problems.
If you take care of your car and timely repair the VAZ 2103 engine, the car will not let you down on the road. And it will delight its owners for many years with its reliability and excellent driving performance.
Verifying that the settings are correct
After completing the adjustment, you need to make sure that the carburetor is working optimally. To do this, sharply press the accelerator pedal several times. If the engine picks up speed smoothly and does not stall, then the screws are adjusted correctly. Inexperienced drivers often open the throttle too much, which leads to excessive fuel consumption. Therefore, the quantity screw must be in such a position that the volume of fuel is sufficient for stable operation of the engine at idle.
It is worth noting that the “Weber” carburetors that were previously equipped with “kopecks” are not so easy to adjust. Therefore, with little experience, it is recommended to contact an experienced specialist, since not even all car services are able to properly configure such “rarities”.
Adjusting the carburetor on a VAZ 2101 will not cause difficulties for experienced car owners. For beginners, it is better to do this work with a familiar master, since it is difficult to adjust the screws correctly the first time. By performing such repairs carefully and according to the instructions, you will make the engine run smoothly and reliably.
Adjusting the choke or trigger
Install the carb, but do not install the air filter. Pull the choke out completely and close the valve. In this position, you need to adjust the air damper cable.
Try pulling out and removing the choke several times. The damper should open and close completely without jamming. If everything is done correctly, you can install the air filter in place, connect all the hoses and carburetor drives. It's time to start adjusting the idle speed of the VAZ 2109. Don't forget about connecting the EPHH.
Malfunctions that may precede carburetor adjustment
Adjusting the VAZ-2101 carburetor may be necessary even before the car owner can notice the first signs of a malfunction. For example, unstable operation of the power unit at idle, changes in crankshaft speed, or regular “damping” of the engine are not always problems that arise from the carburetor. The above device can only be blamed when such problems arose out of nowhere, without prerequisites.
For some reason, a failed carburetor or its assembly needs urgent adjustment, even if the changes did not occur too dramatically. As a rule, floating idle speed appears if there is a problem with the solenoid valve.
A motorist who does not know how to adjust the solenoid valve must disconnect the wire supplying this element and apply the “plus” to the valve contact via the battery. If the winding is functioning normally, a soft click will be heard at the moment of connection. At the same time, you need to check the voltage that is on the wire connected to the electric valve. If there is no voltage, the wiring is damaged. Most likely, such a break is located in the section of the wire that goes from the ignition switch to the valve.
Engine malfunctions are not always signs of the need for carburetor adjustment
The need to adjust the carburetor may also arise in a situation where there is a large amount of carbon deposits in the spark plug electrodes. Because of this circumstance, the spark power will not be enough, which will not allow the gasoline-air mixture to ignite. Even the carburetor can affect the carbon deposits accumulated on the electrodes. Performing its function, it transfers a huge amount of mixture to the combustion chambers. In addition, burnout of the intake valve may occur.
First, you need to adjust the fuel level on a VAZ-2101 car. The motorist will have to adjust the position of the float. Problems can appear to a greater extent only at high speeds. Most likely, it is not the carburetor that is to blame, but the fuel supply. In a used VAZ-2101, the fuel pump diaphragm often wears out and the fuel pump rod wears out.
Checking the pump accelerator and repairing it
You need to start checking by testing the functionality of the system. You need to collect in a beaker the fuel that will be generated during 10 cycles of operation of the throttle lever. From 5.2 to 8.7 cm³ of fuel should accumulate. If this is not the case, you need to clean the VAZ 2101 carburetor jets. To do this, bleed the pump. This will help clear clogged injectors. This procedure is performed about 10 times. Then the fuel is measured again.
If the purging procedure does not give the desired result, the accelerator will need to be completely replaced.
If the engine malfunctions at high speeds, you need to check the pump diaphragm. It could wear out. The fuel pump rod often wears out.
General information about the VAZ-2105 carburetor
Listed below are basic information about the carburetors used on the 2105 VAZ model.
- Purpose. To obtain gasoline from the fuel system, mix it with air and transfer it to the engine cylinders.
- Operating modes. There are four of them: preheating, idle load, medium speed, increased power.
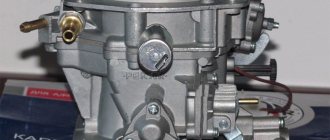
- Carburetor type: 2105-1107010 for engines with a power of 1.3 liters. The marking is applied to a special plate that manufacturers attach to various places on the outside of the device. The most popular modifications presented on the Russian market are DAAZ, Ozon, Solex. They are selected according to the volume of the car engine.
- A carburetor is a complex system of interconnected structural parts for various purposes. His main responsibility is to ensure correct fuel consumption and efficient engine operation.
The quality of operation of the 2105 device depends on the modification of the product, the reliability of its components, the brand and quality of gasoline, compliance of the settings with the technical requirements of the operation of the vehicle, sanitary condition, etc. Features of the functioning of carburetors affect the operation of the engine and can change the speed of acceleration and movement car, average gasoline consumption, ignition features.
Types of Kopeyka carburetors
Jets for carburetors of VAZ 2101, VAZ 2103, VAZ 2106, VAZ 2107 cars
During the production of the VAZ 2101, several modifications of carburetors were installed in its system. They differ in the size of the jets, as well as the presence or absence of a vacuum corrector. In early Zhiguli models, a carburetor was installed with an ignition system without a vacuum corrector.
The most common carburetor on the VAZ 2101 car is the DAAZ carburetor model 2101-1107010. A vacuum corrector system is already used here. All modifications of carburetors can be adjusted using a similar scheme. But it is impossible to install a model with a vacuum corrector instead of a design without it, or vice versa. Carburetors of well-known brands DAAZ/Weber, Ozone, Solex are also often used; among non-standard carburetors, I would like to highlight Solex 21073 and Solex 21083.
Calibration data for DAAZ carburetors 2101-1107010-01, 2101-1107010-03, 2105-1107010-20, 2105-1107010 10:
| Parameter | Carburetor model and chamber number | |||||
| 2101-1107010-01 | 2101-1107010-03 | 2105-1107010-20, 2105-1107010 10 | ||||
| 1st | 2nd | 1st | 2nd | 1st | 2nd | |
| Diameter, mm: | ||||||
| diffuser | 23 | 23 | 23 | 23 | 21 | 25 |
| main fuel jet | 1.30 | 1.25 | 1.30 | 1,30 | 1.07′ | 1.62 |
| main air jet | 1.50 | 1,90 | 1.50 | 2,00 | 1.70 | 1.70 |
| idle fuel jet and transition system | 0.50 | 0.45 | 0.45 | 0.60 | 0.50 | 0.60 |
| idle air jet and transition system | 1.70 | 0.70 | 1,70 | 0.70 | 1.70 | 0.70 |
| accelerator pump nozzle hole | 0.40 | 0,40 | 0.40 | |||
| accelerator pump bypass jet | 0,40 | — | 0.40 | — | 0.40 | |
| ecomostat fuel jet | — | 1.50 | — | 1.50 | — | 1.50 |
| air jet econoepta | 0.90 | — | 0.90 | 1.20 | ||
| econostat emulsion jet | 1.70 | — | 1.70 | — | 1.50 | |
| starter air jet | 0.70 | — | 0.70 | 0.70 | — | |
| jet of the pneumatic drive of the throttle valve of the second chamber | — | — | — | 1.20 | 1.00 | |
| Spray calibration number | 4 | 4.5 | 4 | 4 | 3.5 | 4.5 |
| Emulsion tube calibration number | FI5 | FI5 | F15 | FI5 | F15 | F15 |
| Accelerator pump flow for 10 full strokes, cm3 | 7±0.25% | 7±0.25% | 7±0.25% | |||
| Distance of the float from the carburetor cover with gasket, mm | 7.5±0.25 | 6.5±0.25 | 6.5±0.25 | |||
| Clearance at the dampers for regulating the starting device, mm: | ||||||
| air damper | 8±0.5 | 7±0.25 | 5 | |||
| throttle valve | 0.75 | 0.85 | 0.75 | 0.85 | 0.7 | 0.8 |
Technical characteristics of the engine 2103
In the third ICE 2103, the manufacturer AvtoVAZ returned the original cylinder diameter of 76 mm and increased the volume of the combustion chamber, so the technical characteristics of the engine are as follows:
| Manufacturer | VAZ |
| Engine brand | VAZ-2103 |
| Years of production | 1972 – 1983 |
| Volume | 1.5 l (1452 cm3) |
| Power | 52.4 kW (71.4 hp) |
| Torque | 106 Nm (3400 rpm) |
| Weight | 120.7 kg |
| Compression ratio | 8,5 |
| Nutrition | carburetor DAAZ-2103 Solex (1972 - 1974), then Ozone 2107-1107010-20 |
| Motor type | in-line |
| Number of cylinders | 4 |
| Location of the first cylinder | near the timing chain |
| Number of valves on each cylinder | 2 |
| Cylinder head material | aluminum alloy |
| Allowable warpage | manifold gaskets (intake/exhaust) 0.08 mm cylinder head gasket 0.05 mm |
| Valve seat | width 2 – 2.4 mm, angle 45° |
| Camshaft | one upper cylinder head inside, phase width 232°, exhaust valve advance 42°, intake valve lag 40° |
| Camshaft oil seal | diameters – 40 mm, 56 mm, width 7 mm |
| Cylinder block material | cast iron |
| Cylinder diameter | class A – 76 – 76.01 mm class B – 76.01 – 76.02 mm class C – 76.02 – 76.03 mm class D – 76.03 – 76.04 mm class E – 76.04 – 76.05 mm |
| Pistons and rings | piston made of aluminum alloy with tin coating, cast iron rings, compression outside chrome plated (top) and beveled (bottom) |
| Piston diameter | class A – 75.94 – 75.95 mm class C – 75.96 – 75.97 mm class E – 75.98 – 75.99 mm |
| Gaps | piston/cylinder wall – 0.153 – 0.173 mm (standard) or 0.19 mm (maximum) piston rings – 110 mm relative to the cut plane |
| Upper compression ring | 1.535 – 1.555 mm |
| Lower compression ring | 3.957 – 3.977 mm |
| Oil scraper ring | 2.015 – 2.035 mm |
| Gap between piston groove and ring | 0.03 – 0.07 mm |
| Crankshaft | cast iron, casting |
| Number of main bearings | 5 |
| Gearbox neck diameter | 50.795 – 50.775 mm |
| Main journal gap | 0.1 – 0.5 mm |
| Connecting rod bearings | shaft journal diameter – 47.814 mm liner thickness – 1.448 mm liner width – 28.025 – 28.975 mm |
| Crankshaft oil seals | front – diameters 42 mm, 60 mm, width 7 mm rear – diameters 85 mm, 105 mm, width 10 mm |
| Piston stroke | 80 mm |
| Fuel | AI-92 |
| Environmental standards | Euro 2 |
| Fuel consumption | highway – 6.9 l/100 km combined cycle 8.9 l/100 km city – 9.4 l/100 km |
| Oil consumption | maximum 0.7 l/1000 km |
| Engine oil for 2103 | 5W-30 and 15W-40 |
| Engine oil volume | 3.75 l |
| Replacement frequency | every 55,000 km |
| Working temperature | 80° |
| Motor life | declared 125,000 km actual 200,000 km |
| Adjustment of valves | nuts and feeler gauge |
| Cooling system | forced, antifreeze-A40 |
| Coolant quantity | 9.75 l |
| water pump | polymer impeller, mounted on a block |
| Ignition | transistor contactless, coil B117A and distributor 30.3706 |
| Candles for 2103 | original – A17-DV |
| Gap between spark plug electrodes | 0.5 – 0.6 mm |
| Valve train chain | double-row roller, 116 links, length 49.54 – 49.58 cm |
| Cylinder operating order | 1-3-4-2 |
| Air filter | dry with replaceable cardboard cartridge and pre-cleaner, temperature adjustment according to the season |
| Oil filter | recommended Mann W914/2 |
| Flywheel | 129 teeth, 0.62 kg internal hole diameter – 25.67 mm outer diameter – 27.75 mm number of mounting holes – 6 pieces no offsets |
| Flywheel mounting bolts | M10x1.25 mm, length 23.5 mm, |
| Valve stem seals | Manufacturers Horse or Corteco |
| Compression | pressure in the cylinders from 10 bar, pressure difference in individual cylinders within 1 bar |
| Oil temperature | 80°С |
| Thermostat temperature | 80 – 84°С |
| Valve pressure inside the radiator cap | 0.7 – 1 bar |
| Content of harmful products in the exhaust | CH |
| XX speed | 850 – 900 min-1 |
| Tightening force of threaded connections | spark plug – 37.24 Nm flywheel – 83.3 – 84.38 Nm clutch bolt - 29.4 Nm bearing cover – 80.36 – 84.38 Nm (main) and 51 – 53.5 Nm (connecting rod) cylinder head - two stages 39.2 Nm, 112.7 Nm |
Design of internal combustion engine 2103
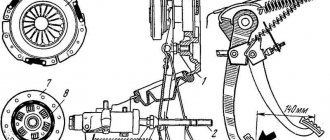
The principle of setting up the VAZ-2103 carburetor
Before you begin repairing the VAZ-2103 carburetor, you should make sure that it is correctly adjusted. If the owner of a domestic vehicle is sure that the VAZ-2103 carburetor urgently needs repair, do not rush to premature conclusions.
Quite often, a simple but competent adjustment is enough for the machine to start functioning as before. Setting up such a unit, by the way, requires the knowledge of the master regarding all calibration data (set values). For carburetor tuning to be successful, it is important to adjust all components of the system. Typically, such actions should begin with external control components. You should make sure that the throttle valves are working properly: if the gas pedal is not under pressure, they should be closed. As soon as the gas pedal is pressed, the dampers should open as smoothly as possible (not jerkily). The next step, which involves correctly setting up the VAZ-2103 carburetor, should be checking the air damper. If the drive is recessed, the structural element being tested must be vertical so that the passage leading to the throttle valve does not block.
Carburetor tuning begins with checking external control components
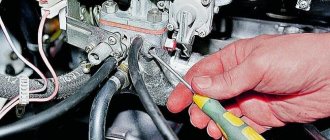
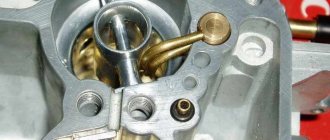
The accelerator pump deserves no less attention. Its functionality helps to detect sudden pedal input. The condition of the pneumatic drive diaphragm should also be determined. Only after the motorist is confident in the normal operation of the elements (after an external check), it will be necessary to spend some time cleaning the jets and sprayers. First of all, you should get rid of the cover of the device being adjusted, then, using a pump, free the float chamber from various sediments. If there is heavily hardened sediment, you can resort to a metal or wood spatula.
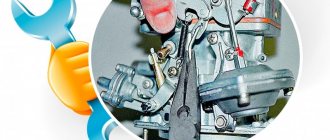
Proper adjustment and cleaning of the carburetor should include the absence of any rags that could clog the jet. As a result, the jets and channels will have to be flushed with clean fuel and purged with air. In order to make sure that all components are completely clean, you need to dismantle them before flushing all the channels. It is important to monitor the order in which the jets will be removed, since subsequent incorrect installation will lead to failure of the power unit. All openings can be freed from harmful accumulations with wire.
It is necessary to completely clean all components: dismantle them and wash all channels
Strainer performance
Adjusting the VAZ-2103 carburetor requires checking the strainer. This element is responsible for the cleanliness of the fuel that enters directly into the float chamber. To clean it, you will have to remove the plug and filter, then free the mesh from any unpleasant stuck particles and blow out the filter itself so that air flows in the direction opposite to the movement of fuel. In this case, any mechanical impact should be avoided.
Before you return the element to be cleaned to its place, you will have to make sure that the fuel nozzle is functioning well. If necessary, it can be blown out. Typically, the float chamber should be drained of gasoline and its needle valve should be open. Before the strainer returns to its rightful location, you need to check the sealing gasket, which can prevent fuel from leaking.
Adjusting the VAZ-2103 carburetor is not complete without cleaning the strainer
Checking the functionality of the float chamber
If you need to adjust the VAZ-2103 carburetor, you will have to pay some attention to the float chamber. If the owner of a vehicle notices increased gas consumption, most likely the reason will be hidden in the too high level of fuel that is in the system being tested. If a completely opposite malfunction is noticed (lack of gasoline), you should check the level of gasoline in the float chamber and the functioning of its needle valve.
First of all, you should get rid of the carburetor cover and, after it is in a horizontal position, adjust the gap that will be formed between the floats and the place where the device being removed will be attached to its base (the distance should not exceed 6.5 mm ). This is exactly the gap that should exist at the maximum possible level of gasoline in the float chamber. To adjust the system, you need to use the float tongue. After this, it is important to check the functionality of the needle valve by removing the float axes and dismantling the valve itself. Both elements must not have mechanical damage.
Float chamber of the VAZ-2103 carburetor
After the adjusting element of the system is installed in place, you should use a bulb to ensure that gasoline flows through the filter. The driver's task is to move freely through the needle valve. The floats should be in place, then it is important to re-pump the gasoline to make sure that there are no leaks anywhere. The result of the work should be installing the cover and checking the gasket (located in the middle between the structure and its cover). The latter must be positioned in such a way that it cannot interfere with blocking the channel and at the same time is located in the mounting holes. The lid should be tightened so that there is no overtightening (there should be no deformation). Otherwise, a deformed part of the system will cause air leaks or gasoline leakage.
It is worth noting that adjusting the VAZ-2103 carburetor is advisable only after warming up the engine and pressing the choke button.
Setting up the starter
The starting system can be configured both with the unit removed and while it is in the car.
Adjustment of the VAZ-2103 carburetor will not be complete if the motorist forgets to adjust the starting system. It is worth noting that a similar procedure can be performed both on a previously removed unit, and directly while it is in the car. If the car owner decides to adjust the starting device without removing the carburetor, he will first have to take care of dismantling the air filter, activating the power unit and slightly raising the choke. As a rule, engine speed should not fall below 3200 per minute.
As soon as the above recommendations are completed, it will be necessary to forcibly raise the air damper (at least by a third). Thanks to this manipulation, the number of revolutions should decrease by 300 units.
The clearance of the VAZ-2103 carburetor should be about 5.5 mm
There are times when such actions are not enough. The driver will have to adjust the speed using the thrust from the pneumatic drive by adjusting the length of the thrust. Adjusting the same structural element on a removed carburetor requires adjusting the distance between the opposite sides of the air damper.
If you are thinking about how to adjust the carburetor on a VAZ-2103, you should not forget about the need to take into account the gap (it should be about 5.5 mm). In view of this circumstance, you need to remove the starting unit tube and use a thin screwdriver to turn the adjusting element of the structure. If you start tightening this screw, the gap will gradually become smaller, otherwise it will become larger. If a motorist independently adjusts the carburetor of the domestic VAZ-2103, he must control the gap that remains between the throttle valve and the diffuser. This gap should not exceed 0.8 mm.
Idling of the device
If the idle speed is set correctly, the number of revolutions will not fluctuate up and down.
Often people who are interested in adjusting the VAZ-2103 carburetor mean by performing the process only adjusting the idle speed. Before you begin this procedure, you need to activate and slightly warm up the power unit (it should reach a temperature of 90 °C). As a rule, adjusting the idle speed of the device in question is impossible without the participation of two screws (quantity, as well as composition of the combustible mixture). One of the screws must be closed with a plug, after which the motor must be activated. Using the screw responsible for the amount of mixture, you should increase the engine speed to 1000 units. And use the mixture composition screw to reduce the adjustable value by 200 units. If configured correctly, the motor will function stably, vibrations should not appear, and the number of revolutions should not vary up and down.
What do we have after proper adjustment of the carburetor unit of the “six”?
Checking the adjustments of the fuel mixture preparation unit is the same important maintenance step as monitoring the condition of the car battery. An integrated approach to setting up the carburetor guarantees not only a comfortable mode of movement, but also a lot of useful points:
- An increase in power and a confident increase in speed.
- No failures in the operation of the internal combustion engine in the low and medium speed sector.
- Improved dynamic characteristics - the car picks up speed faster and accelerates in a short time.
- Optimal engine response, which is expressed in the responsiveness of the gas pedal.
The listed qualities make it possible to effectively use the combustible mixture, which is necessary both in urban traffic jams and on country roads. Therefore, proper adjustment of the carburetor unit will help the car gain speed in a timely manner and complete the planned maneuver.
Adjustment of the VAZ carburetor may be required in various cases: after its repair, after repair of the gas distribution mechanism, ignition system, and even after changing a dirty air filter. Another reason is the transition to winter operating conditions of the car or, conversely, to summer operation. It should be borne in mind that it is possible to correctly and accurately adjust the VAZ carburetor only with the help of a special device - a gas analyzer.
Such a device is available to service station workers who perform work on repairing and adjusting carburetors.
How to adjust a VAZ carburetor with your own hands without special instruments? Before you begin adjusting the VAZ-2106 carburetor, as well as to adjust the VAZ-2104 carburetor, several prerequisites must be met. First: the engine gas distribution mechanism must be in good working order and its valve clearances must be adjusted. Second: work must be performed with a working ignition system and new or fully working spark plugs installed
The third important condition is that the Ozone carburetor itself must be in good working order, its float chamber must be cleaned and adjusted
Adjusting the fuel level in the float chamber is shown in a video by car enthusiast Konstantin Ovchinnikov from Ukraine.
Actually adjusting the VAZ-2105 carburetor consists of setting stable idle speed in a given range. A special feature of Ozone carburetors is an autonomous idle system, that is, fuel is supplied to the engine in this mode bypassing the throttle valves. The idle speed is adjusted using the screws for the amount of fuel mixture (1) and the quality of the fuel mixture (2).
It must be performed with the engine warmed up to operating temperature (about 80 degrees). This can also be done during the carburetor adjustment process. With the engine not running, both screws are screwed in all the way, and then the mixture quantity screw is turned back 3 turns, and the mixture quality screw 4-5 turns. The engine is started and the engine speed is set to around 800 rpm using the quantity screw (by tightening or unscrewing it). It is better if this value can be determined using a strobe light or tachometer on the dashboard. After this, by tightening the mixture quality screw (thereby depleting the fuel-air mixture), we determine at what position the engine speed begins to fall and becomes unstable. From this position, unscrew the mixture quality screw by 0.5 - 1 turn, slightly enriching the mixture for stable engine operation at idle speed. You can try revving the engine to make sure that the idle speed remains stable and is in the range of 800 (+50-50) rpm.
The above operations can be repeated 2-3 times to ensure the correct result. Generally speaking, the task of adjusting the carburetor is to ensure stable engine operation at the appropriate idle speed with the leanest possible fuel-air mixture and, accordingly, the lowest CO level.
Everything described is also true for adjusting the VAZ-2121 carburetor. The VAZ-2107 car is equipped with Ozone with a forced idle economizer, but the VAZ-2107 carburetor is adjusted in the same way. But the adjustment of the VAZ-21213 carburetor is somewhat different, because This model has a Solex carburetor.
Carburetor VAZ 2101
Diagram of the main metering system of the VAZ 2101 carburetor and econostat: The VAZ 2101 econostat is located in the secondary chamber of the carburetor. In the diagram it is conventionally shown in the primary chamber. 1 – Econostat emulsion jet; 2 – emulsion channel of the econostat; 3 – air jet of the main dosing system; 4 – econostat air jet; 5 – econostat fuel jet; 6 – needle valve; 7 – float axis; 8 – locking needle ball; 9 – float; 10 – float chamber; 11 – main fuel jet; 12 – emulsion well; 13 – emulsion tube; 14 – axis of the throttle valve of the primary chamber; 15 – spool groove; 16 – spool; 17 – large diffuser; 18 – small diffuser; 19 – sprayer.
Idle speed of the carburetor VAZ 2101
Diagram of the VAZ 2101 carburetor idle system: 1 – throttle body; 2 – throttle valve of the primary chamber; 3 – holes for transition modes; 4 – hole, adjustable with a screw; 5 – air supply channel; 6 – adjusting screw for the amount of mixture; 7 – adjusting screw for the composition (quality) of the mixture; 8 – emulsion channel of the idle system; 9 – additional air adjusting screw; 10 – carburetor body cover; 11 – air jet of the idle system; 12 – fuel jet of the idle system; 13 – fuel channel of the idle system; 14 – emulsion well.
Acceleration pump VAZ 2101
Diagram of the accelerator pump of the VAZ 2101 carburetor: 1 – screw valve; 2 – sprayer; 3 – fuel channel; 4 – bypass jet; 5 – float chamber; 6 – accelerator pump drive cam; 7 – drive lever; 8 – return spring; 9 – diaphragm cup; 10 – pump diaphragm; 11 – inlet ball valve; 12 – gasoline vapor chamber.
VAZ 2101 carburetor starting device
VAZ 2101 diagram of a diaphragm starting device: 1 – air damper drive lever; 2 – air damper; 3 – air pipe of the primary chamber of the carburetor; 4 – traction; 5 – starting rod; 6 – starting device diaphragm; 7 – adjusting screw of the starting device; 8 – cavity communicating with the throttle space; 9 – telescopic rod; 10 – damper control lever; 11 – lever; 12 – axis of the throttle valve of the primary chamber; 13 – lever on the axis of the primary chamber damper; 14 – lever; 15 – axis of the throttle valve of the secondary chamber; 16 – throttle valve of the secondary chamber; 17 – throttle body; 18 – throttle control lever of the secondary chamber; 19 – thrust; 20 – pneumatic drive.
Throttle valve of the second chamber of the VAZ 2101
Diagram of the pneumatic drive of the VAZ 2101 throttle valve of the secondary chamber: 1 – pneumatic drive nozzle located in the diffuser of the primary chamber; 2 – damper control lever; 3 – lever rigidly connected to the axis of the throttle valve of the primary chamber; 4 – lever that limits the opening of the throttle valve of the secondary chamber; 5 – pneumatic drive nozzle located in the diffuser of the secondary chamber; 6 – lever connected to lever 9 through a spring; 7 – axis of the throttle valve of the secondary chamber; 8 – pneumatic drive rod; 9 – throttle control lever of the secondary chamber; 10 – channel for supplying vacuum to the pneumatic drive; 11 – rod bushing; 12 – pneumatic drive of the throttle valve of the secondary chamber.
Nuances and main malfunctions of Solex carburetors
Despite all the positive aspects and advantages, Solex carburetors have their disadvantages and characteristic “diseases”; one of the main disadvantages is problems with idling due to clogging or airing of the channel. Air enters the XX system mainly due to the tight fit of the cover to the body, since over time the metal is deformed, and such a defect can be corrected by replacing the gasket and grinding the adjacent surfaces.
Another common problem with idle speed is a clogged channel, which can only be cleared if you remove the quality adjustment screw. But the whole difficulty lies in dismantling this screw, since it is located deep in the “body” of the carburetor and is held in place by a rubber seal.
Even a completely unscrewed screw does not simply come out of the channel; it can be dismantled using a piece of hollow tube, for example, taken from an old radio. To use the tube as a puller, we make two cuts at the end, then insert the device into the channel, and remove the part we need by twisting it out.
Another typical drawback of Solexes is failure while driving when accelerating the car, which occurs due to the accelerator pump. To correct this defect, car owners most often upgrade the accelerator pump nozzle (“spout” or “elephant” in common parlance), transferring the injection of both tubes to the primary chamber. Solex practically does not cause any other troubles; it serves for a long time and reliably.
The work applies exclusively to the idle speed of the VAZ 2106. The setting does not affect other engine operating modes. There are two screws for regulation: a large one for the number of revolutions and a small one for the quality of the mixture.
Before starting work, make sure that the ignition system is working properly. Adjust or repair it if necessary. The engine must also be in good working order.
Float system adjustment:
Before you begin this work, you need to make sure that the needle valve is working reliably.
- We take a measurement between the float and the gasket. This distance should be 6.5 millimeters. A slight deviation of 0.25 millimeters is allowed. You can also simply use a suitable drill bit to measure.
- The clearance is adjusted by changing the angle of the float tongue.
- Turn the float all the way. We measure the distance to the gasket in this position. It should be equal to 8 millimeters. Using the tongue we achieve the desired value.