Let's start with the fact that modern cars have an injection power system. However, in the Russian Federation and a number of other countries, you can often find cars equipped with a carburetor. Such cars certainly include the common “classic” VAZ models, as well as front-wheel drive VAZ 2108, 2109, etc.
Taking into account the popularity of the VAZ 2108 carburetor, this model with an outdated dosing system still remains relevant. For this reason, many owners are interested in how to clean, adjust, as well as repair and adjust the VAZ 2108 carburetor. Let's look at the features of this dosing system in more detail.
Models of carburetors for VAZ 2108/2109
Carburetor mechanisms of the Solex series are produced at the Dimitrovgrad Automotive Accessory Plant. The designs are intended for use with front-wheel drive VAZ vehicles, in which the engine unit is located transverse to the body.
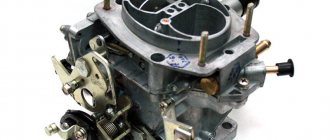
The standard model for equipping the VAZ 2108/2109 is the DAAZ 2108–1107–10 carburetor. It is paired with a 1.3-liter engine. Carburetors 21083–1107010 are installed on 1.5 liter engines.
The DAAZ carburetor is used to equip all cars of the eighth and ninth models
Modern equipment of the VAZ 2108/2109 is provided by carburetors of more advanced models, since they are equipped with a starting device in automatic mode:
- modification 21083–1107010–31 has one stage of automatic control and start in a given mode;
- modification 21083–1107010–35 is equipped with two stages of air damper control, which ensures more stable operation of the power unit;
- modification 21083–1107010–62 is similar to the previous version of the carburetor mechanism, but has the addition of an electrical air-fuel mixture mixing system.
When is equipment cleaning necessary?
The VAZ-2108 carburetor diagram clearly shows that low-quality fuel can clog important parts of the device and significantly impair its performance. Signs that cleaning is needed include:
- Engine malfunction. A mixture in the wrong proportions does not allow the engine to work efficiently, which causes malfunctions and failure.
- Increased fuel consumption. Supplying a mixture with an increased amount of gasoline leads not only to excessive fuel consumption, but also to increased wear of the internal combustion engine, so if a sign is detected, you should not delay checking the operation of the carburetor.
- Dips and jerks appeared during the operation of the car. This symptom indirectly indicates a malfunction of the device, but in this case it will not hurt to diagnose the carburetor.
The standard cleaning option involves first removing the device, and after cleaning, installing it in its place. Cleaning in this way is quite a labor-intensive task, so many drivers have already abandoned this method.
Manufacturers of auto products have developed special aerosols that allow cleaning in a short time and with little effort. The compositions only act on contaminants, so the carburetor is not damaged during cleaning. Using an aerosol for cleaning involves several steps:
- Removing the air filter cover.
- Unscrewing the plug on the carburetor.
- Aerosol treatment of all parts of the carburetor: chambers, dampers, mechanisms, jet channels.
- To obtain an ideal result, experts recommend leaving the composition for 5 - 10 minutes for better interaction with dirt.
- Next, you need to start the car and open the chambers using the choke. Using a special cleaner, remove all remaining dirt.
- The operation is carried out several times until there is no dirt left in the carburetor.
Such aerosols are relatively inexpensive, so there is no need to waste a lot of time, which can be spent more usefully.
On average, the entire cleaning procedure takes no more than 15 minutes, so anyone can use it.
Prerequisites for cleaning the carburetor
To maintain the functional state of the unit, you need to keep its components and compartments clean and prevent the entry of foreign bodies and impurities. The carburetor may stop working properly due to poor fuel quality, improper vehicle operation, or mechanical damage to the carburetor.
Your Nine needs carburetor cleaning if the following “symptoms” appear:
- increase in gasoline consumption (to know the approximate fuel consumption of your nine, use our fuel consumption table);
- reduction in car power when you press the gas;
- idle speed is unstable or absent altogether;
- the level of carbon dioxide and toxins in the car exhaust becomes significantly higher than standard values.
If low-quality gasoline is poured into the car, then you should not “burn through” the fuel system with “95” or “98”, as this will not solve the problem, but can cause significant damage to the engine; in this situation, there is nothing left except cleaning the VAZ carburetor.
Before cleaning: you need to visually inspect it to confirm assumptions about the malfunction of the unit. If the fuel supply is interrupted, rust or carbon deposits form on the walls of the Solex chamber.
Inspect the spark plugs: if they are black or oily, the carburetor is not working correctly and needs to be flushed. See here for any malfunctions what the spark plugs look like.
Expert advice
Clean carburetor
Since you decide to do the cleaning yourself, then pay attention to a few tips from professionals.
- Buy carburetor cleaners at automotive chemical stores. Some sellers will try to sell you a different, "better" product that is not designed for carburetors. Refuse, since it is unknown how such a drug will react to dirt inside the carburetor.
- The well-known, world-famous product WD40 is not suitable for cleaning the carburetor. The reason is simple - it contains oil.
- You will need carburetor cleaner in a bottle. Finding him is not a problem.
- Don't think that simply spraying carburetor spray will fix the problem. VAZ (Lada), carburetor for Niva 2121 carburetor and which carburetor to put on. How to easily clean a burner on a gas stove - youtube. This is wrong. There may be an effect, but it will be temporary.
- If it is heavily soiled, there is nothing left to do except remove, disassemble and wash the carburetor.
- You can contact a service station. But only if you are confident in the professionalism of the people or you have friends who work there. They charge a lot of money for the work, but not everything is washed as efficiently as they would do it for themselves. Plus, it is unknown what means they use. It is not uncommon for special expensive cleaners to be replaced with cheap gasoline or simple solvents.
How to clean the carburetor on a VAZ 2109
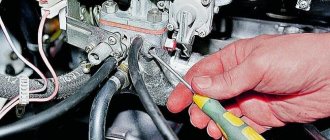
To properly clean the VAZ 2109 carburetor with your own hands, you need to remove the air filter housing, then disconnect all the tubes and wires from the carburetor body, unscrew its mounting bolts and dismantle the unit. After this, you need to prepare a clean surface, and then you can proceed to direct cleaning:
- First of all, remove the jets and clean them with acetone using a toothpick
- Remove the float and, if necessary, replace worn gaskets
- Replace deformed copper sealing washers
- Blow out the emulsion channels with compressed air from a compressor or a simple pump
- Wash all removed metal parts in a separate container with cleaner.
- Use an old toothbrush to clean all visible dirt on the unit body.
Express cleaning methods
The process of blowing and cleaning the parts of a Solex carburetor with your own hands is a long and labor-intensive task, so the question of how to clean a VAZ 2109 carburetor without removing it is relevant for most owners of nines.
For quick washing without dismantling, various auto chemicals are used - the so-called “liquid cleaning”. Sold in cans of 300-500 ml. Some products are designed to be poured into a tank. You need to fill the product with a small amount of gasoline remaining and drive until the fuel runs out. Repeat the procedure after 5-7 thousand km. After first use, clean the gas tank as a preventative measure.
Another group of products is intended for “local” use. The air filter is dismantled and the aerosol from the can is pumped directly through the tubes of the device. After this, you need to start the engine and let the car idle. These products are not a panacea for a heavily contaminated carburetor, but only help in the aspect of prevention and removal of minor contaminants. Even with regular use of this auto chemical, cleaning the carburetor of the VAZ 2109 should be carried out at least three times a year.
How does Solex differ from Ozone and Weber?
The main difference between Solex carburetors and devices of previous families is the possibility of installing it on transversely located power units with the float chamber forward. This installation option made it possible to eliminate the leanness of the fuel mixture when the car enters a turn, climbs, or during sudden acceleration.
In addition, Solex has a completely different float chamber design. It has a two-section design, which allows the device to be used both on front-wheel drive cars and on classic cars.
Solex carburetors are reliable and maintainable
Scooter starting enrichment device
Setting up the carburetor 2107 ozone
There are two types of starting concentrators - manual and automatic.
The manual (mechanical) starting enrichment requires adjustment - it must be opened at startup and closed after the engine warms up using a cable on the steering wheel. But manually opening and closing the additional channel for supplying the mixture is inconvenient. An automatic starting enricher (thermoelectric valve) is installed on most modern 2t and 4t scooters. We will learn about the device of the automatic starting enrichment further.
- Solenoid valve body
- Ceramic heater
- Drive (powder)
- Stock
- Pusher
- Damper
- Fuel chamber
- Float chamber
- Starting fuel jet
- Spring
The scooter carburetor has a small additional fuel chamber 7, which is connected to the main float chamber 8 through the start nozzle 9. The tube from chamber 7 leads to the mixing chamber into which air is supplied and from which the air-gasoline mixture goes into the engine. A valve 6 can move in the mixing chamber, similar to a carburetor throttle valve, only much smaller in size. Just like the throttle valve, the starting valve contains a spring-loaded needle that closes the fuel channel when the valve is lowered. Valve body 1 is wrapped in thermal insulation (polyethylene foam) and covered with a rubber boot. This enricher design is used on almost all modern scooters.
Older models may use a design without an electric heater, heat is transferred to the drive through a copper heat-conducting cylinder directly from the scooter's engine cylinder, and instead of a powder with a heating element, a membrane is installed. One cavity of the flask, where it is located, is connected through a thermal valve to the intake manifold, which is mounted on the cylinder head.
Tuning carburetor engine VAZ 2108 1.3 l.
Modification of this unit is not as common as tuning 21083 1.5 due to the lack of meaning; all other things being equal, the 083 engine will always be ahead, it initially has greater volume, power, torque and huge potential for modifications at the same or lower costs. Occasionally, boring for a 79 mm piston is practiced, resulting in a volume of 1.4 liters, but the walls will be very thin, overheating is possible, and accordingly the service life is sharply reduced. The simplest and most inexpensive tuning of a 2108 1.3 engine is to buy a 21083 1.5 l engine or block 083 and finish it to the desired level.
Boring the VAZ 2108 engine and how to boost it correctly
The option of obtaining a volume of 1.4 liters is practiced. installation of Kalinovsky pistons 76.5 and Kalinovsky crankshaft 75.6, connecting rods from the same with shrinkage of 2.3 mm. Cylinder head from 083 or 16 valves from Kalina. On the shafts, intake and exhaust the car will go faster than the new Priora.
Injector for VAZ 2108 engine
On a car with a 1.3 engine, you can install an injector from a 1.5 liter 21083, everything will work on standard firmware.
Preparing to blow and flush the carburetor
What do we need to clean the carburetor of a VAZ without resorting to the services of a car service center? First, the car owner must understand which elements and chambers of the unit are subject to purging and cleaning.
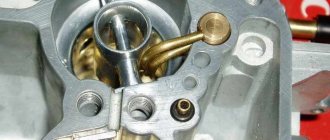
Jet location
Most often, the problem can be solved by correcting deficiencies in:
- jets;
- sealing gaskets;
- diaphragms of the accelerator pump and trigger mechanism.
To wash and blow out the carburetor with your own hands, the car owner will need:
- dry and clean rags (during the cleaning process, no lint should fly off the rag);
- toothpicks and cotton swabs;
- washing spray (suitable for all types of devices, including Solex);
- a set of screwdrivers and wrenches for removing parts;
- container for technical liquids;
- personal protective equipment - rubber gloves and goggles.
Before cleaning the carburetor, you need to prepare a work area: it should be a dry, level, illuminated area, since blowing and cleaning often entails the loss of small parts.
Solex design
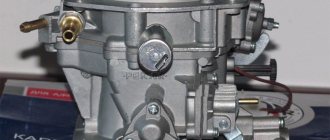
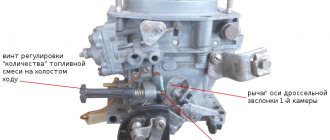
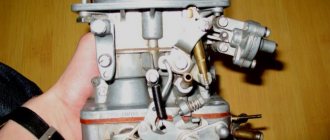
The carburetor mechanism of all modifications on the VAZ 2108/2109 is emulsion and consists of two internal combustion chambers. At the top of the carburetor there is a cover that prevents dirt from entering the cavity of the device, and fittings - fuel lines are supplied to them. The middle part is the body itself, into which diffusers and cameras are mounted. At the bottom of the carburetor are the float chamber and throttle valves.
The key elements of the system are:
- accelerator pump;
- float;
- throttle thrust;
- forced idle economizer;
- main dosing system;
- trigger mechanism;
- econostat;
- vehicle idle system.
The principle of operation of the Solex carburetor is that gasoline is supplied through the inlet valve in the fitting. The fuel is directed directly into the float chamber. The fuel level in the cavity must always be at a certain level to avoid dips and jerks in engine operation. Level control is carried out through the movements of a needle valve mechanism.
After the chamber, gasoline is sent to emulsion wells, where it is supplied in strictly limited quantities through fuel nozzles. It is in the wells that air flows break up large drops of gasoline, forming a single air-fuel mixture with it.
If you are interested in repairing the fuel pump in VAZ 2108/2109 cars, it is recommended that you study the following material in detail: https://vazweb.ru/desyatka/pitanie/remont-benzonasosa-vaz-2109-karbyurator.html
The mixture is supplied to diffusers, and through them to the power unit device. Thus, the main task of the carburetor is to form the air-fuel mixture in the desired consistency and direct it to the engine.
The interaction of many elements ensures smooth operation of the motor
Aerosols
It is convenient to work with them, since the aerosol comes out under pressure and additionally clears blockages with a flow of air with the mixture. Sprayers contain propane, acetone and a number of other dangerous components. Therefore, avoid getting them in your eyes and hands. How to check the oxygen sensor on a VAZ 2114 is frozen. They catch fire easily and can only be extinguished with carbon dioxide fire extinguishers.
Aerosol Abro for carburetor cleaning
Aerosols do an excellent job, but they cannot clean the float chamber.
The cleaning process is the same for all cars:
- Remove the air filter;
- Spray cleaner through the tubes outside and inside;
- After 3 minutes, start the engine at high speed and spray the product intermittently for 2 minutes.
This process will take you a maximum of 15 minutes.
Carburetor clogged
If the carb becomes clogged, this will certainly affect the difficulty of idling, starting the engine, instability when driving, etc. In especially severe cases, the car simply stalls on the road or does not start at all. Failures, jerks, and swaying (several repeated failures) are often observed when trying to accelerate or maneuver. And the most unpleasant thing is that a clogged carb consumes a lot of expensive gasoline.
If the carburetor is clogged
In a word, it is impossible to continue driving the car. Cleaning the carburetor, carried out competently and quickly, will help to easily correct the situation. The need for the procedure arises periodically, since the device tends to become clogged over time due to dirty fuel with impurities. It turns out that you can clean the carb without removing it from the car. Let's figure out how this is done in detail.
Settings
- Remove the minus terminal from the battery and the air filter.
- Slightly open the bolt that secures the linkage to the choke lever.
- Turn the air damper lever until it is completely open.
- In the cabin on the instrument panel there is an air damper drive lever - press it all the way.
- Pull the rod all the way out and tighten the bolt that secures the rod to the air mixture lever.
- Pull the air damper control lever on the instrument panel all the way. If the air damper does not close completely after this, then slightly open the bolt securing the traction cover and, moving the cover, completely close the throttle damper. The bolt can now be tightened.
- Place the minus terminal and filter in place.
How to flush a carburetor assembly without disassembling it
Flushing the Solex carburetor is recommended by the manufacturer in cases where there are clearly any problems with its operation: increased gasoline consumption, jerks and jolts when driving, unstable idle speed, problems with starting.
The traditional method of washing carburetors is to completely disassemble them into individual components, which is not always possible for an inexperienced VAZ owner to do. To simplify the procedure, a technique was created for washing and cleaning the carburetor without disassembling it into components. This technique is based on the use of special aerosols in cans. The most affordable carburetor cleaners are considered to be aerosols produced by ABRO and Mannol - they can be bought at any auto store for 100–150 rubles.
These cleaners do an excellent job of cleaning carburetor mechanisms, and they are also very easy to use. To flush the Solex carburetor, it is recommended to turn off the engine, let it cool and begin the procedure:
- Remove the air filter box from the car and place it to the side.
- Unscrew the solenoid valve from the carburetor body.
- Place a special narrow nozzle on the aerosol can and spray the liquid on the nozzle channels, the first and second chambers, dampers and all visible elements of the carburetor.
- After this, spray the aerosol on the external parts of the mechanism.
- Wait 5–8 minutes (depending on the aerosol manufacturer’s recommendations). During this time, the liquid will be able to corrode accumulations of soot and dirt.
- Next, you can start the engine so that it removes all remaining dirt.
- If during one procedure the carburetor did not have time to be properly cleaned, then you can treat it again with the same aerosol.
After such cleaning, the VAZ 2108/2109 will significantly increase its dynamic characteristics, since the accumulation of dirt will not interfere with the normal operation of all parts of the carburetor.
Video: how to clean the carburetor on a VAZ with your own hands and without removing it from the car
How to replace carburetor parts
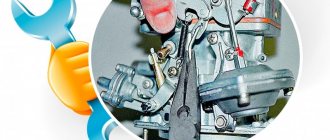
Replacing the float, accelerator pump diaphragm, and seals is not particularly difficult. Most often, during repairs, repair kits selected for the type of carburetor are used, which include everything necessary to replace the elements.
The replacement procedure is not regulated in any way: it is enough to remove the damaged part and install a new one in its place. The main criterion: the identity of the elements when replaced.
Aerosols
It is convenient to work with them, since the aerosol comes out under pressure and additionally clears blockages with a flow of air with the mixture. Sprayers contain propane, acetone and a number of other dangerous components. Therefore, avoid getting them in your eyes and hands. They catch fire easily and can only be extinguished with carbon dioxide fire extinguishers.
Aerosol Abro for carburetor cleaning
Aerosols do an excellent job, but they cannot clean the float chamber.
The cleaning process is the same for all cars:
- Remove the air filter;
- Spray cleaner through the tubes outside and inside;
- After 3 minutes, start the engine at high speed and spray the product intermittently for 2 minutes.
This process will take you a maximum of 15 minutes.
As for manufacturers, today the following brands are in deserved demand: Abro, Hi-Gear, Mannol, Gunk, STP, Turtle Wax, Wurth.
Pros and cons
Taking into account the characteristics of the engine, in particular the small volume of 1.3 liters, immediately after launch into production the following shortcomings were revealed:
- leaks through the block cover gasket - the error has not been corrected;
- Solex carburetor - required frequent adjustment of the idle modes;
- pump - intensive wear of polymer blades.
Since the 2108 engine was the first with a transverse arrangement under the hood of a car, the default exhaust manifold changed its design in comparison with previous generations of AvtoVAZ internal combustion engines. However, the intake manifold remained the same.
Carburetor tuning
Not all owners of VAZ 2108/2109 cars know that you can modify the carburetor yourself. Tuning will not only increase the resource of the power unit, but also increase the speed characteristics of the car. To do this, you will need to ensure a decrease in the resistance of the air flow that is sucked into the carburetor.
To carry out tuning, it is necessary to remove the carburetor, clean it inside and outside to ensure full operation of all its components.
After which it is necessary to remove all the jets and throttle valves from the housing. The cavities of the two internal combustion chambers must be enlarged using a lathe. The larger the volume of the chamber, the less air resistance there will be. And also, simultaneously with boring the chambers, it is recommended to increase the cavity of the diffusers. It is better to entrust work on the machine to a specialist, since this is the only way to avoid damage to the housing.
In addition, you will need to select new jets with larger diameter holes. It is recommended to install fuel and air nozzles with an increase in the opening by 0.05 mm. This is quite enough to increase the throughput of carburetor parts.
In addition, you can change the needle on the economizer device. It is best to replace it with a rubber product. The rubber needle can withstand longer periods of high loads and has an increased service life. Only such equipment will allow you to get rid of the engine freezing when you sharply press the gas pedal.
Increasing internal cavities minimizes air resistance
Level determination in float chambers
In each case, the adjustment begins with setting the appropriate level in the float chambers.
Not everything is configured from the factory, so you need to take care of completing the task yourself. The driver must set the gasoline level correctly:
At the first stage, it is recommended to start the engine and let it run. Most often it takes about five minutes. At this time, you are allowed to gently throttle, because otherwise the extra effort will lead to shooting at the carburetor or exhaust pipe. After the engine starts running, it is recommended to carefully turn it off. The next step is to carefully remove the fuel supply hose
You need to act carefully, as gasoline may splash out of the structure. If this task is not completed, correct readings will not be achieved.
Only if you successfully remove the carburetor cap will fuel flow under pressure into the chamber. Otherwise, no changes will be recorded and the help of specialists will be required. The next task is to unscrew the 5 screws that attach the carburetor cover. Now you can remove the choke cable. The carburetor cover may be removed. It must be kept in a horizontal position. Whether the floats can be kept intact and operational largely depends on the correctness of these actions. It is recommended to measure the distance. For correct measurements, use a caliper. If it is missing, a ruler is recommended. The distance should be between 23 and 25 millimeters in both chambers. In any case, the indicators in the chambers used will differ slightly from each other, because the collector is not located horizontally. In order to assess the correctness of the indicator, it is recommended to find out the average value. If deviations are detected, the tongue is carefully bent in the desired direction, after which the gasoline is partially poured out. Only after all indicators meet the established standards is it possible to assemble the camera in the reverse order. The final stage of the check is starting the engine. At this time, it is important to look into the carburetor chambers. In order to see everything, you will need a powerful flashlight. It is advisable to watch for at least 30 seconds. During this time, not a single drop of used fuel should fall. If gasoline drips from the diffusers, an overflow may be suspected. After everything, the gasoline level in the chamber is re-measured.
The engine cannot be fully started. Otherwise, there is a risk of overflow when the engine is running.
It is important to understand that adjusting the floats of the VAZ-2108 Solex carburetor is only the first and important stage of engine tuning
