Modern Lada model
Like any modern foreign car, the Lada Priora has many different sensors installed. The condition of important vehicle systems depends on their correct operation. The problem is that if some sensors fail, the Priora can continue to move. Faults of this kind can lead to increased fuel consumption, unstable engine operation, and increased wear of parts, but the car will drive, and you will only find out about the fault when it means you have to make expensive repairs.
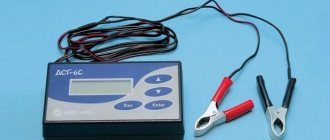
In order not to go into the engine compartment with a multimeter, the Priora has a controller that allows you to check faults using a special tester, a plug-in or built-in on-board computer. In order to diagnose the systems, just press 2 buttons and look at the error codes.
Technical description and interpretation of error P0444
This diagnostic trouble code (DTC) is a generic code. Trouble code P0444 is considered a common code because it applies to all makes and models of vehicles. Although the specific repair steps may vary slightly depending on the model.
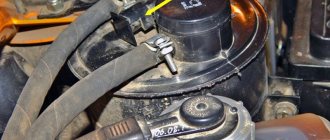
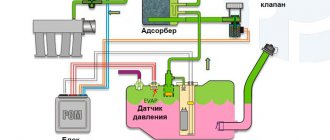
This code indicates that part of the EVAP control system is no longer functioning properly. The EVAP system is made up of many parts, including (but not limited to) the tank cap, fuel lines, charcoal canister, purge valve, and others.
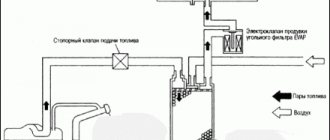
An emission control system (EVAP) prevents the release of fuel vapors from the vehicle's fuel system. Fuel vapor is directed through hoses into a coal canister for storage. Later, when the engine is running, the purge control valve opens, allowing fuel vapor to be drawn in under vacuum.
The purge of the EVAP canister is controlled by a valve that, thanks to the vacuum created by the engine, allows fuel vapor to be drawn in. They go from the fuel tank to the engine to be burned, rather than escaping into the atmosphere.
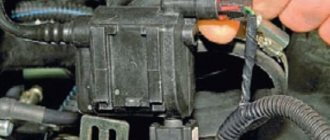
The purge valve measures the desired amount of fuel vapor. Controlled by the vehicle's powertrain control module (PCM) or engine control module (ECM). If the PCM/ECM does not see the expected voltages or detects an open circuit when commanding the purge valve, DTC P0444 will set.
About notOshibka.Ru
Consent to the processing of personal data
I hereby confirm and give my voluntary consent to the website neoshibka.ru (Internet address https://neoshibka.ru/) in accordance with Article 9 of the Federal Law of July 27, 2006 N 152-FZ “On Personal Data” for processing and the use of my personal data specified during the registration process, commenting, or when filling out any other contact form on this site, with or without the use of automation tools, including collection, recording, systematization, accumulation, storage, clarification (updating, changing ), extraction, use, transfer (distribution, provision, access), depersonalization, blocking, deletion, destruction of personal data in order to collect statistics and improve the services provided by the site. The processing of personal data is also carried out for the purposes of my information notification (distribution of information, if desired, there is an unsubscribe function) and for conducting analytics and statistics.
I am aware that:
- This consent to the processing of my personal data specified during registration on the Site, sent (filled out) using the Site, is valid for 20 (twenty) years from the date of registration on the Site;
- Consent can be withdrawn by me based on a written statement in any form;
- Providing personal data of third parties without their consent entails liability in accordance with the current legislation of the Russian Federation.
Because You are not logged in. To come in.
Because you are not a trusted user (phone number is not verified). Enter and confirm your phone number. Read more about trusts.
Because The topic is archived.
Symptoms of malfunction
The main driver symptom of P0444 is the MIL (Malfunction Indicator Light). It is also called Check engine or simply “check light”.
They can also appear as:
- The “Check engine” warning light on the control panel will light up (the code will be stored in the ECM memory as a malfunction).
- The engine may run lean or run rough if the purge valve is stuck open.
- Excess pressure in the gas tank in the form of a "whistling" sound when the cap is removed, this indicates that the purge valve is not working at all or is stuck in the closed position.
- Slight increase in fuel consumption.
The severity of the P0444 code is moderate. The car will be able to continue driving, but harmful emissions into the atmosphere will increase. Which in practice will not allow you to pass the toxicity test.
Error 0444 on VAZ 2114 - causes, symptoms and solutions
This diagnostic trouble code (DTC) is a generic powertrain code, which means it applies to OBD-II equipped vehicles. While general, specific repair steps may vary depending on the make/model. An evaporative emissions system (EVAP) allows fumes from the gas tank to enter the engine to burn, rather than being vented into the atmosphere as emissions. The purge valve solenoid supplied switched battery voltage. The ECM valve controls the valve by operating the ground circuit, opening the purge valve at specific times allowing these gases to enter the engine. The ECM also monitors the groundcircuit for errors. When the purge solenoid is not activated, the ECM should see a high voltage on the ground circuit. When the solenoid is activated, the ECM should see the ground voltage pulled low, close to zero. If the ECM does not see these expected voltages, or perceives an open in the circuit, this code is set. Note: This DTC is similar to P0444 and P0445.
Diagnosis and problem solving
Use a scan tool to command the purge valve to activate. Listen for a clicking sound coming from the purge solenoid. It should click once, and on some models it may click again.
If a click does not occur when the scan tool is activated, disconnect the connector and check the solenoid and connector for damage. Then check the battery voltage at the lead wire with the key on.
If voltage is present, manually ground the contact using a jumper and see if the valve clicks. If so, then the solenoid is working correctly, but there is a problem with the control circuit. If it does not click when manually grounded, replace the purge solenoid.
To check for a control circuit problem, reconnect the solenoid and disconnect the ground wire from the connector. With the ground wire disconnected from the controller, turn on the key and manually ground the purge valve control wire.
The solenoid should click, meaning there is no problem with the control wire to the solenoid, and there is a problem with the purge valve actuator circuit from the ECM. If it does not click, there is an open in the wiring between the ECM and the solenoid.
When troubleshooting P0444, you must clearly understand what you are doing. Otherwise, seek help from a specialist.
Malfunctions of auxiliary systems and ignition
- P0300 - no spark in all cylinders;
- P0301 - no spark in cylinder No. 1;
- P0302 - no spark in cylinder No. 2;
- P0303 - no spark in cylinder No. 3;
- P0304 - cylinder No. 4, no spark;
- P0326 - knock sensor readings are outside the permissible limit;
- P0327 - poor signal in the circuit of the same device;
- P0328 - signal too strong in the same circuit;
- P0335 - crankshaft sensor circuit is faulty;
- P0336 - crankshaft sensor readings are outside the permissible limit;
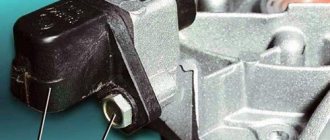
- Camshaft sensor location
P0337 - crankshaft sensor shorted to ground;
- P0338 - the network of the same device is interrupted;
- P0342 - weak signal in the phase sensor network;
- P0343 - the signal in the network of this device is too high;
- P0346 - the readings of the same device are out of the permissible limit;
- P0351 - break in the wiring of the ignition coil of cylinder No. 1;
- P0352 - open circuit of coil No. 2;
- P0353 - break in the wiring of coil No. 3;
- P0354 - open circuit of coil No. 4;
- P0363 - lack of spark and fuel supply in faulty cylinders;
- P0422 - the converter is broken;
- P0441 - incorrect air flow through the canister purge valve;
- P0444 - the canister valve wire is broken;
- P0445 - it has shorted to ground or BS;
- P0480 - open circuit in fan relay wiring;
- P0481 - fault in the same wiring.
On which cars is this problem most common?
The problem with code P0444 can occur on different machines, but there are always statistics on which brands this error occurs more often. Here is a list of some of them:
- Audi
- BMW (BMW X5, E39, E46, E53, E60, 330i, 530i)
- Chery (Chery Amulet, Handicap)
- Chevrolet (Chevrolet Aveo, Lacetti)
- Chrysler
- Citroen (Citroen C4)
- Daewoo (Daewoo Matiz, Nexia)
- Ford (Ford Focus)
- Hyundai (Hyundai Accent, Genesis, Creta, Santa Fe, Solaris, Elantra)
- Infiniti
- Kia (Kia Optima, Rio, Sorento)
- Mercedes
- Nissan (Nissan Altima, Qashqai, Tiida, X-Trail, 350Z)
- Opel (Opel Corsa)
- Peugeot (Peugeot 207, 307, 308, Partner)
- Skoda (Skoda Octavia, Rapid, Fabia)
- Subaru
- Volkswagen (Volkswagen Passat, Polo Sedan, Tiguan)
- VAZ 2107, 2114, 2115
- Gazelle
- Lada Vesta, Granta, Kalina, Largus, Niva, Priora
- TagAZ Accent
With fault code P0444, you can sometimes encounter other errors. The most common ones are: P0010, P0031, P0033, P0036, P0037, P0056, P0102, P0243, P0245, P0300, P0440, P0441, P0442, P0443, P0445, P0446, P0447, P0448, P0449, P045 2, P0453, P0455, P0456 , P0500, P0505, P0700, P0722, P1403, P2008.
Is it possible to drive with this problem?
Despite the fact that the malfunction in question does not in any way affect the condition of the car, driving until the problem is fixed is strongly not recommended. Inadequate response to the gas pedal can easily provoke an accident. Imagine that you are overtaking and at that moment the traction suddenly disappears, and oncoming traffic appears ahead. Or before an intersection or pedestrian crossing, the car makes a jerk.
Considering that you can solve the problem yourself in the shortest possible time and with a minimum of costs, you should not delay repairs.
Spark plugs, BB wires, coil
If a VAZ-2114 car stalls, the “check” is on, or the engine “troubles” at idle, you need to pay attention to the ignition system. The main elements are spark plugs and high-voltage wires. Often on domestic cars there is a breakdown of spark plugs or wires. It is necessary to check these elements for serviceability and replace if necessary. The best way to check is to install a pre-made set of spark plugs or wires.
This way we can narrow down our search. If even one spark plug is faulty, it is better to replace the entire set. Otherwise, there is a high probability that the breakdown will happen again, only on a different cylinder. It is also recommended to check the spark plug gap between the central and side electrodes. Over time, this gap increases. The normal value should not exceed 1.3 millimeters. If the gap is larger, it can be corrected by bending the side electrode closer to the central one. If the distance between the electrodes is too large, a spark is difficult to form. Part of the fuel mixture will simply go into the air. Typically, the service life of spark plugs is 20 thousand kilometers. Some people install iridium ones because they last longer. But as motorists say, there is no point in overpaying. The characteristics of the internal combustion engine will remain the same, and the cost of such spark plugs is equivalent to three or four sets of regular ones, which are no worse.
Less often on a VAZ, the ignition coil itself fails. At the same time, the “check engine” lamp lights up on the instrument panel. The engine may stall, start poorly, or stall. The coil cannot be repaired and must be replaced completely with a new one. As for the wires, you can check them by measuring the resistance.
Oxygen sensor
This is one of the most common reasons why the “check” light is on on the VAZ-2114. All Ladas of this model leave the factory with a catalyst. As a result, an oxygen sensor is needed for its proper operation. The ECU uses it to determine which ignition timing to set next, as well as the composition of the mixture.
If the sensor stops providing information or sends incorrect data, the ECU will take average values as a basis, and a “check” will light up on the instrument panel. What is the solution to this problem? Many people simply place a fake one. The best option is to install a mechanical blende. It screws into the standard hole and simulates the operation of a lambda probe. The ECU constantly receives the same, normal lambda value. Such a sensor will no longer be able to break, since it has a special coating.
Formation conditions
Error code P0443 is generated when the ignition key is turned to the ON position, that is, the ignition is on, but the engine is not running, and the ECU diagnoses an open or short circuit in the electrical winding of the evaporative emission control valve. At the same time, the “check” signal light is also activated.
Also, some vehicles have additional requirements for generating the error code p0443. For example, for the popular Chevrolet Captiva, these conditions are the ignition on, as well as the voltage on the battery and in the vehicle’s electrical system in general ranging from 11 to 18 Volts DC. In addition, the ECU diagnoses an error after 6 seconds of meeting the mentioned conditions. Other machines may have different values, but the logic remains the same.
Checking with a plug-in tester
More accurate and comprehensive diagnostics can be performed using a connected computer or a special tester. However, the data displayed on the screen is alphanumeric. The letters have the following meaning:
- P
– errors in the operation of the electronic systems of the power unit; - C
– problems with the functioning of the chassis; - B
– electronic malfunctions in the cabin; - U
– joint system errors.
In addition, the number 0 means OBD code 2, numbers 1 and 2 indicate the enterprise code, and 3 is the backup password.
Basic ignition system
(the letter P precedes the digital designation):
- 0300
– no spark in the cylinders of 16 valves; - 0326
– defect or short circuit in the knock indicator circuit; - 0337
– difference of the crankshaft controller to ground; - 0343
– high level in the headlight sensor circuit 0342 – a similar low indicator; - 0422
– signaling device malfunction; - 0444, 0445
– failure of the adsorber valve; - 0480, 0481
– problems with the fan assembly.
Fuel-air system
(the letter P is located before the numbers):
- 0030
– open circuit between the oxygen indicator and the exhaust gas converter; - 0116
– problems with thermal control of the cooling fluid; - 0102
– error in the air flow control circuit; - 0201, 0202, 0203, 0204
– break in the injector wiring; - 0217
– overheating of the power unit; - 0172
– excess amount of air,
0171
– gasoline, in the fuel mixture; - 0230
– malfunction of the electric fuel pump; - 0266 0269, 0270, 0272, 0274
– problems with injector drivers.
In principle, diagnostics using BC makes it possible to identify the main faults. Basic error codes for Priora 8 and 16 valves using a plug-in tester provide significantly more information. To understand it, you should study the decoding of indicators, which is not so difficult.
Diagnostics using the built-in BC
To view the error codes, you need to find the daily mileage reset button on the dashboard, press it and, holding it, turn the ignition key. The self-diagnosis mode will turn on. All arrows on the instruments should move from minimum to maximum values and back, and all positions on the LCD display should light up. You need to look: if any position does not light up or the arrow on any device does not move, then you should check the corresponding sensors, their networks or display for malfunctions.
Priora on-board computer
In the same mode, press any button for switching modes of the built-in BC 2 times, after which digital codes may appear on the liquid crystal display:
- 2 - very strong voltage in the BS;
- 3 - errors in the fuel level sensor system in the gas tank;
- 4 - error in the coolant temperature sensor system;
- 5 - error in the air temperature sensor system outside the car;
- 6 — motor overheating;
- 7 — emergency low oil pressure;
- 8 - malfunctions in the brake system;
- 9 - battery is low;
- E - error in the data packet stored in the EEPROM.
Many drivers ask how to reset error codes on a Lada Priora. Perhaps their built-in BC is faulty, since a working on-board computer automatically exits the diagnostic mode after 30 seconds if you do not press any control buttons.
How to fix the problem?
To fix error P1602, you need to determine the cause of its occurrence. Even during normal operation of the car, simply deleting it from the memory of the electronic control unit, as many VAZ owners do, is wrong. The problem may be more serious than it seems. The only exception is that the code appears after removing the terminal from the battery or in frosty weather.
The first step when an error is detected is to check the battery charge, the condition of its terminals and wires. It is also necessary to test with a multimeter and visually inspect the contacts on the ECU, generator and sensors, ring and evaluate the condition of the wiring by eye. It is often very easy to find the location of broken or oxidized terminals. You can fix these problems yourself.
If the generator or battery is not working properly, it is often possible to restore its functionality. The battery often just needs to be charged with a charger and the terminals cleaned. But many owners also repair the generator themselves. Sometimes it is better to replace these devices.
Problems associated with low-quality fuel are easily solved. To do this, just change the gas station. If there was a switch to another fuel or the unit was flashed, it is advisable to contact an auto electrician. He will do the correct firmware for the equipment.
Instructions for performing diagnostics via a laptop with your own hands
Error 0327 on VAZ 2114
For diagnostics you will need a laptop and a diagnostic adapter. The laptop can be of any power, it does not matter for diagnosis. The adapter is universal and suitable for all VAZ models (the author of the video is KV Avtoservis).
There may be a mismatch between the diagnostic pads. In this case, you can buy an adapter. A diagnostic program is supplied with the adapter, but the software can be downloaded from the Internet on specialized sites. They have the same set of functions, but may differ in unique features.
One end of the adapter is inserted into the DR, and the other directly into the USB port of the laptop. After connecting the adapter, turn on the ignition. At the next stage, we launch the program and begin diagnostic work. When the program starts, the computer connects to the electronic control unit.
The interface will depend on the downloaded program. These can be lists with indicators or graphs with values. Based on these readings, we can draw the first conclusions about the operation of the engine and the main systems of the car.
Diagnostic Tool Interface
When a list of detected errors is displayed, their decryption can be found in the test file, which is usually attached to the program. It deciphers all the errors that may appear during malfunctions.
Having deciphered the codes of detected errors, you should begin to eliminate them. First of all, it is worth checking the sensors, since the correctness of the readings and operation of the ECU depends on their serviceability. A sensor malfunction may cause the error to appear. For more accurate diagnostics, additional checks of machine components may be necessary. After fixing all the problems, be sure to run a test to make sure everything is working without errors.
To do this, turn off the ignition and turn off the diagnostic equipment. To reset data from the microcontroller, simply disconnect the negative terminal on the battery. Then the process is repeated: the laptop is connected and diagnostics are repeated. The process is repeated until all errors are eliminated.
Troubleshooting
After finding out the reason why the Priora or Kalina does not drive, it is necessary to correct the situation. If the coding indicates a break in the power supply to a structural element, you need to completely check the entire line and the device itself. It is better to do this by replacing parts with known good ones (new). It is also taken into account that standard connectors may become loose or fail over time.
There are several methods for troubleshooting the problem, but together they constitute a complete diagnosis of the car for faults in the coolant temperature sensor. After all, error number 4 gives a signal about exactly this. You can fix it like this:
- First we check the sensor to see how well it functions. It copes with the assigned tasks, there are no complaints about the speed and clarity of data transmission - let's move on to the next point. Does not respond to signals - most likely, it is completely broken and requires replacement.
- This is followed by checking for contact and absence of plaque. If a problematic connection is identified, the sensor will have to be replaced with a new one. And if the surface is covered with plaque, it is necessary to thoroughly clean the seat.
- Now you can move on to the on-board circuit, make sure that there is contact there.
- The remaining dilemmas usually lie in electronics, for this reason the car is taken to a specialist who can adjust the device. Usually in such a situation the ECU is re-flashed, which means that errors are prudently reset.
The issue of eliminating error 4 can be solved on your own, but not in one hundred percent of cases. Sometimes you have to turn to specialists to perform work that requires specific knowledge and skills. But it would be right to try to prevent a breakdown, since most often it occurs after a long period of parking in the cold in an open area (that is, not in a garage or covered parking).
ERRORS ON-BOARD COMPUTER GRANT / KALINA / PRIORA
0102 Low level of mass air flow sensor signal 0103 High level of mass air flow sensor signal 0112 Low level of intake air temperature sensor 0113 High level of intake air temperature sensor 0115 Incorrect signal of coolant temperature sensor 0116 Incorrect signal of coolant temperature sensor 0117 Low level of temperature sensor coolant 0118 Coolant temperature sensor signal high 0122 Throttle position sensor signal low 0123 sensor signal high 0130 Oxygen sensor signal 1 incorrect 0131 Oxygen sensor signal low 1 0132 Crankshaft sensor signal high 1 0133 Slow response oxygen sensor 1 0134 No signal from oxygen sensor 1 0135 Malfunction of oxygen sensor 1 heater 0136 Short circuit to ground of oxygen sensor 2 0137 Low level of oxygen sensor 2 0138 High level of high signal of oxygen sensor 2 0140 Open circuit of oxygen sensor 2 0141 Malfunction of oxygen sensor 2 heater 0171 Too lean mixture 0172 Mixture too rich 0201 1 control circuit open 0202 Injector 2 control circuit open 0203 0204 Injector 4 control circuit open 0261 Injector 1 circuit short to ground 0264 Injector 2 circuit short to ground 0267 Injector circuit short to ground sunki 3 0270 Short to ground in the injector 4 circuit 0262 Short to +12V in the injector 1 circuit 0265 Short to +12V in the injector 2 circuit 0268 Short to +12V in the injector 3 circuit 0271 Short to +12V in the injector 4 0300 Many misfires 0301 Misfires in 1 cylinder 0302 Misfire in cylinder 2 0303 Misfire in cylinder 3 0304 Misfire in cylinder 4 0325 Knock sensor circuit open 0327 Knock sensor signal low 0328 Knock sensor signal high 0335 Crankshaft position sensor signal 0336 Crankshaft position sensor signal 0340 Sensor error and phases 0342 Low phase sensor signal 0343 High phase sensor signal 0422 Low converter efficiency 0443 Canister purge valve circuit malfunction 0444 Short or open canister purge valve 0445 Short to ground canister purge valve 0480 Cooling fan circuit malfunction 1 0500 Incorrect Speed sensor signal 0501 Invalid signal speed sensor 0503 Speed sensor signal interruption 0505 Idle speed controller error 0506 Low idle speed 0507 High idle speed 0560 Incorrect on-board network voltage 0562 Low on-board network voltage 0563 High on-board network voltage 0601 ROM error 0603 External RAM error 0604 O Internal RAM error 0607 Malfunction knock channel 1102 Low oxygen sensor heater resistance 1115 Faulty oxygen sensor heating circuit 1123 Rich idle 1124 Lean idle 1127 Rich partial load 1128 Lean partial load 1135 Oxygen sensor heater circuit 1 open, short circuit 1136 Rich mixture in Light Load mode 1137 Lean mixture in Light Load mode 1140 Measured load differs from calculation 1171 Low CO potentiometer level 1172 High CO potentiometer level 1386 Knock channel test error 1410 Canister purge valve control circuit short circuit to +12V 14 25 Chain control circuit of the canister purge valve, short circuit to ground 1426 Control circuit of the canister purge valve open 1500 Open circuit of the fuel pump relay control circuit 1501 Short circuit to ground of the fuel pump relay control circuit 1502 Short circuit to +12V of the fuel pump relay control circuit 1509 Overload of the idle speed regulator control circuit 1513 Idle air regulator circuit really speed short circuit to ground 1514 Idle speed control circuit short circuit to +12V, open 1541 Fuel pump relay control circuit open 1570 Incorrect APS signal 1600 No communication with APS 1602 Loss of on-board power supply voltage to the ECU 1603 EEPROM error 1606 Rough road sensor incorrect signal 161 6 Sensor rough road low signal 1612 ECU reset error 1617 Rough road sensor high signal 1620 RFOM error 1621 RAM error 1622 EPROM error 1640 EEPROM Test error 1689 Incorrect error codes 0337 Crankshaft position sensor, short to ground 0338 Crankshaft position sensor, short to ground open circuit 0441 Air flow through valve incorrect 0481 Cooling fan circuit malfunction 2 0615 Starter relay circuit open 0616 Starter relay circuit short circuit to ground 0617 Starter relay circuit short circuit to +12V 1141 Oxygen sensor 1 heater malfunction after the neutralizer 230 Fuel pump relay circuit malfunction 263 Force driver malfunction nki 1 266 Malfunction Injector Driver 2 269 Injector Driver 3 Malfunction 272 Injector Driver 4 650 CheckEngine Lamp Circuit Malfunction
Possible causes of error P0443
Wiring, evaporative accumulator valve, ECM
To cause P0443, there must be a problem with the purge control circuit, not necessarily with the valve. Usually they are a valve body block and thesolenoid as an assembly. Or it could consist of separate solenoid withvacuum lines to the purge valve. However, it could be any of the following: a bad purge solenoid (internal shorted or open) wiring harness chafing or rubbing another component causing a short or openon control circuit connector worn, broken or shorted due to water penetration driver circuit inside powertrain control module (PCM) bad
