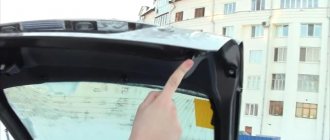
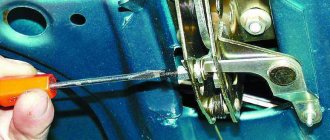
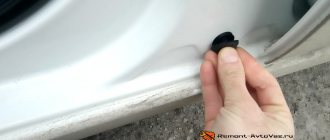
Many owners of the VAZ 2109 and other five-door Samaras have noticed that over time, knocking and extraneous noise appear in the rear of the car. It is especially noticeable on bumps or when driving along uneven sections of the road. It is mainly mistaken for the knock of worn shock absorbers or broken silent blocks of the rear beam. In reality, the problem lies in an unadjusted or incorrectly adjusted rear door lock. The simplest thing you can do is tighten the fastening bolts more tightly, or remove the adjusting washers from the bottom of the fastener loop. It is advisable to tighten the lock itself tightly with bolts to the body and move it back as much as possible, thereby allowing the lock loop to press more tightly against the lock. In this matter, the main thing is not to overdo it, otherwise the lock will not close, or it will, but after a strong slam of the door. We select the position of the latch in which the door will close tightly when you press the closed door (without the need to slam the door).
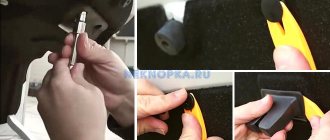
A second, but no less important role is played by rubber bumpers, or door buffers. We simply unscrew the buffer until the doors, when closed, are aligned with the line of the car body. We also check the condition of the door seal. If everything is done correctly, the knocking and noise should disappear.
Often a door noise occurs when a pin that prevents the door from moving horizontally breaks off. Over time, the retainer bushing wears out, which is not repairable, and since the retainer bar costs around 60 rubles, there is no need to bother, we just change it completely.
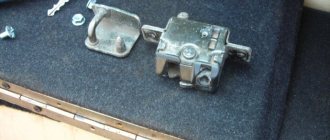
If you did everything according to the instructions and the knocking still persists, then I’m afraid to upset you, but your lock and latch are critically worn. An example of a completely worn lock is visible in the photo below.
In this situation, there is only one way out - replacing the lock. Be careful, beware of fakes, the price of a quality product should not be lower than 600 rubles, since a good lock is made of hardened metal and covered with chrome. Counterfeits are easy to recognize by their inconspicuous appearance, poor processing and often lack of packaging. In particular, good locks for VAZs are produced by the DAAZ company, and they look like this:
After repair or replacement, I recommend securing all fastening points with additional nuts, or placing them on a thread locker.
How to adjust the trunk lock on a VAZ 2112, 2110, 2111
- Loosen the lock nuts.
- Remove the protection cover from the lock.
- Move the lock in the required direction and tighten the screws.
- Now we check whether the lock can be easily slammed.
- If necessary, the adjustment process can be repeated again. But if the lock closes well, tighten the fastening bolts.
If the lock on the body does not fit into the lock on the lid when closing, then loosen the bolts securing it and move it in the required direction, after which we tighten the bolts back.
Adjusting interior door locks
The front locks are designed to be locked from the outside using a key and from the inside using a pull rod. The device has an external face located on the door handle. The structure is closed both from the inside and from the outside. Installing a lock is more difficult than installing a lock on the back door. The rear actuator is connected by a rod to the door lock button and the handle for opening it. It does not have an external locking mechanism.
Tools and materials
When starting work, you must ensure that you have the necessary tools and materials.
During the work you will need:
- impact screwdriver;
- hand drill;
- flat head sander;
- felt-tip pen;
- cushioning material.
In this case, you should carefully read the visual video lesson of operation and adjustment techniques presented on the websites of car enthusiasts. Step-by-step instructions and advice from experienced repairmen will help solve the problem with the least amount of labor.
The peculiarities of the repair are associated with the difference in the design of the lock of the rear doors from the front ones, but the locking mechanism is the same and consists of a latch on the pillar and an actuator on the door, which should fit perfectly together. In this case, the door should close easily and tightly without distortions or gaps.
Front door adjustment
The front door locking device is more complex to install, since it comes with an internal and external locking device. A lock is mounted inside the casing, which can be locked from the inside of the cabin and an external device located on the handle. The cylindrical cylinder is used to open the interior with a flat key of the sulfide type lock. After installing the lock, it can only be adjusted by a latch or a heel located on the rack.
The latch is a structure for receiving the executive part of the lock, the tongue. Depending on how the position of the receiving channel is set, the opening force and the difficulty of locking the lock depend. The front door must be positioned so that the gap on all sides is uniform, there is no distortion when opening, and the door must move easily. All this will be done in a VAZ 2109 car by adjusting the door locks.
If the door closes tightly, the fixation of the heel must be loosened by half a turn of the screw securing the latch and slightly move the receiving chamber outward, slightly moving the plate. Once you are sure that the problem has been resolved, tighten the bolts.
The door does not close tightly and a gap is created between the body. On the contrary, you need to loosen the bolts and push the lock deeper into the structure. When closing, the canvas goes up; the adjustment will consist of lowering the latch down and then stabilizing it with pads made of waterproof fine sandpaper. The door can be lowered down to 2 mm if a gasket of this thickness is placed under the counter part.
Before you begin adjusting the lock with the response mechanism, you should fix its primary position by tracing the outline with a felt-tip pen. After completing the adjustment, tighten the three mounting bolts until tight.
Rear interior doors
The lock installed on the door does not have a key. The closing mechanism is designed on the same principle and consists of a latch and a tongue. However, if the door is replaced, its adjustment is carried out in the canopy areas. The existing two units with the upper one fastened to three powerful bolts, and the lower point to two, allow you to set the gaps and fix the alignment before adjusting the lock. In this case, the door can be raised or lowered, pushed into the cabin or taken out.
When carrying out these operations, you will need an impact screwdriver; it will not be possible to simply twist the fastener only by using a jerk and twist. You can see in detail how this operation is performed in the photo in the materials of the car repair website. Having completed the alignment, all fasteners should be screwed in completely and gaskets and fastener position clamps should be installed.
Once the door is centered, you may not have to adjust the lock using the heel. If necessary, work is carried out as when adjusting the front doors.
How to adjust the latch and replace the trunk lock on a VAZ 21099, VAZ 2109, VAZ 2108 Removal
- First, remove the lock from the trunk lid. We unscrew the two nuts with which the lock is attached to the lid.
- Next we remove the lock itself.
- From here we remove a small spring and check its condition. If the spring is heavily compressed or skewed, we replace it with a new one.
- After this, we remove the button with the cylinder from the inside of the trunk lid and check the condition of the button in the same way. If, when pressed, the button slows down or is not working at all, then we also replace it with a new one.
Attention! On the VAZ 21099 car, the lid lock cannot be disassembled, and therefore there is no need to try to repair it. In case of defect or malfunction, we replace it with a new one.
Lada Granta rear doors are difficult to open
Some owners, after purchasing a LADA car, notice malfunctions in the operation of the doors. For example, the back door doesn't open well. You can cope with the problem yourself by adjusting the locks and door geometry. The defect can also be corrected under warranty from an authorized dealer. Malfunctions that owners of LADA cars (and other car brands) encounter when the door locks are not adjusted:
- the door does not open or close;
- the door closes/opens poorly (tight);
- large gaps between the door and the body (water gets into the cabin, rattling and whistling appear at speed).
Door adjustment on all LADA cars (XRAY, Vesta, Largus, Granta, Priora, Kalina Niva 4x4) is performed in the same way. There are no fundamental differences.
In this case, it is necessary to make adjustments.
- Using a socket with an extension, unscrew the two bolts that secure the latch.
- After this, we adjust the clamp, and then tighten the bolts back.
This is approximately how you can adjust the trunk lid lock on the VAZ 2109 and VAZ 2108
VESKO-TRANS.RU
How to open the trunk of a VAZ 2115 desert
Motorists know it's too much. There is a problem with the lock breaking. This is especially true for Russian-made cars, the quality of which is not ideal in almost all respects. The worst thing about this is that the malfunction is unexpected when it is absolutely necessary .
, spare, pump, in other words, some kind of thing in the rear compartment
It is for this reason that it is important to know how to open a chest without a key if the passage breaks its lock. Every motorist will need this skill. for both everyday use and long trips
both for everyday use and for long trips.
Adjusting the latch and replacing the trunk lock on a VAZ 21099:
Removal: 1) First, to remove the lock from the trunk lid, use a wrench or an extension with a head cap to unscrew the two nuts that secure the lock to the trunk lid.
2) Once the retaining nuts are removed, remove the inner lock from the cover by hand.
3) Next, remove the small spring from the same place and check its condition.
Note! If the spring suddenly becomes too compressed or skewed, replace it with a new one!
4) And then from the inside of the trunk lid, remove the button with the cylinder and check the condition of the button in the same way.
Note! Replace the lock button that is not working and also slows down when pressed with a new one!
Note! The trunk lid lock of the VAZ 21099 car is not dismountable, so do not try to repair it or do anything with it. If the lock is in a defective condition and is faulty, then it must be replaced with a new one!
1) First, put the entire system back together. That is, if you previously removed the button with the cylinder and a small spring, then install them in their places in the reverse order of removal.
2) Next, take the new lock in your hands and install it in its place, still tightening it with the same fastening nuts.
3) After installation, try closing and opening the trunk lid. If, when closing the lid, the trunk lock suddenly does not fit into the hole in the latch, usually in this case a distinct knock is heard in the area of the lock, and the lid closes very poorly, in this case:
15: Adjusting the torsion bars
We will talk about adjusting the tension of the trunk lid torsion bars.
Finally, my hands got around to the torsion bars (damn it), over time they weaken and the trunk lid does not hold when opening, and especially since I have it cursed, a serious infection, and sometimes you climb into the trunk for something and then suddenly the lid flies on your back, The sensations are not the most pleasant, I think many have experienced this!
“Hello” to AvtoVAZ engineers, there is a separate boiler in hell for you, especially for those who decided to install Torsion Bars and not Gas Lifts!
The hemorrhoids are still there when stretching, if you do this, I highly recommend doing everything carefully and thinking about every movement, otherwise these torsion bars have the ability to jump off with CRAZY speed and force, so no one has canceled the safety precautions!
Well, from words to deeds:
We take the pry bar and insert it between the hooks as shown in photo 1, slowly press and remove the hinge of the trunk lid, slowly release the pry bar, when the tension disappears, remove the pry bar, pull out the other end of the torsion bar from the hole, there are 3 holes, we need to put this end in the very bottom 3 hole, as shown in photo 2. When removing the torsion bars, the trunk lid will not hold, you need to prop it up with a stick or have someone hold the lid, otherwise you can get a Hi-Kick to the head))
Afterwards, we assemble everything in the reverse order, but only with stronger force, using the same mount, insert the torsion bar hook into the eye of the trunk lid hinge, while making sure that the torsion bar does not jump off, it is important when reassembling that the torsion bar is in the central lock as in photo 3 , this holds it and there is less chance that the torsion bar will come off when tensioned.
On the other side we do all the same movements, then we smeared the whole thing with graphite.
I think I explained everything clearly, perhaps for some it will be nonsense, but for others it will be visual instructions that will make the process easier. In any case, if you have any questions, write, I will be happy to answer! Well, and finally, 2 videos in which you can see the result of this procedure, for me the goal was not to automatically raise the trunk lid, which many people strive for, but specifically so that the lid would hold and not fall at the most inopportune moment!
That's all! Peace for everyone !
FakeHeader
Comments 13
Thanks for the instructions, before this I was constantly looking at these torsion bars and couldn’t figure out how to increase the force, now the noisy cover is holding on by itself)
No wonder, I’m glad that my post was useful to someone))
It turns out that if my lid is not noisy, then after this procedure it will open completely on its own? Otherwise I have springs, but I don’t like them
Well, according to the idea, it should rise on its own when opened! Need to try ))
Well, I never fell on my back even without springs. My casing is in place without any noise, it is not heavy, but springs are needed.
Well, we'll wait and see, there will be a need to install springs or shock absorbers)) time will tell))
From the factory, the ends of the torsion bars are in the lower holes. Over time they weaken and now I drive with springs. So there is no need to be particularly happy. But with springs from the button, the lid rises halfway on its own.
with noise, it’s unlikely that it will rise on its own))) the good news is that you can calmly poke around in the trunk and the lid won’t fall on your back with all its might))
I understood one thing: after adjusting the torsion bars, the shooting quality became simply terrible)))
YouTube cut down the quality of the footage, I filmed it on my phone, the quality was normal)) so this question is not for me))
Well, almost)) but the lid opens great, you really don’t have to worry about installing springs or shock absorbers, everything is much simpler))
Yes, I got comfortable and when the lid made a slight noise, it gently began to open without a jerk at the end
The middle of 2011 is very important in the history of the domestic automotive industry. It was this period that Russian car enthusiasts remembered for the release of a new product from the Volga Automobile Plant - the Lada Granta sedan. This car successfully fulfilled its purpose, namely replacing the classics of the Samara family. Created on the basis of the Lada Kalina, Granta today enjoys enormous success among buyers not only in Russia, but also far beyond the borders of our state.
Today the car is produced in 3 main trim levels: “standard”, “norm” and “luxury”. If with the second and third options everything is more or less clear (as they say, we will do everything for your money), then owners of cars with the first configuration were missing such an important detail as the electric drive of the trunk lid and hood lock. At first glance, it seems that such a trifle cannot significantly spoil the mood of the happy car owner. However, given the weather conditions in our country in winter, installing an electric lock for the hood or trunk lid on this car is literally asking for it. Judge for yourself, because in 20-degree frosts, the problem of opening the trunk lid and hood becomes the main headache of the car owner: either the key cannot be inserted into the core of the lock, or it can only be pulled out with great effort. One way or another, a lock with an electric drive is needed, and it is very difficult to argue with this fact.
Typical breakdowns and their symptoms
If the door lock does not work on the Ford Fusion, then it is necessary to establish the cause of the malfunction. Basic moments:
how to paint wood-look walls with your own hands
Problems can be prevented by regular diagnostics, preventative maintenance and a sealed boot that completely covers the button.
Thanks to the lining, dirt or water will not be able to get inside the mechanism. To install this element, you need to remove the device, install the boot inside and secure it.
The fifth door does not close well
The fifth door does not close well
Post by vadim_rzn » 27 Dec 2015, 21:16
Fifth door
Post by Tibidabo » Dec 27, 2015, 9:55 pm
Fifth door
Post by Pretorian » Dec 27, 2015 10:16 pm
Fifth door
Post by vadim_rzn » Dec 27, 2015, 10:44 pm
The fifth door does not close well
Post by Dj-ikss » Dec 28, 2015, 08:36
The fifth door does not close well
Post by vadim_rzn » 06 Jan 2016, 11:16
The fifth door does not close well
Post by Kukuruzin » 06 Jan 2016, 16:56
The fifth door does not close well
Post by Tarasevich » 06 Jan 2016, 17:30
The fifth door does not close well
Post by kvn-ven » 07 Jan 2016, 12:23
The fifth door does not close well
Post by haller » 08 Jan 2016, 17:21
The fifth door does not close well
Post by Tarasevich » 08 Jan 2016, 17:34
Causes of trunk lid knocking
If, when driving over bumps, a clanging, knocking or other knocking sound is heard from the trunk lid, the reasons may be as follows:
- The trunk seal rubber is worn;
- the rubber bands (rubber stops) into which the lid rests are worn out or not adjusted;
- the trunk lid hinges are loose;
- The trunk lock is poorly adjusted or broken.
The condition of the seal located under the trunk lid and the rubber stops can be checked visually. Lyada hinges are quite reliable and can last a long time. The main cause of the noise is a misaligned or broken trunk lock, which does not hold the trunk tightly enough.
If the trunk is difficult to close or open, the cause is also a misaligned or broken lock.
If the trunk lock of a Priora hatchback is being replaced, then after installing the lock it must be adjusted. Therefore, first we will tell you how to change the lock on a Priora.
What tools will you need?
To replace or adjust the trunk lock, you will need:
- open-end wrench 10;
- open-end wrench 13;
- socket wrench 10;
- socket wrench 13;
- flat screwdriver;
- crosshead screwdriver;
- pliers.
After installation (before adjustment), the lock must be lubricated, so you also need to stock up on machine oil.
knocking (rattling) noise in the rear
stolki
Happens here
Answer: knocking (rattling) sound in the rear of the cabin
I tried to make a support for the backs from soft porous rubber. It turned out like this (see photo)
Admins, please give me space for photos, I can't post them.
Kiryushka
Rare guest
Answer: knocking (rattling) sound in the rear of the cabin
I ran my Vitarka in a small marathon, 2100 km. Most of the roads are nasty. It went well over potholes, but now everything is rattling until I can’t even determine where it is on the side, in the back, the driver’s armrest-glove compartment. In short, now everything is a rattle. Mileage 7 thousand.
Happens here
Answer: knocking (rattling) sound in the rear of the cabin
I was impressed about the magnets, but solutions for the rear seats have not been found in 4 years on the forum
DenGr
Rare guest
Answer: knocking (rattling) sound in the rear of the cabin
Overawe1979
Experienced truck driver
Answer: knocking (rattling) sound in the rear of the cabin
VLADVAS
Happens here
Answer: knocking (rattling) sound in the rear of the cabin
I drove a Suzuki 2008 for three years and nothing rattled! Now I got a new one and the rattling sound appeared immediately after the euphoria from buying a new car wore off. I went through everything: the shelf, the seats, the fasteners and seat belt tensioners, the box under the seat. In any case, this is the trim of the rear right or rear fifth door or the trim of the wheel arches. The rattling is absolutely characteristic: on small irregularities such as gravel, washboard, small frequent irregularities. Alternatively, remove the suspicious trim and drive without it. Draw conclusions and put the casing back one element at a time. The one that will rattle must be insulated, laid, or glued somehow.
Overawe1979
Experienced truck driver
Answer: knocking (rattling) sound in the rear of the cabin
stolki
Happens here
Answer: knocking (rattling) sound in the rear of the cabin
ssergey71
Our person
Answer: knocking (rattling) sound in the rear of the cabin
Don’t tell me, this rattle is already bad! A new car will hold it together, but then it will rattle. It seems that the noise has already been made, I adjusted the wheel on the door, it was quiet for three days, then it creaked again, the driver’s seat began to click under load, I don’t understand where, the mess in the middle rattles, although it stretches all the way. And all this with 15 tons of mileage. This didn’t happen in Eskudika in 05. close. These little things started to upset the car! For 1.2 m. And what an ambush it is.
How to measure gaps?
In factories and professional workshops, special rulers are used to easily measure the gaps between panels. It is not difficult to make such a ruler yourself. It can quickly compare different gaps without even remembering the values.
The coincidence of adjacent panels along the plane can be checked by applying a ruler with its edge simultaneously to two edges of different panels. A gap of 2 mm is allowed between the ruler and the body.
Manufacturer's recommendations for body panel gap sizes vary among different body panels. There may be different options for the front fender and hood compared to the front fender and front door. Typically, the size of the gaps between panels varies from 3 to 8 mm. In some cases the gaps may be larger.
We accurately repair door switches on Ford Fusion
The Ford Fusion door switch is a switch that catches and transmits the signal for opening or closing the door structure to the power supply. It is installed inside the driver's and passenger doors, in the luggage compartment niche. The end switch is directly related to the lock. A light indicates that it is working. If the door is left in the open position for a long time, the device begins to beep. It's worth thinking about repairs and other ways to fix the problem when the device stops working.
working with the trunk door
While driving it was annoying: constant creaking, intake of exhaust gases and cold, the washer did not work, the wiper did not work.
Everything was simple with the washer and the wiper, in two places the tube was disconnected, in the door and in the side wall, it reached through the gap without disassembling the interior. This is actually a problem with Suzuki. The tubes are constantly disconnected, they are connected along the entire length through plastic bushings, over time they have lost their elasticity and do not stay on the bushings; the pressure of the washer motor is often enough to rip it off. The issue has not been fundamentally resolved yet, perhaps zip ties will help.
Dvorink - the connector came loose, bent the pins, connected it.
When in the biography of this car there was a penny without brakes, insurance and rights, it went into the door at an angle, crushed the bottom corner, and tore the metal.
From the jam, a gap appeared on top of the door; exhaust, dust, sound and even light were sucked in there. The budget is small, the budget was spent on washers for 30 rubles in lerumerlen, I placed them under the bottom loop. The gap is gone.
The creaking came from the friction of the plastic door trim against the metal door. I removed the trim, bought a furniture seal, tore it lengthwise, I got this rubber profile like the letter P, it was empty inside, I additionally cut it lengthwise and glued it exactly along the perimeter of the plastic, everything was rubbed there, it’s hard to make a mistake. I put the plastic back, its edges lay exactly in the rubber self-made groove, the creaking, knocking, rattling from the door went away.
The rest of the noise came from the wheel case, I removed it, and now I’m driving without the case.
I straightened out the dent with torn metal using a shovel handle, a hammer and a mounting tool, and filled it in with Movil.
Source
Burning the limit switch
After it has been possible to turn off the part, in some cases the element is burned. To operate, you will need a 500 Watt lamp. If the driver has never encountered such repairs, it is better to contact a service station. The following equipment will be required:
From the above listed devices, a burning device is assembled. For further actions, you will need an outlet into which the device will be plugged in. The work is carried out in several stages:
Along the way, it is important to check the resistance at the contacts. It should be zero.
After the burning is completed, the device is de-energized and the battery terminal is returned to its place. At the end, it’s worth opening and closing the doors to make sure everything is working properly.
