February 21, 2022 33,452
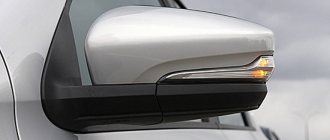
Currently, Lada Priora is equipped with electric drive and heated exterior mirrors. One of the popular modifications is the installation of side mirrors of the new SE model (with heating, electric drive and turn signal indicators). We'll tell you how to replace old-style mirrors with new ones with your own hands.
Required
: Electrically controlled external mirrors with turn indicator (article: 2170-8201050-75 and 2170-8201051-75, price about 3,500 rubles), turn signal caps SE.
Installation
Remove the standard side mirrors (pry off the mirror triangle with a screwdriver and remove the three mounting screws). Install the new mirror in the reverse order.
We stretch the turn signal wires to the mirrors:
- Remove the door trim.
- Remove the turn signal from the fender and disconnect the block. We install plugs instead.
- Pull the wires out of the fender and into the interior. To do this, unscrew the sill trims in the cabin, peel back the carpet and felt and pull the black wire in the engine panel. We determine which of the two +12 V wires using a multimeter or a test lamp. We insulate the second wire.
- Route the wire from the passenger compartment to the car door through the corrugation.
Specifications
Any models must meet the following criteria:
- Clear reflection. All details should be visible even when shaking and swaying.
- Visibility. The road behind the car should be visible to the horizon.
- No color or shape distortion.
- Separating the interior mirror in case of an accident. The structure should fold or break off when hit with a head.
- Folding exterior mirrors. They should fold in the event of a sudden collision.
- Safety. No sharp corners, splinters due to damage, etc.
- Dimensions. The outer casing should not protrude beyond the vehicle body by more than 20 cm.
Connection
Old style mirrors (without direction indicators) have two connectors (3 and 2 wires):
The mirrors of the new SE model have 1 block of 6 wires:
We cut off the wires from the SE mirror block and solder it according to the diagram:
- How to turn on the heated mirrors on a Priora
The process of installing and connecting mirrors of the new SE model is also shown in the video:
Let us remind you that we previously talked about other improvements to the Priora. For example, how to make lights in the rear-view mirrors and replace a burnt-out turn signal in the outside mirror.
Photo: Minishty in-flight magazine
Keywords: side mirrors Lada Priora | Lada Priora accessories | turn signals Lada Priora | heating Lada Priora
Found an error? Select it and press Ctrl+Enter..
- We independently install heated mirrors on a Volkswagen Polo sedan
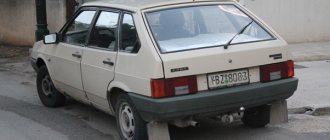
Good visibility is important for safe driving. While driving, the driver always has to “keep his finger on the pulse” so as not to get into an unpleasant situation (accident). The side mirrors on the Priora are initially made quite well - the viewing angle is enough to sit still when reversing or changing lanes. This is not a joke, it’s really like a Kruzak review. After the Priorovskie cars I get into other cars and I miss my familiar overview. Mirrors on Priora come with turn signals (repeaters); this is the Special Edition version of Lada (luxury) Priora cars. The price of these is naturally more expensive, but not by much 900 rubles. They can be installed on a regular Priora. Turn signals in mirrors are a newfangled theme and they look beautiful and are also practical.
The side mirrors of the Priora 1 car have been improved along with the restyling of the car. In the SE luxury version, which is essentially the most expensive and complete package of the car, these devices have changed, the car has become even more convenient “for the driver”. Some people buy such SE mirrors on a Priora 2 and install them even if they originally bought a car with a more economical package.
All that remains is to properly disassemble the mirror and make friends with the wires. Indeed, to install the modernized version you will have to put a lot of effort into finding reasons. You can do simple tuning, if you want to change the appearance to a more curly one - just put covers on the mirrors. It seems like a small change, but the car looks more solid with them.
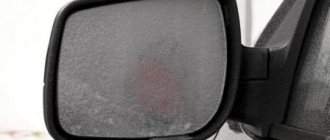
Who hasn’t felt the thrill of using a car after ten, or a classic, freezing the car in winter - heating seems to be a common thing, but this was not the case on the VAZ. The heated mirrors of the Priora car are implemented using spirals. Often turning on heating in wet weather, a mark forms on them. Despite this, after 6 years of use, they have not faded.
Choosing mirrors
We decided to purchase and install heated mirrors ourselves, but the question of choice is not an easy one, since today a huge number of different models are sold on the markets, which differ in appearance, price and technical characteristics. To help with the
choice, we will not describe or list unnecessary ones details, but rather consider the points that will be important to pay attention to when purchasing
Visual characteristics
An important characteristic is the reflection coefficient, in other words, reflectivity:
- You can see this value for your car in its passport
- According to the standard, the reflectance coefficient (reflectivity) for a car mirror must be more than 40 percent
- Otherwise, you run a high risk of not seeing what’s going on behind your car and getting into an accident.
The second equally important characteristic is the correctness of the transfer (without distortion) of the shape of objects:
- It is difficult to evaluate this characteristic
- All you have to do is look at your reflection in the sample being tested.
- And if your reflection resembles the reflections in the funhouse mirrors, then you should not purchase such a product
In addition, you should pay attention to the presence of an anti-reflective coating on the mirror element:
- Only high-quality “tinting” will protect your eyes from being blinded by reflected light.
- However, it is worth considering the fact that excessive darkening further reduces reflectivity and can lead to incorrect color rendering
Mechanical characteristics
When purchasing heated side mirrors, you need to pay close attention to the position adjustment present, as well as on what principle it is implemented:
- For example, if you take standard mirrors from a VAZ 2110, they have a lever adjustment mechanism, which has a number of disadvantages
- Therefore, a cable mechanism is more preferable, since it is smoother and has better adjustment accuracy compared to a lever mechanism.
- However, the ultimate dream of every car owner, without any doubt, is electrically controlled elements
- In this case, a joystick is located inside the car, with which you can easily set the location of the side mirrors as you prefer.
It is worth recalling a point that applies not only to the choice of mirrors. Rather, this is a general recommendation that everyone needs to remember when purchasing any spare part:
Immediately pay attention to the quality of the mirror element, carefully inspect all the parts of the case. The parts should show cracks, scratches, chips, or other mechanical damage. In addition, you should pay attention to the packaging and branded packaging. Any self-respecting manufacturer supplies its products exclusively in branded packaging, it usually indicates the address and telephone number, and also contains detailed information about the model. Therefore, feel free to open the box to make sure that there are instructions inside in your native Russian language, as well as an installation diagram. In addition, an important factor is the presence of the necessary fasteners in this kit, a set of wires and seals, which will allow you, during self-installation, to reduce additional costs, in addition, significantly reduce the time required to complete the work
Heating efficiency
Another parameter that interests us, for the sake of which all the actions were done:
- Because ultimately you need a mirror that will be able to work effectively under adverse conditions
- We need to evaluate the heating rate and quality of the heating element and how quickly moisture, snow and icing will evaporate from the surface
- You won’t be able to evaluate such phenomena on your own without special sensors and a computer program, so all you have to do is connect and test in real conditions, observe visually and record the time
This concludes, additionally watch the video on this topic, good luck in installing the heating.
Standard side mirrors - article number and price
For the Lada Priora car, standard parts with electric drive have catalog number 2170-8201017. Price – about 3,100 rubles per set.
Compared to the SE version, they have one design disadvantage. The surface area does not completely cover the mirror, which can also be “usefully” occupied. This shortcoming was corrected with the SE, where the mirror elements were actually made larger.
Heated mirrors on the Priora received a larger mirror element. Thanks to this, the driver does not have to lower them when reversing – even this difficult-to-reach area is visible. For the SE version, repeaters were added to the mirrors. Priora with electric drive, repeater and heating (catalog number 2170-8201021, price - about 3,800 rubles per set) was much more expensive than conventional versions.
Please note that kits are often sold unpainted or painted to match the body color. If necessary, paint the body of the mirror device before installation. Painting it yourself will turn out much better. Some stores offer painting only the upper parts of the body, but you can choose any painting method yourself. Speaking about the rear-view mirror of a Priora car, you can notice that it is ordinary, as simple as two rubles, attached to a holder that is secured under the trim.
How to glue a rear view mirror to a car windshield
The need to dismantle the rear view mirror does not arise often, mainly in the event of an accident, collision, or impact with oncoming traffic.
Many car owners complain about the lack of methodological information on removing the rear view mirror of a Lada Vesta.
To help drivers, we will consider the main points during dismantling:
- Open the hood.
- Remove the terminals from the battery.
- Open the driver and front passenger doors wide.
- Remove the top and bottom plastic covers.
- Press the metal lock and slide the mirror up from the mount.
Note to the driver!
In the “luxury” configuration of the Lada Vesta, the rear view mirror (hereinafter referred to as the rear view mirror) is installed with a rain and light sensor. You need to move the mirror mount up. In all other configurations, sensors are not installed; the mount must be moved down.
Take this information into account when replacing the CBV to avoid damaging the equipment. Many craftsmen do not know the intricacies of attaching the interior mirror, which damages two digital sensors.
Disassembly procedure
Once the structure has been removed, disassembly can begin. If it is required, of course. Perhaps you have found a new mirror whose price suits you completely. Then you can skip this point.
If it is necessary to disassemble an element, we start from whether it is internal or external.
The interior mirror is disassembled as follows:
- there is a place where the glass and the body are connected;
- spin is inserted;
- pressed with little force;
- a gap appears;
- use a mediator to pass along the entire length of the gap;
- the body is divided into 2 parts;
- the mirror is removed;
- everything else is located underneath it;
- We carry out the necessary work.
You may also need to disassemble your car side mirror.
It doesn't matter whether left or right
- Using a hairdryer, the area between the case and the glass is heated;
- Do not heat to high temperature. Use a household hair dryer on medium power;
- Use a flat-head screwdriver to separate the body into 2 parts;
- Sometimes it is necessary to bend the terminals;
- If you are afraid of damaging the mirror, wrap the instrument with electrical tape;
- On some cars you need to slightly press the mirror to the center and move it to the side;
- The glass is carefully removed;
- Remove the screw from the plastic frame, if there is one;
- Under the frame we see the entire mechanism;
- Use a screwdriver to remove the broken structure and replace it with a new one.
That's it, the work is almost completed. But since we disassembled everything and changed the necessary components, now we need to assemble the structure and install it back on the car.
Review of Manufacturer Prices
| Name / catalog article | Price in rubles |
| LadaVesta and Lada XRAY, Renault Megane 3 with light and rain sensors (8200000509) | From 2000 - 2200 |
| Reflector without light and rain sensors (7700838529) | From 1200 |
| *price indicated as of 04/05/2019. |
Conclusion
Replacing a mirror in a Lada Vesta car yourself is quite simple. The task completes within 10 minutes. Difficulty may arise when purchasing equipment. Check the modification of the car, the presence of pre-installed rain and light sensors. There are no significant differences between domestic and foreign components. The owner of the technical equipment chooses based on personal preferences.
Reassembly
I will say right away that the assembly is carried out simply in the reverse order of the previously carried out dismantling work. Therefore, I see no point in talking about this separately.
With mirrors on special mounting brackets, everything is also extremely simple. All that remains is to tighten the fasteners and fix the mirror on the ceiling or side of the car.
But what’s really more difficult is gluing a car mirror. To begin, choose the appropriate composition. Household superglue or double-sided adhesive tape will not work. Tested by many car owners. It's better to ask for the appropriate adhesive at an auto parts store. If found, for gluing you need:
- choose a warm and sunny day without high humidity;
- create a temperature in the garage of 25-27 degrees;
- remove all dirt and traces of old glue from the body;
- walk a little along the joint with sandpaper;
- sand the gluing area on the mirror;
- degrease all surfaces;
- Apply the required thin layer of glue to the holder;
- spray the purchased activator on the fastening area;
- attach the glass to the surface;
- press the mirror to the glass;
- keep as long as the glue manufacturer said;
- remove the remnants of the used activator and glue from your mirror and also the holder itself;
- put the entire structure in its rightful place;
- use as intended.
Basic faults
- The fasteners have become loose. Each part is held in place by several fasteners at different points. They may become so loose that tightening them will be useless. Everything will depend on the severity of the damage. In some cases, replacing the fasteners will be sufficient.
- The heating does not work. Check the connection of the wire blocks. Perhaps it is enough to strengthen the wire connections so that they no longer come loose.
- The electric drive does not work. Adjusting the position of mirror devices while sitting in your seat is much more convenient than doing it manually. Check the wiring.
- Turn signal repeater. If the repeater does not work, it means the signal is not reaching it. The problem, again, is the wiring.
- Broken mirror element. It will be enough to replace it with a new part, but during the replacement you should be extremely careful. It is important to prevent splinters from getting under the cover.
How to connect
Usually only two wires come out of the heater element; they can be connected without observing polarity; the connection will always be parallel and polarity does not matter. Since you can and should turn on the heated mirrors together with the rear window heater, you can connect directly to this system. That is, when you turn on the heated rear window, the heated mirrors will also turn on, the relay and button for heated mirrors are not needed in this case.
If you plan to connect separately from the heated rear window, then you need to stock up on a power button, a relay and a 10 A remote fuse (if you use a 10-amp power button, you can do without a relay, since you can connect heated mirrors directly, due to low power consumption).
If you still need to make heated mirrors from scrap materials, then, as mentioned above, the easiest way to do this is from a car light bulb. This method is universal and suitable for absolutely all cars.
First of all, the mirror body itself requires a little modification; it needs to create a heat shield. This can be done using foil by simply gluing the inside of the case. Then place and secure there the socket with the car light bulb, making sure that the lamp does not touch the mirror itself or the body (the lamp heats up quite strongly, and if touched, it can damage the mirror element or melt the mirror body).
You can also make a heated mirror on a car, with two operating modes, a powerful mode aimed at quickly defrosting the mirror and a weak one to protect against fogging. This can be organized by installing, for example, a two-contact lamp (21\5). Into the mirror housing, and connecting it accordingly. In this case, 21 Watt will work for rapid defrosting, and 5 Watt will be enough to protect against fogging.
How to disassemble a mirror (left and right) on a Priora car - removal and installation
Replacing a device that is installed on a car of the “Norma” or “Standard” trim levels with the SE version becomes a good way of tuning. In order to disassemble these devices, you will have to disassemble the interior trim. Carry out the work as follows:
- Cashback on VTB Multicard: when is it credited, how to connect?
- Remove the screws that secure the A-pillar trim.
- Pull part of the trim towards you.
- The part is held in place by three bolts. First, lower the glass, then slowly unscrew the bolts, taking the reflective element with your other hand.
- Do not jerk the device. First, disconnect the wires - there should be two terminals going through them. The first is for heating, the second is for position adjustment.
- Place the new part in place of the old one and secure it with bolts.
Connecting the mirrors of a Priora car should be done according to the following diagram:
- the green wire goes to the black-green one;
- red wire - to blue-red;
- connect the blue wire to the black-blue one;
- brown wire - to red-blue (second block);
- black to black wire (second block; This is the “minus” for repeaters and heating).
If you change this part in winter, when the outside air temperature drops below zero, you will have to be more careful with the mirror element. Once you remove it, you should warm it up using a hair dryer or heat gun. The surface may become chipped or “burst,” so that it remains useless. You will have to prepare for the replacement in advance by obtaining the necessary tools.
AvtoVAZ
Currently, Lada Priora is equipped with electric drive and heated exterior mirrors. One of the popular modifications is the installation of side mirrors of the new SE model (with heating, electric drive and turn signal indicators). We'll tell you how to replace old-style mirrors with new ones with your own hands.
Required
: Electrically controlled external mirrors with turn indicator (article: 2170-8201050-75 and 2170-8201051-75, price about 3,500 rubles), turn signal caps SE.
Replacing a Lada Priora mirror (VAZ Priora)
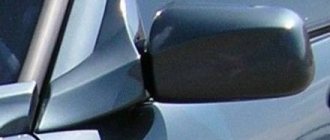
Mirrors on the Priora SE and the old model, what is the difference?
1) The presence of turn signals on the mirrors. SE has them, old ones don't.
2) Visibility, it is greater on the SE mirrors.
3) Mirror mounting triangle. On the SE mirrors it fits better without any gaps.
4) Protection from rain. SE mirror housings provide less protection from rain and snow.
5) The external differences of the mirrors can be seen in the following photos:
At the moment, the price of SE mirrors on Lada Priora is about 3,300 rubles.
Installing SE mirrors on Priora
How to remove a mirror on a Priora. We follow these instructions, dismantle the old-style mirrors and install the SE mirrors in the reverse order.
Connecting rear view mirrors Priora (SE)
Old style mirrors have 2 connectors with wires:
Block No. 1: mirror control:
Block No. 2: heated mirrors:
SE mirrors have 3 connectors with wires (an additional plus (6th wire) is for the turn signal). Connecting new mirrors is carried out in the same way, all colors are the same, except for one - +12V mirror heating, brown is used instead of Gray.
Block No. 1: mirror control:
- red connects to red-blue.
- blue with blue-black.
- green with green-black.
Block No. 2: heated mirrors:
- Instead of gray there is brown, we combine it with blue-red (black-red).
- black with black (used for heating and for turn signals).
Block No. 3: direction indicators:
For those who haven’t figured it out, here’s a diagram for connecting the SE side mirrors on a Lada Priora:
The main thing is not to confuse the red-blue and blue-red wires. They are almost the same, so before connecting it is better to check them with a tester (multimeter or + 12V light bulb), connecting the minus of the tester to the body, and the (+) to the wire. If the lamp lights up after turning on the heated mirrors, then this is the correct wire that needs to be connected to the brown mirror wire.
Connecting the SE mirror turn signals: You can take the plus for the turn signals from the direction indicators in the car's wing.
- Left wing - blue-black and black wires.
- Right wing - blue and black.
By the way, for the VAZ 2172 the VAZ 2112 Coupe also borrows some body elements, for example, a spoiler.
The most common reason why many people replace the exterior mirror on a Priora is its failure due to the so-called impact “on the mirrors” from another car. This can happen on the highway when the road is too narrow, when two cars can hardly fit on the roadway. If you and your car are unlucky and the mirror breaks, then replacing it will not be difficult.
To perform this simple repair of the Lada Priora, we will need two screwdrivers, a flathead and a Phillips.
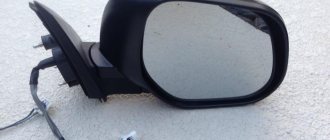
First of all, you need to pry off the “triangle” plug from the inside of the door with a flat screwdriver, as is clearly shown in the photo below.
Underneath it are all the fastening screws, as well as the power wires for the electric drive and the heating of the mirror element.
Disconnect the wires by lightly pulling the edges in both directions:
And after that, you can unscrew the three screws securing the exterior mirror using a Phillips screwdriver.
Now all that remains is to thread the wires through the door hole and completely remove this part from the car.
Installation is carried out in reverse order. Replacement will not take more than 10 minutes. The price of a set of new Lada Priora mirrors starts from 1800 per pair - with electric drive and heating. But the same option can be found at a disassembly site for almost half the price.
You will need flat and Phillips blade screwdrivers.
1. Use a screwdriver to pry off the mirror trim from the interior side
2. ...and remove the triangular trim by removing the two pistons for its fastening from the door holes.
3. Holding the mirror with your hand, remove the three screws that secure it.
5. ...and disconnect the heating wiring harness block...
This is what the outside rear view mirror looks like when removed from the car.
7. Install the outside rear view mirror in the reverse order of removal, adjusting its position using the oval holes in the door.
You will need a Phillips blade screwdriver. 1. Pry up the front edge of the decorative cover...
3. Remove the two mirror mounting screws...
5. Install the interior rear view mirror in the reverse order of removal.
Installation
Remove the standard side mirrors (pry off the mirror triangle with a screwdriver and remove the three mounting screws). Install the new mirror in the reverse order.
We stretch the turn signal wires to the mirrors:
- Remove the door trim.
- Remove the turn signal from the fender and disconnect the block. We install plugs instead.
- Pull the wires out of the fender and into the interior. To do this, unscrew the sill trims in the cabin, peel back the carpet and felt and pull the black wire in the engine panel. We determine which of the two +12 V wires using a multimeter or a test lamp. We insulate the second wire.
- Route the wire from the passenger compartment to the car door through the corrugation.
Problem and solution
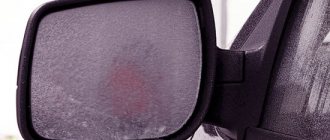
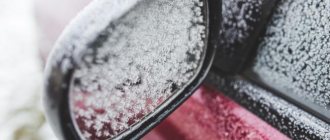
Winter is coming. And here, unfortunately, side rearview mirrors cannot always help the car owner. Winter is a particularly difficult time of year for motorists. We will not now list all possible technical problems, starting with starting the engine, but will touch only on purely mechanical problems:
- Let’s just remember how in the morning, leaving the entrance and looking around at the cars parked nearby, it’s not always possible to immediately understand which one is yours
- The reason for the conspiracy is quite banal - overnight snowfall
- So, your first task arises to get a shovel or other improvised means and dig out your iron horse
- After this, we move on to cleaning the body of the VAZ, then the windows of your car
- Problem arises: what to do with the rearview mirrors?
- Ice and snow did not ignore them
Connection
Old style mirrors (without direction indicators) have two connectors (3 and 2 wires):
The mirrors of the new SE model have 1 block of 6 wires:
We cut off the wires from the SE mirror block and solder it according to the diagram:
The process of installing and connecting mirrors of the new SE model is also shown in the video:
Most popular options
Panoramic (spherical) mirrors
Installation and connection of side mirrors SE on Priora
Instead of the usual interior element, you can install a panoramic one. They require a trial period that lasts approximately 2 weeks. Panoramic accessories provide a better view, but “move away” objects. If during this time the driver gets used to distortions and constant recalculation of the distance to objects, the accessory can be left.
The advantages of such models are:
- no blind spots;
- free movement along the rows;
- focus on a panoramic view, rather than on the side elements, and a holistic perception of the road situation at the rear;
- control over the behavior of rear passengers.
Anti-glare
When choosing which mirrors to put on a VAZ 2114, if you often have to drive in poor visibility conditions, pay attention to options with anti-dazzle
Wedge cover
The surfaces of the reflective layers are placed at an angle to each other. Two layer positions, for day and night operation, can be switched manually or electrically. During the day, images are reflected from the mirror surface, and at night from the outer glass surface.
Liquid crystal reflective layer
A layer of liquid crystals is located between two glasses and normally reflects objects with normal brightness. In blinding light, the crystals change their characteristics and reduce the brightness of the image. The transparency of the crystals is determined by an electronic control system.
Tinting
Tinting with special films weakens the light that blinds the driver. But the effectiveness of tinting depends on the individual qualities of the driver.