The parking (or hand) brake is designed to keep the car from moving on an uneven surface. When the handbrake lever is fixed in the upward position, the cable is tensioned, going to the equalizer, which in turn distributes force to the two rear wheels through two cables. At the moment when the cable is tensioned, the spacers in the drums of the rear wheels move the blocks in different directions, which fixes the wheels, and accordingly the car, in a stationary state.
Like any part of a car, the parking brake tends to fail. If such a situation occurs with your car, then it is necessary to carry out repairs as quickly as possible. Replacing a VAZ 2110 hand brake with your own hands is not a difficult procedure if you have the tools and appropriate skills. Let's look at each element separately.
Signs of a malfunction of the VAZ 2110 hand brake
There are a number of signs that indicate a malfunction of the parking brake system. We list the main ones:
- When the handbrake is pulled on, the rear wheels spin and the car rolls down the hill. The cable is probably loose and needs to be tightened.
- When the handbrake is weakened, the rear wheels jam. This indicates frozen (in winter) or worn out pads. There is also a high probability of a faulty return spring.
- When driving, you can hear squeaks from the rear wheel drums. As in the previous case, the pads jam.
- One of the wheels is blocked and does not rotate (goes skidding). In this case, a spring malfunction is excluded - the problem is inside the drum in one of the wheels.
In most cases, it is enough to adjust the brakes, since the cable tends to stretch and sag. It is also not uncommon to encounter a malfunction inside the drums themselves due to their vulnerability to external factors.
Master cylinder with reservoir
1 – main cylinder body;
2 – low pressure sealing ring; 3 – drive piston of the “left front–right rear brake” circuit; 4 – spacer ring; 5 – high pressure sealing ring; 6 – pressure spring of the sealing ring; 7 – spring plate; 8 – piston return spring; 9 – washer; 10 – locking screw; 11 – drive piston of the “right front–left rear brake” circuit; 12 – connecting sleeve; 13 – tank; 14 – brake fluid emergency level sensor; A – clearance Master cylinder with sequential arrangement of pistons. A tank 13 is mounted on the master cylinder body, in the filler neck of which a sensor 14 for emergency brake fluid level is installed. The high pressure O-rings 5 and the rear wheel cylinder rings are interchangeable.
Adjusting the hand brake VAZ 2110
The first thing you will need to do when a malfunction is detected is to adjust the tension of the handbrake cables. To do this, drive the car onto a pit or lift and follow these steps:
- Place wheel chocks under the wheels and loosen the lever by lowering it down.
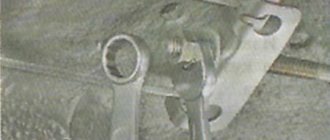
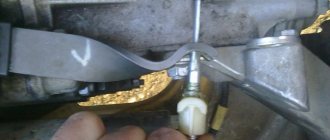
- Loosen the locking nut with one wrench, and use the second wrench to tighten the adjusting nut. Tighten until the cable stops sagging.
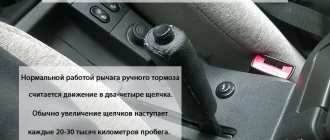
- Check by pulling the lever up - the number of clicks until it is fully tensioned should be in the range from 2 to 4. If this is the case, leave the lever in this position.
- Tighten the locking nut, holding the thread from turning.
- Loosen the handbrake lever and check the rotation of the rear wheels - they should spin without resistance.
The manufacturer recommends tightening the handbrake every 30,000 km.
How do they work?
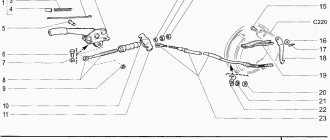
The operation scheme is banal and simple - there is a handle that is connected to a cable, which in turn is in a special braid (that is, the cable runs in it). Then this cable is hooked onto a special adjusting bolt (it can be tightened and loosened), which is engaged with a bar, along the edges of which there are two more cables that go to the two rear wheels. And these cables (extending to the wheels) are engaged with a special bracket, it is this that opens the pads and blocks the drums.
That is, in simple words, when you move the handle up (raise the handbrake), the cable stretches and pulls two separate cables to the wheels. Inside the drums, the brackets are unclenched, which spread the rear pads, due to which the wheels are blocked.
Let's watch a short video and it will become clearer.
Replacing the hand brake lever on a VAZ 2110
If adjusting the handbrake does not help, then it is necessary to replace one of the elements of the handbrake. And one of the possible faults is a broken lever. To replace it, you will need a standard set of tools and 15-20 minutes of time. Place the car over the hole and secure it with wheel chocks.
The first thing to do is disassemble the plastic panel between the seats. Then you need to loosen the cable tension and remove the rod axis located on the lower part of the lever (from the bottom side). After this, unscrew the 4 bolts securing the lever bracket to the car body (10mm wrench). It is very important not to damage the ground wire, which is attached to the body along with the lever bracket.
Replacing the hand brake rod of a VAZ 2110
The parking brake linkage often requires replacement because it is used in conditions of high humidity and dirt. The most common reason for replacing it is a rusty thread, which makes it impossible to adjust the handbrake. To perform the work, you need to lift the car on a lift or drive it into a pit. Next, follow these steps:
- Lower the handbrake lever to the down position.
- Unscrew the adjusting and locking nuts from the lever rod.
- Remove the lever axis by pulling out the pin with pliers.
- Remove the lever rod from the cable equalizer housing.
Installation is in the reverse order. After installation, adjust the parking brake tension.
Replacing hand brake cables on a VAZ 2110
Cables tend to stretch, unravel, rust and get stuck in places where they come into contact with other elements. If such a situation occurs, then they need to be replaced. Replacing the hand brake cable of a VAZ 2110 is a procedure that will take you several hours of time, since to complete the work you need to remove the rear wheels and disassemble the drums. So let's get started:
- Before installation, lubricate the new cables with transmission or any other oil.
- Unscrew the adjusting and locking nuts, thereby disconnecting the distributor.
- Remove the rear wheels, then remove the brake drums.
- Remove the cables from the brake housing.
Install the parking brake cables in reverse order.
Source
Wheel cylinder
1 – block stop; 2 – protective cap; 3 – cylinder body; 4 – piston; 5 – seal; 6 – support plate; 7 – spring; 8 – crackers; 9 – thrust ring; 10 – thrust screw; 11 – fitting; A – slot on the thrust ring
The rear wheel brake mechanism (Fig. Rear wheel brake mechanism) is drum-type, with automatic adjustment of the gap between the shoes and the drum. The automatic clearance adjustment device is located in the wheel cylinder. Its main element is a split thrust ring 9 (Fig. Wheel cylinder), installed on the piston 4 between the shoulder of the thrust screw 10 and two nuts 8 with a gap of 1.25–1.65 mm.
The thrust rings 9 are inserted into the cylinder with tension, providing a shear force of the ring along the cylinder mirror of at least 343 N (35 kgf), which exceeds the force on the piston from tension springs 3 and 7 (see Fig. Brake mechanism of the rear wheel) of the brake pads.
When, due to wear of the linings, the gap of 1.25–1.65 mm is completely removed, the shoulder on the thrust screw 10 (see Fig. Wheel cylinder) is pressed against the shoulder of the ring 9, as a result of which the thrust ring moves after the piston by the amount of wear. When the braking stops, the pistons are moved by the force of the tension springs until the cracks stop against the shoulder of the thrust ring. This automatically maintains the optimal clearance between the pads and the drum.
Purpose and location of the parking brake
The location of the handbrake is known to every VAZ 2110 driver - there is a lever installed between the front row seats, when pressed, braking occurs. The metal cable is a mechanical drive in this unit. By lowering the lever, the driver provides tension on the cable, which presses the rear brake pads to the wheel discs. Breakage of the lever is extremely rare, since the main load falls on the metal cable, as a result, after some time it loses the required tension.
The operation and maintenance manual for the VAZ 2110 states that at least once every six months it is necessary to carry out diagnostics of the brake system, including the parking brake. The traffic regulations have requirements for this unit - it must hold the car at a slope of 25 degrees. If the metal cable is not damaged, and the adjustment does not bring results, then the problem is in the rear brakes - this requires a full diagnosis from specialists.
Vacuum booster
1 – vacuum booster housing;
2 – amplifier housing cup; 3 – rod; 4 – adjusting bolt; 5 – rod seal; 6 – sealing ring of the master cylinder flange; 7 – diaphragm return spring; 8 – amplifier pin; 9 – tip mounting flange; 10 – valve; 11 – hose tip; 12 – diaphragm; 13 – amplifier housing cover; 14 – sealing cover; 15 – piston; 16 – protective cover of the valve body; 17 – air filter; 18 – pusher; 19 – pusher return spring; 20 – valve spring; 21 – valve; 22 – valve body bushing; 23 – rod buffer; 24 – valve body; A – vacuum chamber; B – atmospheric chamber; C, D – channels The rubber diaphragm 12 together with the valve body 24 divides the cavity of the vacuum amplifier into two chambers: vacuum A and atmospheric B. Chamber A is connected to the engine inlet pipe through the check valve of the tip 11 and a hose.
The 24 valve body is plastic. At the exit from the cover, it is sealed with a corrugated protective cover 16. The valve body contains the main cylinder drive rod 3 with a support sleeve, rod buffer 23, valve body piston 15, valve assembly 21, pusher and valve return springs 19 and 20, air filter 17 , pusher 18.
When you press the pedal, the pusher 18, the piston 15, and after them the valve 21 move until it stops against the seat of the valve body. In this case, cameras A and B are separated. As the piston moves further, its seat moves away from the valve and through the resulting gap, chamber B is connected to the atmosphere. The air entering through filter 17, the gap between the piston and the valve and channel D creates pressure on the diaphragm 12. Due to the difference in pressure in chambers A and B, the valve body moves along with the rod 3, which acts on the piston of the main cylinder.
What is needed to adjust the handbrake
To adjust the parking brake, you will need one of the following tools:
In the absence of all these conditions, which any ordinary driver is unlikely to be able to provide, you can get by with support “goats”, which are installed under the rear of the body after it has been raised with a jack. It is also worth considering the presence of two “13” keys and pliers in the set.
Where to start adjusting
VAZ 2110 handbrake does not work
The parking brake adjustment process is as follows:
- the car is placed on an overpass (or a ditch, or generally raised with a jack);
- the position of the brake lever is checked - it should be the lowest;
- Using the first key, the lock nut is loosened, while at the same time holding the adjusting nut with the second key.
- The adjusting nut is tightened until the handbrake cable is tensioned.
Note. When tightening the adjusting nut, the rod must be held with pliers.
VAZ 2110 tighten the handbrake
- Now you should make sure that the full stroke of the lever is from 2 to 4 clicks;
- After the stroke has been checked, the equalizer locknut should be tightened while holding the adjusting nut with a wrench.
- The handbrake lever goes down, after which the rear wheels are turned by hand. Their rotation should occur evenly and without jamming.
Note. If the handbrake drive cable cannot be tensioned during the adjustment process, this part should be replaced.
VAZ 2110 handbrake adjustment
Causes of malfunctions
Now you need to determine why the parking brake or handbrake on the car does not hold.
Many of the reasons are quite simple and common. They can be diagnosed and eliminated in minutes:
The rear pads are worn out. This is one of the most common reasons why the handbrake on a car does not work. With such a malfunction, in parallel, the driver may hear a strong grinding noise when pressing the brake pedal. Tightening the cable will not solve the problem. You'll have to install new pads first
Moreover, it is extremely important to change the pads on both sides at the same time, regardless of the state of the second element on the axis. Incorrect adjustment. Speaking about the reasons why the handbrake does not hold the car in place, it very often turns out that it’s all a matter of adjustment
The adjusting bolt is loose, and therefore the problem is solved by tightening it. Cable jamming in the sheath. This is a problem that is typical after long-term use of the car, that is, it occurs on cars with mileage of more than 5 years. Moisture can gradually penetrate into the cavity between the cable and the sheath. Rust forms and jamming occurs. You can try to solve the problem by disassembling and lubricating the cable, or replacing it as an assembly. Broken cable. A break can occur under the car or directly at the junction with the lever. The issue can only be resolved by replacement. Formation of ice, sticking of salt and reagents on the linings. Not the most common occurrence. But if you drive through puddles in winter and then leave the car in the cold, then such a scenario cannot be ruled out; Oil or brake fluid on the pads. This can happen if the cylinder or oil seal leaks. The brake clutch is insufficient and the fluid causes slippage. First, the leak is eliminated, then the surface of the pad is cleaned. Hydraulic problems. Relevant for vehicles with a hydraulic parking brake. Here the working fluid itself usually leaks out and the required level drops. Partial repair or replacement of components is required.
The reasons may indeed vary. Replacing components is not always the only way out of the situation. But if the pad shows signs of wear and damage, then you shouldn’t count on preventative measures. Replacement only.
Cause of cable failure
Replacing the handbrake lever of a VAZ 2110
The main reason why the handbrake rod breaks, naturally, is the service life of this cable. The fact is that when used, the cable is subjected to constant loads from the forces actuating the handbrake and due to the fact that it is located under the body of the vases, constantly interacting with high humidity, while experiencing a lack of lubrication. As a result, the steel threads that make up the cable simply fray. Also, the reason for the breakdown of the VAZ 2110 hand brake cable may be that during operation, wear of the drums and brake linings of the right and left wheels occurs in an uneven order, causing the corresponding cables begin to lengthen by different amounts and the handbrake simply stops working over time.
Replacing the handbrake lever of a VAZ 2110
The parking brake can also receive mechanical damage after emergency braking of the car, when the driver activates all brake systems. Due to the weakening of the cable tips and its difficult movement in the sheath, breakage is also possible, which leads to the need to replace the cable. In any case, regardless of the reason for the need to replace the parking brake cable, every car owner will sooner or later have to face this problem.
Which cable to choose
When choosing any car part, you must first of all be guided by its compatibility with your specific brand. Obviously, the cable from Chevrolet will not fit the Zhiguli. But there are times when people purchase unsuitable cables.
In our case, it is difficult to confuse anything. The handbrake cable of the VAZ 2114 is exactly the same as that of similar models of the domestic manufacturer. It can be found at any auto parts store. Several manufacturers produce cables, and all are usually of the same quality. This is understandable, the detail is not complicated.
There shouldn't be any problems when choosing. The prices are quite reasonable and there is not much difference. The only thing worth doing is to read on the packaging about compatibility with your car, just in case.
After following all the instructions, you can replace the handbrake cable on VAZ cars yourself. This will have to be done quite often, due to the design features of the brake system and its fragility. Having such skills is always useful. Now you know how to change the parking brake cable on a VAZ 2114.
The handbrake plays an extremely important role in ensuring driving safety. This element of the braking system not only serves to prevent a parked car from rolling, but can also help avoid a traffic accident. That is why it is necessary to always monitor the serviceability of its entire system. Now let's try to figure out how to tighten the handbrake.
Diagnostics and testing of the handbrake on a VAZ-2110
According to the regulations, adjustment of the hand brake is carried out once every 30 thousand km.
However, there are situations when adjustments cannot save the situation. In cases where the handbrake cable is stretched to the limit or when the rear pads and brake drum are worn out, adjustment will not give any results.
The design of the parking brake system of the VAZ-2110 car.
Terms and Conditions
The factory says that under normal operating conditions, the handbrake lever should make 2-4 clicks before the rear wheels are completely locked.
It’s easy to check - find a slope of about 20-25% , tighten the handbrake all the way ( there should be no more than 7-8 clicks ), put the car in neutral. If a car with a normal load holds well on a slope, the system is in good working order, and you can continue to operate. Otherwise, adjustment is necessary.
The exception is those cases when the handbrake cable is torn, soured in the casings or stretched . Then, first, we buy a new cable, and after replacing it and diagnosing the condition of the brake drums and rear pads, we will make adjustments.
If the adjustment does not help
There are not many cases when adjusting the parking brake did not have any effect. However, this is no reason to despair.
It is possible that the handbrake cable has broken. This is a rare occurrence, but all options need to be considered. Especially if your VAZ 2110 is not new. By the way, on newer models the cable also breaks if the car is used very intensively. The braking system is simply not designed for such loads.
Device diagram
There are several situations in which it is necessary to replace the parking brake cable:
- The cable broke;
- The tips gave way;
- The cable threads have stretches, which over time can turn into a full-fledged rupture;
- The cable is difficult to move inside the sheath even after abundant lubrication.
Replacing hand brake cables on a VAZ 2110
Cables tend to stretch, unravel, rust and get stuck in places where they come into contact with other elements. If such a situation occurs, then they need to be replaced. Replacing the hand brake cable of a VAZ 2110 is a procedure that will take you several hours of time, since to complete the work you need to remove the rear wheels and disassemble the drums. So let's get started:
- Before installation, lubricate the new cables with transmission or any other oil.
- Unscrew the adjusting and locking nuts, thereby disconnecting the distributor.
- Remove the rear wheels, then remove the brake drums.
- Remove the cables from the brake housing.
Read also: Audi 80 rack design
Install the parking brake cables in reverse order.
You will need: two 13mm wrenches, a 13mm socket wrench (head), a Phillips screwdriver, and pliers.
1. Disconnect the wire from the “–” terminal of the battery.
3. From the bottom of the car, unscrew locknut 1 and adjusting nut 2 of the parking brake and remove equalizer 4 from rod 3.
4. Remove the protective cover from the hole in the floor and remove it from the rod.
5. From inside the passenger compartment, unscrew the screw of the front fastening of the parking brake warning lamp switch bracket. Please note that the ground wire of the switch is secured with a screw.
6. Remove the four bolts securing the parking brake lever (the two front ones also secure the switch bracket).
7. Set the bracket with the switch aside.
8. Remove the parking brake lever by moving the rod out of the hole in the floor.
9. To replace the rod, remove cotter pin 1, remove washer 2.
11. Replace worn or cracked plastic bushing. Assemble and install the parking brake lever in the reverse order of disassembly. After installing the lever, adjust the parking brake (see “Checking and adjusting the parking brake drive”).
Reference manual for servicing VAZ, LADA 110 cars.
Ignition adjustment 2110. Engine compression for VAZ 2112, immobilizer for VAZ 2111. Valve cover for VAZ 2112, cylinder block gasket for VAZ video. The cost of a generator for a VAZ. replacement of fuses for VAZ 2112, design of the oil receiver for VAZ 2112. oil recommended by the factory for the box of VAZ 2112. replacement of the water pump (pump) for VAZ 2112. Replacement of valve stem seals for VAZ 2110.
Where to start replacing
Replacing the handbrake of a VAZ 2110
First of all, replacing the cable begins with the following operations:
- lowering the handbrake lever all the way down;
- removing the brake disc of the wheel on which the replacement is being made;
- removing the muffler from the suspension cushions, and the resonator from the rear suspension;
- lowering the exhaust system;
- unscrewing the locknut and adjusting nut;
- removing the equalizer from the rod.
- remove the end of the cable being replaced from the equalizer;
- remove the tip of its shell from the bracket located on the car body;
- bend the cable fastening brackets;
- remove the rear brake pad and disconnect the cable end from the lever;
- loosen the nut that secures the cable holder to the rear axle;
- remove the cable first from the holder, then from the bracket, and finally from the brake cleat.
The work ends with the new cable being installed in place in the reverse order to its removal. In this case, it is worth paying attention to the location of the cables in the bracket - it should be crosswise. After installing the part, be sure to adjust the handbrake. Now, knowing how to adjust the handbrake of his car and replace its cable with his own hands, the car enthusiast can avoid contacting a service station, and thus save his money, since the cost of repairs is not low. If instructions for performing all this work are not enough, it is quite easy to find on the Internet both photos and videos showing these processes in great detail.
Parking brake VAZ 2110
The principle of operation of such an element of the VAZ 2110 car as the hand (also known as parking) brake is quite simple. A special cable is used as a mechanical drive for the device.
By pulling the handbrake handle, the driver simultaneously provides tension on the cable, which occurs evenly on the brake pads of each wheel. If the parking brake is faulty, you should carry out work such as VAZ 2110 adjusting the handbrake, or repair it by replacing the cable.
It is noteworthy that it is easy and simple on the VAZ 2110 to both tighten the handbrake and replace it. If the handbrake malfunctions, the driver runs the risk that the car will move on its own or, conversely, will not be able to continue driving after stopping on an uphill slope.
That is why you will have to adjust the handbrake in any case - and this can be done without necessarily going to a car service center. An experienced car enthusiast is able to adjust the parking handbrake of a domestic car on his own.
Malfunctions and their symptoms
Determining that a cable needs adjustment or replacement is quite simple. Signs of a faulty mechanism appear as follows:
- The handbrake is pressed effortlessly - the cable is loose, you need to tighten it.
- The mechanism does not respond to pressing the lever - the drive is torn or flew out, or the reason may be the wear of the rear pads.
- If the handbrake is stuck, the drive is damaged and needs to be replaced.
Important! The parking brake needs to be checked at least once every 30 thousand kilometers. The handbrake must always be applied.
Having taken out the main element, you can visually determine its condition. Replacement is required in the following cases:
- Up to 2% are damaged or torn.
- The cable moves with difficulty even after applying lubricant.
- The drive tips have grooves.
Is adjustment necessary?
First you need to determine whether the adjustment will really solve the problem of the handbrake malfunction.
Adjusting the parking brake
To do this, a small test is carried out. Moreover, it is recommended to do a similar procedure after every 30 thousand kilometers, even if you are sure that the parking brake works well.
Drive your vehicle to an area where there is a slight slope. Place the car on it, turn on the handbrake and shift to neutral. If the car starts to roll down, everything is obvious - the handbrake needs repair.
Pulling up the handbrake
It is likely that you just need to tighten the parking brake on the VAZ 2110 to fix the problem.
- Drive to the inspection hole, from where it is most convenient to make adjustments. Another option is a lift. You'll find something here. This way you can easily get to the necessary nodes.
- Make sure the brake lever is in its lowest position.
- Take two keys. You will loosen the lock nut first and tighten the adjusting nut second.
- Tighten the adjustment nut until the cable is properly tensioned.
- It is strongly recommended to hold the rod when tightening the adjustment nut with pliers.
- Now make sure that the lever makes full travel in 2-4 clicks, no more.
- If after checking everything turned out to be good and the working stroke is correct, tighten the equalizer locknut while holding the adjustment nut with a second wrench.
- Release the handbrake lever down and turn the rear wheels by hand. Rotation should occur evenly without any jamming.
- But if the adjustment did not allow the cable to be tensioned, then the element must be replaced.
How much does it cost to tighten the handbrake and can you do it yourself?
Actually the question is rhetorical, as you understand in different regions, the cost can range from 200 to 1000 rubles. For example, in the capital, the price is often 500 – 1000, but in the regions you can raise it for 250 rubles.
And to be honest, the work itself only takes a few minutes, the main thing is to find a hole or a lift, a key of 10 and off you go. You need to tighten the middle bolt, the one that is in the middle, it is the handbrake, tighten the nut and thereby tighten the cables.
Of course, if they are rusty or torn, then everything is much more complicated; it is better to trust the master, because replacing the cables from the rear drums is not at all an easy task.
That's all, read our AUTOBLOG, I think it clarified the situation.
(11 votes, average: 4.36 out of 5)
Similar news
Rust converter composition. Can I do it myself?
How to unscrew a brake pipe. If it has soured and the edges are torn off.
Anti-squeak plates for brake pads. Why are i needed?
Aspects indicating the need to adjust the handbrake
There are several ways that will help any car owner, without exception, to help with the question of whether it is advisable to adjust the handbrake. It is worth noting that there is no need to check the handbrake every day; it is important to pay attention to this detail every 30 thousand kilometers.
To find out whether the handbrake needs to be adjusted, you need to park your car on a slight slope, then leave the car on the handbrake and put the gear in neutral. If the vehicle slowly but surely begins to move down an incline, then the vehicle's parking brake may not be working properly.
Of course, this problem can be solved by replacing the VAZ-2110 handbrake rod, however, as practice shows, it is quite enough to make a very simple adjustment of this part.
- The travel of a properly adjusted handbrake lever should not exceed 8 clicks. The optimal lever stroke is 6-7 clicks (this number varies depending on the car model; details for a specific VAZ model can be found in the operating instructions supplied with the car).
- After installing the new cable, the rear wheels of the car should be jacked up and try to spin them by hand. Rotation must be free.
- Now the brakes should be checked while driving. You need to drive 30-40 meters, then slow down using the parking brake. After braking, you need to get out of the car and touch the rear brake drum. It should not be hot, its temperature should not exceed the ambient temperature. If the drum gets so hot that it burns your hand, this means that the brake cable is too tight and should be loosened.
- To loosen the cable, you should put the car back on the inspection hole, unscrew the lock nut on the outer tip with a 13mm wrench, and then loosen the main fastening nut. After this, the locknut is tightened again.
- If the brake cable is too slack, it needs to be tightened. All steps are listed above, with one exception: the main nut on the tip should be tightened, not unscrewed.
- To independently check the reliability of the parking brake, you should find a slope with a ratio of 1:5 (that is, 1 meter high and 5 meters long), drive the car onto it, turn off the engine, put the car on the parking brake and squeeze the clutch. After these actions, the machine should remain in place and not roll downhill. If the car does roll, you should tighten the brake cable a little more.
As you can see from our article, there is nothing complicated about replacing a brake cable, and even a novice car enthusiast can do this task. The main thing you should pay attention to in this case is compliance with safety regulations. When changing a cable, it is very easy to get injured or get a chemical burn, so it is better not to carry out this operation alone, but to work together with an experienced auto mechanic.
Where to start replacing
Replacing the handbrake of a VAZ 2110
First of all, replacing the cable begins with the following operations:
- lowering the handbrake lever all the way down;
- removing the brake disc of the wheel on which the replacement is being made;
- removing the muffler from the suspension cushions, and the resonator from the rear suspension;
- lowering the exhaust system;
- unscrewing the locknut and adjusting nut;
- removing the equalizer from the rod.
- remove the end of the cable being replaced from the equalizer;
- remove the tip of its shell from the bracket located on the car body;
- bend the cable fastening brackets;
- remove the rear brake pad and disconnect the cable end from the lever;
- loosen the nut that secures the cable holder to the rear axle;
- remove the cable first from the holder, then from the bracket, and finally from the brake cleat.
The work ends with the new cable being installed in place in the reverse order to its removal. In this case, it is worth paying attention to the location of the cables in the bracket - it should be crosswise.
After installing the part, be sure to adjust the handbrake. Now, knowing how to adjust the handbrake of his car and replace its cable with his own hands, the car enthusiast can avoid contacting a service station, and thus save his money, since the cost of repairs is not low.
If instructions for performing all this work are not enough, it is quite easy to find on the Internet both photos and videos showing these processes in great detail.
At the same time, problems with the handbrake can lead to serious trouble if an uncontrolled car crashes into some obstacle or, even worse, into another car. Let's look at problems with the handbrake and how to fix them yourself without contacting specialists at a service station.
Advice! If the cable tension on the handbrake is insufficient, in addition to the handbrake, the car must be left “at speed”, this will protect you in case of unforeseen circumstances.
When the linings on the rear brake pads wear out and the drive cables are pulled out, a problem often arises in adjusting the handbrake stroke (parking handbrake). The examples that will be described in the article will help to cope with this problem not only for the VAZ-2110, but also for other domestically produced cars.
If the problem cannot be resolved by adjusting and tightening the handbrake, you must immediately replace the faulty part with a new one; there is no need to take unnecessary risks. If the handbrake malfunctions, the car can move on its own, and this is an important factor that this mechanism must be checked regularly and, if necessary, the handbrake must be tightened. It will not be difficult for you to replace the handbrake at home, and you do not need to take the car to a service center.
You should not ignore the condition of the handbrake and periodically check the cable tension; it is recommended to do this after every 30 thousand km. It is quite easy to identify problems with the handbrake; you need to put the car on an incline and put the handbrake on.
If the car rolls down, the parking brake does not work. This problem can be solved by replacing the handbrake, but in most cases simply adjusting or tightening the handbrake is sufficient.
The easiest way to fix problems with the handbrake is to pull it out of the cabin. To do this, you need to remove the protective cover that covers the handbrake, after which we will need a 10mm wrench, which should be used to tighten the tension bolt. This adjustment will allow you to slightly tighten the cable, which is convenient for slight loosening. If such manipulations do not give the desired result, it is necessary to resort to other methods of adjustment.

