Without electricity, nothing will work. So on a car, the voltage in the on-board network is maintained by a generator. You need to understand how many amperes you need in the on-board network.
It all depends on the amount of attachments, air conditioning, heating, etc. Depending on the configuration, a generator is also selected. Read the article to the end and we will cover this topic. Removing and replacing the generator on a Lada Priora car depends on the attachments; if the car does not have air conditioning, then the unit can be removed in 6 steps. If the air conditioner costs 9 steps, we will talk about them in the article. This part on Priora comes in 3 types. Their prices are also different.
Connection diagram for the VAZ-2101 generator
Structurally, generator 2101 consists of the following main elements:
- The rotor is a moving part that rotates from the engine crankshaft. Has an excitation winding.
- The stator is the stationary part of the generator and also has a winding.
- Front and rear covers , inside of which bearings are installed. They have eyelets for attaching to the internal combustion engine. The back cover contains a capacitor necessary to cut off the alternating current component.
- Semiconductor bridge - called a “horseshoe” for its similarity. Three pairs of semiconductor power diodes are mounted on a horseshoe-shaped base.
- A pulley on which the VAZ-2101 generator belt is placed. The belt is V-shaped (on modern cars a multi-ribbed belt is used).
- The voltage regulator is installed in the engine compartment, away from the generator. But still it must be considered part of the structure.
- The brushes are mounted inside the generator and transmit the supply voltage to the field winding (on the rotor).
How to change bearings on a Priora generator
Failure of rolling elements of VAZ electric generators is fatigue wear due to long-term operation. Let's look at how you can replace the bearings yourself.
- Prepare the device for disassembly. Here's what it looks like with the cover removed.
- Unscrew the voltage regulator and disconnect the wires.
- Unscrew the terminals to remove the diode bridge (marked).
- Disconnect the capacitor.
- Unscrew the 4 studs.
- The studs are unscrewed. Lay the device on its side and use two screwdrivers to separate it into 2 parts.
- The top ball bearing will open.
- We turn the generator over and install it on a vice. Warm up the lower ball bearing race (You can try without warming up).
- Usually the seat expands when heated, and the ball bearing easily comes out of it. But it happens that the rotor shaft comes out, but the part remains in the seat.
- In this case, you need to continue heating and tapping the part to knock it off the seat. Don't overdo it to avoid breaking the lid. The ball bearing seating areas should be thoroughly cleaned.
- We remove the upper rolling element from the rotor shaft with a puller.
- Take the dimensions of the removed bearings and buy analogues (information is presented below). You might be able to read the numbers.
- Start installing new parts by preparing the seats. Sand with P1000, P1200 or P1500 sandpaper. Lubricate with graphite grease.
- Open the covers at the p/sh, check for the presence of lubricant.
- Add lubricant, close the covers, turn the part over and fill the other side with lubricant, close the covers. Ball bearings are ready for installation.
- Place the small ball bearing on the rotor shaft. Take a tube of the appropriate diameter so that the blows fall on the outer ring.
- Tap the end of the tube with precise blows of a light hammer. When the part snaps into place, you will feel a harsh kickback. This operation is also performed with a puller, only the legs are installed on top of the end.
- Now insert a large bearing into the cover socket and lightly hit the outer race with a hammer to drive it into the seat.
- When the ball bearing fits into the socket, do not forget to mint the edges of the seat in a circle at intervals of 3-4mm. To do this, select a core with a beveled tip (a small chisel or beard will do).
- We continue assembly in reverse order. We put on the pulley. Do this in a vice. Clamp the rotor poles, put on the pulley and tighten the nut tightly. There is no key on the shaft, so apply force to ensure the pulley fits snugly.
- Pay attention to the outer and inner washers. They may vary. When removing the pulley, it is advisable to make a mark so as not to mix it up during assembly.
Connection diagram for the VAZ-2107 generator
1 - battery; 2 - negative diode; 3 - additional diode; 4 - generator; 5 - positive diode; 6 - stator winding; 7 - voltage regulator; 8 — rotor winding; 9 — capacitor for suppressing radio interference; 10 — mounting block; 11 — battery charge indicator lamp in the instrument cluster; 12 - voltmeter; 13 — ignition relay; 14 - ignition switch.
Connection diagram for the VAZ-2108 generator
The VAZ-2108 generator has a rather massive stator winding, since it uses a large cross-section wire. It is with its help that electricity is generated. The wire is wound evenly over the entire inner surface of the stator into recesses specially provided for this purpose in the magnetic core. It’s worth talking about the latter separately. The middle part, the generator stator, consists of a series of thin metal plates pressed tightly together. They are often boiled on the outside to prevent separation.
Connection diagram for the VAZ-2109 generator
- Alternator. The 37.3701 or 94.3701 series can be installed.
- Negative diode.
- Additional diode.
- Positive diode.
- Alternator warning lamp, also known as battery discharge lamp.
- Instrument cluster.
- Voltmeter.
- Relay and fuse box located in the engine compartment in the compartment between the engine and the vehicle interior.
- Additional resistors built into the fuse mounting block.
- Ignition relay.
- Egnition lock.
- Accumulator battery.
- Capacitor.
- Rotor winding.
- The voltage relay is located in the engine compartment.
Connection diagram for the VAZ-2110 generator
On VAZ-2110, 2111 and 2112 cars, a 94.3701 generator was installed with a maximum output current of 80 Amperes and a voltage = 13.2–14.7 Volts.
Here is a breakdown of the connection diagram for the generator on the ten :
- Battery 12V;
- generator 94.3701;
- mounting block;
- egnition lock;
- battery charge indicator lamp in the instrument cluster
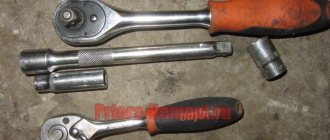
Preparation and necessary tools
It is more convenient to remove the generator on a Lada Priora on an overpass or inspection hole. Before you begin dismantling, prepare the following tools:
- locksmith's crank;
- extension;
- cardan from the tool kit;
- heads for 10, 12, 13, 17;
- spanners for 10, 12, 13, 17.
- WD-40 product.
This is interesting: On the way to a “perpetual” engine When you drive onto a pit or overpass, do not forget to install chocks under the wheels so that the car does not roll spontaneously. Then disconnect the negative terminal from the battery. Apply WD-40 to the mounting areas of the generator and air conditioning compressor. Wait 10-15 minutes for the product to take effect.
How to check the generator yourself
How to check a VAZ generator using the example of model 2109. Generator type 94.3701 alternating current, three-phase, with a built-in rectifier unit and an electronic voltage regulator, right-hand rotation.
Generator connection diagram . The voltage to excite the generator when the ignition is turned on is supplied to terminal “D+” of the regulator (terminal “D” of the generator) through indicator lamp 4 located in the instrument cluster. After starting the engine, the excitation winding is powered by three additional diodes installed on the generator rectifier block. The operation of the generator is controlled by a warning lamp in the instrument cluster. When the ignition is turned on, the lamp should be on, and after starting the engine, it should go out if the generator is working. If the lamp is brightly lit or glows half-lit, it indicates a malfunction.
The “minus” of the battery should always be connected to ground, and the “plus” should always be connected to the “B+” terminal of the generator. Failure to turn the battery back on will immediately cause increased current through the generator valves and damage them.
It is not allowed to operate the generator with the battery disconnected. This will cause short-term overvoltages to occur at the “B+” terminal of the generator, which can damage the generator voltage regulator and electronic devices in the vehicle’s on-board network.
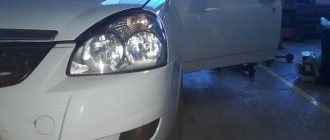
How to Remove a Generator on a Priora With Gur
Removing and replacing the Priora generator: symptoms, devices, diagrams
After visiting the car, the owner of Lada Prior may wonder how many components need to be disassembled to get to the generator. The technicians will explain that VAZ 2170 air conditioners and power steering models require a special approach. But in fact, the replacement is not as difficult as the service center employees describe. It will take just over an hour to take your time and enter a new block. To help you understand what we are talking about, we have prepared additional materials: wiring and alternator , car tags. We also recommend that you study the section that describes how to install a generator on Prioru.
Circuit and device
The alternator diagram shows how the device is connected to other parts of the car. Air-conditioned Lada Priora and GUR received model 5102.3771, which has a number of advantages over previous generations. An increase in power at low engine speeds is one of the advantages of the device: the rotor speed decreases over time by 300 minutes, and the output power increases by 4-6 A. This innovation allowed the use of a box-type machine, and also increased the yield for the winter.
The diagram shows that the operation of the device is controlled by a warning light that is mounted on the dashboard. When you turn on the ignition key, the lamp should light up after starting. Come out. This is how a working generator
. If the light stays on while the engine is running, it means the unit is malfunctioning, the diagram will help you understand.
Once the circuit is understood, you can move on to the parts of the generator.
Symptoms of malfunction
On car forums, you can often notice Lada owners complaining about air conditioning as the flow increases. You should immediately be able to tell that the current is not increasing. it's about tension. If the devices indicate that the generator is too strong, you should look for the problem in the relay. Electrical defects include burning or wear of the brush, damage to wiring and windings, damage to the controller relay (high current), defects in the operation of the diode bridge. As for mechanical problems, these include worn springs and bearings, damaged belts, or damaged housings.
Source
Replacement and removal of the electric generator
The generator on a VAZ car is removed either for complete replacement in case of failure or to carry out repair work to replace faulty parts. To perform dismantling, prepare a standard set of tools; it is advisable to drive the car into the inspection hole.
- Disconnect the battery.
- Remove the protective rubber cap from terminal “30” and unscrew the nut and remove it from the wire stud.
- Disconnect the block with wires from the generator connector.
- We loosen the tightening of the generator to the adjusting bar, then lift it all the way up to the cylinder block and remove the belt from the pulleys.
- Completely unscrew the bolt securing the adjusting bar to the cylinder block, then from the bottom of the car unscrew the 2 bolts securing the lower bracket to the block and remove the generator, pulling it out of the engine compartment.
The generator on any vehicle, including the Lada Priora, is designed to power electrical equipment while driving. Much depends on the performance of this unit, and its breakdown will lead to the fact that the equipment will not be able to work correctly. Learn more about the design, malfunctions, and installation of the mechanism from this article.
How to tension the alternator belt
When checking whether the belt is tensioned on a Priora car, keep in mind that marks are applied to the camshaft pulleys. Rotate the crankshaft until the marks on the camshaft pulleys coincide with the cutouts on the reverse side of the drive.
With normal timing tension, the protrusion of the inner sleeve of the tensioner pulley should coincide with the opening of the outer race. If the belt is in good condition and the marks do not match 1/2 of the reach width, the tension should be adjusted.
- Loosen the bolt holding the tension roller.
- Make sure the cutout of the roller aligns exactly with the protrusion on the back of the roller bushing.
- Using wrench 15, tighten the tensioner pulley bolt.
- Simply put, to tension the belt, the generator roller needs to be turned in the opposite direction clockwise.
Which generator is better to install?
Regardless of which generator is installed on the Priora, the owners of these cars often replace the unit due to the fact that not all devices allow connecting various equipment to the on-board network. Which manufacturer is good and which device is better to install on the Lada Priora?
You can supply generators of the following brands:
- BATE 90 ampere;
- KZATE 115a;
- BOSCH 120 amp;
- devices manufactured by VAZ for 120 or 115a.
Generator unit for Priora
In principle, other models of generator devices for domestic cars can be found on sale. When purchasing, the main thing is to check the integrity of the unit so that there are no signs of damage on the body. It is better to use high power so that there is a power reserve, thereby the device will last longer. In addition, it should be taken into account that it is not recommended to install less powerful generators, especially if many devices are connected to the vehicle’s on-board network.
How to remove a generator on a Lada without air conditioning
If you do not have additional equipment installed, replacing the Priora 16 valve generator will be a little easier, since there will be more space under the hood.
- Remove the negative terminal from the battery.
- Remove the protection from the engine.
- Unscrew the nut on the belt tensioner (not completely, a maximum of four turns). Now you can turn it around by turning the screw a little. When it is loose enough, you can remove it.
- Remove the protective cap to later remove the terminal from the wiring harness. Now you can remove the wiring block.
- Remove the nut to remove the top mounting bolt, then do the same with the bottom mounting bolt.
- Remove the belt and then the entire generator.
Since in advanced configurations with air conditioning the belt on the generator is longer, then if it is necessary to replace it, you need to remember some subtleties. Especially if you feel that the quality of grip on the rollers has become much worse, then you will have to re-tension or change them. The first thing that indicates a problem is a whistle, a clear decrease in the battery charge level, even if it should be fully charged. New batteries can be ordered here: https://www.rimir.by/products/car/akkumulyatory-95/. In this case, first of all, you should look at the belt to see if it is elastic, if there are any third-party cracks on it.
Replacing the Priora 16 valve alternator belt should be done after 60 thousand kilometers, or once every two years.
Possible malfunctions and ways to eliminate them
The operation of Lada Priora generating devices may occasionally fail.
For what reasons may a generator from Priora not work correctly:
- Elements F12 have burned out on the fuse diagram. In this case, the devices on the dashboard will stop working, and the lamp will not light up when the ignition is turned on. Replacing the part will solve the problem.
- There has been a break in the power supply circuit of the instrument devices; the symptoms will be similar to those described above. To fix the problem, you need to check the connections, as well as the contacts from the orange wiring.
- The ignition switch refuses to function. Regardless of what kind of lock it may be, it needs to be changed.
- Souring or wear of the mechanism brushes, oxidation of slip rings. Symptoms of malfunction will be the same. To solve the problem, you need to change the voltage regulator on the Lada Priora, and also clean the contacts. Many priority drivers today use a three-level voltage regulator - three levels allow you to always control the voltage level in the network.
- The excitation winding leads have broken. The problem can only be solved by replacing the rotor of the unit.
- If the drive belt slips, the battery discharge lamp will indicate this - adjusting the tension will solve the problem.
- Another reason why the Priora Lux generator may be faulty is damage to the valves of the rectifier device. The block itself will have to be replaced.
- The battery discharge lamp may appear when the diode batteries of the excitation winding are damaged. In this case, the rectifier unit will also have to be changed.
- A short circuit or break may occur in the stator winding - it will be necessary to repair the latter or install a new one instead. Also, the stator needs to be changed in case of an interturn short circuit or a short circuit to ground.
- The bearing elements have worn out - the car owner will be informed about this by third-party sounds when the generator unit is operating. In the video below you can familiarize yourself with the procedure for repairing a mechanism at home (the author of the video is Repair and Tuning).
Anchor malfunction.
Another common malfunction of a modern generator is wear of the armature slip rings. This is due to their small diameter and high armature speeds. On old-style generators, the rings had a larger diameter, and the armature rotated at a lower speed and therefore were less subject to wear, but the wires of the armature winding could fall off in them, which also leads to malfunction. To check, you can connect a test lamp in series with the power source and slip rings, or measure the resistance between them. The lamp should be lit when connected, and the resistance value should be about 0.5 - 2 Ohms. Upon visual inspection, the slip rings should not be worn.
All these recommendations are just a small part of the malfunctions that most often occur in operation. If the check fails to determine the malfunction, you must contact the service for a complete, professional diagnosis and repair of the generator.
“If you notice an error in the text, please highlight this place with the mouse and press CTRL+ENTER” “If the article was useful to you, share the link to it on social networks”
Removal and installation instructions
As practice shows, the main reason why a unit fails is the connection of various electronic devices to the car’s on-board network. Many energy consumers need high voltage generators. Therefore, when purchasing a node, you need to consider how many devices will connect to it. If you take a 115A or 120A mechanism, this will be the most reasonable choice for cars “stuffed” with electronics.
Find out more about dismantling and installation below:
- To perform the work, you will need a 13 key. First of all, you need to disconnect the battery.
- In accordance with the operating instructions, dismantle the mechanism drive belt. After this, you can disconnect the wiring block from the D+ connector on the device.
- Then you will need to move the rubber boot and unscrew the nut. Having done this, you can disconnect the wiring from the terminal pin.
- After these steps, unscrew the nut of the screw of the lower clamp of the assembly to the special bracket. The nut itself can be removed with a spacer sleeve.
- Next, remove the retaining screw. After this, the nut securing the assembly to the upper mount can be completely unscrewed. The adjusting screw also needs to be completely unscrewed, then remove the tension bar.
- After completing all these steps, you can remove the mechanism from the machine. The unit is being repaired with the replacement of all necessary elements. After the repair is completed, the generator can be put back in place; the installation procedure looks identical to dismantling, only all steps are repeated in reverse order. After installation, it is necessary to adjust the strap tension. If the belt is not adjusted, this may cause the mechanism to malfunction. After all the actions completing the repair procedure, the tension bar fixation nut must be tightened to a torque of 20 Nm.
Causes of problems
Lack of power supply may be due to mechanical damage or disturbances in the electrical device of the generator.
- body deformation;
- violation of fixation (breakage of fastenings);
- wear of bearings, springs, couplings and other components.
Electrical problems on Lada Priora:
- interruption of the electrical circuit in the winding/short circuit;
- relay failure;
- disturbances in the conductivity of the diode bridge current;
- wear of carbon brushes;
- armature plate deformation/short circuit.
It’s good if the damage turns out to be minor, for example, wear of the carbon brushes. Then replacing them will solve the problem. In some cases, only a new unit can correct the situation. To replace the brushes, you can get by with freeing access to the dynamo without removing it, but replacement requires the complete dismantling of the equipment.
Given the differences in models, there are also nuances in removing the generator.
Video “How to repair a Priora generator with your own hands?”
Detailed information and recommendations regarding the repair of the generator unit from the Lada Priora car are given in the video below (the author of the video is the Do-It-Yourself channel).
If the generator is seriously damaged, it does not have to be repaired, but completely replaced. Parts necessary for repair may be missing, or the breakdown may not be repairable at all. Meanwhile, the on-board voltage and the quality of battery charging depend on the good operation of the power unit. It's a shame when, despite a good motor, electrical equipment does not work properly.
And if we are talking about VAZ cars, then sometimes a replacement is in demand due to the lack of power of standard devices. Modern automakers offer many additional devices that increase the level of comfort when traveling, but they also consume a large amount of electricity, and old devices cannot cope, so they have to be replaced with more powerful ones.
Many people are interested: which generator to buy if they have a VAZ? Here you need to consider them separately by model, so before you go shopping, read the recommendations of specialists and compare them with your wishes and capabilities.
Removing a generator with air conditioning
Let's start with the fact that if the air conditioner is Panasonic, then you do not need to remove the compressor along with the generator, but if it is Halla, then you cannot do without removing the compressor. The procedure for removing the generator in this case consists of the following steps:
- First, the engine protection (8 or 16 valves) is removed.
- Next, remove the compressor drive belt (if necessary).
- After this, the generator contacts are disconnected.
- Next, the engine compartment mount is unscrewed, after which the bolt is pulled out.
- Then, if the compressor is removed, then it must be moved down and then to the right.
- Then the bolt with the metal sleeve is pulled out.
- Only then can you remove the generator down the engine compartment.
It should be noted that during this procedure, a problem with the engine bolt often arises. It happens that it is installed with the head down, which is why it is not possible to remove it completely. The fact is that it rests against the engine mount, which prevents removal of the generator. In this case, you need to jack up the engine and carefully remove the cushion. If this cannot be done, then it is advisable to replace the bolt with a new one. It must be positioned with the head facing outwards, then there will be no problems with removing the generator.
To summarize, we note that removing the generator is a long and serious procedure. In order to do everything correctly, you need to have skills and knowledge. If you doubt your abilities, it is better to contact the craftsmen who will quickly and efficiently remove the generator cover with or without steering wheel, replace these parts, and also completely put in order any car, whether it is a luxury class or not. If you have certain knowledge, you can safely carry out this work, following the instructions. Moreover, this page is accompanied by a video that will help you remove the generator on your Priora yourself.
Source
Generators for VAZ 2106 and 2107
The generator on the VAZ 2106-2107 costs the same as on the VAZ 2101 - G221. If you install additional external current consumers that operate constantly, this will lead to undercharging and insufficient current will be supplied from the relay regulator. These additional devices include:
- powerful audio systems;
- fog lights;
- TV;
- preheater;
- additional heater;
- fridge.
Any similar device will lead to greater power consumption and, consequently, to premature battery discharge, even when the engine is running at high speeds. Standard devices for 2106 were developed a long time ago and are not designed for modern energy-consuming add-ons.
In this case, it is recommended to replace the standard generator with a more powerful unit.
What to install?
G 222
If you need to increase the current power, then, when deciding which generator is better to install on the VAZ 2106 or 2107, instead of the standard one, take the G 222, which was installed on the VAZ 2105, Nivakh. It would seem that it itself is no better than the standard one on the “six”, but you can take an upgraded version that will be more powerful. Unlike the 221, this unit is designed with a built-in regulator relay, assembled into one unit with brushes. The G 221 gives an output of 42 A, and the 222nd - 50 A. Increasing the cross-section on the rotor winding increases the power, although the design is completely similar to the G 221. However, to install it on the 2106 you will need minor modifications. The easiest way is to install brushes from G 221. They fit perfectly in place of the relay. This modification is quite feasible even for car enthusiasts who do not have the skill.
It can be installed on a VAZ 2106 G222 with a standard regulator, but then it is necessary to change the connection diagram of the electrical machine.
On 2107 everything is installed without problems.
Check the voltage at medium engine speeds at the battery terminals, if it is 14 V at 2500 rpm, then everything is fine. You can drive with a more powerful unit by connecting additional options.
Generator 2108
This installation has greater efficiency, delivering a current of 55 A. It is installed on both 2106 and 2107.
The mount is identical to the standard ones, there are no problems during installation. Just remember to remove the battery terminal. You'll have to tinker with the connection to 2106. There are 4 wires going to the standard device. On the “eight” - three, since the voltage relay is built-in. To get a good result, insulate the black wire, connect the rest according to the standard system. The light bulb - the discharge indicator will light up when the generator is running, and will go out if there is no charging.
It is useful to make some more minor modifications. Instead of the old relay, install a regular power one. Then the light comes on only when the engine starts and at low speeds.
On 2107 you only need to add a power relay.
2107-3701010
An even more powerful installation is from the VAZ 2107i, producing 80 A, which can also be installed on the VAZ 2106–2107. With such equipment it is possible to install any electrical systems. For VAZ 2106 only 2107-3701010 is suitable; You can use any generator of this series for the carburetor “seven”.
No recharging of Lada Priora battery (VAZ 2170, 2171, 2172)
Checking electrical equipment
| See all advertisements in the archive |
| 1. Check if the alternator drive belt is broken. If a break occurs, replace the belt and adjust its tension (see “Replacing the alternator belt”). |
| 2. If the belt is intact, check and, if necessary, adjust its tension (see “Generator belt tension”). |
| 3. If the belt tension is normal, check to see if fuse F1 in the fuse and relay mounting block has blown. The location of the fuses and their ratings are indicated in this manual (see “Electrical faults”), in the vehicle repair manual, in the electrical diagram, on the housing of the mounting block and on the fuses themselves. If the fuse is blown, replace it, start the engine and check to see if the low battery light goes out. If the light goes out, you can continue driving. |
5....to the starter...
| 4. If the battery discharge lamp does not go out, check the wires connected to the positive terminal of the battery... |
| 6. ...and to the generator. Wires may be broken, broken inside the insulation, or have oxidized or unreliable contacts. Correct the problem and start the engine. If charging current appears, you can continue driving. |
| If, after taking the measures, the charging lamp continues to light up while the engine is running, then the possible cause of the malfunction lies in the generator itself. There may be several reasons, and it is better to eliminate them in a car service center or garage, and you just have to hope that the energy reserve in the battery is enough to get to them. |
| Recommendation |
| In order to reduce current consumption when driving a car with a faulty generator, if possible, turn off the radio, unnecessary lights, heater fan, window defroster, etc. |
| You will need: flat-blade and Phillips-blade screwdrivers, a 12" wrench (two), a DC voltmeter, a megohmmeter. |
| 1. Remove the rubber boot and connect the “+” wire to the “B+” terminal of the generator, and the “–” wire to the generator housing. |
| 2. Start the engine and turn on the car's headlights. |
| 3. After 15 minutes of engine operation at medium speed, measure the voltage; it should be in the range of 14.4–15.1 V. If undercharging or overcharging is observed (the voltage does not fall within the specified limits), replace the voltage regulator. |
Description Identification numbers Keys Dashboard Instruments Trip computer Heating and ventilation Ventilation control Lock control Control of power windows Using seat belts Airbags Child seat Adjusting seats Adjusting the steering column Using mirrors How to shift gears What to carry Starting the engine Malfunctions when starting the engine Checking the ignition Checking the fuel supply Injection faults Lost idle If the engine runs unevenly Inspect the spark plugs Jerks while driving Does not accelerate Stalls while driving Loss of oil pressure Engine overheats No battery recharging Engine knocks Suspension knocks Gearbox knocks Causes of knocks and noises Steering wheel vibration Brake problems Replacing a wheel
priora-vaz.ru
Lada Priora - generator replacement
The Priora requires a powerful generator; the car has a lot of electronics and a weak installation cannot cope with it.
A generator labeled 5102.3771 is recommended for the Priora, providing a power of 80 A; on luxury versions with even more electronics, a 115 A device is installed. Then which generator is better to install on the Priora?
Car owners recommend a unit produced by KZATEtm Samara plant under number 9402.3701-14, producing 115 A.
There is no need to modify it during installation, you just need to find the connector, because there are differences from the standard one. You can use a plug from a VAZ-2108 from the limit switch for turning on the reversing lights, which costs only 20 rubles.
Next, you will have to make a little modification when connecting to the “B+” power terminal in order to fit it to the desired size.
The cost, of course, of domestic units is higher than that of Chinese or Bulgarian ones, sold for 2200 and 3000, respectively. For Russian ones they ask for about 4000. But if you need repairs with Russian-made components, you can easily find spare parts.
What bearings are on the Priora generator (VAZ 2170): size, price, article number
We have already figured out how to replace failed parts. Now it remains to understand which bearing is better to buy. There are different generators on Priors - 115A or 90A. The second is for a less powerful car without air conditioning and power steering. Ball bearings have a number (marking). The front element is 6303, the rear element is 6202.
There are a lot of both original and non-original spare parts on the market:
- Front ball bearing 6303: FAG 6303 2ZR (Germany), SKF 6303-2Z (Sweden), KOYO 6303 ZZ, CM (Japan), NTN 6303 ZZ (Japan).
- Rear ball bearing 6202: FAG 6202-С-2HRS, SKF 6202-2-RSH, KOYO 2RS, NTN; 6202LLU.
In addition to the bearings listed above, below is a table that will help you navigate the offers on the market and select the best quality part:
Which generator is better to put on a VAZ 2110
VAZ 2110 factories install KATEK generators with a current of 80 A. The service life is 140,000 km, which is approximately 10 years of vehicle operation. Answering the question of which generator is better to install on the VAZ 2110, experts recommend products from Russian manufacturers.
What to consider when choosing
- Russian manufacturer or foreign? Of course, first of all, Russian manufacturers are preferable. If only because it is easier to find spare parts in the event of a minor breakdown. If you purchase a generator for a VAZ 2010 from a not so popular company, it may be difficult to find spare parts, and they will not cost you so much.
- Current strength. Factory models for VAZ 2010 - 3771 or 94.3701 - are designed for 80 A, this current is enough, even if there are additional devices that consume it. More powerful ones - 120 A - are installed in the presence of powerful acoustics, no harm is done to the battery, and you will provide all energy consumers with uninterrupted current.
- It is better to purchase a generator if there is a warranty on it. There may well be a defective product, and the warranty will provide the opportunity to replace it with a new one.
Generator Manufacturers
It is best for 2010 to purchase a standard generator from KATEK or KZATEtm Samara plant, and about 50% of owners do just that, according to statistics. They are reliable, cope perfectly with their functions, creating the necessary tension.
Among the foreign-made generators, we can recommend Bosch, Delphi and Denso, which are also reliable and popular.
Generator bearings Lada Priora: diagnostics and signs of malfunction, causes
The following circumstances may indicate that it is necessary to replace the generator bearing:
You can diagnose the malfunction as follows:
- remove the belt;
- start the engine and listen carefully. If nothing buzzes, then the sound came from the ball bearing;
- move the pulley. If there is play, it must be replaced.
These videos will help you understand the diagnostic procedure:
The Priora generator bearing is noisy:
Whistling in the electric generator and overheating:
How the electric generator hums:
How to check generator bearings:
Where is the generator located at Priora - the device of the VAZ 2170 unit
The unit itself for a car with air conditioning (or power steering) looks like this:
- Drive pulley for additional elements;
- Tension roller;
- Mounting the right side of the engine;
- Electric generator pulley;
- Air conditioning blower pulley.
If a VAZ Priora without air conditioning (or without power steering), the configuration changes slightly and looks like this.
During disassembly, you will have to disconnect the belt and remove the engine protection. The belt tensioner will need to be replaced. There is also the option of dismantling the part through the car headlight. Below we will describe in detail how to change bearings in a generator, including the process of dismantling, disassembling the electric generator itself, and installing new elements.
Generators for VAZ 2114
The generator initially built into the 2114 is low-power, and if it also breaks down and you decide to purchase a new one, the question arises: which generator is better to install on the VAZ 2114? It is important here that the unit is more powerful, but there is no need to change the fastenings.
- The most successful replacement option for a VAZ 2014 is a generator from a Priora or Kalina with air conditioning. This installation has a power of 115 A, which is 35 A more than the characteristics of the units.
Installing these generators for 2014 usually does not cause problems, however, it will be necessary to replace the pulley, but it only costs about a hundred rubles and is not difficult to find.
- The Eldix brand generator also has a power of 115 A and works well. The disadvantage is that it is almost impossible to find spare parts, and even if there is a minor breakdown, you will have to replace the entire generator instead of repairing it.
Please note that a lack of charging voltage can occur simply due to oxidation of the battery terminals; keep an eye on them by cleaning them regularly.
Replacing Priora generator brushes
The relay regulator is made together with brushes. At first I removed the generator to replace the relay regulator, but this task turned out to be quite labor-intensive due to the inconvenience of its location, especially the Priora with air conditioning and the hose prevents me from doing this. The second time I did not remove the generator.
I disconnected the wires. I took off the back cover, it is secured with three latches on the sides, you just push them out and the cover can be easily removed
Removing the relay regulator was also not difficult, just unscrew the two mounting bolts and disconnect the connector from the relay regulator contact.
Putting everything back together wasn't too difficult either. The photo shows the relay regulator after I trimmed the contacts with sandpaper and then put it in place. It turned out to be in working order, but I had already purchased a new relay regulator. For some reason, brushes often fail, especially when you encounter this problem in winter, apparently this is due to high energy consumption due to the heater and loads when starting a cold engine.
And now when the prior generator does not charge, I first check the brushes
Generators for VAZ 2115
VAZ 2115, created on the basis of the “nine”, adopted the main components and assemblies from it. Accordingly, there are also many problems with equipment. If the car has a carburetor engine, it can be equipped with a 55 A generator 37.3701, which differs from the above in the mounting method. However, this voltage is not enough for the constant use of modern audio systems, fog lights and other energy-consuming options. Which generator is better to install on a VAZ 2115 - car owners definitely recommend installing it with a power of at least 80 A. Now on the VAZ 2115, as well as on 2113-2114, three-phase 94.3701 with an output of 80 A are installed.
For more power, you can install a 90 A Priorov generator KZATE 9402.3701 in 2015, which is suitable for the mounting and pulley. A reliable unit will provide you with the necessary energy for any number of energy-consuming devices.
Summarizing the above, it can be noted that when buying a generator at a VAZ to replace a broken one or to increase power, it is better to choose Russian models, since they are most suitable in design and you will not have to carry out expensive modifications. In addition, you will always find the necessary
The best prices and conditions for the purchase of new cars
see also
Comments 28
Up to 5 kzata only and can be bought at 115A. From more or less the norms of the gene and for which spare parts can actually be purchased. The gene can be repaired ad infinitum. It's a personal choice for everyone.
Cheaper and better to repair the old one
Just don’t take StarVolt with that shit (((
I went to see an electrician I know, he dissuaded me from changing the gene, they dismantled this one, for some reason the gene is rated at 80 A, the result was replacing the diode bridge, bearings, regulator relay, they installed a three-level one again, a total of 1700 spare parts and plus a thousand labor
For Bosch you can look at me: www.drive2.ru/l/498569150642258086/ www.drive2.ru/l/498722807392239625/ Now it holds 13.9-14.2 at idle and a little lower under load.