Changing car gears is a standard process that every driver has brought to automaticity. Therefore, every step of this process should not be spoiled: the gears should be engaged the first time, and the lever should lie comfortably in the hand. Comfort will largely depend on the gearshift lever, which the driver holds most of the time behind the wheel. Replacing the gearshift knob itself is not difficult, but you need to know how to do it.
The gear shift mechanism on a Priora car changes not only due to wear: it is considered an important element of the interior. Therefore, it can be replaced with something else. For example, remove the gear knob from Priora 1 and install a part from Priora 2. Any tuning is possible - instead of a standard part, you can put any one. It can be supplied from a new car, or from any other car - modern capabilities will allow you to make an “adapter” for any lever.
Standard gear knob - article number and price
The gear knob on a Priora, the price of which is quite reasonable, differs for different generations of the car. After restyling, the internal appearance of the Priora really changed, and even the gear shift lever changed in appearance. It has become a small detail against the backdrop of all the changes, but for many the part from Lada priora 2 remains more preferable when the time comes to replace the gear shift mechanism.
Dorestyling
The pre-styling mechanism consists of the following main parts
- Gear shift lever – 2110-01703088-00, price – 200 rubles;
- Pressure plate – 2110-01703238-00, price – 30 rubles;
- Protective cover – 1111-01703200-00, price – 200 rubles.
Restyling
The restyled gear shift mechanism consists of spare parts included in the following list:
- Handle overlay – 2170-01703124-00, cost – 50 rubles;
- Gear shift lever - 2170-01703088-00, cost - 250 rubles;
- Protective cover – 1111-01703200-00, cost – 200 rubles.
To remove the gearshift lever on a VAZ 2110, follow these instructions:
- Remove the engine splash guard.
Disconnect the ball joint from the lever or remove it altogether.
We hold the extension with a “24” wrench and use a wrench of the same size to unscrew the extension nut.
Next, knock out the bolt and remove it.
Using two “19” keys, unscrew the nut from the bolt that secures the lever to the body.
We remove the lever from the bracket, having previously knocked out the bolt.
The next step is to remove the washer from the stretcher, as well as the lever.
Behind the large washer on the extension there are three washers for adjusting the angle for the longitudinal inclination of the steering axis.
To unscrew the brace from the cross member of the front suspension, use a pair of 24mm wrenches, unscrew the nut, remove the washer and remove the brace from the silent block.
Do you know about the main malfunctions of the manual transmission knob?
The device, together with the gear shift mount, is quite simple. There are several basic faults that can be corrected or simply repaired part of the box drive. Malfunctions of the gear shift knob include the following:
- External signs of wear. The part itself can wear out quite well, lose its color and become “greasy”. This is unpleasant, because this appearance ages the interior, and the lever itself becomes unpleasant to hold in your hand.
- Torn cover. The cover will collect all the dust along with small grains of sand so that they do not get inside. If the cover breaks in at least one place, all the dust will fall down. It will interfere with the standard operation of the Priora gearbox mechanism, so that over time, signs of a malfunction of the large mechanism will appear.
- The gearshift knob dangles like a play. First of all, such play interferes with correct and quiet gear shifting.
The easiest way to eliminate rattling gear lever is to install a spring
The simplest solution would be to install a spring that will hold the gearbox lever and prevent it from vibrating and making an unpleasant rattling sound. The best part about this modification is that we don’t have to disassemble anything! The photo below shows how to install the locking spring (and they also say that you can wrap the gearshift lever with a medical tourniquet along with the spring for a tighter fixation).
A more reliable way to combat gearbox rattling is to install plastic or rubber washers on the gearbox axle. True, this method takes a little longer and requires a little disassembly.
In order to install rubber or plastic washers on the gearbox axle you will need:
An ordinary plastic lid from a glass jar (or any soft plastic);
- Scissors;
- Key for 10 and 13;
- File; Screwdriver.
First, you need to remove the casing from the gearshift knob and lift it up (there is no need to remove the gearshift knob itself). Then unscrew the nut by 13 (the photo below clearly shows where it is located).
Then use a Phillips screwdriver to unscrew the screw (see photo below).
After this, unscrew the two nuts by 10 (see photo below).
We remove the bolt, bushing and washers and generously lubricate them with thick lithol (photo below).
You need to cut a washer out of plastic to fit the sleeve. After this, we return the entire gearbox mechanism to its original position by adding two plastic (or rubber) washers to the small slots along the edges (photo below).
The washers, as can be seen in the photo above, must be inserted to the right and left of the bushing (the bushing will, apparently, have to be sharpened a little).
Manufacturers and prices of analogues
Gear shift levers are also produced by other manufacturers:
- Sphere AutoBra 2138-K (together with a leatherette cover, with red inserts) – 390 rubles;
- Sphere AutoBra 2138-SR (together with a leatherette cover, completely black) – 390 rubles;
- Sphere AutoBra 2140-CH (together with a leatherette cover, black, perforated surface) – 450 rubles;
- Sphere AutoBra 2141-Sr (together with a leatherette cover, the lever itself is gray) – 400 rubles;
- Azard KPP-00132 (black set with genuine leather frame) – 480 rubles.
Repair of gear shift lever VAZ 2170 Priora
- Repair manuals
- Repair manual for VAZ 2170 (Priora) 2004+.
- Gear shift lever repair
The gear shift lever should turn freely and without jamming in the ball joint.
Otherwise, check and replace the ball joint and spherical washer if necessary. If, after pushing down all the way, the lever does not return completely to its original position, check and, if necessary, replace the spring. Remove the floor tunnel lining (see “Removing and installing floor tunnel linings” ).
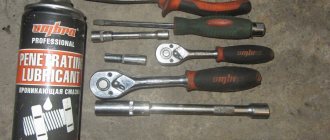
You will need: a 13mm wrench, pliers with thin jaws.
1. Remove the lever axle, plastic and spacer bushings (see “Replacing the gearshift lever axle bushings” ).
| 2. Use a screwdriver to pry... | 3. ...and remove the retaining ring. |
| 4. Remove the ball joint with the lever from the cage. | 5. Remove the spring from the cage. |
| 6. Inspect the reverse lock bracket trim... | 7. ...and a plastic axle stop. Replace parts if they are broken or show signs of wear. |
| 8. To remove the cover, unscrew two nuts and remove one bolt securing it. | 9. By spreading the spherical washer, remove the ball joint. |
| 10. Remove the spherical washer from the spherical pin of the lever. | 11. This is what the parts of the gear shift lever look like. |
| 12. Replace broken or badly worn spherical washer and ball joint. | 13. Replace a broken or loose spring. |
14. Reassemble and install the gear shift lever in the reverse order, having previously lubricated the ball pin of the lever and the internal cavity of the race with grease.
| 15. When installing the ball joint, make sure that the protrusions on it fit into the grooves of the spherical washer, thereby... | 16. ...fixing the clip in the washer. |
↓ Comments ↓
1. Car structure
1.0 Car structure 1.1 General information about the car 1.2 Passport data 1.3 Car keys 1.4. Controls 1.5. Heating and ventilation of the cabin 1.6 Ensuring a comfortable air temperature in the cabin 1.7. Doors 1.8. Passive safety equipment on the car 1.9. Seats
2. Recommendations for use
2.0 Recommendations for use 2.1. Safety rules and recommendations 2.2 Running in the car 2.3 Operating the car during the warranty period 2.4. Preparing the car for departure
3. Problems along the way
3.0 Malfunctions along the way 3.1. The engine does not start 3.2 Malfunctions of the fuel injection system 3.3 Idle speed has disappeared 3.4. Interruptions in the operation of the 3.5 engine. The car moves jerkily 3.6 The car accelerates poorly 3.7 The engine stalled while driving 3.8. Oil pressure dropped to 3.9. Engine overheating 3.10. The battery does not recharge 3.13. Knocks in the engine 3.16. Wheel puncture
4. Maintenance
4.0 Maintenance 4.1. General provisions 4.2. Inspection work 4.3. Lubrication and filling works 4.4. Diagnostic work 4.5. Repair and adjustment work
5. Engine
5.0 Engine 5.1 Design features 5.2 Possible engine malfunctions, their causes and solutions 5.3 Useful tips 5.4 Checking compression in the cylinders 5.5 Removing and installing the decorative engine casing 5.6 Removing and installing the engine splash guard 5.7 Installing the piston of the first cylinder to the TDC position of the compression stroke 5.8 Replacing the drive belt gas distribution mechanism and tension roller 5.9 Replacing the power unit supports 5.11. Replacing engine seals 5.13. Engine cylinder head 5.15. Engine repair 5.16. Lubrication system 5.17. Cooling system 5.18. Power supply system 5.19. Design Features
6. Transmission
6.0 Transmission 6.1. Clutch 6.2. Gearbox 6.3. Front wheel drives
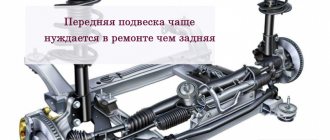
7. Chassis
7.0 Chassis 7.1. Front suspension 7.2. Rear suspension
8. Steering
8.0 Steering 8.1 Design features 8.2 Possible steering malfunctions, their causes and solutions 8.3. Steering column 8.4. Steering linkage 8.5. Steering gear
9. Brake system
9.0 Brake system 9.1 Design features 9.2 Possible malfunctions of the brake system, their causes and solutions 9.3 Bleeding the brake system hydraulic drive 9.4 Removing and installing the vacuum brake booster 9.5 Replacing the brake pedal axle bushings 9.6. Main brake cylinder 9.7. Front wheel brakes 9.8. Braking mechanisms of the rear wheels 9.9. Pressure regulator 9.10. Brake hoses and tubes 9.11. Parking brake
10. Electrical equipment
10.0 Electrical equipment 10.1 Design features 10.2. Battery 10.3. Mounting block (relays and fuses) 10.4. Generator 10.5. Starter 10.6. Ignition switch (lock) 10.7. Electronic engine control system (ECM) 10.8. Ignition system 10.9. Lighting, light and sound signaling 10.10. Windshield cleaner 10.11. Washer reservoir 10.12. Electric fan of the engine cooling system 10.13. Electric motor of the heating and ventilation system fan 10.15. Cigarette lighter 10.16. Instrument cluster 10.18. Electronic anti-theft remote control system 10.19. Immobilizer 10.21. Replacing sensors and switches
11. Body
11.0 Body 11.1 Design features 11.2 Possible body malfunctions, their causes and solutions 11.3 Removing and installing windshield frame lining 11.4 Removing and installing soundproofing upholstery in the engine compartment 11.5. Removing and installing bumpers 11.6 Removing and installing the fender liner and protective wing cover 11.7 Removing and installing the front fender 11.8 Removing and installing decorative sill trims 11.9. Hood 11.10. Trunk lid 11.11. Doors 11.12. Seats 11.13. Seat belts 11.14. Rear view mirrors 11.15. Interior fittings 11.16. Instrument panel 11.17. Heater 11.20. Body care
12. Applications
12.0 Appendix 12.1 Appendix 1. Tightening torques of threaded connections, Nm 12.2 Appendix 2. Fuels, lubricants and operating fluids 12.3 Appendix 3. Nominal filling volumes 12.4 Appendix 4. Basic data for adjustments and monitoring 12.5 Appendix 5. Spark plugs used on vehicles 12.6 Appendix 6. Lamps used on a car 12.7 Appendix 7. What you need to have in a car 12.8 Appendix 8. Tools used when repairing a car
13. Electrical diagrams
13.0 Electrical Diagrams 13.1 Diagram 1. Instrument Panel Harness Connections 13.2 Diagram 2. Vehicle Front Wire Harness Connections 13.3 Diagram 3. Engine Electronic Control System (ECM) Harness Connections 13.4 Diagram 4. Vehicle Rear Wire Harness Connections 13.5 Diagram 5. Light Harness Connections license plate light 13.6 Diagram 6. Left front door wiring harness connections 13.7 Diagram 7. Right front door wiring harness connections 13.8 Diagram 8. Rear door wiring harness connections
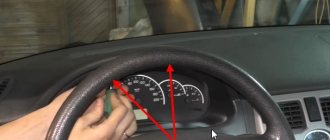
How to change the gear knob on a Priora
In order to remove the gearshift knob on a Priora, as well as to carry out any replacement or modification operations with it, it is necessary to dismantle the control system. So, for example, you can change a part by installing the version developed for Vesta. But the easiest way is to replace it with a standard part: you don’t have to make any modifications.
We remove the Priora gearshift knob, following the standard algorithm:
- Tighten the handbrake so that the Priora is locked in place;
- Remove the cover - just lift it to the top;
- It is better to heat the plastic part with a hairdryer and use a screwdriver to remove the sign with the painted speeds;
- Having rested a piece of a pre-prepared square at the bottom of the lever, use an adjustable wrench to make a stop so that the part goes up.
Watch this video for more details:
Replacing individual elements
On the mechanics, the procedure is the same for the knob and its cover, as well as the cover; on the robot, only the replacement of the cover and the knob is the same, because the cover is not structurally provided there. In addition, the procedure for pre-restyling and restyling cars, in other words, for the first and second generation, is slightly different.
Overlay
Regardless of why you decide to remove the Priora gearbox handle, always start by removing the trim. To do this, pry it out with a thin, narrow screwdriver, being careful not to damage the upholstery of the ball. Then, when the part snaps off, remove it and replace it with a new one. Once the new pad is in place, press it gently but firmly against the ball until the clips click into place.
Preparing to replace the handle
Sometimes there are balls without an overlay, so before removing this element, carefully inspect the knob; if the overlay is insertable, there will be a thin gap between it and the handle; if there is no gap, the part is not removable.
Knob
To remove the handle, you will first have to snap out its cover, this will open access to the fasteners, then on the first generation, heat the white plastic sleeve using a household hair dryer (3-5 minutes) and, pulling the ball up, remove it from the lever. On the second generation, disassembling this part is even easier - unscrew the nut holding the knob, then, without losing any parts, carefully remove it from the lever. Balls for cars of different generations are not interchangeable, because the Priora-2 gearshift knob is designed differently than on a first-generation car.
If you don’t know what generation of Priora you have, then remove the trim and inspect the fastening; if there is a white bushing, then the first one, if there is a nut, then the second one. If you got a car without a knob, then the first generation has a flat lever, and the second has a round one. This difference arose due to the fact that the first generation of Priora is equipped with a rocker, and the second - with a cable transmission with a different gear selection mechanism.
On some first-generation machines, a knob without a pad is installed; in this case, to dismantle the part, you need to pull it up strongly with both hands. Install in the reverse order, that is, first align the slot in the ball and the lever, then press as hard as you can on the first one until it snaps into place.
On the cable box, remove the cover and unscrew the nut, then dismantle the part and carry out the installation in the reverse order.
If you got a Priora with AMT, then to remove the ball, pull it strongly up, and to install, align the ridges of the lever and the grooves of the knob, then press it hard so that it fits onto the lever.
Case
To replace the cover, also known as the Priora gearbox cover 1–2, proceed as follows:
- Remove the knob.
- Use a thin screwdriver to pry out the plastic frame of the cover, recessed in the tunnel.
- Lift the cover up and turn it inside out.
- Cut off the electrical tape or zip tie holding it to the plastic stopper.
- Take it off.
- Put on the new cover and, turning it inside out, secure it with electrical tape or a clamp on the limiter.
- Turn it back inside and back in, then snap the plastic frame into the tunnel window provided for it.
- Reinstall the knob.
Replacing the gear knob on a Priora
This procedure will allow you to quickly install the cover on the Priora gearbox handle without much effort. In case of any damage, no matter whether the leather is cracked or there is a hole in it, the cover cannot be repaired, only replacement is necessary.
Lever arm
To replace the rocker arm, do the following:
- Remove the ball and cover.
- Using a 13mm wrench, unscrew the nut securing the gearbox linkage to the lever.
- Remove the reverse gear limiter; it is secured with three self-tapping screws.
- Remove the bolt securing the rod to the lever.
- Move the rod away from the lever.
- Remove the old gaskets from the lever.
- Remove the ball joint retaining ring.
- Pull out the gearshift lever along with the hinge.
- Replace the lever and, if necessary, the hinge.
- Install new gaskets.
- Reassemble the mechanism in reverse order.
On a cable box, as well as a robotic transmission, it is impossible to remove the lever separately, only together with the gear selection mechanism.
Life hack: how the gearshift knob rattles (oscillates) on a Priora
Rattling occurs due to the fact that there are too large gaps inside. The amplitude of vibrations of the internal parts increases, a knock appears along with vibration - this is how the Priora gearbox knob rattles. The remote bushing of the lever is the source of vibration. You can fix this problem in the following ways:
- Installing the washer - place an additional plastic washer between the rocker and the gear shift knob. Its parameters are an internal radius of 9 mm, an external radius of 13.5 mm. Select the plastic so that it is soft enough. This is necessary so that frosty temperatures do not destroy the bushing;
- Replacing the bushing with a fluoroplastic one. Standard – metal;
- Shortening the bushing means sharpening the gearbox remote bushing by 2 mm on both sides, and then coating the part with lubricant before reinstalling it;
- A short-stroke rocker will eliminate vibrations - the alteration will be quite serious, but switching on the desired speed will be easier, but you will have to make a lot of effort to move the lever.
Often rattling is removed using a repair kit. It will get rid of rattling if there was none before.
Why is it being changed?
The main reason for replacing this element is the desire to update the interior design. Some people don’t like the knob, others don’t like the dull cover or the nondescript trim, while others think that replacing the Priora gearbox knob will make the car’s interior more interesting.
However, there is another problem in which you have to remove the lever to replace it, but it can only be solved on your own on machines equipped with rocker gearboxes (2170 and 2180). Not every Priora owner likes too much lever travel, due to which any gear is engaged only with a significant amplitude, so the solution is to install a short-throw rocker.
The cable box is often subjected to the same operation, but the lever installed on the gearbox is changed, so it is quite difficult to do this work on your own.
This operation involves replacing the gearshift lever and the rod connecting it to the gearbox. After this is completed, the Priora gearbox knob moves back and forth almost 2 times less, thanks to which the driver can change gears faster and with a smaller amplitude of movement, which is especially important for those who like to drive in racing mode.
How to replace an assembly part
The replacement method depends on the type of transmission, but the methodology differs even on cars with mechanics, not to mention cars with a robotic gearbox. Therefore, further we will talk about both replacing each part separately and replacing the lever assembly on vehicles with different transmissions. After all, the “Priors-2” gear knob and the “Priors-1” gear knob are very different in design from each other, and are also not at all similar to the robot control lever.
Gearbox cover: price and manufacturers
Even a malfunction of such an insignificant part as the gearshift lever cover can cause quite a lot of trouble. There are several options for a box cover that can be installed instead of a torn standard one:
Autobra 2183-CH. Black, made of genuine leather – 400 rubles.
Universal options. Manufacturers often present a cover (boot) for Lada Priora along with a lever. It can be completely different: black, two-color, with or without edging. You don't always want to change everything at once, so searching for a new boot may take some time.
What manual transmissions are on the Priora?
VAZ cars of the Lada Priora family are equipped with three types of manual transmissions (2170, 2180 and 2181), which differ in the way the gearbox is controlled - rocker (2170 and 2180) and cable (2181).
In the first case, the operation of the box is controlled directly through a rigid rod, pivotally connected at one end to the gear selection lever in the cabin, and at the other end to the control rod of the actuator inside the gearbox itself.
In the second case, a pair of flexible cables are used to control pendulum levers located on a separate speed selection and activation device mounted on the top of the box.
Handle from Vesta to Priora
A detail from Vesta on Priora attracts the attention of many VAZ-2170 owners. Even analogs cannot compete with it. The insert on the gearshift lever itself is made of high-quality black mirror plastic with a silver edging. The catalog number of the standard part for the VAZ 2170 assembly is 8200-379945. Cost with dust cover – 2,000 rubles.
It is important to note that there will be no problems with installing the gear shift part - the mounting is similar. Completion of minor tuning should be indicated by a thorough check of the lever's functionality. It is better to detect the lack of “response” of the box while the car is standing still. Carry out a little diagnostics, then hit the road.