02/04/2022 53 903 VAZ Priora
Author: Ivan Baranov
Many novice drivers are interested in adjusting the Priora clutch, since problems with the clutch often arise when operating the car. It happens that while driving there are sounds in the form of clicks. These sounds can be removed by adjusting the clutch drive. The article describes in detail the adjustment of the cable and clutch pedal, so even a novice driver can perform these operations.
[Hide]
Replacing the clutch release cable
If the cable breaks or moves tightly in the sheath, replace the cable assembly. Remove the air filter (see “Removing the air filter”). In the engine compartment...
... by pulling the cable forward, we remove the leash with the cable from the groove of the clutch release fork lever
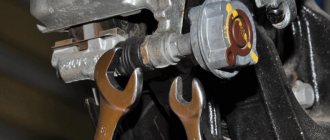
Using a “17” wrench, unscrew the nut securing the front end of the cable sheath to the bracket on the gearbox several turns, holding the sheath by the hexagon with another wrench of the same size.
We remove the end of the cable sheath from the bracket on the gearbox. Inside the car, under the dashboard...
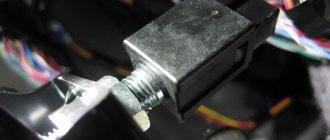
...using an 8 wrench, unscrew the nut securing the cable sheath bracket to the pedal bracket. The operation of removing the housing of the automatic cable length adjustment mechanism from the clutch pedal pin must be performed in a hard-to-reach place. To make the operation easier, pull the clutch pedal firmly towards you...
...so that the trailing edge of the pedal slightly deforms the thin sheet metal of the body panel. Use a screwdriver to pry up the retaining bracket of the clutch pedal pin...
...and remove it (for clarity, shown in the engine compartment with the clutch pedal cover removed).
Remove the eye of the housing of the automatic cable length adjustment mechanism from the clutch pedal pin. We remove the cable sealing cover from the hole in the front panel...
...and pull the cable into the cabin.
Unscrew and remove the leash from the threaded end of the cable. Before installing the cable...
...check the condition of the plastic bushing on the pedal pin. We replace the worn bushing with a new one and apply grease to the pin and bushing. We install the cable in the following sequence: – thread the cable through the hole in the front panel from the passenger compartment into the engine compartment; – install the sealing cover into the hole in the front panel; – put the housing of the automatic cable length adjustment mechanism on the pedal pin and secure it; – secure the cable sheath; – screw a plastic leash onto the threaded end of the cable so that the end of the cable tip is flush with the end of the leash; – insert the leash into the groove of the clutch release fork lever. After installing the cable, we adjust the clutch drive. To do this, pull the cable forward by the threaded end until it stops, overcoming the force of the spring, and hold the cable in this position.
Using a caliper we measure the distance from the end of the plastic leash to the clutch release fork lever, which should be 27 mm. If necessary, rotate the leash to achieve the required distance. When removing the load (releasing the cable), the leash should adhere to the fork lever without play. After this, press the clutch pedal three times to activate the automatic cable length adjustment mechanism. We check the full travel of the clutch pedal, which should not exceed 146 mm.
Many novice drivers are interested in adjusting the Priora clutch, since problems with the clutch often arise when operating the car. It happens that while driving there are sounds in the form of clicks. These sounds can be removed by adjusting the clutch drive. The article describes in detail the adjustment of the cable and clutch pedal, so even a novice driver can perform these operations.
Adjustment instructions
The Lada Priora is equipped with a clutch cable with a ratcheting mechanism. The cable is backlash-free and does not require adjustment, but manufacturers recommend this be done during every maintenance.
Clutch cable
To adjust the cable on the Lada Priora, you need to prepare a screwdriver and a ruler. The procedure then consists of the following steps:
- To perform work, you must open the hood.
Engine compartment of Lada Priora First, you should disconnect the mass air flow sensor and remove the air filter.
Engine compartment without air filter
- After this, a cable will be visible, at the end of which there is a plastic clip.
- Before adjustment, it is necessary to set the cable to its original position: overcoming the resistance of the spring, push the cable clamp forward until it stops in the direction of movement of the car.
- This clamp should be pulled towards you and the distance between it and the plug should be measured, it should be 27 mm.
- The distance is adjusted by turning the tip counterclockwise. In this way, an increase in distance can be achieved.
- Twist the clamp until the distance is 27 mm. Accuracy is very important here.
- Now you can release the cable and place it in the fork.
- After completing the steps, you need to get behind the wheel and press the pedal three times until it stops.
- Then again you need to measure the distance, it must be exactly 27 mm, otherwise we adjust until the desired distance is achieved.
- Next, you should insert the tip into the groove of the mechanism fork and release it. Thanks to the spring, the tip driver clamp is installed without any gap.
- After adjusting the cable, you need to return everything to its place, start the engine and check the operation of the mechanism.
- jerks appear when starting to move;
- noise and shock when shifting gears;
- the pedal gets stuck.
We measure the distance using a ruler
After adjustment, the clicks disappear and the clutch release pedal operates softer.
Clutch pedals
When the clutch pedal travel is large, the clutch is not completely disengaged, so it still comes into contact with the flywheel of the power unit. When the stroke is low, the driven disk does not turn on completely, which leads to slipping and loss of torque.
You should measure your pedal stroke if the following symptoms occur:
The symptoms described indicate that the mechanism requires adjustment. You can diagnose its operation on Priora yourself. To do this, start the engine, slowly release the PS and start moving. If, when the PS is released, the car immediately begins to move, this means that there is no free play. If the car does not budge even with the pedal fully released, then its travel exceeds the norm. The brake pedal should be at the same level as the brake pedal. In this case, its full stroke will be in the range of 125-135 mm. Fluctuations up to 160 mm are possible.
Self-diagnosis
Most often, problems with clutch operation are associated with the pedal. The pedal is loose, squeaks, or is too tight. A tight clutch can also be mitigated by adjustment.
But the problems that occur during operation of the lever already relate to the mechanism itself: clutch disc, basket, fork. The sensor is in between and rarely shows the real problem. If the problems inside are more serious and the best solution is a trip to the service center, then we can correct the symptoms of the pedal ourselves.
Adjustment begins with inspection. We take a regular ruler and measure:
- Cable clamp and fork. There should be a standard 27 millimeters between them. Plus or minus 2 millimeters. If the distance does not match, then you need to adjust
- Pedal travel. We rest one edge of the ruler against the floor, under the pedal assembly, and with the other we measure the distance to the pedal while parked. Here she should be from 12.5 to 13.5 centimeters. Ideally, it should be flush with the brake assembly. Permissible overshoot - up to 16 centimeters (160 millimeters)
If your pedal assembly or engine compartment elements do not correspond to these numbers, then you need to make adjustments. Let's talk about it further.
Video “Adjusting the clutch drive”
This video shows the process of adjusting the clutch on VAZ cars, including Priora.
No one will dispute the essential role of the friction clutch in the operation of a car transmission. The efficiency of using the traction of the power unit and even safety directly depend on the quality of the clutch. It is important for VAZ 2170 owners not only to replace the components for transmitting torque in a timely manner, but also to configure their control system extremely correctly.
Causes of breakdowns and solutions to problems
Domestic automakers are not particularly reliable and durable in their parts and assemblies. It is not surprising that many car components quickly fail and are no longer suitable for further use. All this causes many car owners to have characteristic problems in the operation of the clutch mechanism on their car. However, you should not blame only car manufacturers for all the problems that arise, since many malfunctions are the result of careless operation of the car by the car owner himself.
| Insufficient pedal travel causes the clutch itself to “drive” | To eliminate this defect, it is necessary to regulate the mechanism drive itself. Car service station professionals can help solve this problem. |
| Clutch pedal sticking | This problem usually occurs when parts of the drive mechanism are damaged. This can be resolved by replacing the damaged part. |
Features of the Lada Priora clutch
Any motorist interested in how to adjust the clutch on a Priora should know about the presence of the drive cable auto-adjustment function. That is, VAZ designers took care of the owner and saved him from the need to constantly adjust the clutch drive mechanism during operation. The same ratchet-type system is installed on Kalina , but both there and on Priora it is impossible to do without periodic adjustments. This factor has been proven by practice and forum discussion pages.
How does an automatic cable tensioner work?
In the release drive on the VAZ 2170, there are no gaps as a concept, hence the name - backlash-free clutch. The ratchet mechanism serves to compensate for the working length of the cable as the driven disk linings wear out. To understand the process, it is important to accept the following data:
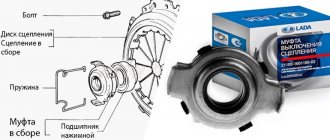
- During operation, the driven disk wears out and its linings become thinner - as a result, the release bearing and basket springs shift towards the gearbox.
- Accordingly, the fork at the place where the cable is attached moves towards the radiator.
- The spring located on the bushing of the adjusting mechanism is compressed at this time and tightens the clamps of the cable tip.
- As a result, the tip is pulled out of the driver, due to which the wear of the disc linings is compensated.
For those who don’t yet know how to adjust the clutch on a Priora themselves, it is important to take into account the moment when the linings are new. In this case, when releasing the pedal, the ratchet bushing will only lightly touch the bracket without releasing the clamps. Therefore, the toothed tip of the cable will not move relative to the housing. Only as the linings wear out does the spacer sleeve release the spring-loaded clamps and the cable tip extends to the amount necessary to balance the worn parts.
When is adjustment of the clutch drive mechanism necessary?
Despite the presence of innovative ideas in the field of transmission control, Togliatti automakers still recommend checking the condition of the ratchet mechanism at every maintenance. In addition, it would be a good idea to pay attention to the signs that indicate problems with the clutch control system:
- Loss of traction due to unreliable connection between the flywheel and the disk.
- “Sagging” of the clutch pedal.
- Difficulty changing gears.
- Extraneous sounds when using the clutch pedal.
The symptoms are generally identical to those when the drive needs to be adjusted on a VAZ 2110 , i.e. their identification should not cause any problems. It should not be forgotten that the automatic tensioner has its own compensation limits. The working stroke of 27 mm is the same stroke of the compensator.
In other words, during the operation of the disk, the fork moves precisely by this length. Therefore, the problem of how to adjust the clutch on a Priora car can practically be solved in an elementary way. Even if you want to, you won’t be able to overload the release bearing.
How to check the clutch drive parameters of a VAZ 2170?
A few simple steps will help you make sure that the drive needs to be configured:
- Open the engine compartment hood.
- Disconnect the MAF sensor and remove the air filter.
- Just below the battery, find a cable with a plastic clip.
- Pull the mechanism clamp forward in the direction of travel.
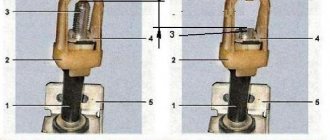
- Holding the tip in an extended position, measure the distance L (in the photo), the norm corresponds to 27 mm.
What to pay attention to
There are certain signs that the clutch on the Lada Grant has failed and action needs to be taken. It is worth paying attention that if the car has just been purchased, the pedal will be pressed quite easily. If this requires great effort, then this is the first evidence that the clutch needs to be adjusted or replaced.
It is also worth paying attention to the appearance of extraneous squeaks at the moment when the driver presses the pedal. In addition, it should not twitch when the car owner does not touch it.
It wouldn't hurt to know
What do most owners of new Lada Priora do? Naturally, they treat the body with Movil or something similar against corrosion; they don’t have any more problems at the initial level. However, there were complaints about squeaking when pressing the clutch pedal; sometimes it was present when the engine was warm, sometimes only when it was cold - the essence is that there is a problem.
Of course, everyone immediately starts reading the “primer book” on how to correctly adjust the clutch on their Priora, which sometimes helps, but the fact of the matter is that sometimes. After this, owners can try several more methods, after which the squeak may disappear:
- Replace the drive cable, some drivers praise the “tenth”.
- Check the presence of a spring in the automatic tension mechanism; sometimes the effect can be achieved after replacing the standard part with a spring with greater elasticity.
- A certain percentage of car enthusiasts get rid of the crackling noise by lubricating the fork and the plastic cable nut.
- Lubricate the installation site of the plastic bushing on the pedal bracket with lithol.
- Remove the boot from the fork lever and lubricate the gearbox input shaft with graphite grease from a can.
Symptoms of a problem
The main symptoms of a malfunction are:
- Hum, whistle and other unnecessary sounds when pressing or releasing the pedal;
- “Push” even if the working moment was caught on time.
If there is a suspicion that the clutch is faulty, then diagnostics can be done using traditional methods, without disassembling the engine compartment internals.
Slip check
We fix the car with the handbrake, engage third or fourth gear, slowly (slower than usual!) depress the leftmost pedal and press the gas at operating torque. If everything is fine with the handbrake, then the test will be true. The car has stalled, which means it’s time to change the pressure plate.
How to replace the clutch cable of a Lada Priora
As practice shows, replacing the cable connecting the clutch drive with the gearbox on a Lada Priora is very rarely required. It breaks quite infrequently. The most common problem with it is the threads; its components become frayed. For this reason, the clutch mechanism begins to jam regularly and the pedal eventually does not want to return to its place.
The replacement procedure is not particularly complicated, but it does require time and some effort. For work you will need the following tools and materials:
- a set of keys;
- flat screwdriver;
- cable clamp.
You can get to it in Priora only through the engine compartment. To do this, of course, you will need to open the hood. The cable itself is located next to the gearbox.
In what cases does an element need to be replaced:
- when broken;
- due to jamming;
- due to stretching;
- in case of failure of the mechanism regulating its length.
Let's sum it up
Taking into account the above information, it becomes clear that there are many reasons why the clutch pedal is tight or the clutch is hard. In the process of troubleshooting, you should step by step check the pedal mechanism itself, and then move on to the clutch elements, cables, rods, etc.
Finally, we note that often before the clutch pedal becomes tight, characteristic signs indicate problems that have appeared (traction disappears, jerks, vibrations, noises, etc. appear). For this reason, when the first signs of clutch malfunctions appear, a complete diagnosis of all its elements is necessary.
Ignoring this rule often leads to the fact that a tight or hard clutch pedal can come as a surprise to the driver while on the road. The clutch pedal also fails, the clutch may not “grab”, etc. To avoid such unforeseen breakdowns, the quality of the clutch must be checked at every scheduled maintenance.
Removal process
First of all, you will need to dismantle the air filter:
- remove the cable itself, using a leash to remove it from the fork of the drive that disengages the clutch;
- using 17 keys (2 pieces), partially unscrew the two nuts holding its shell on the gearbox crater bracket and pull it out;
- under the dashboard, located directly in the car interior, tighten the nut with an 8mm wrench from the pedal itself.
You just have to remember that getting to the place where the lower part of the cable is attached to the pedal will be quite difficult.
Access is hampered on one side by the engine compartment partition, and on the other by the lower edge of the instrument panel. The work space is significantly limited. But performing the required operation is quite simple - using a flat-head screwdriver that fits the length.
It will be much more difficult to remove the staple. To make it easier to operate, the pedal is raised as high as possible. Ideally, the bracket should appear above the opening. The main thing is to remove the fastening from the cable itself. In the future, it is easy to put on the bracket either using pliers with long lips, or from the side of the power unit with your hands.
Next you will need:
- remove the expansion tank of the engine cooling system;
- dismantle the thermal insulation of the engine on the left side;
- Unscrew the bolts and remove the fastening brackets holding the rubber boot in place (both on the left and on the right) and remove it completely;
- Using a screwdriver, carefully remove the retaining bracket from the fastening axis of the cable guide;
- the latter, in turn, is removed from the foot drive finger.
It is important not to lose the plastic sleeve installed there. Without it, the cable cannot be attached. If it becomes unusable, you need to put a new one on your finger.
Finally, all that remains is to pull out the mat holders (there are 2 of them). This must be done carefully, since they are plastic and break easily.
After this, you need to remove the rubber cover installed in the partition of the engine compartment and finally pull out the damaged cable.
How to install
Before installing a new cable, you need to thoroughly lubricate both the bushing and pin on the pedals. The plastic composition Litol-24 is best suited for this.
Then the end of the cable is threaded into a hole located in the bulkhead of the engine compartment on the passenger compartment side of the car so that it ends up in the engine compartment. The rubber cover is also tucked in there.
The gear tip driver is put directly onto the clutch drive pin and secured with a bracket.
The end of the shell is secured with a nut to the pedal bracket. Make sure that the fixation is secure. It is unlikely that anyone will like to, if something happens, climb there again due to a poor-quality connection.
Next, under the hood, the lower part of the shell is stuck into a special hole on the gearbox bracket.
The leash is screwed onto the end of the cable (there is a thread there) - the latter should protrude approximately one turn outward, but no more.
Now comes the time to adjust the clutch drive. Upon completion of this process, the pedal is pressed all the way two or three times and then the setting is repeated.
The working surface of the tip driver must be treated with the above-mentioned lubricant.
All that remains is to make sure that the entire mechanism is now working properly and install all previously removed parts in place.
You can learn more about the process in the video below:
Hydraulic failure
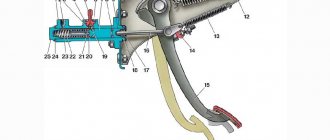
Some VAZ models have a hydraulically driven clutch. This system involves:
- line where the special liquid should be located;
- slave and master cylinders.
Here the base of the pedal is fixed to the piston rod of the latter. Pressing it squeezes out the liquid, and it goes into the working cylinder, which acts on the fork. Thus, the pedal on a VAZ can fail if the system loses its tightness. First of all, you need to see whether there is enough liquid left in the tank located in the engine compartment. Proceed like this:
- make up for its deficiency;
- monitor the stability of the level.
Lada Priora Sedan SE [189] › Logbook › Replacing the clutch cable
I haven’t written anything for a long time, I’ve been busy at university. And the little one just had no time for it. In short, the clicking clutch pedal got me. And it would be fine if it just clicked, it could still be tolerated, but the fact that the gearbox worked poorly did not suit me at all. The gears turned on terribly. The clutch was not particularly tight. The pleasure of driving has faded away. It's not a good idea to drive like that. I started to figure it out. Back then I didn’t know that Priors have a clutch cable with a ratcheting mechanism. I thought that it was the same here as in the VAZ 10 family. I reached under the hood to tighten the cable. I pulled it up a little. I noticed that the clutch pedal did not rise at all. Hm. The first time I press the pedal, I hear a familiar click. I rode around a bit. It seems to have gotten a little better, but still not the same. Well, that's not how a checkpoint should work. I got on the computer. It turned out that almost every second priority breeder has this problem. Kaliny seems to have the same problem. The Internet says that you need to modify the cable, install some springs, come up with something... In the end, it is not a fact that there will be a 100% effect. Not our option. There was also advice to simply replace the cable with a new one. But something told me that there was a problem in the cable. What kind of cable is this interesting? In general, the engineers’ initial idea was not bad, but they ruined everything again)) It’s all about the ratchet mechanism. Its design is such that it chooses the clutch cable tension itself. With increasing mileage, the clutch inevitably wears out little by little, and the adjustment in the well-functioning mechanism gradually disappears. And you have to tighten the cable. Here this problem was solved by installing a ratchet mechanism. In theory, he should do it himself. Everything seems to be fine, but this GAD doesn’t regulate a damn thing properly))) A regular VAZ 2110 clutch cable came to our aid. Here are two cables in comparison
Reviews from car owners
If you look at the opinions of car owners about this component of the car, many note that it quite often creates problems. For example, some have to deal with tight pedal movement or the appearance of unpleasant crunching and clicking noises.
However, few people have to buy a complete clutch kit. Often a specific detail is enough. Therefore, most often it is enough to install a new cable or lubricate the jacket. Accordingly, even if this unit fails, repairs will not be as expensive as it might seem.
In general, car owners are satisfied with this car. It is inexpensive and does not require special care. If you do not use it in extreme conditions, then there should be no problems. It also performs well on difficult roads. Many note that modern foreign cars at the same cost have much worse characteristics.
Removing and installing the clutch release cable Lada Priora
Required: keys “8”, “17”, calipers or ruler.
1. In the passenger compartment, under the instrument panel, using an 8-mm wrench, unscrew the nut securing the cable sheath stop to the pedal bracket and remove the stop from the bracket.
2. Using a screwdriver, remove the locking bracket and the housing of the wear compensation mechanism for the linings of the Priora driven disk from the clutch pedal pin.
3. Remove the plastic bushing from the pedal pin and inspect it. Replace a heavily worn or damaged bushing by lubricating it with Litol-24 or LSC-15 grease before installation.
4. In the engine compartment of the VAZ 2170, remove the seal of the Lada Priora clutch release cable sheath from the hole in the front panel.
5. By pulling the tip of the cable forward in the direction of movement of the VAZ 2170, remove the tip from the groove of the clutch release fork.
6. Using a “17” wrench, unscrew the nut securing the tip to the bracket on the VAZ 2172 gearbox, holding the tip from turning with a second wrench...
- 7. . remove the tip from the bracket and remove the cable from the cable by pulling it out of the hole in the front panel.
- 8. To install a new drive cable for releasing the clutch prior, first pass it through the hole in the front panel and secure the wear compensation mechanism housing to the clutch pedal pin.
- Before installing the compensation mechanism on the pedal pin, apply LSC-15 or Litol-24 grease to the pin bushing.
- 9. Attach the cable sheath stop to the pedal bracket.
- 10. Install the cable sheath seal into the hole in the bulkhead
- 11. Install the end of the cable sheath into the Priora gearbox bracket and tighten the nut securing it.
- 12. Screw the leash onto the lower end of the cable, ensuring that the tip protrudes relative to the end of the leash by 0–1 mm.
13. Set the clutch release cable of the Lada Priora to its original position by moving the lower end of the cable all the way forward in the direction of travel. Holding the tip in an extended position, measure the dimension L between the fork and the leader, it should be 27 mm. If the size does not correspond to the specified value, set it by rotating the leash in the desired direction.
14. Insert the tip of the cable into the groove of the clutch release fork of the VAZ 2171 and release - under the action of the spring, the tip guide should be installed on the fork without gap.
Before installing the tip driver on the fork, apply LSC-15 or Litol-24 lubricant to its surface in contact with the fork.
15. Press the priora clutch pedal three times all the way and measure the distance L again (see paragraph 13). If necessary, repeat the adjustment.
