Already on new cars of the VAZ 2110 series, buyers noted the insufficient effectiveness of noise insulation and wind protection by rubber on the doors. Therefore, there is no need to talk about used cars.
Over time, creaking and rustling noises appear, and the driver and passengers experience discomfort from the cold seeping through worn-out seals. Plus, loose fitting of the doors leads to the appearance of moisture inside the cabin during snow or rain.
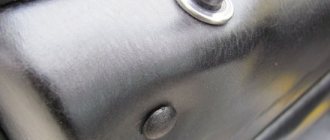
It would seem that such an insignificant element as a seal, but how many problems it can cause in case of wear or mechanical damage.
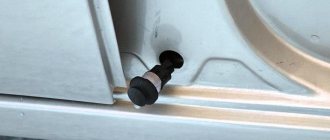
The seals at the bottom of the doors, near the thresholds, are subject to the greatest wear. Therefore, every buyer of a used VAZ 2110 or the owner of a rather old car must first replace these same rubber bands.
Appearance of the gum
Purpose
Color marks are also drawn in a certain place where there is a filler in the form of a porous rubber rod. The insert in the body of the seal is necessary so that when installing it in the door opening, it does not break and become deformed in the corner of the opening, where the transition is not so smooth.
Thanks to the insert, the product becomes level without breaking, which guarantees a tight fit in this area of the opening, which provides a reliable seal.
Differences
An ordinary, cheap sealant has no filler, and therefore there are no color marks. They are mounted on any side of the doors, both left and right. Ask salespeople at your auto store for universal door seals. They also fit on front or rear doors. The only thing you need is to cut off the excess part at the junction with a margin. Rubber sags over time.
Removal
When you have purchased the required number of seals, you can begin to work.
The first step is to remove the old rubber elements, after which the installation of new parts begins.
Let's tell you more about the dismantling procedure.
- Remove the plastic trim panels installed on your vehicle's door sills. To do this you will need a thick screwdriver. Remove carefully, being careful not to damage the plastic caps. But it’s better to buy new ones in advance if you can’t carefully dismantle the threshold.
- Now remove the old pieces of rubber from the seats. Simply tear off the sections that are torn off by hand.
- Remaining rubber can be cleaned off with any available tool. Only be careful with sharp objects so as not to damage the metal and paint layer.
- Very small residues and traces of glue are removed using solvents. Make sure that the solvent you choose will not damage your paintwork.
- Go over the doorway with a vacuum cleaner, remove all dust and dirt. Take special care to clean the bottom part. If wet cleaning was used, wait until everything is thoroughly dry.
Upcoming work
Installation
This process cannot be called complicated. You are not required to have any special training or extensive experience. Although you should at least be able to handle glue.
Working with the back door
Each stage is performed consistently and carefully to achieve the desired result and create comfort inside the cabin.
- Even if you have already measured the required length of the seals for your doors, we advise you to do it again. Anything can happen.
- Cut the required length, plus leave a couple of centimeters of reserve. Although if we are talking about a ready-made set of rubber bands, you won’t have to cut or leave anything. Skip the first two points.
- Insert a tube made of silicone or polymer inside the sealing tape. They are sold everywhere, so there should be no problems finding them.
- The length of the tube must match the length of the rubber. This tube will serve to create the necessary elasticity and allow the elastic to press more tightly to the door. This way, ventilation gaps will not appear, and the cabin will become much quieter.
- A shaped side rubber seal is glued to the bottom.
- If the tape is solid, you can start putting it on from either side, as is more convenient for you.
- If it is a measuring rubber band, then start from a point between the door overhangs, or 30 centimeters from the bottom of the threshold. Moving up or down is a personal choice for each master. There is no difference here.
- Push the figured profile all the way down. To do this you will need a rubber or wooden hammer. He's a mallet.
- When the seal is installed around the entire perimeter, an extra piece will be revealed. Cut the tube straight and end-to-end, and make the elastic itself seem slightly deformed. It's like you tore it off by hand. This will avoid the unpleasant phenomenon of siphoning through the joint.
- Replace the pistons; if some were damaged during removal, replace them with new, intact ones.
- Replace the plastic cladding removed from the threshold.
- The second contour of the seal is glued along the edges carefully, but as tightly as possible, after which time is given for the glue to dry completely.
Almost immediately you will feel the difference between the old and new seal. This is a useful exercise that allows you to get rid of unpleasant sounds, knocking, whistling and cold air flowing directly onto your feet.
Let's start work
Having prepared the tools and materials, you can begin soundproofing the doors:
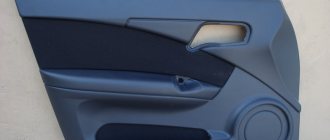
Removing the window handle
First layer
Vibration-isolating material is glued to the inside of the outside of the car doors, cutting it into pieces in advance for convenience:
First layer of vibration absorber
Second layer
Now, a soundproofing material, such as Accent, is glued on top of the vibration insulation, here it is advisable to cover the entire area of the door, the sound insulation will be better.
The emphasis is on the second inner layer
Third layer
The instructions dictate that all technological holes on the inside of the doors be covered with vibration insulation; using Madeleine, we wrap all the places where parts come into contact (such as wires, the edges of the speaker mounts, the places where the trim and the door come into contact).
Dismantling
After purchasing everything you need, you can first begin dismantling and then installing a new seal. The first stage is removing the plastic facing panel from the threshold. This is done using a regular flat-head screwdriver. Just try to do everything carefully, without damaging the plastic clips that secure the panel.
This is followed by the removal of old rubber bands. This is done by tearing it off, then removing the residue using available tools. If you need to remove the remaining glue or small debris, use a solvent (be careful that it does not dissolve the paintwork of the car).
Next, you need to clean the entire doorway from dust and various contaminants, paying special attention to the lower parts. You can do dry cleaning with a brush and vacuum cleaner. If you still need to wash it, let the surface dry thoroughly before installing the rubber bands.
Causes and remedies for poor foot heating
If the heater does not blow well into the legs of the VAZ-2112, then it is worth checking the condition of the plastic block, due to which the heated air flow is distributed. In common parlance this element is called a herringbone. But before that, you should make sure that the heater itself is functioning properly.
Problems with pipes
Work to eliminate the problem begins with dismantling the torpedo, behind which the blower pipes are hidden. In the meantime, you can pay attention to the side window blowing system, which is a sore spot of the VAZ-2112. It would be appropriate to replace the corrugated hose or carefully seal the cracks that are on the panel. To achieve optimal results, it is advisable to implement two options.
Damper problems
Having completed this stage, you can move on to the damper, which often does not press against the heater well enough. This leads to the loss of some of the heat along the way to the user, as a result of which the VAZ-2112 stove blows weakly into the feet. To fix this problem, you will need to remove the damper and the standard seal. The valve and all existing cracks need to be treated with model. After this, the air flow will move in the desired direction. Pay attention to the standard sponge, which can be replaced with bitoplast-10, glued in several layers. If you follow these recommendations and correctly follow the described steps, the heater will properly supply heat to your feet.
Insufficient sealing
If your feet are not warm enough, but the heater is functioning normally, it is worth considering the problem of heat loss that occurs as warm air flows from the driver's seat. This problem can be solved with the help of polyurethane foam, which will fill existing cracks and prevent warm air from being used for other purposes. As a bonus, the car owner will get rid of the annoying squeak on the panel.
Removing the standard distributor
The standard air distributor is not good enough on the VAZ-21124; the stove blows poorly into your feet, often precisely because of this element. It urgently needs improvement or dismantling. It is the latter option that will be the most preferable and effective. Instead of the dismantled element, it is necessary to install high-quality corrugations, attaching them to the panel using polyurethane foam. Pipes must be chosen of the same size (about 40 mm). At the end of the work, three corrugations directed to different zones will be responsible for air distribution.
Fan fault
Is the stove not blowing into your feet or is it blowing extremely badly? Perhaps the reason is hidden in the operation of the fan. To eliminate a problem of this nature, you will need to check the condition of the fuse, contacts in the block and test the ignition relay. Diagnostics of fan performance consists of turning on the heater and checking its operation at different speeds. If the fan turns on only at the third speed, then the problem lies in the resistor, which will need to be replaced.
Checking the switch
The switch may also be the cause of poor heater performance. To check it, you need to use a 12-volt light bulb with two wires soldered to it. The torpedo console must be dismantled. Next, turn on the ignition, connect the minus to the body ground, and the plus to the resistor. If the switch is working properly, the light will glow. If the light bulb does not show any signs of life, then the fuse must be replaced. But replacing the fuse will not be enough. It is necessary to look for the short circuit that caused the fuse to fail. It would also be a good idea to inspect the chain; it may be broken. If the function of the stove is only to heat the air, then this indicates a malfunction of the relay. It is located under the dashboard, in the center console.
In principle, the heater installed on the VAZ-2112 is of high quality, its design is designed quite competently, so even in severe frosts the car’s interior is warm and comfortable. But the above problems can still arise. If they are eliminated in a timely and high-quality manner, the heater will continue to perform its functions.
https://litezona.ru/vaz-2112-ne-duet-na-bokovye-stekla/ https://ladaautos.ru/vaz-2112/pochemu-pechka-ne-duet-v-nogi-na-vaz- 2112-i-kak-pochinit.html https://xenon-kiev.com.ua/dorabotka-pechki-vaz-2110-2112/ https://avtocity365.ru/ustrojstvo-i-ekspluatatsiya-avtomobilya/pechka-vaz -2110-ne-duet-v-oblast-nog/ https://remam.ru/vozdsys/ne-duet-v-nogi-pechka-vaz-2112.html
VAZ 2112 does not blow on the side windows
The VAZ 2110 - 2112 has one bad feature: the heater does not work well, or rather, the flow of warm air weakly blows into the driver’s feet and onto the front side windows. For this reason, every now and then your feet freeze and the windows fog up. But as they say, there is always a way out of every situation. The solution would be to remake the stove, or, more precisely, its air duct.
So, let's begin. Before starting work, you need to make sure that the stove is working well, otherwise you will have to repair it. If it works properly, then we begin work. First we will need to remove the torpedo and disassemble it into parts. All elements of the stove panel are bolted together.
There are 2 options for solving the problem with poor blowing of the side windows:
For better blowing of the side windows, I chose option 2. The prerequisite for this choice was that corrugation is good only for heating the legs. In general, the second option is better than the first, so let’s get to work on gluing all the seams and cracks of the air ducts. Using silicone we glue the gaps between the lower and upper parts of the torpedo, as well as the holes for fastenings.
Next we move on to modifying the furnace dampers, which direct air to different zones. From the factory, the damper does not fit well to the body, so some of the warm air disappears, getting into the cracks between the damper and the body. The air begins to flow into nowhere, or more precisely, it circulates under the panel and does not provide heat.
Let's start dismantling the damper, remove the damper and see how Auto VAZ is still worried about us, the factory seal cannot be called a seal, it does not seal anything, but only slightly covers the cracks. Once the seal is removed, you will see gaps.
Using insulation, I glued the entire valve and removed the cracks. This procedure will have a good effect on the flow coming out of the damper; the air will not be lost in the gap before exiting, but will flow into the cabin in full. If you knead the lips, you can use Bitoplast 10 on the body. We work carefully with Bitoplast 10, in some places it will be necessary to glue it in 2 or even three layers, in a word, we make it last forever.
A larger percentage of the incoming air disappears in the area where the air begins to travel to the driver's window. This gap is very large, so I decided to foam it with polyurethane foam. Perhaps someone will wonder if the foam squeaks when driving, I will answer - no, it has been tested by time.
Next, let's move on to improving the air ducts in the area of the driver's feet, front and rear passengers. The module for distributing warm flow to the feet, as you already understood, is also full of cracks.
Because of these cracks, the wind blows poorly at your feet, because half the force of the flow goes nowhere. I thought a little and a great idea came to my mind. I decided to use corrugated pipe. This pipe is doubly good, since it delivers warm air in the initial volume, but also does not take up much space during installation.
The small size of the corrugation will free up space in a pile of wires, making it easier to access the wires. I did everything this way: I removed the standard air distributor, pushed three corrugations into the remaining hole and filled everything with foam.
The central corrugation has a smooth surface inside the hose, because if you install a hose with a ribbed surface inside, the stove will whistle when turned on. The diameter of the corrugation should be 40 millimeters - no less, no more. So what do we get? One corrugation goes to the driver’s feet, the second to the front passenger’s feet, and the 3rd goes back at the rear passengers’ feet. Then we put the entire structure in place and enjoy the warmth. And so, without investing a lot of money, we modernized the stove and it warms the interior better.
Hi all! It's no secret that the stove on the 10th family basins is, to put it mildly, crap. And all because at AvtoVAZ they believe that gaps of 0.5 - 1.5 cm in the heater air ducts are the norm! Through these cracks the air disperses throughout the panel and stupidly heats the panel from the inside! I’m generally silent about the air ducts for the feet of the rear passengers; the designers creating them look like they were smoking something)) the lower pipe just leads to nowhere and the warm air heats the gearshift lever and the handbrake! And the air that still passes to the air ducts heats exclusively the floor, because it is directed towards the floor.
And so, having read the bortoviks on D2 and forums about the 10th family, I decided to take on modifying the stove, since winter is about to come.
For this we will need corrugations (in my case 40mm, it all depends on your imagination, somewhere they wrote that corrugations with a diameter of less than 40mm whistle), sewer pipes 50mm and bends to them at 90 and 45 degrees, again size and quantity depends on your imagination and how far you are willing to go in this direction. My entire emphasis was solely on the practicality of this modification, no feng shui or glamor, only hardcore)))
And so we went, looking ahead, I’ll say right away that it won’t be possible to properly modify the heater without removing the panel, and I was also planning to glue noise under this very panel, and immediately make noise on the floor and do a lot of other things. Why... the car is disassembled, everything needs to be done at once (I thought I was naive!). But there was only enough time for the panel. I strongly advise against doing this procedure spontaneously, especially for family people for whom this car is the only means of transportation, and especially in cold weather; disassembling is fine, you can do it in one day, but assembly can turn into a fierce fuck-up)
A hair dryer really saved me when pasting a Shumka)) In short, there are a lot of letters, let's get down to business.
At this stage, when I disconnected all the wiring from the panel and it fell, I thought what the hell am I doing) How am I going to put it all back together? Since I did such things for the first time, but it was too late to give up, as they say, do it once you start! By the way, I advise you to label all the connectors that you disconnect, it will make assembly easier. When disassembling, screw bolts, self-tapping screws, etc. back into the same places and holes, it is very convenient when assembling, you don’t need to look for everything in a heap or somewhere else.
Step-by-step instructions on the topic of VAZ 2112, the stove does not blow on the side windows - go ahead, we are waiting for you. Here you will find videos on car repair, reviews and photos. How to repair a car yourself at home. We will help you with repairs and repair the car yourself. We know how to restore a car with minimal investment. I have attached video instructions.
Installation
This work, in principle, is not too difficult; it can be done even without special training. Just take into account that the installation of the seal and the simultaneous modification of wind and noise insulation must be carried out carefully and meticulously, then you will ensure greater interior comfort for several years to come.
The installation is carried out according to the following algorithm:
- Even if you have previously measured the seal seat, do it again, following the popular wisdom that it is better to measure seven times;
- Cut the seal to the required length with a small margin (a couple of centimeters). Of course, if you bought a ready-made “ten” set of rubber bands, then ignore these two points;
- Inside the seal, insert the polymer or silicone tube that you have. Accordingly, its length should also correspond to the elastic band. This tube is designed to give elasticity to the entire insulating structure and create a better fit of the rubber bands, thereby protecting the interior from unnecessary additional “ventilation” and unnecessary sounds;
- Glue the side curly seal at the bottom;
- A solid rubber band can be worn anywhere. And for measuring, it is best to choose a starting point between the door awnings (or about 30 cm from the bottom of the threshold). Whether you move the installation up or down does not matter;
- It is necessary to push the figured profile all the way down. This is done only with the help of a rubber or wooden mallet (hammer);
- When you walk around the entire perimeter, you will probably find that there is a lot of material. The insert element (tube) must be cut exactly end-to-end, and the seal must be cut in such a way that there is slight deformation of the adjacent areas. Thus, there will be no “siphoning” through the joint;
- Install the piston, remount the plastic sill trim;
- Carefully and tightly glue the second contour along the edge of the door. Let it dry.
Almost immediately when closing the door you will hear a softer dull sound. And while driving you will not hear annoying noises and whistling of the cold wind penetrating inside. After a while, you see, you will forget about the pain in your previously cold left knee.
How to properly install an additional door seal on Lada Priora, Granta and Kalina
Some owners of modern Lada cars (Priors, Grants or Kalinas) experience a whistling sound in the door area when driving at speeds above 80 km/h.
Others complain about water and dust getting into the cabin. All these shortcomings can be eliminated with the help of modifications, which involve installing an additional door seal. You will need: D-profile seal with dimensions 14*12 mm, degreaser, RKI-19 (article 000017504293020), RGI-135 (1118-6107028).
How to change door seals on a Priora
July 29, 2015 Lada.Online 164 426 21
Some owners of modern Lada cars (Priors, Grants or Kalinas) experience a whistling sound in the door area when driving at speeds above 80 km/h. Others complain about water and dust getting into the cabin. All these shortcomings can be eliminated with the help of modifications, which involve installing an additional door seal.
You will need: D-profile seal with dimensions 14*12 mm, degreaser, RKI-19 (article 000017504293020), RGI-135 (1118-6107028).
Replacing glass frame seal elements
External polymer elements are gradually destroyed under the influence of moisture, solar radiation and dust and need to be replaced. The step-by-step guide for replacing seals is as follows:
- dismantling old elements using a screwdriver, being careful not to damage the coating,
- removing dirt under the old linings and wiping the seats with a rag,
- We install new seals in place, while trying not to hit or apply much force.
Having completed all the work on one door, we move on to the next one, considering that their design is similar, then there are no special features in them. This is how we consistently eliminate natural ventilation of the car interior. Photos with step-by-step operations allow you to perform all actions quickly and get good results.
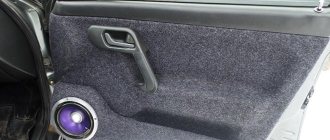
Additional operations to eliminate noise in the VAZ 2110 interior
Statistics show that the majority of drivers of Russian cars are not satisfied with the increased noise in the car. This is caused by the use of low-quality rigid polymer materials and insufficiently reliable fasteners. Therefore, reassembling the interior of even a new car is the most frequently requested service at many service stations. All work can be done with your own hands if you carefully study the instructions for carrying out the entire necessary cycle. The body can be properly isolated from extraneous noise only through complete disassembly . The panels are removed, and polymer or sponge inserts are glued in the places where they meet, which will prevent knocking or other sounds from occurring. The price of materials and work is relatively low, so the total cost of work will be acceptable.
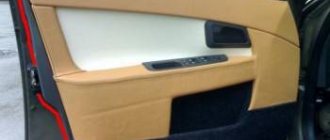
View of the improved doorway of the VAZ 2110
A car improved in this way becomes more comfortable and convenient to use, both in the city and on the highway. A high-quality replacement of the VAZ 2110 door seal eliminates aerodynamic noise and moisture leakage during precipitation into the car interior.