Replacing, adjusting and tuning headlights on Kalina: modernizing our Lastochka
Before you disassemble the front or rear lights or change the bulbs in the optics of the Kalina station wagon, sedan or hatchback, let's understand its structure:
- external glass designed to protect light sources and prevent moisture and dust from entering them;
- a plastic case onto which the main components are fixed;
- a rubberized seal between the headlight housing and the glass is used to ensure the tightness of the structure;
- low and high beam lighting sources, as well as turning lights;
- a plastic reflector located inside the housing, characterized by the presence of a mirror surface and used to reflect light from lamps.
Heading optics contains 4 lamps
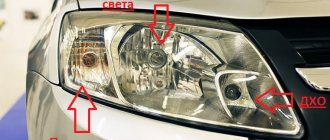
Let's look at how the directional optics, that is, the front headlight, is designed. The block contains four compartments, each of which contains one element:
- High beam lamp (H1);
- Low beam lamp (H7);
- Combined lamp for running lights and “dimensions” (W21/5W);
- Turn signal lamp (P21W yellow - PY21W).
The standard size of the element is indicated in parentheses.
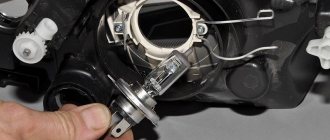
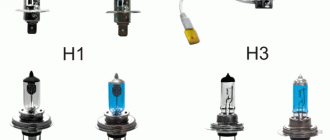
If we talk about low and high beams, standard power lamps (55 watts) are installed from the factory. It is not recommended to greatly exceed this value. Lighting fixtures of sizes H1-H7 look like this:
H1 – high beam, H7 – low beam
When making a purchase, the main thing is not to confuse an H7 lamp with a halogen lamp of a similar size (H4). Also, some companies produce 24-volt lighting devices.
When replacing halogen light sources, adhere to the following rules: do not touch the glass with hands without gloves; it is recommended to degrease the lampshade before installation. “Secunda” is suitable as a cleaner.
The following text shows the side and running lights:
New Lada: FAQ. Tightening torques for threaded connections There will be two filaments in the size lamp and DRL
Its standard size is W21/5W. Well, the turn signal bulbs in the directional optics use standard ones. They are equipped with a metal base, their standard size is P21W (PY21W).
The yellow lampshade looks like orange
Removing the rear light, replacing lamps VAZ (Lada) Kalina 1117 2004-2013
Tool:
- Driver for socket attachment
- High nozzle on the wrench 10 mm
Parts and consumables:
Note:
The work is shown on the left lantern.
1. Disconnect the wire terminal from the negative terminal of the battery.
2. To replace the lamps in the rear light, simply unscrew the fastening nuts and remove the light from the body without disconnecting the wiring block. Inside the trunk we bend the cut out part of the upholstery. Using a wrench or a high 10mm socket, unscrew the three nuts securing the light (the third nut is located under the upholstery and is not visible in the photo).
3. Move the lamp away from the body. By turning the side and fog light lamp socket counterclockwise, remove the socket with the lamp from the lamp housing.
4. Pressing the lamp, turn it counterclockwise all the way and remove the lamp from the socket.
5. Install the new lamp in the reverse order. The combined parking and fog light lamp has two protrusions located at different levels.
6. When installing it, the protrusions must fit into the corresponding grooves of the cartridge. The grooves on the flashlight body have different widths. This should be kept in mind when installing the lamp socket.
7. We carry out the operations for replacing the remaining lamps in the same way.
Position of the lamps in the rear light: 1 — reverse lights; 2 — brake signal; 3 — direction indicator; 4 - side and fog lights.
8. To remove the light, squeezing the clamps of the wiring harness block, disconnect it from the rear light wiring block. Using your hand, push the rubber sealing cover of the wires out from the hole in the body.
9. Having unscrewed the nuts securing the lamp (see above), remove the lamp by pulling the wires with the block through the hole in the body.
10. Install the lamp in the reverse order.
The article is missing:
High-quality photos of repairs
Replacing low beam lamps
The standard replacement of the low beam bulb on a Lada Kalina is quite simple. The procedure does not require deep knowledge of auto electrics or the presence of specialized tools.
To perform the procedure correctly, you must prepare all the tools and follow the sequence of actions.
- Place the car on the handbrake and remove the terminals from the battery. It is recommended to drive the car into a well-lit garage or leave it outside, this will make it easier to see small parts and fasteners.
- Remove the plastic block cover. Here you can tighten the element by hand without using tools. In some configurations, the plug can be made of hard rubber (what it depends on is unknown). It is important to consider that the element often dries out and cracks. Therefore, you need to buy it in advance.
- The replacement of the low beam bulb on the 1st generation Lada Kalina continues, at the stage of disconnecting the wiring. The contact group often gets stuck, which forces the master to tense up a little. By rocking the block from side to side, you will need to pull it off its seat. In this case, you need to hold the device body so as not to damage the element. If a part is broken, it cannot be repaired - the entire unit is replaced.
- Next, remove the lamp retaining spring from the hook. Then you will need to move it to the side so that it does not interfere.
Important! You should not completely pull out the latch - it will be extremely difficult to install it in place. The bar simply slides out so that the light bulb can be removed.
- Next, the light bulb itself is pulled out of the socket. You only need to support the emitter by its metal elements; you should not even touch the glass part of the lamp.
- Installation of the new part is carried out in the reverse order. At the same time, it is important to check the reliability of the device. If there is increased vibration, the lamp may fall out of its socket, which may cause an accident.
Replacing a 2nd generation Lada Kalina light bulb is done in the same way. The headlights of the cars are almost identical in terms of design.
How to replace the lamps yourself
Changing a light bulb in Kalina yourself is not difficult. The time spent on the work depends on the skill of the driver and the size of the hands. Some owners change light fixtures in 15-20 minutes without removing the headlight, while others suffer for more than an hour and ultimately dismantle the optics.
When replacing, cloth gloves are used. This helps protect the skin on your hands and also prevents contact with the bulb. When touched, fingerprints remain, which heat up when the light is turned on and after a while burn through the thin glass.
During work, the battery terminal is unscrewed to avoid a short circuit, which will lead to burnout of the fuse link in the fuse box.
Far module
Replacing the high beam lamp is easier than in the low beam module, since the cover is located closer to the radiator grille.
To perform the operation you will need:
- Turn off the Kalina engine.
- Open the hood lid.
- Remove the protective boot on the back of the flashlight.
- Carefully disconnect the plastic chip.
- Open the latch.
- Pull out the lamp.
Assembly is carried out in reverse order. When installing the terminal, you need to check the contacts and, if necessary, clean them using a flat-head screwdriver, sandpaper or a special chemical spray.
Low beam
Replacing a low beam lamp on a Lada Kalina depends on the experience of the owner and is divided into two types:
- Without removing the headlight.
- With module dismantling.
Most Kalina owners cannot replace the lamp in the left headlight due to limited space. In this case, you will have to ask a more dexterous friend or dismantle the lighting device yourself for convenience.
To change lamps on installed optics:
- Unscrew the filter housing near the left headlight and move it towards the engine.
- Disconnect the washer motor terminal, remove the screws and move the reservoir to the side.
- Open the light module seals.
- Remove the block with wires.
- Remove the spring clip.
- Remove the part.
Assembling the headlight with a new spare part is carried out in the reverse order.
To dismantle the headlights, you need to unscrew the grille, fasten the modules and disconnect the contact chip. Place the removed optics on a convenient surface and replace the light elements.
Dimensions and DRLs
In the first generation Kalina, the dimensions are installed under the cover of the near reflector.
Replacement is no different from work in the near headlight compartment, however, to disconnect the lamp, it is turned counterclockwise. Drivers often install a diode instead of the original light source, which has a bright glow and can work for more hours.
Replacing DRL lamps on second generation Kalina:
- Open the hood.
- Find the plastic retainer at the bottom of the lamp near the radiator grille.
- Turn left 90°.
- Pull towards yourself.
Daytime running lamps do not contain halogen in the bulb, so they can be handled by hand when installing. Parts without gas include reverse elements, which are changed by bending the trim in the luggage compartment. To replace the Kalina station wagon's brake light bulb, you will have to unscrew the plastic plug on the fifth door, disconnect the chip and pull out the old spare part.
Turn signal
If the marker light on Kalina is freely accessible, then it is more difficult to get to the turn signal module.
To install a new lamp, you need:
- Unscrew the screws holding the air intake barrel and washer fluid reservoir.
- Move the parts towards the engine.
- Feel for the plastic cartridge and turn it to the left.
- The lamp is removed from its seat by slightly pressing and turning it 90° to the left.
To install a new part, you need:
- Install it into the cartridge.
- Press and turn to the right until it stops.
The finished element is mounted in a standard hole. You can check the operation of the light by turning on the corresponding key on the Kalina instrument panel.
Fog lights
When replacing the fog lights, partial dismantling of the locker will be required. To do this you need:
- Turn the wheel towards the engine compartment.
- Unscrew the screws and unclip the clips where they are attached to the bumper.
- Bend the fender liner.
- Turn the light bulb to the left until it stops.
- Pull towards yourself.
- Disconnect the plug.
To install a new light source in the PTF, you must first snap the connector, insert the part into the lamp and turn it to the right.
After carrying out the work, you need to check the correct functioning of the light and adjust the angle of the reflector. A properly functioning car light ensures good visibility in all conditions and safety on the road.
Other lamps in the station wagon and hatchback
To illuminate additional equipment in Kalina-2, lamps of standard size C5W are used. They are:
- In the license plate light socket;
- In the trunk light;
- In the glove compartment lighting module.
The interior is illuminated by a C10W lamp, and additional side lamps are equipped with T4W lamps.
Light bulbs and body turn signals
The side turn signals are equipped with incandescent lamps without a socket (W5W). And H11 lamps can be installed in the front fog lights. Successful replacement.
All about Lada Kalina lamps
In our material, we tried to collect the most important information about the lamps that are used in the Lada Kalina model, popular among domestic car enthusiasts. This will primarily be useful to know for those owners who, for various reasons, have to choose and purchase lamps for installation in the lighting fixtures of their cars.
Today, a retail network of goods of the relevant type is able to offer a lot of options for lighting components, where even a professional, not to mention a beginner, can get confused. LED sources are becoming especially popular, considered by the owners of Lada Kalina 2 as an alternative to standard lighting elements.
Next in order.
1. Let's touch on the headlights.
These devices contain three lamps with different purposes. Let's make a reservation right away: direction indicators don't count.
1.1. A traditional lamp with an “H1” socket is responsible for the high beam. If there is interest in the LED analogue, then its marking is “4456”. Note that a standard lamp is preferable due to more correct beam formation through the optics reflector.
1.2. Low beam is provided by using an “H7” type bulb. An analogue is the LED source “3528”. In this case, the halogen device has advantages, since the Chinese LED product is not able to provide the required level of illumination.
1.3. Side light. There is a light component “W21/5W” here. The source implies a combination of traditional side lights and running lights. In this case, it is very difficult to select similar LED lighting equipment, since its pinout type is “7443” or “3157” (you can get confused).
2. Stern lighting fixtures.
2.1. The most common components here for the rear of the Lada Kalina 2 car are brake light sources. These are “P21W” type bulbs. As an analogue for use, let’s use the LED device “1156”. When installing the lamp, you will need to achieve a beam dispersion angle of 360°.
2.2. Lamps responsible for reverse gear. Their type is "R10W". The products are small-sized and have a similar base as that of the “P21W” sources. They differ only in length. The overall dimensions of the lamp considered here should not exceed 3.75 mm.
Read more: How to wash your car to make it shine
Care must be taken when selecting an LED emitter as the alternative "1156" component must meet the specified size limitation.
2.3. Lamps used for reversing the universal version of the body. Here we have a “W16W” source, which can rightly be considered a baseless analogue of the “P21W” lamp. Would you like to use an LED lamp? Look for the “T15” option with a 360-degree dispersion angle.
2.4. Side lighting element and daytime running light. Here the manufacturer used a dual “P21/4W” design. The lamp has two filaments and a base identical to the “P21W” device.
If you are interested in the LED option, purchase the “1157” device.
3. Turn signals.
These important elements of periodic lighting in Lada Kalina 2 are “P21W” lamps. Their flasks are endowed with yellow color. LED analogues are “1156” sources, which have a similar color.
4. Side repeaters.
Here the manufacturer uses common “W5W” type lamps.
A similar device with LED technology is the “T10” product.
5. Anti-fog optics.
If you become the owner of a “Luxury” Lada Kalina, you will have to install (when replacing) the well-known “H11” type lamps in the designated headlights.
When the owner of a Lada Kalina likes LED devices, then you should find lamps of a similar type (“H11”) on sale, but it is desirable that the scattering angle be equal to the same 360 degrees.
6. Other sources of Kalina.
At the end, it remains to “walk” through some more lamps.
6.1. Lighting of the salon space. “C10W” elements are used. The length of the device does not exceed 41 mm
We pay attention to this aspect!
6.2. The registration number is illuminated by W5W lamps.
6.3. Luggage compartment and glove compartment. Here we decided to combine the categories, since identical sources are used to illuminate both spaces - “C5W”.
6.4. Lamps used to illuminate the interior space near the front seats. The element "T4W" is used
Its length is 26 mm, which is also important at the time of selection
What lamps are used on Kalina
The first generation Lada Kalina uses several types of light bulbs and indicator lights.
The location and names of the elements are as follows.
- Distant lights - H1;
- Low beams - H2;
- Front marker light and side direction indicators – W5W;
- Turn signals – PY21W;
- Front fog lights – H11;
- Fog lights at the rear of the vehicle - P21;
- Stop and reverse lamp – P21W;
- License plate backlight – W5W.
Standard illuminators often do not meet the requirements of motorists. They poorly illuminate the road and quickly fail. Therefore, some users replace the low beam bulbs on the Lada Kalina with diode models. To do this, you should select the appropriate elements on the market and modify the optical elements of the car.
Some drivers believe that simply replacing light bulbs is enough. However, it is not. The factory optics of the first viburnum are not adapted to work with such elements and will quickly fail. There is not enough space in the headlight to remove large amounts of heat from the diode, which leads to deformation of the lens and the plastic housing itself.
To tune the device, you must replace it completely. There are many offers and options for optics modifications on the 2022 market. Just select the appropriate option and install it instead of the standard one.
A similar replacement of a 2nd generation Lada Kalina light bulb is not required. The latest generation factory optics are already capable of working with diodes and have the necessary margin for full operation. The manufacturer insists that the most advanced versions of cars are launched on the market with diodes and replacement as such is not required.
Removing the rear light, replacing lamps Lada Kalina
The work is shown on the left lantern.
Disconnect the wire terminal from the negative terminal of the battery.
To replace the lamps in the rear light, simply unscrew the mounting nuts and remove the light from the body without disconnecting the wiring block.
Inside the trunk we bend the cut out part of the upholstery.
Using a wrench or a high 10mm socket, unscrew the three nuts securing the light (the third nut is located under the upholstery and is not visible in the photo). We move the lamp away from the body. Turn the side light and fog light bulb socket counterclockwise.
. remove the socket with the lamp from the flashlight body. Pressing the lamp, turn it counterclockwise all the way.
. and remove the lamp from the socket. Install the new lamp in reverse order.
The combined parking and fog light lamp has two protrusions located at different levels. When installing it, the protrusions must fit into the corresponding grooves of the cartridge.
The grooves on the flashlight body have different widths. . This should be kept in mind when installing the lamp socket. We carry out the operations for replacing the remaining lamps in the same way.
Position of lamps in the rear light
1 — reversing lights;
2 — brake signal;
3 — direction indicator;
4 - side and fog lights.
To remove the light, squeeze the clamps of the wiring harness block and disconnect it from the rear light wiring block.
Using your hand, push the rubber sealing cover of the wires out from the hole in the body. Unscrew the nuts securing the lamp (see above).
. remove the light by pulling the wires with the block through the hole in the body. Install the lamp in the reverse order.
Replacing the brake light bulb on a Hatchback
The rear lights on the Lada Kalina Hatchback are designed in such a way that to replace the bulbs it is necessary to almost completely remove it. To do this you will need a minimum of tools, namely:
- 10 mm head
- extension
- ratchet or wrench
So, first of all, we open the tailgate (trunk lid), and from the inside you need to find those places where the nuts securing the rear light to the car body are located. One of them is shown in the photo below, made in the form of a special technological window in the casing:
And the second is located on top under a plastic plug, which must be removed by pressing two latches on the edges and pulling it towards you:
And now unscrew two nuts, one on top:
And the second one at the bottom through the same hole in the trunk upholstery:
Now you can move the rear light a little to the side by pulling it from the outside with a little force:
And from the back of it, you can without any problems remove the lamp that needs to be replaced, be it a hundred-signal, reverse, turn signal or marker. The cartridge itself is quite easy to remove; just turn it slightly counterclockwise.
To remove the light bulb itself, you need to press it lightly and also turn it counterclockwise.
Fog lights
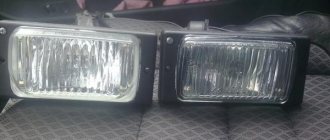
PTFs for Kalina are installed only on expensive trim levels. However, all wiring is installed from the factory and there are “ears” for mounting on the bumper. To install headlights, you will have to purchase a power button, frames in body color and a relay.
Installation of fog lights:
- Use a screwdriver to remove the plugs under the PTF.
- Screw the lights into the standard recesses.
- Snap frames to hide excess cavity.
Lada Kalina Cross uses matte black plugs that do not require painting. When installing on your own, you should buy bolts for fastening the headlight in advance.
How to connect the electrical part
Connecting the PTF to the standard wiring does not take much time. To search for the braid, you should inspect the area of the spar at the entrance of the main beam. The PTF plug is taped to the wires with electrical tape.
Fog lights Kalina 2 are often equipped with detailed instructions and an additional switch that must be installed instead of the old module to turn on the light. Connecting to pre-laid wiring does not take much time and does not require laying additional contacts.
If there are no power cables in the braid, you will have to independently pull the wires into the cabin, connect them to the connector, fog lights with plus and minus, and connect them through a relay. A detailed description of the connection is included with the part in the form of a diagram.
During the installation process you will need:
- insulating tape;
- copper wires;
- corrugation;
- connectors suitable for lamps.
Replacement process
The process of replacing lights on the Lada Kalina 2 differs depending on its type. There are “Kalina 2” hatchback and station wagon. For a hatchback, the replacement sequence is as follows:
- open the 5th door of the car;
- Remove the 2 bolts securing the rear lighting component to the luggage compartment side. Use the key on 8;
- pull the light from the back of the car towards you, using little force;
- remove the fastener studs from the headlight fixing fasteners at the rear;
- move the lighting component away from the car body;
- if you need to replace the lamp, remove the socket with the broken product;
- After installing a new lamp in the lighting system, perform the entire process in reverse order.
Removing the rear light on a Lada Kalina hatchback The principle of removing a headlight on a Kalina (station wagon) and replacing the block lighting differs depending on the shape and structure of the car itself. For the process of replacing the rear light unit you will need:
- open the 5th car door;
- open the hatch located in the trunk trim;
- disconnect the block with the light cables at the rear of the car from the harnesses and wires;
- Unscrew the 3 nuts securing the product to the car body;
- disconnect the device lock;
- remove the lamp retainer from the car body.
If you are interested in replacing the lamp, then after the above steps you need to remove the broken socket by turning it counterclockwise. This way you can remove it from the headlight housing. The new lamp is inserted into the socket by pressing and turning it clockwise. If you need to completely replace the lighting, simply insert the new product into place and perform the reverse steps of disassembly.
Replacing rear lights – Lada Kalina Blog
To independently replace the rear light assembly, one 8-mm wrench will be enough, preferably a socket with a ratchet and a Phillips screwdriver. This procedure will not take more than half an hour and will not cause much trouble. Everything is described in order below.
Guide to removing and installing rear lights on Lada Kalina
- The first step is to open the Velcro windows in the trunk trim, which give access to the headlight mounting bolts. Although, I would recommend bending the corner of the trim completely in the right place. To do this, you need to unscrew two screws. The first one is located on the threshold of the trunk, closest to the corner:
Headlights
Replacing a headlight yourself will require preparation of the car and tools. To work you will need:
- set of wrenches;
- screwdrivers;
- rag;
- gloves to protect hands.
For ease of work, you need to wash Kalina in advance and clean the space in the garage. To replace the headlights, you need to remove the bumper and unscrew several mounting bolts.
Dismantling
Steps required to remove headlights:
- Open the hood lid.
- Disconnect the battery terminal.
- Pull out the clips from the front of the fender liner.
- Unscrew the radiator grille fasteners and remove it.
- Unclip all the clips along the contour of the bumper and unscrew the screws.
- Remove the bumper without scratching the corners of the fenders and headlights.
- Disconnect the optical power plug.
- Remove the two screws holding the light on top.
- Remove the lower headlight bolts.
- Carefully remove the part.
Repair
To disassemble the Kalina headlights, they will need to be dismantled. You can repair the Kalina headlight by polishing the glass, replacing it, washing the internal parts, or restoring the reflector.
To remove the glass you will need:
- Dismantle the part.
- Heat the headlights in the box using a hair dryer.
- Tear off the glass.
- Carry out all the required work and assemble the lantern using a special sealant.
To disassemble the headlight, it will take several hours, depending on the experience of the car owner. Replacing Kalina's headlight glasses will improve the exterior and increase light transmittance.
While working, it is important to follow safety precautions, do not leave the hair dryer unattended and use gloves
Installation
Before installing the lights, you should wash the mounting points and mounting space. Installation is carried out in the following order:
- The power plug is connected.
- The Kalina headlight mounts are aligned and secured with standard bolts.
- The bumper is hung from the front and screwed onto self-tapping screws.
- The radiator grille is installed.
- The left and right fender liner clips are being returned.
In versions with fog lights, you will have to additionally connect the connectors to the lamps when installing the bumper and disconnect them during removal.
Stern maintenance
On a Lada Kalina, replacing the brake light bulbs may be necessary if the headlight is damaged or the element itself burns out. Due to the design features of the car, repairs can only be performed by completely disassembling the rear panel and removing the entire headlight.
- On a Lada Kalina, replacing brake light bulbs begins with dismantling the headlight. To do this, you need to remove the plastic cover from where the seat belt comes out. The second part is attached a little lower - near the belt reel. The nuts are unscrewed with a No. 10 wrench. You should be extremely careful when doing this. If a part flies into the body panel, you will not be able to get it out.
- As soon as the device is freed from its mounts, all lamps will be accessible. You can remove them from the mount by turning the base 45 degrees clockwise.
- Next, the light bulb itself is removed and replaced with a new one.
- Reassembling the headlight is performed in reverse order.
Replacement of glass in the headlight unit of a Lada Kalina car (for Bosh headlights)
1. Remove the headlight unit from the car, see the operations described above 2. Remove the six metal rivets that hold the glass. You can remove the rivets using a flat blade screwdriver.
3. Remove the glass. 3. Install new glass on the headlight unit. (The seal between the glass and the headlight housing is sealed with a rubber seal. If the rubber has lost its plastic properties, use a sealant. Apply a thin layer to the place where the glass contacts the seal. Replace the glass, remove excess sealant. 4 Install the metal clips in their places. Reinstall the headlight.
How to choose good lamps
It is not enough to replace a faulty element in a car; you also need to select the right spare part. Light bulbs are no exception. The auto parts market offers a large selection of lighting devices from a variety of manufacturers with appropriate quality.
Conventionally, lamps can be divided into three categories:
- Good lamps should last a long time, but don't have to be expensive. Quite good manufacturers, such as Philips, Osram, etc., sell affordable lighting devices with standard characteristics. The price of one lamp, for example, with an H1 base is, on average, 102 rubles. In this case, the characteristics will be averaged, as on standard lamps with, “Dialuch” and other lamps, on the packaging of which you can find Chinese characters, are cheap low-quality light sources. The illumination is worse, and the service life can sometimes exceed the operating time of even the most expensive lamps.
- A separate category of light sources are expensive light bulbs or, as they are commonly called, high-brightness lamps. Trivial examples are: Osram Nigth Breaker +110 or Philips Racing Vision +150. In fact, the brightness of such lamps is actually higher, since they operate in overheating mode. But durability is less. You can also include LED lamps and xenon, as this is a kind of optics tuning.
When it comes to choosing a lamp, we always think of light sources for low beam headlights or PTF. For other luminaires, lamps are selected with much lesser requirements.
Lighting devices are a guarantee of safety
Today, there is probably no driver who is not aware of the regulatory requirements for operating a car. These standards also apply to external lighting devices; the brake light lamp also falls under the standard, since the use of a car with these components that do not comply with the factory regulations in terms of design is prohibited.
This approach is dictated by safety requirements, which involve ensuring sufficient illumination and visibility of the car on the roadway, but at the same time eliminating the risk of blinding not only pedestrians, but also oncoming drivers by the light beam. In addition to headlights, the indicated requirements also apply to stern lighting fixtures.
The main element in any headlight is the lamp. The efficiency of illumination of the road surface depends on its quality conditions. Many people are interested in the question of what kind of light bulbs are in Kalina.
Lighting tuning options
The most common options for tuning Lada lighting products are:
- tinting;
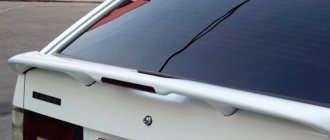
- installation of an additional brake light.
Tinting of car lights occurs by painting or wrapping with film. The second method is more popular among drivers, because the film does not reduce the lighting intensity so much. In addition, covering the lantern with film can be done faster and better than conventional painting.
Tinted tail light
For the coloring process you will need:
- hair dryer (household or industrial);
- plastic scraper;
- clean scraps of fabric;
- vinyl film (1 square meter is enough);
- stationery knife;
- water sprayer.
It is possible to carry out the tinting process without removing the lighting, but performing such work at the highest level is only available to trained specialists. It would be better to first dismantle the products according to the standard scheme.
After this, you need to clean the components from dirt, spray water (if indicated in the instructions for the film) and apply the vinyl. To give it the desired shape, heat it with a hairdryer, and then smooth it with a scraper, removing excess water. Cut the film with a knife and wait for it to dry. The whole process will not take more than an hour. Remember that applying paint or film will affect the brightness of your lighting, so you may need to install brighter bulbs.
An example of painting the lights on a VAZ 2109
Often, to improve safety on the road, Lada drivers decide to install an additional brake light at the rear. For this you will need:
- knife or file;
- key to 8;
- LED strip;
- glue;
- soldering iron;
- wiring;
- sealed substance.
If you install additional components, it is not necessary to dismantle the Lada bumper - just stick your hand under it at the location of the light sources and unscrew the corresponding nut with a size 8 wrench.
Additional brake lights on Lada Kalina
After this, disassemble the reflector: cut off the layer of sealant with a sharp knife and clean the edges with a file. Next, take the LED strip, cut it into pieces and place it on the glue inside the reflector. Connect the wires coming from the tape to the lighting system using a soldering iron. After installation, check that the connection is correct by turning on the brake lights. If you did everything correctly, assemble the reflector using a sealing substance. Pull the wiring coming from the tapes through the rubber in the reflector body. Wait for the sealant to dry. Route the wiring to the left (right) side of the car, depending on the installation location of the first reflector. Route the wires into the luggage compartment after removing the plug. After this, connect the brake light to the lamp wires, isolate the wiring and check the operation.
We remove the headlight, having previously dismantled the bumper on the Lada Kalina
In any case, you will need tools such as 8 and 10 mm wrenches, screwdrivers: flat and Phillips. Of course, you need to take care of spare parts in advance when it comes to lighting system components. I will especially say about the keys.
Drivers who do some work on their own know that there are open-end, socket and ring wrenches. If space allows, it is best to hold the nut with a socket or cap. Then all its sides are grasped. This ensures that the edges, if difficult to rotate, will not be damaged.
It is advisable to have heads as well. It is best if you prepare a ratchet. The fact is that in some places it is quite difficult to operate a simple key, since it turns at a small angle.
The first thing you need to do when dismantling the headlight and removing the bumper is to use a Phillips screwdriver to unscrew the four screws that secure the fender liners. After this, you need to find a couple more screws. They are below, one on the right and one on the left. To avoid mistakes and waste time, it is better to use an inspection hole.
If it is not there, then you can perform the operation lying on a pre-prepared mobile plane or on the floor, covering it with improvised material. When these two lower screws are also unscrewed, unscrew the three bolts also located at the bottom.
Now you can easily remove the radiator grille and unscrew the bolts that secure the bumper to the body. The next operation is to remove the decorative grille. It is made of plastic and is located under the license plate. There are two bolts there. They are easy to find. After they are unscrewed, you just need to pull the grill towards you.
The last step is to unscrew and remove the two screws under the license plate. Then we grab the edges of the bumper and, pointing it towards ourselves, tear it off the latches. The Kalina bumper is light. You can remove it from the latches and hold it suspended without an assistant.
And now the bumper is removed.
All that remains is to dismantle the headlight. To do this, remove the bumper power beam. Then remove the bolts securing the headlight. To find them, you need to tilt the beam a little to the side. These bolts are best removed using an 8mm socket equipped with a ratchet.
There are two more bolts at the top. We unscrew one with an 8 key, the second with a Phillips screwdriver. After this, disconnect the power plugs. It must be remembered that the fixation of these connectors is ensured by latches. Where they are located can be determined even by touch. The plug can only be disconnected by bending the latch. Now we just grab the headlight housing (take it with both hands) and remove it.
Removing the rear light Kalina station wagon
The work is shown on the left lantern. Disconnect the wire terminal from the negative terminal of the battery. To replace the lamps in the rear light, simply unscrew the mounting nuts and remove the light from the body without disconnecting the wiring block. Inside the trunk we bend the cut out part of the upholstery.
Using a wrench or a high 10mm socket, unscrew the three nuts securing the light (the third nut is located under the upholstery and is not visible in the photo). We move the lamp away from the body. Turn the side light and fog light bulb socket counterclockwise.
. remove the socket with the lamp from the flashlight body. Pressing the lamp, turn it counterclockwise all the way.
. and remove the lamp from the socket. Install the new lamp in reverse order.
The combined parking and fog light lamp has two protrusions located at different levels. When installing it, the protrusions must fit into the corresponding grooves of the cartridge.
The grooves on the flashlight body have different widths. . This should be kept in mind when installing the lamp socket. We carry out the operations for replacing the remaining lamps in the same way.
Position of lamps in the rear light
: 1 — reversing lights; 2 — brake signal; 3 — direction indicator; 4 - side and fog lights.
To remove the light, squeeze the clamps of the wiring harness block and disconnect it from the rear light wiring block.
Using your hand, push the rubber sealing cover of the wires out from the hole in the body. Unscrew the nuts securing the lamp (see above).
. remove the light by pulling the wires with the block through the hole in the body. Install the lamp in the reverse order.
Replacing light bulbs in the dashboard of Lada Kalina
Cleaning the viburnum is a separate matter. There are a large number of lights, indicators and alarms here.
The procedure is performed like this.
- As usual, set the car to the handbrake and remove the terminals from the battery.
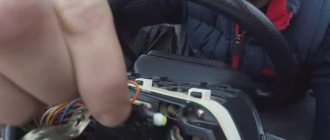
- Next you will need a Phillips screwdriver. Using the tool, remove the two mounting screws. It is important to carry out the change very carefully - the panel is in a visible place and scratches can significantly spoil the appearance.
- After the decorative trim is released, you can carefully pull it out, overcoming the resistance of the latches. The lower part of the panel is equipped with special rollers. The guides must “survive” after repair,
- Under the decorations there is a mount for the tidy itself. The screws are also unscrewed with a Phillips screwdriver and the panel is removed.
- Next, the actual replacement of light bulbs in the Lada Kalina panel begins. To do this, you need to remove the device from the mounting socket and disconnect all contact groups and wires from the device.
- Once the panel is completely removed, you will need to move to a well-lit area to continue the repair procedure.
- Subsequent replacement of light bulbs in the Lada Kalina dashboard is carried out with a thin tool. After finding the required element, it should be disconnected from the socket and removed from the seat. This is done with pliers or special pliers. Grasping the cartridge, you need to turn it clockwise and pull it towards you.
- Next, you need to diagnose the cartridge; if the latter is working, only the illuminator is changed.
- Installation and assembly are performed in reverse order. At this point, the replacement of light bulbs in the Lada Kalina panel is completely completed.
