To start an engine, two main components must be present: the air-fuel mixture in the combustion chamber and a spark from the spark plug. The first is the responsibility of the car’s fuel system, which supplies gasoline from the tank to the unit that prepares the combustible mixture. The presence of a spark is ensured by the ECU. It delivers a powerful electrical discharge to the spark plug in the final cycle of compression of the air-fuel mixture in the combustion chamber. As a result, the crankshaft and the associated piston group rotate. A failure in the operation of any component will cause difficulty in starting the Priora engine or make it impossible.
practical guide
To check the ignition switch you will need a multimeter.
1. Prepare the car for work and disconnect the wire terminal from the negative terminal of the battery.
2. Remove the decorative linings of the steering column.
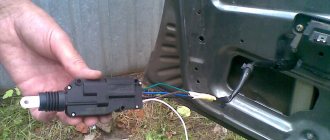
3. By pressing the latch, disconnect the ignition switch (lock) block from the wiring harness block.
4. Using a multimeter in ohmmeter mode, check the serviceability of the terminals in the block.
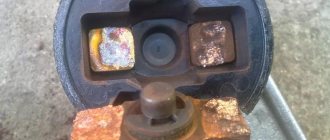
Perform the test when the key is in position O - “off”, all contacts should be open. Then check the contact closure in position I - “on”, contacts 15 and 30 should be closed (resistance between terminals A and C is close to zero). In position II - “starter”, contacts 15 and 50 should be closed (the resistance between terminals C and D is close to zero).
Designation of the terminals on the ignition switch (lock) block: A - pin 30; C - contact 15; D - pin 50
We replace the ignition switch with a faulty contact group.
Add a comment Cancel reply
You must be logged in to post a comment.
What is the device?
The ignition switch is a special device that supplies direct current to the starter traction relay. Such impulses come from the battery and are activated when the lock is turned on. Without the correct operation of the device, the car will not function fully.
Design Features
The mechanism includes two main parts. The ignition key is placed in the lock cylinder, which puts the car into operating mode and activates the lock itself. The second part is the contact group. It closes in a certain sequence, depending on the position of the key in the cylinder.
Why the system might break down
The need to replace the lock may arise for a number of the following reasons:
- wear and tear of individual parts. Burnouts or oxidation of the system drives are common;
- incorrect contacts. Violation of such circuits leads to combustion, oxidation and lack of working abilities;
- cylinder wear. The breakdown is manifested by difficulties when using the key;
- Lost car key. A trivial but compelling reason for replacement.
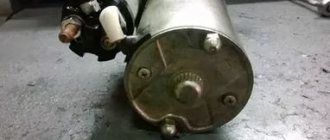
Removing the ignition switch, replacing the contact group and immobilizer coil
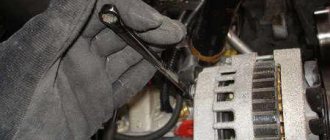
We remove the ignition switch to replace it if its cylinder mechanism fails, to replace the contact group of the switch, and also if it is necessary to replace the immobilizer coil. Disconnect the wire terminal from the negative terminal of the battery. To access the ignition switch, remove the upper and lower steering column casings (see “Removing the steering column switches, switch connector and spiral cable drum device”).
Remove the sealing ring from the ignition switch. Having released the pad lock...
...disconnect the ignition switch contact block from the instrument panel wiring harness block. Use a slotted screwdriver to pry up the edge of the immobilizer coil wire block...
...and disconnect the wiring block of the instrument panel harness from it. The heads of the ignition switch mounting bolts are torn off.
Loosen the bolts using a chisel... ...and unscrew the bolts with pliers
Remove the bracket and ignition switch from the steering column.
Using a Phillips screwdriver, unscrew the three screws...
...and remove the ignition switch bracket.
We take out the locking rod of the anti-theft device. Turn the key in the ignition switch...
...and remove the locking rod drive and the drive spring.
Remove the stopper with the spring from the drive. We push the cylinder mechanism out of the switch body.
We take out the locking ball and cylinder mechanism.
We remove the locking ball spring from the hole in the mechanism.
Prying it with a screwdriver. ... we disengage the two plastic latches of the cover of the ignition switch wire block and open the cover. We mark the wires located in the block.
Using a thin awl or stiff wire, bend the locking tendrils of the wire tips...
...and remove the wires from the block. Remove the insulating tube from the wires.
Squeeze the three plastic latches with a screwdriver. ...remove the contact group from the switch body and bring the wires out through the holes in the body.
Prying it with a screwdriver. ...we disengage the three plastic latches...
Standard ignition switch - article number, price, how it works, device
The module on Priora does not work directly with the components that initiate the engine start. For it to work properly, you need to wait a few seconds before starting until the fuel pump creates the required pressure. On the Priora, only wires are connected to it - the paths along which messages pass from the ignition switch to the electronic control unit.
The ECU of the Priora car just receives data about the position of the key and can crank the starter if this operation is “not blocked”. Due to a breakdown, it can only turn on the ignition, leaving the battery to work.
After the ECU key has turned, it gives commands to several parts at once. When you turn on the second position, let the fuel pump run for 5 seconds so that it pumps fuel from the tank closer to the engine.
When the starting process itself begins, the starter rotates - the force it creates goes to the crankshaft;
the ignition system element converts the low voltage current coming from the battery into a high one so that the spark plugs are “charged” and give a spark at the right moment;
Video “Detailed instructions for replacing the seal”
Visual instructions on how to replace a unit at home are given in the video below (author - channel In Sandro's Garage).
The ignition switch on a Lada Priora car starts the engine. In order for it to start, the machine needs to be given a command. The price of a part for a Priora car is from 1,800 rubles. Replacing the ignition switch is a simple procedure that a beginner can handle.
The driver, turning the key in the lock with the immobilizer in several different positions, gives the command to turn on the ignition or start the engine. Only after this everything starts to work: the starter turns, the crankshaft begins to move, and finally the spark plugs give a spark for the first portion of the air-fuel mixture. But the operation of all these parts may not take place due to a malfunction of the ignition switch on the Priora.
If the car does not start, and you are sure that the components are working properly and the battery is charged, you will have to remove it in any case to inspect and identify the fault. Repairs can be done by anyone; it’s enough to understand all the steps in detail. If it does not help, then the ignition switch needs to be replaced.
How to change and remove it on a Lada Priora car and how many actions need to be performed, you will learn from the article.
Diagram and pinout of the ignition switch on Priora
The diagram looks like this:
Using the diagram, you can track the presence of an immobilizer, as well as a blocker for excessive cranking of the starter. It starts from the battery - the pinout transmits voltage from it to point 30. Here the connection to K4 is a fuse relay. The contact group of the ignition switch of a Priora car will only work if the locking rod is in place and holds the key.
There are two positions in the diagram – I (ignition) and II (engine start). Replace the ignition switch of the Lada Priora in accordance with this diagram.
Possible malfunctions of the protection system and ways to eliminate them
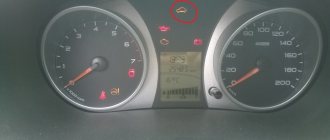
If the ignition switch fails on a VAZ 2170, many motorists may confuse this problem with a breakdown of the ignition coil or, for example, the ignition module. But as for the 3Z specifically, its repair or replacement is carried out only if the key is not moved to position I or the steering wheel is not blocked after the key is removed. The key must always return to position I after starting the engine. If this does not happen, then you can either repair or replace the ignition switch.
Basic faults
Usually the module is “sinned” when the battery is dead - nothing will turn on, even the ECU will not receive a signal. You can solve everything by charging the battery or installing a new one. But if you are sure that the key in the ignition switch has turned, but there is no “effect”, then the problem is in the module.
- Firstly, one of the dangerous problems is a faulty locking rod. As was said, it does not allow you to remove the key when it is in position I or II. If you accidentally notice that the key falls out, try to replace the block as soon as possible. It happens that replacement is taken due to an immobilizer error. This can only be done as a last resort, having accurately checked all possible “escape routes”, because reconfiguring the ECU will take a lot of time.
- Secondly, the wiring connected to the unit may become damaged, and it will become “cut off” from the Priora’s electronic control unit. It is necessary to ring all sections of the wiring and change it. In the same group of problems is the fuse relay. If the fuse is blown, the engine will not start.
- Thirdly, the spring may become deformed or break. This manifests itself in the fact that after cranking the starter and starting the engine, the key does not return to position I.
Elimination of breakdowns of the anti-theft system
Sometimes the Priora does not start due to the immobilizer - it simply does not “see” the key. An immobilizer is an electronic anti-theft device that prevents the engine from starting without the original key. The principle of operation of the mechanism is shown schematically in the photo.
The principle of operation of the immobilizer
In the body of the original ignition key there is a transponder chip 3, which contains a complex electronic code. When the driver inserts the key into the ignition, the immobilizer is activated and the electromagnetic waves 2 of the electromagnetic coil 1 begin to read the encoded code. If the codes in the memory of both the immobilizer electronic unit and the transponder match, the engine starts; if there is an error during reading, the engine will not be able to start.
In the event of a breakdown, an anti-theft device can become a serious problem for the car owner, since the location of the micro-immobilizer - a relay that ensures the functioning of the main vital systems of the car - is almost impossible to find. The mechanism can be disguised as a fuse or controller and installed in the most unexpected places, otherwise the entire anti-theft system becomes meaningless. It is possible to revive a car if the immobilizer fails, but it is quite troublesome. If the transponder is damaged, try using a spare key. If the chip is working, but the system still does not “see” the key, you need to buy another one and reflash the electronic control unit.
You will need a PIN code to reinstall the software. If it is not there, you will have to buy a new ECU.
The system may not respond to the key if the reading coil is damaged: in this case, the lock assembly with it will have to be replaced. To avoid causing problems with the immobilizer, you should not try to start the engine in severe frost or if the battery is discharged. It is not recommended to place keys near sources of strong electromagnetic waves (for example, a microwave oven). You cannot keep keys from different cars in one bunch, or remove the battery terminal while the ignition is on.
Removing and installing (replacing) the ignition switch on a Priora
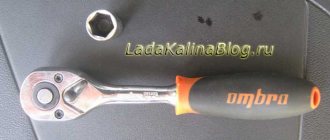
Before removing and replacing the module, have a few tools ready:
- chisel;
- hammer;
- pliers;
- key "10";
- Phillips screwdriver.
Replacing the Priora ignition switch is carried out according to the following algorithm:
- Put the car on the handbrake, remove the negative from the battery.
- Remove the steering column covers - to do this, insert a screwdriver into the small technical holes and unscrew the bolts.
- In front of you will be a steering shaft, to which the ignition module is attached with four bolts. They are twisted very tightly - so that potential hijackers would have to waste time removing the module; to do this, they would have to tear off all the fasteners. Place the chisel under the bolt head and tap the chisel with a hammer until the bolt head begins to rise.
- By lifting the threaded fasteners, you can unscrew them - but for convenience, it is better to do this not with your hand, but with prepared narrow pliers - there is a lot of space for standard ones.
- As you unscrew each bolt, try to “catch” the falling module.
- All that holds it is a block of wires. Disconnect it, then install a new ignition module for the Priora car instead of the old one. Tighten the fasteners just as tightly, but try not to tear them off when tightening.
Troubleshooting
The ignition switch on a Priora often fails due to improper use. The first step before replacing the device is to disconnect the battery. To do this, remove the terminal. Also remember to remove the steering cover and disconnect the electrical connectors.
The Priora ignition switch is bolted to the steering rack. You won't be able to unscrew them with a screwdriver or keys. You need to use a hammer or chisel. Otherwise, use an electric drill, which can remove the bolts.
When removing the bolts, they may break. There is no need to worry about this; such a part can be easily and quickly replaced. To simplify the work of replacing the lock, simple bolts or screws are installed in the future. They can be unscrewed with standard tools.
Replacing the ignition switch on a Priora includes checking the voltage of each contact. This process prevents unwanted problems with the new lock. In order not to confuse the connection of the contact group, their “natural” arrangement is first recorded. This simplifies the work with replacement and provides you with a hint when completing the assembly of the mechanism.
If the Lada Priora ignition switch is not replaced, then problems may arise with its components. Replacing a contact group involves the following process:
- The casing is removed and the lock is pulled out.
- The correct pin connection sequence for reconnection is recorded.
- According to the recorded connection principle, a new contact group is distributed.
- Place the lock in its original position, covering the steering wheel with the removed cover.
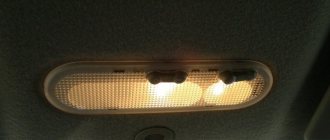
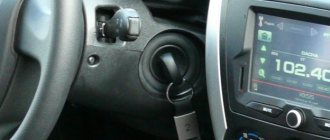
Lock lighting
Illumination of the ignition switch in a Priora car is a convenient modification in the dark. There are ways to tune anything inside your Priora. One of the most practical ways is to help yourself find the ignition switch by highlighting it. But getting a flashlight or phone out takes a long time and is impractical. Instead, you can put a backlight on this part, which will also be aesthetically pleasing to the car owner.
Such an upgrade can be purchased on Chinese websites - preferably only for Priora. To connect, climb under the steering casing, place the LED strip, and the wire soldered to it needs to be “powered.” When connected to contacts No. 8 or No. 9, when the dimensions are turned on, the backlight turns on.
Button instead of ignition switch
As a replacement, the Lada Granta and many foreign car models have a START-STOP button. We can say that the start button is a matter of driver convenience, but if you want to make your car unique, you can use different options:
- removing the standard module - the steering wheel will not be blocked;
- The standard module remains, but the steering wheel lock does not work;
- The standard module remains in place, the steering wheel lock works.
You can supply a pre-formed kit, or assemble it yourself - it will be several times cheaper, but not faster.
The cost of the set will be from 1,300 to 1,800 rubles, individual parts in total from 300 to 500 rubles.
How to put
To place a button instead of a module, perform the following steps:
- Remove the negative from the battery.
- Remove the steering casing and the plastic panel to the right of the pedal assembly.
- In accordance with the instructions that came with the start button, connect the wires to the block.
- Connect the green cable from the central unit to the brake pedal switch connector.
- The wire from the button should be connected to the three-pin connector of the central unit.
- If you need to disable the steering lock, cut off only the part of the key that fits into the cylinder and leave it in the lock in the first or second position.
- Place the key at the junction of the casing.
- Test the Start-Stop button with a few presses.