Let me start from the beginning, for a long time I was not satisfied with the native world of the Kirzhachi, like many people. There is a lot of information on modifying headlights. I didn’t want to modify the original lens modules, they were designed clumsily, this is sadomasachism (IMHO) I took the path of least resistance. Order the simplest modules from China, an analogue of the Morimoto mini H1. They are not the best, but believe me, after the Kirzhachi they are simply space better than the BOSCH low-beam headlights, I don’t see the point in installing expensive and cool lenses in a VAZ. MODULES from CHINA
1. Dismantling the headlights.
-heat over the burner, in the oven, with a hairdryer, SLIGHTLY -cut off the glass with a utility knife -CAREFULLY remove the frame from the plastic case! We take a screwdriver and insert it between the iron frame (the lens and the high beam reflector sit on it) and the plastic body and unscrew the bellows of the headlight regulator all the way until it clicks! -exactly the same for the second one
2.Lens adjustment
Next, I want to tell you one of the easiest ways to avoid making a plate or bending the studs.
-Take the original lens and rivet the rivets using pliers, or a drill
3. Place the new lens on the frame
I took M4 screws (I think) length 50 mm nuts and caps. We don’t regret everything with a reserve. - I screwed the screws in such a way that about 10 mm stuck out inside, and the lens moved away from the frame by 40 mm. -we don’t spare the nuts, pay attention to the photo. I used nuts everywhere on each side so that everything would hold securely. -the curtain on the lens should be turned upside down (sort of) -PLASTIC CLIPS ON WHICH THE FRAME IS SET WE DRESS CAREFULLY, YOU MAY EVEN APPLY WITH A LITTLE BOILING WATER. WE HOLD THE CURRENT PART, WITH YOUR FINGERS, GENTLY PUSH IT.
-Be sure to check all the positions of the side adjusters so that the new lens does not rest against the mask or glass! -You can paint the mask. I already had it painted black.
4.Glue it together
.I took regular silicone sealant. We cleaned the old one, degreased everything and applied the new one evenly, glued it in.
Replacing headlights for a VAZ 2110 is a relatively common occurrence. This is usually due to one of the following reasons:
- mechanical damage to headlights;
- breakdown of old lighting system components;
- desire to change the appearance of the car.
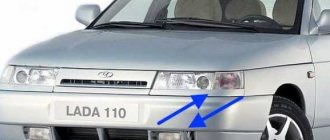
Headlight for the VAZ 2110
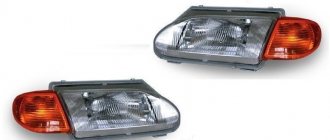
The choice of headlights for the VAZ 2110 is small - there are 2 types of lighting system components for it:
- components from the German company Bosch;
- components from the Russian one in the city of Kirzhach (“the popular” name is simply Kirzhach).
It would seem that in terms of quality comparison, the domestic analogue should lose to the German one. However, due to its features, many car enthusiasts, despite the price, choose “Kirzhach” for their 2110 car model.
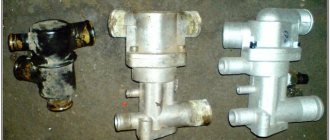
The lighting complex from the Russian company consists of:
- glass;
- reflector;
- hydrocorrector;
- lenses;
- curtains;
- lamps;
- various fasteners (screws, springs for hydraulic corrector).
Headlight lighting "Kirzhach"
Disassembling headlights
Before you start modifying the headlights in a VAZ 2110 car, you need to perform the following simple steps:
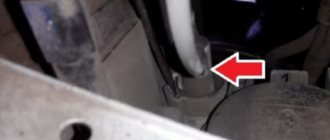
- Their removal and disassembly. Using a utility knife, the glass is carefully removed from the headlight, and since it is secured using a special sealant, extreme caution is required so as not to break it. But if it breaks, then this is not a problem, you can buy it separately;
- Next, the reflector is removed, unscrewing several bolts.
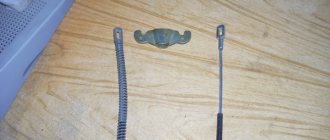
- The next step is to remove all the wires from the back of the headlight and the spring from the place where the hydraulic corrector is inserted, and only then is it possible to remove the frame with the module itself from the headlight housing.
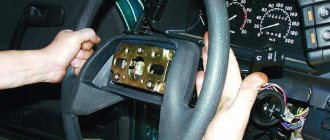
- Remove the low beam module using a screwdriver and disassemble it completely.
About altering the curtains
It is needed to prevent blinding of drivers ahead. To do this, the curtain is made straight. First, a template is cut out of cardboard, then a metal product is made from it. The finished product is installed on the module, before which it can be covered with foil for better dispersion of the light flux.
If desired, you can find several more additions to this modification in different sources. Do-it-yourself modification of Kirzhach headlights on a VAZ 2110 also brings moral satisfaction for the owners. Therefore, be careful and prudent, and everything will work out for you.
Every modern owner of a domestically produced car strives to make his “baby” unique and as comfortable as possible to use. There are countless ways to modernize your car; in this article we will look at this type of modernization such as tuning Kirzhach headlights or, as it is commonly called, “angel eyes” with modification of the optical lighting system. As an example, we will take a Lada 2110 car.
Finalization
In order to make the glow better, they are refined, which includes the following steps:
- Shifting the lens closer to the reflector;
- Modernization of curtains;
- Changing the shape of the reflector.
These are the main stages that will ultimately lead to the complete modernization of Kirzhach headlights on a VAZ 2110 car. Now it is necessary to consider each individual stage.
Lens in the headlight of Kirzhach VAZ 2110
Shifting the lens closer to the reflector
The alteration begins with shifting the lens to reduce the area of the lens onto which the light flux falls. As a result, the curvature of the lens will also become smaller.
- Disassembling the module and removing the lens from it. Carefully mark the cut at the intended location of the module. It is imperative to ensure that the lens curtain does not move from its place, but remains at a distance of 50 mm due to the focal length of the lens;
- Cut off the lens at the marked location and attach it to the module. It is attached using the cuts that were made earlier, but the module itself will become shorter. The main thing in all this is that the closer the lens is, the more heating will occur due to its small area. In order not to miss the distance, the most optimal would be to approximate the lens by 10 mm.
Carrying out modernization of curtains
To carry out modernization and modification at the highest level, good and high-quality light distribution is done. The curtain is made straighter so that the light does not blind passing drivers driving in front of the VAZ 2110 into the rear mirrors. This type of curtain was developed according to the European GOST standard and is very successful.
To do this, you will need cardboard from which the curtain template will be made. The prepared cardboard template is transferred to a plate of metal material. To cut it out, metal scissors are used and the finished curtain is attached to the module. Also, if desired, it can be wrapped in foil to provide better light dispersion; it can also be used to install fog lights.
Under the lens on the module body, the edges are cut off. If they are cut correctly (no more than one millimeter along the ring), then the edge of the ring will not interfere with the correct flow of light.
Changing the reflector shape
If you want to change the width of the light output without changing its height, then you can change the shape of the reflectors yourself. By the way, on imported cars the reflectors have an oval shape, which is the best option.
Refining the headlights with a complete change in the shape of the reflector will help to significantly increase the width of the light beam. The reflector on a VAZ 2110 car has a standard round shape, and if you take it and press it to the floor, you can easily get an oval shape.
To reduce the cost of the reflector, it is made from ordinary sheet metal using an inexpensive cast method and therefore this material is very elastic and can be easily changed in shape.
Reflector in the headlight of Kirzhach VAZ 2110
To avoid cutting your hand, you should wear a glove. But you shouldn’t get too carried away, since there are certain standards for the width, which should be 93.2 mm in the flattened part. If this standard is not maintained, then the light beam will have a deformed feed shape. Therefore, when changing the shape of the reflector, efforts are applied little by little, controlling the change in size. So that when installing the reflector, all the fasteners coincide, they are also made oval in shape, as is the reflector fastening itself.
These changes, simple in their technology, will allow you to easily and without additional costs upgrade the Kirzhach headlights on a VAZ 2110. But the main thing is that all the changes made are not certified and fall entirely on the responsible shoulders of the driver.
After upgrading the headlights, it is imperative to adjust the VAZ 2110 headlights.
How to move the lens?
This operation is carried out to move the lens to reduce its area that receives illumination from the lamp. This achieves a decrease in the curvature of the lens. This can be done this way:
- It is necessary to completely disassemble the module and remove the lenses from it. Cuttings must be made at the proposed new location for installing the module. At this time, it is necessary to carefully monitor the position of the curtain; it should always be at a distance of 50 mm;
- In the marked place, you need to saw off the module and strengthen the lens; for this, previously made cuts are used, and the module becomes somewhat shorter. It is important to take this point into account; the lens heats up, so the optimal approximation size will be 10 mm.
Adjusting the luminous flux
In order for the VAZ 2110 to be driven comfortably, all the rules of correct light supply must be followed so as not to blind oncoming drivers. There are special screws on the headlamp housing that are used to adjust the light supply.
When you turn the left screw, the angle of inclination of the optics changes vertically, respectively, turning the right screw changes the optics horizontally.
To correctly set the luminous flux, a horizontal line is drawn from the ground to the center of the headlights and another similar horizontal line is drawn 65 cm below it. After all the preparation has been completed, you can proceed directly to the adjustment:
- the right headlight of the car is covered with cardboard paper and the low beam is turned on;
- Using the adjusting screws, the center of the light beam of the left headlight is set, which is done in the same way with the right one.
About affordable lighting equipment for dozens
Today, the automotive market is filled with lighting equipment from various manufacturers, with the help of which you can not only improve the illumination of the roadway, but also transform the appearance of the car thanks to their updated appearance. Most owners choose products from two companies. This is domestic, Kirzhach optics from this company receives good reviews, and German branded from Bosch.
No one can say for sure which one is better, but some features of these products should be mentioned. The optics are expensive, but have a built-in lens for the low beam lamp. Its presence allows you to focus the light flux, which means improving your visibility of the roadway. These headlights lend themselves well to numerous tuning options. Also for these products there is a legal installation of xenon.
If, to improve illumination, we take original products from Bosch as a basis, then it does not have all of the above features and advantages. Manufacturers do not produce modifications of these products, but their price is somewhat lower than domestic products. Bosch optics are more susceptible to contamination, since their glazing area is larger than that of a domestic headlight.
Alternative option
If the driver of a VAZ 2110 car seems that simple Kirzhach headlights do not provide good road lighting, then a bi-xenon module can be installed in them if desired.
The Kirzhach headlight module and the bi-xenon module are not very different, but this will not be an obstacle to replacing them.
Installing a bi-xenon module consists of several stages:
- Removing the module seat in the headlight to install a new part in its place;
- The next step is to connect the xenon lamp wiring to the standard wiring.
Installation of xenon lamps is very simple, because it occurs without changing the wiring. After the alteration, the lighting will be completely different from what it was before. After changing the modules, the ignition unit is attached to any point, there are many places for this, it is installed anywhere at the driver’s request.
Afterwards, everything is put back in its place and the glow at night is checked in practice.
After modernization, modifications and various alterations, at the request of the driver, the Kirzhach headlight must be mounted back on the VAZ 2110 using a sealant or a special construction sealant.
Differences between Priors 2 headlights
The Priora 2 headlights differ from the usual ones mainly in the shape of the reflector and the quality of the optics used.
I took off the bumper, unscrewed the screws from the factory plastic plugs, screwed on the purchased headlights, it took a little time to install the Bosch, probably about an hour, and only because the screws standing on the round plastic plugs turned out to be short and I had to look for six longer pieces for reliable fastening of the foglights in the bumper. They could have included such a small thing in the headlight kit.
The headlights have an adjustable light beam, of course, after installing them on the car along with the bumper, I had to slightly adjust the light beam of the PTF lamps so that they would better illuminate the side of the road. They are equipped with Bosch H11 halogen lamps with a power of 55 W; they quite well complement the standard low-beam headlights on the sides of the car.
Roadsides have become much better visible at night, especially in the courtyards of high-rise buildings. Sometimes, you know, people suddenly go out onto the road, especially when there is mud or deep puddles on the sidewalks. Riding with the Boches has definitely become more comfortable and, most importantly, safer. By the way, I heard that Bosch’s glass will be thicker than Kirzhach’s, which means that they will have fewer cracks from water in puddles. The main function, illumination of roads in rain and fog, is performed well by these PTFs. I recommend them for purchase to Prior owners who do not have them in their configurations from the factory. Suitable for restyled Priors with SE bumper. They will definitely come in handy on the road, especially in winter. Can also be used as DRLs (daytime running lights).
Which headlights are better for the VAZ 2114. Many owners of the VAZ 2114 are extremely dissatisfied with the quality of work of the factory installed headlights. Accordingly, for many, the question of choice is very acute: which headlights are better for the VAZ 2114? Let's try to understand this issue in more detail.
Among the offers of the automotive market, there are two main competitors: Kirzhach headlights and Bosch headlights.
Replacing the lens in the headlight of a Kirzhach VAZ 2110
So where did it all start, I had Bosch headlights, I didn’t like that they shine a little narrowly, install a kirzhach, it shines of course wider but still not ice, I wanted better, while reading this forum I came across information that you can screw Hella or OLLO xenon modules into the kirzhach , I began to look closely at these devices, as a result, the choice fell on OLLO modules with 4300K lamps; I didn’t want to, fundamentally I think this is the best option, I ordered them, at the time when I ordered I had not yet heard about the law prohibiting xenon, so there are no obstacles it was, then it was accepted, but since I had already ordered the modules, I had to scroll below; I’ll show you how I implemented it. So, let's begin. we take a Kirzhach headlight, to install the module you need to remove the frame with the low and high beam from the body, to do this you need to remove the glass from the headlight, and as you know on the Kirzhach, the glass is attached to the body with a sealant, this sealant must be carefully cut off, I really don’t recommend leaving uncut areas with sealant, so one glass has died, so we take the tool
Societies › VAZ: Repair and Modification › Blog › Morimoto lenses for Bosch 2110 head optics
I have long wanted to create this, but something always got in the way. In the end, everything we needed has arrived, we can get started.
So, for assembly you will need:
First, we completely disassemble the headlight and dismantle the useless lamp holder in the “lower” lamp. Next, drill a hole in the reflector across the diameter of the lens mount and cut off the excess area, preferably with a grinder)
The time has come to put masks on the lenses and here a problem arises...
After drying, we collect everything into reflectors
Complete satisfaction visited me after completing each step))
The most tedious part is left for last - adjusting the glass. Yes, specifically the fit, because the glass is a little larger than required. Fitting, trimming, fitting, trimming. and so on a couple of times until the appropriate size)
Next is painting the shells and drying. Assembly into housings.
Along the way, I make some configurations in the original wiring. I did not use the bi-xenon braid from the lens set. I swapped the high-beam headlight wires in the headlight socket so that I didn’t have to change the placement of the wires inside the headlight. The diode lamp in the “distant” lamp now plays the role of dimensions and DRLs. It is turned on with the “dimension” key. I removed the T10 chip from the remaining dimensional wires and crimped onto its space two terminals suitable for the curtain control connector. Those. the curtain is controlled by the “distant” native wiring without the use of an additional braid.
The last step is to glue the glass.
After a little drying, we load everything into the asshole truck and go to the garage to install.
I added a box to control the DRLs into the original wiring. When you turn on the close one, the DRLs turn off. I found a small glitch in the controller; when I turn off the nearby DRLs, they don’t turn on again. I’ll reassemble it on a regular 5-pin relay and add blinking DRLs along with a distant one))
We screw on the turn signals, glue the ignitions to the housings, connect, check, screw on.
It’s a pity I didn’t have an ordinary camera at hand, and it’s impossible to convey everything using a phone, but still... this is a bomb, isn’t it?))
Now, out of joy, let’s move on to the things that delayed this satisfaction. 1. Masks from marimoto did not fit into the Bosch reflector. Interfering parts were cut off. Naturally, there are G1 lenses that fit without modifications, but I wanted these specifically. 2. The reflector also had to be cut significantly in order to tighten the fastening nut and create space for the lamp clamp. The thick silicone washer had to be sacrificed for the same reason. 3. The glass does not fit in size. I tried three sets). There is nothing terrible about this, it just takes a lot of time.
Everything else is done quite quickly and without problems. I'm more than pleased with the result. The light and appearance are much better)
Lastly, let’s calculate the cost of the alteration: 2400 rubles + 2700 rubles + 1800 rubles + 2200 rubles Total: 9100
r without taking into account the price of the headlights themselves, because they already existed.
Is it worth it? In my opinion, YES! But everyone decides for themselves.
Lensed xenon: 2110 (Kirzhach) + Morimoto Mini H1
#1 DaY
- Users
- Posts: 143
Xenon everyone, let's go! We love the pictures, don’t be shy, they’re all clickable!
Owners of Kirzhachev headlights suffer greatly from virtually absent headlight light. There is only one way out - to install xenon, but in the standard lens it is not fully implemented in the matte reflector and turns into a headache for passing drivers - the halogen daw successfully blinds.
I offer the cheapest modification option, which consists of replacing the lenses with Chinese ones, specially designed for a xenon light source.
So, there are dozens of headlight conversions using Morimoto Mini H1 lenses.
Carefully peel off the glass and remove the decorative mask. We get this picture:
Comparison of standard lenses and Morimoto Mini H1
In the modification I use M3x50 screws, nuts with a nylon insert and enlarged M3 washers. I move the lens 35mm from the plane of the reflector bracket:
The screws are adjusted and ready for adjustment:
General plan of the new lens in the headlight:
Exposed and tightened lens:
I run the electrics from below the headlights to make the ignition units less visible. At the same time, replacing the lamp will not be difficult:
Then I simply glue the headlight together with sealant, put in the clamps and secure it with paper tape just in case.
General view of the resulting headlight. As you can see, the lens turned out to be very recessed (strange, but this is exactly how it was on the original), for the future it is clear that it can be safely extended to 45mm: “Grains of sand” are glass defects from time to time. So far they are not critical and there is no need to polish the headlights.
Well, as usual, the result. General view of the car with low beams on:
Projection of the neighbor on the wall. Xenon 4300K:
Long range - xenon + halogen H1 55W:
The alteration is not complicated, the adjustment of the near beam is made to the far beam, which in the end turns out to be enchanting, but what’s strange is that in the Kirzhach both the high beam reflector is matte, and the reflective halogen high beam fades against the background of the lensed xenon.
Why film
The main reason is failure, failure to perform the direct functions of the device. There may be a lot of reasons for replacing the headlights on a Prior. Broken outer glass, loss of tightness, fogging of lenses from the inside, deterioration of the reflector itself, breakdown of fixing elements. Replacement, repair of old contacts, installation of a new type of light bulbs. To solve them, you will have to unscrew the entire module from the car body, which will make it more convenient to repair and modernize optical devices. The block is not completely dismountable: to separate the glass from the body, it is better to heat the joint with a hair dryer until the sealant softens. Next, remove the melted sealant as much as possible using improvised means. We try to separate the glass with a screwdriver, clean all the separated parts from the old glue with a knife and sandpaper. The glass is seated back onto the sealant.
Kirzhach headlights for VAZ 2110
- Model features
- Headlight modernization
Replacing headlights for a VAZ 2110 is a relatively common occurrence. This is usually due to one of the following reasons:
- mechanical damage to headlights;
- breakdown of old lighting system components;
- desire to change the appearance of the car.
Headlight for the VAZ 2110
The choice of headlights for the VAZ 2110 is small - there are 2 types of lighting system components for it:
- components from the German company Bosch;
- components from the Russian one in the city of Kirzhach (“the popular” name is simply Kirzhach).
It would seem that in terms of quality comparison, the domestic analogue should lose to the German one. However, due to its features, many car enthusiasts, despite the price, choose “Kirzhach” for their 2110 car model.
The lighting complex from the Russian company consists of:
- glass;
- reflector;
- hydrocorrector;
- lenses;
- curtains;
- lamps;
- various fasteners (screws, springs for hydraulic corrector).
Headlight lighting “Kirzhach”
POSSIBLE INSTALLATION PROBLEMS
The headlights on the VAZ 2114 Bosch still have certain technical differences both from the original components and from the Kirzhach. For example, due to the fact that the light module is somewhat shorter, the cover that covers the glass may interfere with the uniform dispersion of light. Therefore, it is better to fasten the headlight to the car body with bolts so that the reflector is also screwed inside the headlight. To screw the headlight evenly, you need to gradually tighten both bolts, distributing the efforts. If you place it unevenly, then the headlight may begin to shine not directly and downward, but in an unknown direction, and it will be of no use on the road.
Also, during installation, you should always align the edges of each case to avoid burrs. If you make the edges smooth, then they will not interfere with the passage of light, and one millimeter of metal will not affect the reliability of installation. And if you are not satisfied with the width of the light beam that covers the road, then you can try to find another reflector. Any of the methods discussed can help correct the situation and make Kirzhach headlights better and more productive. By the way, it’s really better to modernize Kirzhach yourself, since Bosch is structurally a little more complex than its competitor.
Model features
Experts assessed possible headlight options for VAZ according to several parameters:
- ensuring excellent visibility at night. At the same time, the light should not blind oncoming drivers. In this parameter, both Kirzhach and Bosch are approximately the same;
- features of reflectors. The German analogue of the headlight has reflectors for low and high beam, while the domestic one has a lens for low beam and a reflector for high beam. This ensured almost the same level of illumination during the tests. The lens, which is installed in the headlights of the Russian manufacturer, provides better brightness (helps create clear lines of light, and is also suitable for installing xenon optics). In addition, some drivers note that the illumination is not very high-quality when the low-beam headlights are on; the product, due to the reduced lighting area, does not have such a drawback.
Differences between the Kirzhach headlights
Another feature of the Kirzhach headlight is that it can be easily bought in city stores, because the sales market for such headlights is in Russia. This and other features of the headlight make it more attractive to VAZ 2110 drivers and determine a slightly higher price for components from this company.
Sometimes it happens that, having purchased new headlights from a Russian one for your VAZ, you notice that their glow is not very good. Inexperienced drivers may attribute this to a defect or poor quality of the purchased product.
However, most often the problem is in the usual setting of the headlights. It is advisable to adjust the new lighting components that you install in place of the optics you just removed.
To do this, you will need, in addition to the skill of a draftsman, a flat surface. But if you do not have the necessary skills and time, entrust the adjustment of the Kirzhach headlights to specialists.
Removing a headlight from a VAZ 2110
Other manufacturers and types of lamps
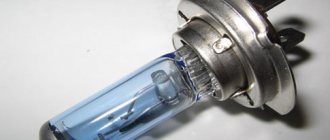
Of course, many are trying to install other types of light sources and other types of lamps. All headlights discussed above have a halogen lamp. That is, it is actually the same incandescent lamp, but its filament operates in a gas environment (bromine or iodine halogens).
There are also alternative fog lights.
Xenon PTF
Standard PTFs converted to xenon fog lights.
The old xenon PTFs worked on lamps D1 and D2, the new ones received lamps D3 and D4 without the use of mercury vapor. Theoretically, the efficiency of such fog lights and the luminous intensity are higher than those of halogen lights. However, do not forget about the specificity of PTF - not to cause reflection of the beam from the water suspension. And all inexpensive xenon headlights require very precise adjustment of the light beam and are not able to provide a low horizontal stripe to combat fog.
In addition, the maximum color temperature for the effectiveness of fog lights is 3000-4500 K, otherwise they will be of no use and blinding light will be provided for oncoming drivers. The prices of such foglights are not lower than 5-7 thousand (Hella Micro DE, for example). Anything cheaper is useless and even dangerous.
LED PTF
Intelligent LED PTFs are very expensive, and it makes no sense to buy cheap ones.
The main disadvantage of effective LED fog lights is their huge price and low efficiency.
The low efficiency is explained by the fact that a regular LED produces light that is bright and pleasant to the human eye with a temperature of about 6000 K. For head optics this is not bad, but not for PTF. However, there are exceptions. For example, Osram LEDriving FOG 101 headlights. A high-tech device with LEDs of a proprietary proprietary design with a color temperature of about 3000 K, which is just suitable for PTF.
Headlight modernization
Despite the slightly higher performance indicators for the 2110 model, many car enthusiasts want to improve its equipment. The improvement requires disassembling the headlights, which occurs as follows:
- Remove the glass from the headlight, which is attached using sealant. Use the utility knife;
- remove the reflector. To do this you will have to unscrew a few bolts;
- on the back side of the headlight, remove all the wires, as well as the spring that secures the hydraulic corrector;
- remove the module from the headlight by pulling it towards you.
The most popular ways to improve headlights on a VAZ 2110 are:
- shifting the lens closer to the reflector. This is done to reduce the area of the lens on which the light stream is located, which avoids dazzling drivers who are driving in front (through their rear-view windows);
- modernization of curtains. Provides better light distribution;
- changing the shape of the reflector. This is done to change the width of the light stream. Since the reflector is made of sheet metal, it can easily be given, for example, an oval shape;
- adjusting the light flow. It can be done by tightening several screws on the headlight housing, which will change the angle of inclination of the optics of your car and its horizontal and vertical location.
Kirzhach headlights allow the installation of a bi-xenon module inside them, which enhances the power of the luminous flux. The bi-xenon module and the Kirzhach module are practically no different from each other, which makes them easy to replace.
Tuning headlights for VAZ 2110
It happens as follows:
- the module is removed from its seat according to the algorithm described above;
- The wiring of the xenon bulbs is connected to the wiring of the car.
To change the lamps in the Kirzhach headlight, you do not need to buy new wiring, and after replacing the module, the ignition unit can be attached to any convenient place.
Installing xenon lamps will make the lighting brighter. After assembly, it is advisable to immediately check the lighting in the VAZ 2110 to ensure that the wires are connected correctly.
Changing the type of optics (tuning)
Car enthusiasts often tune their car headlights to improve their appearance. High-quality tuning gives the car a fashionable look and beauty. If you choose the right accessory, the appearance of dozens will change completely . The most popular among car enthusiasts is tuning headlights in the form of tinting. It is carried out in a variety of ways that have virtually no effect on the brightness and quality of road lighting. Types of headlight tinting:
- Painting of the headlight mask;
- Glass painting;
- Glass tinting film.
The process of such tinting is best shown in a video. For those who don't want to paint or tint their headlights themselves, there are ProSport headlights. They are already sold in black or chrome. You just need to install them instead of the standard headlights. Only they cannot boast of high quality or bright light.
Replacing the lens in the headlight of a Kirzhach VAZ 2110
Cashback 20% of the cost of the repair kit to the card within 24 hours, for all members of the Drive2.RU community, after publishing a review!
Repair kit for replacing standard lenses with Hella Standard for a VAZ 2110 car. The repair kit is designed to replace standard lenses with modern bi-xenon lenses Hella Standard. You can do the replacement yourself by removing the headlight and opening the glass, or you can contact a car lighting studio or a headlight retrofit specialist with this repair kit (see the list of installers in your city in the website menu).
Why is it profitable to purchase a repair kit from us? - the price of new original headlights is 5-10 times higher than the cost of a repair kit - non-original headlights have very low quality light - we have the lowest prices in Russia, our own production base for frames, direct supplies of bi-xenon lenses from the manufacturer's plant
Compatibility: VAZ 2110
Why do standard headlights lose brightness over time? The reflector coating of standard halogen or xenon lenses, even on premium cars, fades over time and light is lost in the lens reflectors, so the lens module itself has to be replaced. The most optimal solution is to replace the standard modules with Hella Standard bi-xenon lenses using adapter frames for Hella Standard.
Choosing an optical system for Lada 2110
One of the most popular models of optical systems on the market today is the “Pro sport” system.
However, this model of headlights has a number of disadvantages that cannot be left unnoticed, since the safety of both the driver and passengers directly depends on the quality of the lighting emitted by the car. Based on reviews on the Internet, we can conclude that the “Pro sport” headlight emits low quality lighting and is unable to properly provide visibility of the track at night. Therefore, it is worth considering purchasing a Kirzhach headlight.
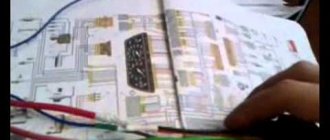
Example of headlight packaging
After unpacking the headlights and checking the package, the question arises: “Where to start?” In this case, You Tube will be your best assistant. On this site you can find many interesting videos on the topics of tuning headlights, fine-tuning lights, etc. Even if these videos differ from your vision of the work process, do not be upset, since each master uses a variety of approaches and materials in his work. Your task in this case is to emphasize for yourself the basic principles and approaches to installing headlights and get a high level of motivation, since without it it will be very difficult to achieve the desired result.
see also
The price for headlights of this model ranges from 2350 to 2550 rubles and largely depends on the dollar exchange rate. Also, to the initial costs it is worth adding the cost of a can of paint 200 rubles and masking tape 48 rubles. The approximate amount of initial costs is 5148 rubles.
Xenon on a VAZ 2110: do-it-yourself installation in a standard headlight
It is no secret that the quality of vehicle lighting has a direct impact on the level of safety. Both for the motorist and his passengers, and for other sections of the road.
Many believe that xenon on the VAZ 2110 is installed illegally, and any inspector can fine you a tidy sum of money. Today we will talk about the legality of xenon and the features of its installation on the domestic “ten”.
What common
In addition to the fact that both “Bosch” and “Kirzhach” serve one “great purpose” (illuminating the road surface and notifying other road users of the driver’s intention to make a turn), they have several common external features. Not every car enthusiast can distinguish a model from one manufacturer from another offhand, and the difference is sometimes revealed only upon closer examination.
By the way, many car owners believe that both optics models under consideration do not deserve attention, and any of them, after purchasing a car, should be replaced with a more advanced one, carefully adjusted, or at least modernized. The controversy of this statement remains in question.
Question of law
Legal equipment
Therefore, to install xenon as fog lights and main headlights, you will need to purchase a set of legal equipment. There must be an inscription in the form of the letter D on the headlight glass. It indicates that bi-xenon lights are connected to these headlights. Consequently, everything is legal, and therefore there is no need to fear the traffic police post.
If you have xenons but have an H on your headlight glass, you will have problems. This is because such an inscription indicates that halogen lamps must be located under the glass.
Benefits and Potential Problems
Bi-xenon does an excellent job of illuminating the roadway and adjacent areas. This applies to both headlights and fog lights. A characteristic feature of xenon is that it emits bright white light with a blue tint.
Xenon in headlights and PTF
Fog lights from Bosch, which are installed on the VAZ 2110, do not have lenses. Instead, reflectors are provided here. This makes the beam of light not low enough.
Therefore, when installing xenon, it is very important to install focusing lenses so that the bi-xenon behaves appropriately. That is, it illuminated the road efficiently and did not blind oncoming cars.
Improving the light "tens"
Of all the kits tested in road conditions, the Bosch light seemed brighter and more uniform to all participants in the experiment. Therefore, when replacing headlights during body repairs, it makes sense to remember the comfort of movement at night.
To improve illumination using available methods, we will need:
Bosch direction indicators (right and left).
Lamps H3 and H1 - 2 pcs.
Fog lights are more susceptible to abrasive wear and cracks in the glass from encountering snowdrifts. Therefore, it is advisable to supplement the list with new “PTFs”.
If your car does not have fog lights, we will correct this deficiency. In addition to the list above, we purchase:
- fog lights - 2 pieces (right and left - identical);
- front PTF power indicator (green);
- fog switch;
- Wiring kit for fog lights, including harness, relay and fuse.
At the end of the work, we adjust the lighting devices (don’t forget about PTF), and enjoy the “correct” light. As a result, we obtain uniform illumination of the roadway at a relatively low cost. Moreover, without violations of GOST standards and problems with passing technical inspection.
We wish our readers good visibility and smooth roads.
Removal
Set
Of course, without dismantling the old headlights it will be impossible to install xenon devices. Dismantling is performed as follows.
- The vehicle is deprived of power by removing the negative terminal from the battery.
- The connectors going to the headlights are disconnected. All without exception.
- The fasteners are removed from the top mount. The bolts are located there.
- The radiator grille is dismantled.
- The bolt that holds the headlight unit in its lower part is removed. He's there alone.
- Next, pry up the cover using a flat-head screwdriver and remove it.
- Now take a 10 mm wrench and use it to remove the fixing nut to the bracket.
- All that remains is to remove the headlight unit.
- Do not forget to pry the hydraulic correction cylinder retainer using the same flat-head screwdriver to remove the unit.
- The direction indicators are removed. To do this, simply unscrew a couple of bolts.
Module installation
If you want the installation of xenon on a VAZ 2110 to be carried out within the law, buy a new approved module.
Kirzhach in analysis
Just be sure to take into account the fact that the “Bavarian” Hella Lens G2 . This is a second generation module with wider lenses. The first generation is not suitable for us.
Of course, the cars are structurally different, so the installation will have to be slightly adjusted.
To get started, purchase the necessary materials. Just two pieces:
- Ignitor;
- Ignition unit;
- Hella lenses;
- Bi-xenon lights.
If you take used lenses rather than new ones, purchasing the entire set will cost you about 3.5 thousand rubles. Since you will install them yourself, there should be no additional financial costs.
The revision process looks like this.
- Measure the size of the seat where the standard Kirzhach module is mounted. Now the Hella module will be located there. The place should be prepared in advance.
- The standard wiring is connected to the wiring from the bi-xenon optics. There are no problems here, since everything matches perfectly.
- Now the new bi-xenon module is put in place.
- You can fix the ignition unit in any way convenient for you, since there is more than enough space for installation in the VAZ 2110.
Installation in a standard headlight unit
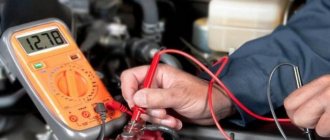
Preparing the wiring
This can be done by following a certain sequence of actions:
- The first step is to disconnect the negative cable from the battery;
- Prepare the wiring. The plus goes to a yellow wire, the minus goes to a brown wire. Two minuses and the same number of pluses are crimped one by one, after which they must be carefully insulated;
- Process the holes for the lamps with a simple handy tool - a file. Check periodically to see if the bulbs are included. If you overdo it with sharpening, it will be more difficult to return the sawn material to its place;
- Now install bi-xenon optics;
- The wiring from the light bulbs is pulled through the protective cover. You will have to drill a hole first. Therefore, having a drill at hand is a must;
- After installing the headlight in the base, fix it. Just don’t get too clever with polarity;
- Along with the lamp, instructions for connecting the ignition unit are provided. Follow it, there is nothing complicated in this scheme;
- Replace the headlights;
- Connect the negative terminal back to the battery;
- If the headlights function and turn on as expected, then the work can be considered completed early. There remains the last, but very important stage - adjustment.
As you can see, xenon on a VAZ 2110 is quite real. But to avoid any problems with the law, we advise you to spend a little more money and purchase a full-fledged legal module rather than risk driving past every traffic police post.