Checking the efficiency of the cooled glove box Lada Vesta and XRAY
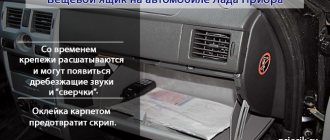
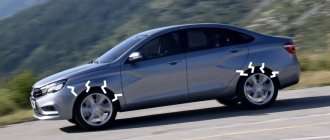
On its latest models, AvtoVAZ for the first time began to use the “Cooled glove box” option (also called the “glove box”). On vehicles with air conditioning, a small air duct fits into the glove compartment, which can cool, for example, a bottle of water. Let's consider how effective such cooling is.
The central air ducts under the panel (dashboard) have an additional branch that fits into the upper corner of the glove box. For the contents of the glove compartment to begin to cool, you just need to open the flap (turn it). If cooling is not required, the damper can be closed.
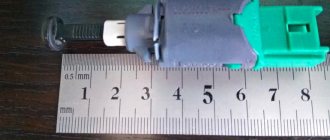
To check the effectiveness of glove box cooling, a popular test was carried out. At an air temperature of +25 degrees, the interior of the Lada Vesta car heated up to +31 degrees. At this point, a Garmin Tempe temperature gauge was placed in the center of the glove compartment. Then we turned on the air conditioning at speed 4 and closed the central air ducts.
After just 50 minutes of driving, the temperature in the cooled glove compartment dropped from 31 to 14 degrees. For reference: the temperature of cool water is 12-15 degrees. This means that the cooled glove box has fulfilled its function.
How the German auto industry is deceiving customers with “thermal windows”
DRIVER FATIGUE DETECTION SYSTEM
Not only does this option often work incorrectly, displaying a cup of coffee on the dashboard almost every 15 minutes, but it also does not react in any way to a person who has actually closed their eyes. During editorial tests, we tested a dozen cars equipped with a magical function, according to marketers, where they tried to portray a driver who had actually fallen asleep at the wheel, but no one made us coffee in the cockpit.
It would be great if the system didn’t just try to monitor the driver’s movements and actions, but actually responded to them. And it would be even better if additional electronic assistants were connected during this: for example, keeping the car in the lane while maintaining a distance from the car in front until it comes to a complete stop.
How the Lada Vesta heater works in brief
In order to provide at least some kind of material and technical basis for our current search for heat in Vesta’s cabin, let’s briefly look at the principle of operation of the stove. This could not be done in relation to the VAZ 2110 stove or classic Zhiguli. However, Vesta has its own nuances.
The layout diagram shows the stove body itself, No. 5
In principle, the Lada Vesta heater is designed and built like people’s, as we are used to. The housing (5) is located under the front panel power beam. In the case we find all the same elements of the heating system:
- stove radiator;
- supercharger (fan, or whatever you want);
- a damper for distributing the flow of warm air (we will have questions about it);
- actuator (geared motor) of the damper drive;
- cabin filter;
- blower power regulator.
This is how the air should be distributed throughout the cabin.
Warm air is distributed through the air duct system under the front panel - to the windshield, to the panel deflectors, to the feet of the rear passengers, to the driver's and front passenger feet. There is nothing new in this system, however, VAZ engineers did not provide for a couple of nuances, which resulted in problems with the stove:
- Uneven supply of warm air across zones (driver, front passenger, windshield).
- The warm air flow not from the side, but from under the front panel to the driver’s feet is not adjustable.
- The damper drive system requires improvement.
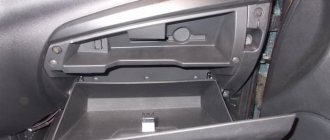
- Outflow of warm air into the glove compartment cavity.
- Leaks in the air ducts and stove body lead to significant heat loss.
Technical characteristics of the VAZ 21807 gearbox
| Type | Mechanics |
| Number of gears | 5 |
| For drive | front |
| Engine capacity | up to 1.8 liters |
| Torque | up to 170 Nm |
| What kind of oil to pour | ZIC GFT 75W-85 |
| Lubricant volume | 2.2 liters |
| Change of oil | once every 75,000 km |
| Replacing the filter | every 75,000 km |
| Approximate resource | 175,000 km |
Lada
| Vesta sedan 2180 | 2016 – present |
| Vesta Cross 2180 | 2018 – present |
| Vesta SV 2181 | 2017 – present |
| Vesta SV Cross 2181 | 2017 – present |
Glove box repair
If you needed to remove it to fix a broken handle that had a broken hinge, the procedure for removing it is the same. The box itself consists of a pair of main parts glued together. Yes, precisely glued, and not attached in a different, more reliable way.
Therefore, in order to separate them, it will not take much effort. Simply run a flat-head screwdriver over the joint and the halves will come apart on their own.
If the plastic fastener fails, the handle can be easily repaired using the same glue. The reliable Poxipol is perfect. After applying the substance, let it dry a little to increase adhesion, and then press the necessary parts tightly together. In principle, instructions for use are on each package of glue.
To prevent a similar incident from happening again, it is better to slightly improve the handle design using
a banal nail that will serve as a rod.
Drill holes for the stud using a screwdriver. Select a nail of appropriate length and diameter. File it down and install it to strengthen the handle.
The glove box is assembled in the reverse order of dismantling.
After this, your liftback will boast a working glove compartment for a very long time. Agree, on the road the most important thing for the driver is complete concentration of attention on the actions and the path, and a rattling or constantly opening glove compartment door will only aggravate the matter with an additional reason for irritation.
Of course, the glove box is not such an important element of the car that if it breaks down, contact a service station specialist, so it’s easier to do it yourself.
Valve manufacturing
From a plastic CD box, cut out a valve valve in the shape of a circle with a hole in the center. Then we make butterfly-shaped holes in it.
We cut out two L-shaped elements from a plastic box and glue them with Moment glue. One side to the round valve slide, and the other to the square handle stem. We reinforce the fastening with hot glue, and reinforce the connection with the valve with staples from a stapler, soldering them into plastic. We glue an anti-creak (madeline) onto the surface of the valve and cut out a hole, which we also process with a soldering iron.
How the stove works
- A small interior radiator is connected through pipes to the engine cooling system, it is from this that the heat comes, and the heater starts working from it;
- The heat received from the radiator is dispersed throughout the cabin by an electric fan, which forces air into the air duct nozzles;
- The resistor (RFV) sets the operating rate of the electric fan;
- The cabin air filter is installed at the outlet of the electric fan;
- A damper is installed in the air ducts, which controls the flow of air reaching passengers;
- The gearmotor moves the air flow distribution damper according to the task;
- And the tasks are distributed by the control unit for the heater (stove) and, if available, the air conditioner. Under the control of the SAUKU unit (heater and air conditioning control unit) there is a fan, gearbox, and various heater sensors.
Air ducts are directed from the Lada Vesta heater towards the windows, seats and floor. Air adjustment in various directions is carried out by central deflectors. The heat output is controlled by a wheel on the heater.
The Togliatti plant took a new approach to heating the lower part of the car interior. Now the air duct nozzle is located directly above the foot of the right limb, and not to the side, as before.
Depending on the configuration, the procedure for controlling the stove differs.
- For “Classic” (without air conditioning), the left regulator is responsible for the air temperature, and the right one changes the direction.
- The Comfort package has air conditioning. Compared to the basic version, the function of turning on circulation has been added here.
- For “Lux” the developers installed climate control. Using the Defrost MAX mode, the air conditioner turns on automatically. This function also allows you to heat the windows and side mirrors.
- The heater radiator is connected to the system main via rubber pipes. The heat emitted by the internal combustion engine is transferred to the heating system.
- The heating system radiator distributes heat throughout the car interior using an electric fan.
- A preset resistor online regulates the fan rotation speed.
- The air flow is circulated and cleaned by a mesh and cabin filter (see diagram).
- With the help of installed dampers, the driver and passengers regulate the air flow flowing to them.
- The gearmotor rotates the damper based on the readings of the regulator and heater sensors.
Which filter to choose for Camry XV40, XV50
The engine volume does not affect the filter element in any way, so it is the same for both 2.4-liter and 3.5-liter engines. The original factory filter for the Camry XV40 is sold under article number 8713907010. You can also purchase a “cleaner” with activated carbon, which neutralizes odors along with dust and bacteria.
The original carbon filter has trade number 87139-50060. Its cost is higher, but the level of filtration is better.
You can install it yourself, since the Camry XV40 manufacturer does not supply it with it.
For the version in the 50 body, carbon and regular filter elements are also offered. The original cabin filter for the Camry XV50 can be found under article number 87139-50100. The “Cleaner” with the addition of carbon has catalog number 87139YZZ10.
For XV40 and XV50 you can choose:
- popular Russian TSN 9.7.97 produced by Citron or coal model TSN 9.7.153;
- German CU 1919 from MANN-FILTER and its carbon version CUK 1919;
- Polish regular K 1210 and carbon-coated K 1210A, produced by FILTRON.
When replacing the cabin air filter with a cheap substitute, you should remember that analogues do not have such a long service life, and some of them are distinguished by the presence of manufacturing defects. Therefore, when purchasing, you should carefully inspect the part, if possible, and in the future check the cleanliness of the element more often.
Alternative
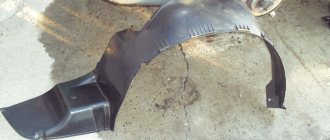
If the problem lies precisely in the side of the carpet, you can refuse to modify the rear air ducts in the Lada Vesta and X Ray and work with it. Some car owners simply cut out a piece of the side. This is effective, but looks unaesthetic.
But there is another option. It is necessary to cut small round holes in the side, just opposite the air duct, and insert rubber bushings into them.
However, one of the owners of Vesta, whose name is Evgeniy and is known on Drive under the nickname gps-nav, found an alternative way of installing a large air filter on the Lada Vesta, which is several times cheaper. It involves purchasing components from different cars and their subsequent modification.
Elements:
- filter element - Filtron AP 074/3 is suitable - 330 rubles;
- air filter housing from the Ford Mondeo 3 model – 600 rubles – can be purchased under article number 4609885902;
- air filter pipe from the VAZ 2111 model – 700 rubles;
- sewer pipe 75 mm and sewer bends 90° and 67° – 220 rubles;
- fitting - 30 rubles;
- plastic ties (2 units) and a metal clamp (2 units).
After all the listed components have been purchased, you can begin work.
Review of Manufacturer Prices
Dimensions: 184x133.5x26 mm.
| Serial number/item | Price in rubles |
| LUZAR 271153553R (original) | From 5000 |
| STELLOX 10-35126-SX | From 4500 – 4700 |
| FENOX RO0004C3 | From 4500 – 4700 |
| RO0003O7 | From 4500 – 4700 |
| AVA QUALITY COOLING RTA6398 | From 4500 – 4700 |
| VALEO 812374 | From 4500 – 4700 |
| NISSENS 76512 | From 4500 – 4700 |
| MAGNETI MARELLI 350218221003 | From 4500 – 4700 |
| *prices are as of May 2022 | |
What to do if the glove compartment is broken
To solve the problem with the glove compartment, you need to directly remove it to repair or replace it. There are two ways:
- Removing the dashboard (front panel);
- Removing the glove compartment itself.
How are these methods different?
If you remove the glove compartment, everything is done clearly according to the instructions and does not require special knowledge and skills - you just need to correctly understand what to disconnect and why.
Removing the dashboard is a larger process that takes more time. This should be done if work will be carried out not only on the glove compartment, but also on the entire panel, or if for some reason the glove compartment cannot be removed using the standard method.
Valve installation
We make a couple of butterfly-shaped holes in the recess. To do this, we first drill small holes, and then work with a knife and a soldering iron.
We screw two self-tapping screws into the recess of the glove compartment drawer, which will limit the movement of the handle (it has a protrusion on the back side).
We install the valve in the recess and fix it with a screw, having previously drilled the handle rod with a drill whose diameter is slightly smaller than the screw thread. The handle with the valve should rotate with slight effort and not dangle.
The arrow shows the gap into which air will penetrate (if the valve is open).
We modify two fittings to the desired shape using a knife. The left fitting will be inserted into the air duct, and the right one into the glove compartment.
Install the fitting using glue.
We cover the inner surface of the box with insulation. And we close unnecessary holes with madeleine
How to remove the glove compartment on a Ford Focus 3
First you need to remove the side panel cover. It can be easily removed, as it is designed so that in case of breakdowns inside the dashboard, it can be opened and closed without problems, and so that the motorist does not have to remove the entire front panel. To do this, you can simply pry its edges with a wide flat screwdriver or spatula and pull it towards you.
Removing the side plug on a Ford Focus
The plug is lifted and pulled towards itself until all its clips are unfastened and it is removed. Under the plug there are two screws - black and white. To work directly with the glove compartment and remove it, you need to unscrew the black one and leave the white one alone.
There are also screws inside the glove compartment itself that you should pay attention to further. Having lifted the glove compartment lid and fixed it in this position, you need to find two screws on top and, unscrewing them, close the glove compartment lid
If it does not open, there is no need to touch it.
Under the glove compartment there are two latches and a fabric spacer that will also get in the way, so first you need to unfasten the latches (they just pull down) and then remove the fabric panel
There is a fuse box inside, so there is no need to touch anything else - you could accidentally touch something important and cause more serious damage to the car than a faulty glove compartment
There are also other screws under the glove compartment that need to be removed, so the steps are as follows: you crawl further under the glove compartment and look for two black screws next to the yellow clips that held the latches. Do not touch the gray bolts - they are not needed now.
Location of the two bottom bolts
Now the glove compartment is held on only by a few clips that simply snap off. It is most convenient to start removing the glove compartment from the right side of the fastenings, where the plastic plug was removed and where the very first bolt was unscrewed. Gently pull down the part of the glove compartment that we then “released”. It bends, so you have to be careful not to break it off completely.
When the clip on the part is detached, you can begin to remove the remaining clips - they are located around the perimeter of the glove compartment, approximately in the corners. After disconnecting all the clips, the glove compartment simply pulls towards itself and is removed. Now you can carry out repair work on it - for example, fix the lid or light.
Removed glove compartment
Features of dismantling
For example, Toyota Camry v50, Camry v40 and Camry Grace were selected.
Important. There are no fundamental differences between the removal of the glove box in these models, however, small nuances still exist
We will analyze all the designated models separately.
So, how to remove the glove compartment from a Toyota Camry v50?
First of all, to remove the glove compartment you need to get rid of the contents. Naturally, if it is full, it will not be possible to remove it correctly. In addition, it is advisable to turn off the car's ignition. Next, open the glove compartment and bend the plastic a little with your hands
At this point, it is important to accurately calculate the forces; if the pressure is too strong, the structure itself can be irreparably deformed. After this, the movement of the glove box will be disrupted and it will have to be changed.
However, if it already required replacement, and it is for this purpose that the dismantling is taking place, then there is no need to worry. The bent part of the wall will reveal hidden grooves. And the glove box itself will move slightly downward relative to its standard position. On the right side of the structure from the outside there is the main fastening. It must be moved for dismantling. The fastening is detached by moving to the sides of the door. In this case, again, do not apply too much effort. If the glove compartment on your Camry won't budge, you're doing something wrong. Or the deformation of the plastic does not allow it to be removed without damage. Once the fastening has been disconnected, the glove compartment can be removed simply by pulling it towards you. Reassembly follows exactly the same pattern. Again, there is no need to apply significant pressure.
Now let's figure out how to remove the glove compartment from a Camry v40. For this:
Again, we remove everything unnecessary from the glove compartment and open it. Remove the shock absorber from the right side of the structure. It is installed so that the box moves as ergonomically as possible, without jerking and does not “walk” on its runners. In order to get rid of the shock absorber, simply pull it horizontally. Also, the grooves of the fasteners located at the back must be removed by squeezing the plastic towards each other. Then both stops will leave their “sockets”
The plastic in this area is very thin and can crack if pressed hard, so be careful. We move the glove compartment vertically down, it will be easy to remove, it will come out of its position on its own.
How to remove the upper glove compartment on a Ford Focus 2
Anyone who has this glove compartment sooner or later is faced with either the fact that it opens on its own on potholes, or that the plastic latch breaks. If not, then either you didn’t use the glove compartment, or you were very lucky)) In general, the latch already broke once, although not completely, I sealed it with Poxypol, sharpened it with a needle file, and it seemed to be going through the winter normally. But in the summer it stopped holding, either because the sun warmed up the interior, or the roads were not so smooth)) After some thought, I decided that the problem was in the lock that holds the latch. I bought a lock, it’s true it’s a duplicate, but it’s inexpensive, I removed the glove compartment from the dashboard, and took it to replace it. Everything would be fine, but in this lock the repaired latch just broke without a chance of recovery. I had to engage in collective farming, because paying about 3,500 for the glove compartment lid was strangled by an amphibian.
In general, we take the old sled from the server hard drive, there is just mild steel about 1mm thick, we cut a strip of the required width from them with metal scissors, we process it with a file to the desired shape and dimensions. We break off the old latch, or rather what is left of it, , snap off the glove compartment lid into two parts (as it turned out, they were slightly melted to each other, but were separated without problems with a utility knife). We drill a hole in the place of the latch and insert the workpiece there.
Full size This is something like this: We put the lid in place, adjust it in length so that the lock opens and closes clearly without jamming, after which we bend the remaining piece of the structure, degrease it and fill it with “poxypol”. After 15-20 minutes everything is already captured.
After the “poxypol” had set and checked for clear opening and closing, I degreased both parts of the lid and glued them with gel superglue, just along the ribs on which they were previously held. It holds up excellently, nothing has moved and there are no extraneous sounds.
Full size Why throw away the Christmas tree? Anyway, there are less than six months left until the new year)) Well, after all this, all that remains is to stick the hero of the occasion back into the torpedo.
It took about forty minutes of pure time to do everything. It holds up well, does not open on its own on potholes, and even the lid is flush with the dashboard when closed, previously it stuck out a little upwards. We will see how all this will behave further.
When I was traveling to neighboring countries in the winter, a common misfortune of GYYafocus guides overtook me - the plastic hook-latch that closed the glove compartment on the dashboard broke off. Even then I knew that this was a fairly constant problem and knew that there were repair options, but at the same time I knew that doing this in winter was dangerous for plastic and, in principle, difficult without a garage, so for almost half a year I drove with a piece of paper, which I used to open the lid to the glove compartment didn’t open) and then I returned a couple of weeks ago to this topic on the ffclub, scoured the entire topic, talked to those who had already repaired it and decided to do it myself. A week of rain had just begun in St. Petersburg and I put it off again. But then the day turned out to be calm at work, so I asked for time off and went to my friends for service. I thought I could handle it in 2 hours. I was wrong))) Well, it all started in the store with the choice of a workpiece, the choice was based on the presence of at least one right angle and a metal thickness of 2 mm.
Equipment
Below are tips for equipping your glove compartment with the necessary things that will ensure your safety on the road and can help in difficult times:
- Contacts in case of an accident - write down the numbers of emergency services (Ministry of Emergency Situations, Ambulance).
- Medical Information - Record medical information about yourself and your family and save it in case of an emergency. Be sure to leave information about any allergies to medications.
- Insurance policy.
- First aid kit.
- Car Manual - There are many different functions in a car. The manual will be needed in a situation where a breakdown has been detected and technical service is far away.
The glove compartment is a fragile part
Experience shows that owners of Fords of different brands often have their upper glove compartments break down - the lid doesn’t work, something is acting up inside, or the light is broken. Whether it depends on the manufacturer or on improper operation, the problem is common, and cars are still different, and it can arise in different situations.
Upper glove compartment on a Ford Focus
The best advice that can be given is a reminder that you need to take care of your car and treat it with more care. Despite the fact that removing the glove compartment is not difficult, it can take a long time. It is much easier to make sure that it does not break, not to slam the lid too hard, and then you will not have to take it out in the future to look for problems.
How to remove the glove compartment on a Ford Focus: detailed photo instructions 4.9 (97.14%) 7 votes
Advantages and disadvantages of automatic transmission
Engineers almost managed to defeat the transmission whine and the box became really quieter
But the knocking noise at idle remains, most of the complaints concern them
Critical wear of manual transmission gears and bearings was delayed beyond 100,000 km
There are also oil leaks from oil seals, but now this is the exception, not the rule
The Lada Granta/Kalina 2 is equipped with a Jatco automatic transmission; this gearbox has been installed on Nissan for more than two decades and has proven itself well during this time. Reviews from owners of Lada Granta with automatic transmission indicate that the automatic transmission shifts gears smoothly, on time and accurately. There is no excessive thoughtfulness, and sudden accelerations and braking do not confuse her.
The disadvantages of the machine include high fuel consumption, especially in urban areas, as well as very expensive repairs.
“Robot” is installed on a wider range of Lada cars (Granta, Kalina, Priora, Vesta and XRAY) and has a number of operating features. According to AvtoVAZ, the robotic gearbox is distinguished by its simplicity, reliability and efficiency. In addition, the robot is easy to maintain, and its repair cost is practically no different from repairing a manual transmission. Fuel consumption corresponds to that of a manual transmission.
The disadvantages of this transmission are mentioned in reviews of owners of Lada Priora with AMT. An “automatic” changes gears with almost no loss of traction torque, but a “robot” cannot do this. It is this moment that car enthusiasts do not like. In addition, there are discussions about the hum and howl of the AMT.
Both transmissions make driving easier, which significantly reduces driver fatigue, especially in traffic jams. What transmission do you recommend for Lada cars? Let us remember that cable “mechanics” are famous for their howling.
Keywords: Lada Granta gearbox | gearbox Lada Kalina | gearbox Lada Vesta | gearbox Lada Priora | gearbox lada xray | universal article
↑ Operating principle
Antifreeze is used as a coolant: a mixture of ethylene glycol and distilled water. The lower the temperature outside the car, the higher the percentage of the chemical reagent (its density) should be.
Important! When using refrigerant, do not mix it with oil. The system must be filled with antifreeze of the same brand recommended by the manufacturer.
Liquid circulation occurs in two circuits. The small circle begins and ends in the engine, including the heater radiator. It operates when the car is not moving or the engine temperature remains up to 85 degrees.
At temperatures above 85 degrees. The thermostat includes a large circuit that involves the engine radiator. Hot antifreeze flows through the outlet hose into the radiator, where it cools and is sent back to the engine. Cooling occurs by air flows entering through the air intakes of the front bumper.
If this is not enough due to high outside temperature or stopping the car with a hot engine, then a signal from the electronic control unit turns on the fan behind the radiator. To control the engine temperature, in addition to the thermostat, there is a special sensor. The operation of the fan does not depend on the position of the key in the ignition switch.
A cabin heater is integrated into the Lada Vesta engine cooling system. Hot engine antifreeze enters its radiator and, after cooling, returns to the large circuit.
When the coolant temperature is above 100 degrees. and a pressure of 0.1 bar the expansion tank comes into effect. The fullness of the cooling system is determined by the level of antifreeze in the tank. In a plastic translucent container, the liquid should be halfway between max. and min. marks. After reaching a pressure in the range of 1.1-1.3 bar, the coolant is discharged into the system.
With the air conditioning system in the Lada Vesta there is a function of a cooled glove compartment (glove compartment). The air duct branch flap is located in the upper left corner of the glove box. To lower the temperature in the glove compartment, you need to open the valve and close the central air ducts while the air conditioner is running.
Replacing the cabin filter of Toyota Camry 40.
According to the manufacturer's regulations, the Camry cabin filter must be replaced during all maintenance, that is, every 10,000 km. mileage At the moment, in addition to the original cabin filters, there are also a large number of analogues from various manufacturers on the market. Some of them are absolutely not inferior in their characteristics to the original ones (made by Toyota). Naturally, there are quite a few options, the quality of which leaves much to be desired.
In the store of our auto repair center, only 100% original consumables are presented, as well as proven high-quality analogues!
You can buy cabin filters for Toyota Camry HERE.
Well, I digress, let's continue! Some of the most common questions are where is the Toyota Camry cabin filter and how to change the cabin filter on a Camry.
Let's start with the Toyota Camry V40.
Replacing the Camry 40 cabin filter is very simple!
The cabin filter is located behind the glove compartment.
If you open the box, a lid becomes visible that blocks access to the filter.
However, in this case you cannot reach the filter. For easy access to the filter, you need to completely open the glove compartment drawer.
To do this, we perform the following procedure:
1. Remove the box shock absorber. We just pull it in the opposite direction.
Then, with quite a lot of force, we squeeze (inward) the side walls of the box (thereby bending the stoppers).
And open the box completely.
Access to the filter is completely open!
Let's start removing the old filter. To do this, press the latches on both sides of the cover and remove it.
This is what it looks like, the installation position is marked.
Removing the cover provides direct access to the filter.
Remove the old filter.
And insert a new one.
Next, we perform the steps in reverse order.
Typical stove malfunctions
The most common problems with the stove on Lada Vesta are the following:
- the actual temperature does not correspond to the set one - low level of antifreeze (antifreeze), clogged radiator pipes or the formation of an air lock, which causes cold air to blow;
- vibration appears during operation - the electric motor is loose;
- insufficient air flow from the deflectors - clogging of channels and air ducts;
- the heater is inactive when it is activated on the dashboard - failure of the fuse (No. 14) of the mounting block.
Checking the stove fan
During the circulation of the air flow, dust particles settle on the surface of the impeller, as a result of which it begins to make noise and extraneous sounds appear.
To clear the fan blades of debris, it is necessary to provide access to the unit.
- Unsnap the glove box.
- Remove the filter element.
- On the right is the furnace mechanism. We press the plastic clips and turn the impeller counterclockwise.
- We remove the motor.
- We wipe the drive with a rag.
- Install the parts in reverse order.
Checking the stove dampers
Dampers are installed in the area between the deflectors and the fan. During operation, they fail, become deformed, and become damaged. Checking the serviceability of the damper on your own is quite simple: you need to activate the stove at maximum speed. If it doesn't blow well, it means the air duct is clogged. Change the damper positions. If you hear squeaking or noise, lubricate the moving parts with silicone grease.
Foggy windows when the heater is activated is the first sign of a ventilation problem. This problem provokes a sharp decrease in visibility on the road and an increase in the risk of an emergency. As soon as fogging is detected, check the condition of the ventilation; most likely, the air ducts are clogged.
Checking heating efficiency
Carry out prevention before the onset of winter. Be sure to check:
- heating the air;
- changing speed modes when switching the control lever, if necessary, replace the brushes of the stove motor;
- absence of extraneous noise, whistling in fan operation;
- the need for a time interval to warm up the air ducts.
Note to the driver! The left and right pipes must be at the same temperature. Otherwise, this is a sign of a malfunction of the heating system.
Manual transmission options on Vesta
When developing this car model, the use of the “native” gearbox, the VAZ 2180, was initially envisaged. However, the former director of AvtoVAZ, Bo Andersson, rejected it due to the hum that occurs when the gears rotate and interact. Instead of the originally planned gearbox, a Renault JH3 manual was installed.
After carrying out the necessary work on the domestic gearbox, the designers managed to reduce noise and also create a more balanced gear shift pattern. After the improvements have been made on the Lada Vesta, the manual gearbox is again installed domestically. It is marked as VAZ 21087.
The new transmission has slightly different characteristics. The gear ratio is 3.94. The car can be accelerated to hundreds in 10.2 seconds, and the top speed has increased to 188 km/m. At the same time, the volume of fuel consumed has also increased slightly. Now it is 7.5 liters per 100 km. in a mixed driving cycle.