For the first time, the Russian auto industry installed electric power steering on Kalina. At the first stages, it worked extremely unstably, up to a complete shutdown. Later, they tried to eliminate the shortcomings, but the EUR remained a weak link and periodically fails, as evidenced by the exclamation mark on the panel. This is evidenced by the feeling of a heavy steering wheel, and turning with one hand becomes difficult.
The principle of operation of the electric booster is to reduce the force that needs to be applied when turning the steering wheel. The Kalina electric power steering control unit uses sensors to calculate the operation of the electric motor at the current speed and torque. Thereby giving a signal of the effort with which the driver needs to be helped when turning. After all, it does not work constantly and needs adjustment, which is carried out by the block.
Reasons for shutdown
The main reason lies in the electric power steering. When ignited, the system performs a self-diagnosis and if the mechanism does not pass it, a signal is turned on indicating a malfunction. The color of the signal indicates the degree of danger. The light turns red, the problem needs to be fixed urgently. If the color is yellow, the vehicle can be operated, but safety precautions should be taken. There may be several reasons why the electric power steering on Kalina does not work:
- speed sensor malfunction;
- torque sensor malfunction;
- speed exceeds 60 km/h;
- engine speed is less than 400 per minute;
- failure in the control unit;
- poorly soldered contacts;
- insufficient tension.
Software shutdown
- The electric power steering on Kalina turns off after 60 km/h. Therefore, keep this point in mind; it is set in the system unit and is not a breakdown. The Priora's electric power steering is switched off at a speed of 110 km/h.
- Also, the EUR does not work at low engine speeds. If the value is less than 400 rpm, it is not active.
This is software planned inactivity. It is needed to give information to the steering wheel at high speed and reduce wear of the mechanism.
Electrical booster malfunctions
In the event that it is impossible to immediately check the cause of failure of the electric power steering on Kalina, you need to remove the fuse from the block. This is necessary to prevent sudden activation of the mechanism, which leads to emergency situations.
A direct indicator of a malfunction of the speed sensor in Kalina's electric power steering is a non-working speedometer, as well as a lit-up exclamation mark on the dashboard. It may not work for several reasons. Check the appearance of the sensor; if it is covered with dirt, simply clean it. See if any metal shavings have become magnetized and remove those as well.
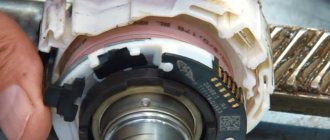
If this does not help, then the sensor is probably faulty. Such sensors are now inexpensive and can be found in many auto parts stores. We do the same for the torque sensor. But where is the speed sensor? It is usually located in the gearbox housing, see photo on the left.
Another cause of malfunction of Kalina’s electric power steering is the generator. The control unit requires a voltage of 13.6 V to operate; if you have less, change the voltage regulator (chocolate) on it.
Also, the contacts could simply become disconnected due to poor-quality soldering. You can either disassemble and solder the contacts or send it to service.
If the problem is in the control unit, it is difficult to solve this problem yourself; the service will either solder it or you will have to buy a new one.
Why doesn't the electric power steering work on Kalina? Fixing the problem
Today, all Lada Kalina owners are interested in the question: why does the electric power steering on the Kalina not work?
After all, this car began to be produced back in November 2004, with electric power steering as standard. The ten-year anniversary has passed, but according to reviews from car enthusiasts, this problem still exists. The electric amplifier consists of an electric motor, a force transmission mechanism and an electronic control system. The operation of the electric booster is controlled by an electronic unit with three special sensors, which must quickly determine the speed of the car, engine speed and the required force to turn the front wheels. When starting the engine with the starter, the electric power steering (EPS) does not work. It turns on only when reaching 400 rpm
crankshaft and stops working when the car accelerates over 60 km. at one o'clock.
Fuse box
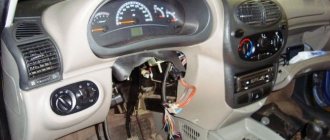
The weak link of the electric power steering on Kalina is the fuse box; if something doesn’t work, it’s worth checking them. To get to them, you need to open the dashboard, to the left of the steering wheel. To do this, pull the top part towards you and the latch will open.
Check if the fuse is working, if it fails, replace it. It is very easy to check, check the integrity of the thread inside the fuse. Changing a 50 amp relay to a 30 amp one will also help.
Newer versions of Kalina are equipped with electric amplifiers from Hyundai, which has a positive effect on its reliability. However, there are still thousands of cars with the domestic version, which malfunctions and breaks down from time to time. Now it will be easier for you to repair the electric power steering on Kalina yourself. The main thing to remember is that not every amplifier shutdown is a breakdown. And you can find the problem yourself and fix it, but somewhere you will have to go to a service center.
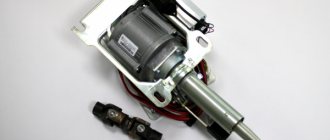
vendor code
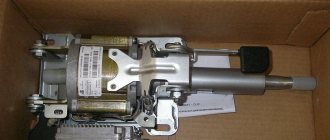
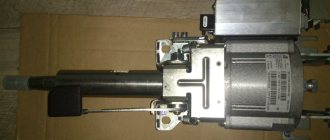
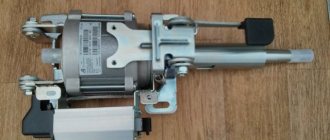
Standard Electric power steering VAZ 1118 (Kalina), Granta, Datsun On-Do (Mi-Do), Priora 11186-3450008-02, 1117-3450008-02
Manufacturer: Autoelectronics, Kaluga, Russia
Price 20,500 rubles
Weight 10 kg
Causes of EUR failure
One of the main reasons why the electric power steering on Kalina may turn off is a breakdown of the device itself. When the ignition is turned on, the system automatically performs diagnostics, which subsequently fails. As a result, the electric power steering does not work due to its own shutdown, which undoubtedly negatively affects the comfort when driving the car.
Repairing the electric power steering can be quite expensive, so if the Kalina is still under warranty, it makes sense to have your power steering repaired at the dealer. In the event that the system has completely failed, you must first turn off the power. In this case, the engine torque will be received by the steering element (rack), bypassing the amplifier.
Another reason why the electric booster does not work is the failure of the speed sensor, which is responsible for the operation of the system in various driving modes. The power steering operates at full power only when driving at minimum speed. When the vehicle accelerates, the force that the system creates on the rack decreases, and this is what the speed controller is responsible for. Do-it-yourself EUR repair involves replacing the sensor yourself; the cost of such an element today is not high.
If a speed sensor directly connected to the speedometer breaks down, then the unit that controls the power steering receives incorrect data. The system automatically turns off, at this moment a diode indicator appears on the control panel, which informs the driver about a malfunction of the device. To avoid the need to repair the amplifier, it is enough to carry out diagnostics in time with a paper clip. Thanks to diagnostics, the motorist will be able to find out about all the problems that are present in various mechanisms and transport components.
Let's summarize this point - for what reasons does the electric amplifier refuse to work:
- There is no signal from the speed sensor. The problem may be either a regulator failure or a wiring fault.
- Very low voltage level in the car wiring. It is necessary to measure the voltage and solve the problem.
- The permissible engine speed has been exceeded.
- The control unit has failed. Repair will solve the problem, but usually if the unit breaks down, it has to be replaced.
Error codes for EMURU "Lada Kalina"
So, we have studied the general circuit of the Lada Kalina electric power steering; now we will consider possible digital error codes and briefly describe their meaning. Note that equipment can be diagnosed using a DST-2M scanner with an installed VAZ-IZH cartridge or MT-10 software.
• C1000 – no error detected. • C1011 – no signal (engine speed circuit). • C1012 – no signal (speed sensor circuit). • C1013 – the voltage in the on-board network has dropped. • C1014 – the voltage at the ignition switch has dropped. Torque sensor: • C1021 – voltage (main output). • C1022 – voltage (control pin). • C1023 – incorrect output signal. • C1024 – no signal. Steering shaft position sensor: • C1031 – circuit malfunction (main signal). • C1032 – circuit malfunction (control signal). • C1033 – lack of power. Engine rotor position sensor: • C1041 – phase A circuit – malfunction. • C1042 – phase B circuit – malfunction. • C1043 – phase C circuit – malfunction. • C1044 – incorrect sequence. • C1045 – lack of power. Power circuits: • C1050 – short to ground. Motor, overcurrent: • C1051 – phase winding A. • C1052 – B. • C1053 – C. Broken phase windings: • C1054 – broken windings. • C1055 – winding A. • C1056 – B. • C1057 – C. Closing of phase windings: • C1058 – closing of windings. • S1059 – winding of phase A. • S1060 – B. • S1061 – C. • S1070 – unidentified. ECU - electronic control unit: • C1071 - RAM error. • C1072 – ROM error. • C1073 – EEPROM error. • C1074 – block relay. • C1075 – the radiator temperature is exceeded. • C1076 – ECU supply voltage. • C1077 – voltage for power capacitors. • C1078 – capacitor charging time. • C1079 – excess current in one of the windings. • C1080 – breakdown of the power transistor. Currently, DST-2M scanners are no longer produced; their place has been taken by more modern and advanced devices of the DST-12 model. With this equipment, you can diagnose not only faults in the Lada Kalina electric power steering. The DST-12 scanner is universal; it is used to service many cars - both those manufactured by AvtoVAZ and models from other manufacturers.
Removing the electric amplifier
- If you decide to repair the electric power steering, then first of all you need to dismantle the steering column switches. Next, you need to disconnect all the blocks with wires from the control panel - if you need to remove the ignition switch, then to do this you need to unscrew three self-tapping screws. A Phillips screwdriver is used for this.
- After completing these steps, you can dismantle the lower cross member of the control panel. To do this, press the clips that secure the wire block, and then disconnect them from the system control unit. Only after these steps can you disconnect the block from the switches themselves.
- The bracket itself is fixed with several nuts, they are unscrewed.
- The entire steering column must be carefully lowered. You need to find the screw that secures the cardan to the assembly shaft. This screw is unscrewed, while you need to hold the nut to prevent it from turning. After dismantling the screw, the terminal clamp must be released, then the intermediate shaft is carefully removed. To prevent installation problems, the location of the shaft, as well as gears, must be marked with a marker. If the marks on the shafts are not aligned, this will lead to problems with the system. When removing the electric amplifier, do not damage the wiring under any circumstances.
- As for installation, the procedure is carried out in reverse order (the author of the video is Murzik Bely).
Trouble-shooting
If, as a result of the diagnostics performed, you were able to find out the reason for the battery light to light up, the malfunction should be eliminated.
If it turns out that the battery has run down, it needs to be recharged. In this case, you need to start the car with a starting charger - this will make sure that the generator is functioning normally and the light has gone out.
If the generator belt is loose, tighten it using the appropriate tensioning mechanism. If the belt is damaged, it is replaced with a new one, followed by the tensioning procedure.
If you find damage to the wiring in one of the sections of the circuit, it must be replaced, but the wires must have the same characteristics as the old ones.
If the voltage relay or diode bridge burns out, these components are replaced with new ones; they cannot be repaired.
As for the generator, worn commutator brushes can be replaced, and the same applies to slip rings. But a broken winding is almost impossible to eliminate, so most likely you will have to buy a new generator.
Causes of EUR failure
Why does the electric power steering on the Lada Kalina not work, turns off and refuses to work, what are the signs of a steering wheel with power steering knocking, jamming, biting or squeaking? To repair the system yourself, you need to know how diagnostics are carried out and what causes precede the breakdown. Most often, the failure of the amplifier is caused by a breakdown of the unit itself and the amplifier fails. Problems of this type are resolved by thoroughly checking the system to identify the exact problem.
As practice shows, often the inoperability of the electric amplifier (failure) is associated with a breakdown of the speed controller.
- the steering wheel is jammed,
- jams
- becomes tight
- and others
Because the speed controller sensor ensures activation and deactivation of the electric power steering under different driving modes. The amplifier on Kalina works if the car is moving at low speed. When the speed begins to increase, the booster automatically turns off, allowing for safer machine control when driving at high speeds.
So, briefly about the reasons for the inoperability of the EUR:
- The speed controller has failed or the control unit does not receive or disappears a signal from it. In this case, the reason may lie in either a breakdown of the sensor, damaged wiring, or poor contact of the controller with the on-board network.
- The voltage in the vehicle's electrical network has decreased. The reasons can be different, ranging from a dead battery and an inoperative generator to the use of inappropriate electrical equipment in the car.
- The permissible crankshaft speed has been exceeded.
- Incorrect operation or failure of the control module. Depending on the cause, the control unit may need to be repaired; more detailed diagnostics need to be done.
Deciphering codes, checking devices
Mistake No. 2. Overvoltage. Error No. 3. An error has been detected in the fuel sensor level; it occurs if the circuit is broken.
Error No. 4. Coolant temperature sensor error. Error No. 5. The outside temperature sensor has failed. Error No. 6. The motor has overheated. This happens if the engine overheating alarm is triggered. Mistake No. 7. Oil pressure is in poor condition. Happens if the alert bell is triggered. Mistake No. 8. Problems with the brakes. Happens if the alert bell is triggered. Mistake #9: The battery is dead. Happens when the alert bell is triggered.
To reset all types of errors, press and hold the reset button until all data on the display is cleared. Testing of devices and their combinations is carried out in accordance with technical specifications using special equipment (pulse generator, from a stable power source, etc.). If a short circuit suddenly occurs in existing devices (less than 40-50 Ohms), the maximum temperature indication must prevail.
The devices operate from an electronic module, which receives signals from various sensors. The tachometer and speedometer are powered by stepper electric motors. The electrical instrument cluster cannot be repaired. The daily mileage of the car can be set on the 0 key, which is located on the right. The meter and its readings are saved when the battery is disconnected. That's all. Good luck!
Before buying a car, I recommend checking the errors of the on-board computer to be sure of the iron horse. If you have identified any problems, we give you the opportunity to familiarize yourself with the error code of the on-board computer.
First of all, you need to watch the video.
The process of launching the instrument panel diagnostic mode, I think, became clear from the video, and below we will now look at the main error codes that may appear on your on-board computer display: Lada Kalina on-board computer error codes
— increased voltage of the vehicle’s on-board network 3
- fuel level sensor error (if a break in the sensor circuit is detected within 20 seconds)
4
- coolant temperature sensor error
5
- outside temperature sensor error
6
- engine overheating (the criterion for triggering an acoustic signal is met)
7
- emergency oil pressure
8
- brake system defect
9
- battery is discharged
In the video above, it was clear that I was displaying errors 4, 6 and 8. With four, everything is clear, as I read many reviews, this error always appears on a cold engine. As for number 6, here most likely there is data in the memory of the on-board computer about the engine overheating alarm that once tripped. If my memory serves me correctly, this happened when I had to trail behind a scraper at a speed of 10 km/h for a couple of kilometers in 40 degree heat. But fortunately, immediately after the signal went off, I was able to drive onto a repaired section of the road and quickly cool down. Regarding the defect in the brake system, I can say the following: the warning lamp for insufficient brake fluid level came on quite often at the same time, and I wrote about this problem here: the brake fluid level lamp is constantly blinking.
Fortunately, my Kalina did not have the rest of the errors listed above. Resetting the readings is very simple, again by pressing the daily mileage button.
If you decide to buy a used Kalina, then be sure to go through the diagnostic procedure and look at the errors that the computer shows. Surely not every owner knows about this and will reset them. And the information may be very useful for you. For example, the car’s engine has already overheated or the engine pressure warning light has tripped, and this is already a serious reason to refuse to buy such a car.
If you decide to carry out maintenance on your car, I advise you to read the article about replacing the fuel filter on a Lada Kalina with your own hands.
Diagnostics
To check the amplifier in a car, you need to remove the plastic trim on the steering column; to do this, unscrew the bolts securing it from the bottom.
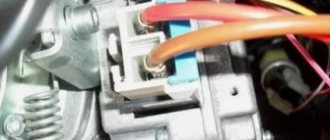
Then you will need to get to the 8-pin plug, its pinout is as follows:
- The blue contact is connected to the ignition switch, this is 12 volt power;
- the red-brown contact is the connection cable to the tachometer;
- the gray contact goes to the car speed controller;
- white and pink wire - amplifier control indicator;
- black-yellow contact is a diagnostic line;
- the next contact is empty, the wire is not connected to it;
- brown contact is ground;
- empty.
More accurate results will be obtained by checking the amplifier using a scanner. But since such equipment can usually only be found at service stations, you can try to check the operation of the system with a paper clip.
To check you need to do the following:
- First the ignition is turned off.
- Then, using a paper clip, you need to close contacts numbered 6 and 7 of this plug, while the plug itself does not need to be removed.
- Next, the ignition must be turned on.
- After completing these steps, the EUR failure indicator located in the dashboard will begin to blink; by the number of blinks, you can determine whether the system is broken (the author of the video is Gosha Vakhromeev).
How to understand where to look for the cause by the blinking indicator icons:
- one long signal and one short signal - the electric amplifier is working;
- one long and two short - no engine speed signal;
- one long and three short - the torque controller is out of order or there is no power supply;
- one long and four short blinks—problems in the operation of the electric power steering motor;
- one long and five short - the steering shaft position controller has failed;
- one long and six short - the motor rotor position controller has failed;
- one long and seven short - problems with the electrical network - the voltage is either too high or very low;
- one long and eight short - the control module of the electric amplifier has failed;
- one long and nine short - the speed controller is broken.
List of online stores, addresses of companies providing services
| № | Name | Contacts, address |
| 1. | STO "A1-Motors" | Moscow, st. 1st Dubrovskaya, 13a, building 4, phone: 8 (495) 120-15-38 |
Reviews of companies
- Vasily: six months ago I installed a servo drive on Grant at the A1-Motors service station. The guys did everything quickly and professionally. My recommendations.
- Ivan: after buying the Lada, I replaced the power steering with an electric steering system. I ordered the work from the service station “Auto Service on Sedova”. New equipment, many repair boxes, work professionally.
- Innokenty: comrades recommended installing an EUR. I bought it at the Motel Varshavsky parts store. Good quality, reasonable prices, bonuses when purchasing.
- Vladlen: I drove the power steering for two years and decided to switch to the electric power steering. They advised to buy from Expert-Auto. Six months have passed since installation, no complaints, my recommendations.
- Vyacheslav: I’m leaving my positive review about the auto parts store “Spare Parts on Wheels”. Professional advice, reasonable prices, friendly staff.
Dismantling and disassembling the electric amplifier
Before removing the amplifier, you need to remove all the steering column switches. Remove the steering rack cover and dismantle the devices, remembering to disconnect the connectors from the power supply.
How to remove the EUR with your own hands:
- After removing the switches, you will need to dismantle the lower cross member of the dashboard. To do this, you need to press the fasteners that secure the connector with wires, and then disconnect the wiring from the control module. Once these steps are completed, you can disconnect the connector from the switches.
- The system bracket is secured with nuts; you will need to unscrew them with a wrench.
- After this, the steering rack will need to be carefully lowered down. To do this, you will need to find the bolt that secures the driveshaft to the booster shaft. This bolt must be unscrewed, but when unscrewing, you will need to fix the nut, this will prevent it from turning. When the bolt is removed, the fastening will need to be loosened, after which the intermediate shaft will be carefully removed. At this stage, we recommend marking the position of the shaft and gears; you can use a marker for this. This step is very important because doing it will prevent possible installation problems in the future. If the marks on the shafts do not match, this may cause problems with the amplifier. When dismantling, be careful not to damage the wiring, as this will also lead to the inoperability of the ESD.
- When the unit is dismantled, it will need to be disassembled and the failed elements replaced. Further editing is done in reverse order (the author of the video is Murzik Bely).
Replacing generator brushes for Lada Kalina sedan (VAZ Kalina)
If the voltage regulator unit, capacitor and not a tight fit of the brushes are faulty, or if they are worn out, the vehicle's supply voltage deviates from the norm. In this case, it is necessary to check the above listed elements and, if necessary, replace them. In this article we will talk in more detail about diagnosing and replacing generator elements in a Lada Kalina car.
To remove the Lada Kalina voltage regulator you will need the following tool:
flat-blade screwdriver, 8mm and 10mm open-end wrenches and 7mm, 8mm and 24mm socket wrenches, hammer, soldering iron, universal meter (with DC voltmeter and megger)
Checking the functionality of the voltage regulator on the Lada Kalina generator
1. Move aside the rubber insulating cover of the positive terminal from the generator.2. Start the engine and allow the engine to warm up so that the vehicle operates normally at idle speed.3. Measure the voltage between the positive terminal and the body (negative terminal). The voltage should be 14.5-15.1 volts.
If there is a deviation from the specified range, the voltage regulator must be replaced. See also checking the Lada Kalina generator regulator in the section “Replacing the voltage regulator”
Checking the functionality of the Lada Kalina generator capacitor
The capacitor is usually checked with a specialized meggometer, since not all universal devices have a measurement of up to 10 MoM. The device is set precisely in the range of 1-10 MΩ. Before connecting to the capacitor, the device shows infinity. If connected to a working capacitor, it begins to charge and an electric charge accumulates on its plates - current flows and, accordingly, the resistance on the device drops. After charging it (saturating the capacitor plates), the resistance again becomes infinite.
Replacing the voltage regulator Lada Kalina
carried out as follows
1. Disconnect the negative cable from the battery.2. Disconnect the excitation block from the generator.
3. Disconnect the positive terminal from the battery by unscrewing the nut.
4. Remove the factory seal from one of the screws holding the plastic casing and remove the screws. Remove the protective plastic cover.5. Remove the two screws securing the regulator and remove the voltage regulator.
6. Check the ease of movement of the brushes. They must protrude at least 5 mm from the voltage regulator housing.7. You can check the voltage regulator by connecting a 12 V lamp to its outputs and applying a voltage in the range of up to 12 volts to its inputs, while the lamp should light and the voltage is more than 12 V to 16 V.
If the voltage is too high, the lamp should go out. If this algorithm does not work, then the regulator must be replaced. Installation of the regulator is done in the reverse order.
Replacing the rectifier unit with a capacitor Lada Kalina
1. Using a soldering iron, unsolder the six leads and remove the 3 bolts.
2. Remove the rectifier unit from the generator. Installation of the rectifier unit is carried out in the reverse order
Checking diodes on the rectifier block Lada Kalina
1. Dodas are checked with a universal device. (6 diodes in total) Connect the black “negative” probe to the negative plate, and the positive “red” probe alternately to the three contact terminals of the diodes. The resistance should be 580-620 Ohms.
Attach the red “positive” probe to the negative plate, and the negative “black” probe alternately to the three contact terminals of the diodes. The resistance should be 580-620 Ohms.
Checking the windings of the Lada Kalina generator
1. Check the generator windings with a device. All windings should have approximately equal resistance, without significant deviations. Deviations indicate a break or short circuit.
Any electrical equipment fails sooner or later. Thus, the most common generator malfunction on the Lada Kalina remains the regulator relay. Replacing this element is not difficult, but requires certain knowledge and skills.
Video on replacing the voltage regulator relay on a Lada Kalina:
This video story tells about replacing the generator regulator relay on a Lada Kalina, the nuances of installation and configuration.
How to tighten the electric power steering rack?
The appearance of a knocking sound in the operation of the electric power steering is associated with the need to tighten the steering rack.
How to do it right:
- First you need to disconnect the battery; to do this, disconnect the terminals from it. Unscrew the battery mount; to do this, you need to unscrew two more nuts located at the edges. After this, the battery is removed and put aside.
- Then you need to lift the plastic stand, there are four more screws under it, they can also be unscrewed.
- Having done this, it is necessary to move this stand forward until the platform is disconnected from the air filter housing retainer pad. After this, the trim can be moved back, this will provide freer access to the rail itself.
- At the next stage, you will need to crawl your hand under the rail. Directly below it, as shown in the photo, there is a rubberized cap; it will need to be removed, this will allow the key to access the adjusting nut.
- To perform adjustment work, you will need a special wrench to tighten the rack; without it, the adjustment procedure will not be possible. Using this wrench, you need to crawl under the car rail to install the tool in the required hole.
- When adjusting, be careful not to overtighten the rack. If its tightening is very strong, then when cornering the rack will bite, and this, in turn, may affect the safety of movement. The angle of adjustment is always different, it depends on how much the nut is loose, but usually when performing such work the nut is tightened by approximately 30 degrees. This should be enough to get everything right. After the adjustment is completed, it will be necessary to check that this task was performed correctly. That is, you will need to make sure that the steering wheel turns normally to any position all the way and there is no knocking. If the knock remains, then the adjustment continues.