If you decide to repair your car yourself, you need to have a good knowledge of its components and be able to read drawings. Of course, such skills come with experience in operating and maintaining the VAZ 2110. This time we will study the operation of the heater in detail. If the heating system functions properly, then both the driver and his companions will be comfortable inside the “ten”. This material contains stove diagrams and descriptions for them. The instruction manual also contains this information, but we try to describe complex processes in simple language. Our task is to convey important information to beginners and experienced motorists.
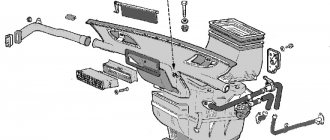
This is what the disassembled heating system of a VAZ 2110 car looks like
VAZ 2110 heater blows cold, why?
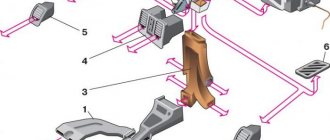
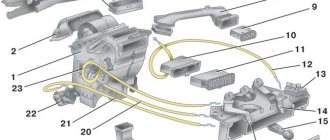
Many owners of “ten” complain that at some point the stove constantly blows cold air and no amount of turning the handles of the automatic heater control system can save the situation. There can be a lot of problems and malfunctions. For example, the ACS controller itself is faulty, the ceiling sensor or micro-geared motor is faulty and simply does not open or close the damper. Another reason is the air (air lock) in the heater radiator, which is simply not capable of heating the air passing through it. Below is a schematic representation of the VAZ 2110 heater device.
Heater dampers VAZ 2110
Often the cause of poor performance of the “ten” heater is the damper of the VAZ 2110 stove. The damper may not close tightly or open poorly. The heater flap itself is made of plastic, which can become warped and perform poorly over time. Many car owners buy a metal damper and change it themselves. How to check the functionality and evaluate the condition of the heater damper? Everything is quite simple, remove the central air duct deflector and there you have it - a damper! Let's look at the photo.
Next, carefully inspect the damper, turn on the stove, turn the controls on the ACS unit and see if the damper works at all. How does it move, does it fit tightly. If she does not respond to commands, then the problem may not be her at all. For one thing, you can see if the lever for redirecting the air flow from the glass to the feet works.
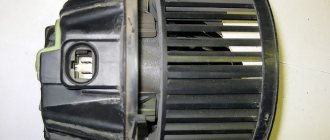
Heater fan VAZ 2110
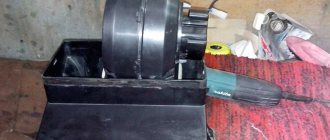
It is quite simple to determine the performance of a stove fan by looking at the noise. If the fan motor burns out, then it naturally will no longer work. However, before rushing to change the stove fan, you need to make sure that the fuse has not blown. As we already wrote above, the fan of the VAZ 2110 stove is located not in the cabin, but in the engine compartment. To get to it, you will need to remove a special apron that separates the engine compartment from the heater housing, vacuum brake booster and windshield wiper mechanism. The actual photo is below for clarity.
So we got to the stove fan, removing the apron and heater casing. By the way, next to you you will see the cabin filter, in the housing a little to the left. It needs to be pulled out and cleaned. If no one has changed the filter before you, over many years of operation it is seriously clogged with debris and interferes with the normal circulation of air, which is sucked into the cabin of the VAZ 2110.
Heater radiator VAZ 2110
The radiator of the “tens” heater is located in the same place as the fan, that is, under the hood (see photo above). To remove it, you must first remove the fan from the heater casing. If you notice a strange smell in the cabin, lift the floor mats; if there are puddles of antifreeze or antifreeze, then the radiator of the VAZ 2110 heater is leaking. Although the clamps may no longer hold... in any case, you will have to disassemble and find out the cause of the leak. Next, we offer a couple of videos demonstrating the process of disassembling, removing the apron, stove fan, cabin filter and heater radiator.
How to modify and modernize the stove with your own hands?
There are many options for tuning and improving the operation of the heating unit, which you can do yourself. To implement each task, you will have to completely or partially disassemble the heating unit.
Before remaking the heating unit of the VAZ 2110, it is necessary to seal the main air duct as much as possible.
Improved side ventilation
There are two ways to improve side ventilation:
- lay the corrugation, which will be aimed at blowing the glass of the side windows;
- modification of the VAZ 2110 stove may involve sealing all the cracks that lead to loss of air flow.
The first option is more effective for blowing the feet of passengers sitting in front and behind. In fact, practice shows that this method has no effect for blowing glass on windows. Therefore, to solve the problem, all the cracks in the panel are sealed.
The task is carried out using silicone sealant or a special anti-creaking agent. All cracks located around the perimeter on the upper and lower components of the center console panel are sealed. All holes located around the fasteners are treated with silicone.
Damper modernization
In cars manufactured after 2003, setting the damper to blow the feet does not produce results, since the heater blows in all directions. In older versions of the car, the damper works better.
The upgrade procedure is performed as follows:
- Using a metal saw, you should cut out the end parts of the damper. There is no need to dismantle the elements of the heating system. The place that needs to be cut is marked in red in the photo below.
- The flap intended for blowing the windshield does not need to be touched. If the consumer cuts off the end parts on it, then the airflow along the edges of the windshield will be worse.
- To increase air intake, a piece is cut out onto the windshield on the driver's side. This part is marked in green in the photo above.
- It will take a long time to cut out, it must be done carefully. The task may take several hours to complete.
- Next you will need a piece of soft aluminum. Alternatively, you can use iron from a coffee can, as shown in the photo. The iron is cut out with a regular knife and fixed on the stove elements.
Improved foot airflow efficiency
To complete the task you will need:
- new boots, the type of parts does not matter;
- grille, can be used from old speakers, you need to cut a circle out of it, if there is no grille, you can use rubber pads for a Fiat Punto car;
- A piece of rubber can be purchased at the car market.
Device
First of all, you should know the very structure of the heating system in order to clearly understand what and how to repair, because for the VAZ 2110, interruptions in the operation of the heater are a typical phenomenon, and from time to time requiring the intervention of reliable hands - be it a driver or a service station worker.
So, the heating system consists of: 1. The actual heater unit, which provides heating for the interior. It is represented (by importance of details):
- An electric motor on which a fan is also attached to pump hot air;
- A radiator, without which the entire system does not work. Moreover, unlike the old heater, the radiator of the VAZ 2110 stove of the new model does not have a tap that shuts off the flow of antifreeze (antifreeze) through the radiator. Thus, it is always (whether in winter or in summer) heated. This was done supposedly in order to eliminate leaks that were often observed through this tap, and also to heat the interior as quickly as possible when necessary. In the summer, the supply ventilation goes past the radiator, but still some VAZ 2110 owners, when repairing the stove, add this tap to the system;
- There are three dampers. One is responsible for air intake recirculation, the second opens/closes the heater duct, the third, the most important for the interior, controls the heater;
- A resistor that regulates the blowing speed.
Heater parts VAZ 2110
All parts are packaged in a block with additional valves, shields, and fittings. This entire device is housed in a housing and is located under the hood closer to the instrument panel.
2. The next block represents the air ducts of the VAZ 2110. They extend directly from the stove and provide:
- Interior ventilation through central nozzles;
- The air distributor works to supply heat (or regular air for ventilation);
- Two air ducts are directed to the rear of the cabin;
- There is a whole system of five nozzles for heating the feet;
- Two side air ducts provide heating for the side windows and part of the interior, providing better heating;
- Two nozzles for ventilation.
The principle of operation of the heater
This, in brief, is the principle of distributing hot or cold air inside the VAZ 2110.
3. The electronic control unit for the stove operates from the passenger compartment. It includes:
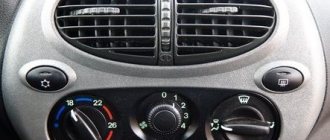
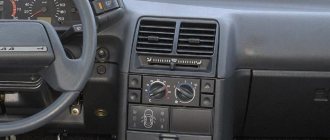
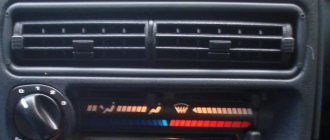
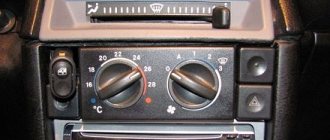
- Controller handle. This device allows you to set the temperature in the cabin that the stove unit should produce. It turns on by turning the knob and sets the temperature from the air, the temperature of which will correspond to that outside, up to 30°C. Most often, this part is called the ACS controller (automatic heater control system);
- The temperature sensor is responsible for turning on the heater when the temperature in the cabin drops by 2 degrees against the set one. The sensor has a microfan, and if the control knob is in position A, then the micromotor in the stove block turns on and the damper begins to operate, ensuring proper heating. Therefore, before starting repairs of the heating system, the operation of this sensor is usually checked. It is located next to the heating lamp on the ceiling of the VAZ 2110. Since it is not repairable, in the event of a breakdown this device should be replaced immediately.
Ceiling interior air temperature sensor
Checking the automatic control system
Diagram of the automatic heater control system
: 1 – fan electric motor; 2 – additional resistor; 3 – controller; 4 – mounting block; 5 – ignition switch; 6 – cabin air temperature sensor; 7 – recirculation switch; 8 – recirculation valve; 9 – micromotor gearbox for heater damper drive; A – to the instrument lighting switch; B – to power supplies
SAUO pinout
:
The SAUO receives information from:
- – cabin air temperature sensor (6), which has a built-in small fan.
- – MMR (micromotor reducer) (9), information about the position of the heater damper.
Damper control
: Based on the received information and the set air temperature, the controller controls the position of the heater damper, sending appropriate signals to the damper drive micromotor.
Fan speed control
: to obtain a low rotation speed (all but the last), an additional resistor (2) is used, which has two spirals with resistance (0.23 and 0.82 Ohms). When both spirals are connected to the power supply circuit of the electric motor, the 1st fan rotation speed is ensured; if a spiral with a resistance of 0.23 Ohm is turned on, the 2nd speed is provided. When the electric motor is turned on without a resistor, the fan rotor rotates at the maximum 3rd speed (4100 min-1).
If the fan operating mode switch handle is in position A, then the controller also controls the fan speed depending on the difference in the air temperature in the cabin and the temperature set point.
Differences in design
The VAZ 2110 was equipped with stoves of the so-called new or old model. Both systems, including those on the VAZ, which has an injector instead of a carburetor, are not particularly different in design.
So, the immediate differences:
- The main difference between the new stove and the old one is in the design of the heater radiator. Therefore, if you are repairing a heating system and decide to install a new model instead of an old radiator, then take into account some nuances;
- In addition, the SAUO controller is also not exactly like that. 4 or 5 position controllers manufactured before the fall of 2003 have already been discontinued and are not suitable for new heater models;
- The micro-gearboxes are also different, starting from release in September 2003. They differ in resistors (shaft position sensors), so you need to check whether the resistor in the MMR model that you purchased is interchangeable.
Old-style MMR
New sample MMR
20.2.8. Heating and ventilation system for cars with VAZ-21114 and VAZ-21124 engines
On cars of the “tenth” family with VAZ-21114 and VAZ-21124 engines, a new type of heater housing is installed with different attachment points to the body and a modified location of the fan electric motor. A different circuit for supplying fluid to the heater radiator was also used.
In the circuit for switching on the electric motor of the heater fan, an additional resistor of a new type is used, equipped with a built-in fuse.
...can be either three- or four-pin (four-pin assembly shown) - for three- and four-way switches, respectively
To diagnose the heating and ventilation system, its controller is connected to the diagnostic block of the engine control system.
Now you can check the operation of the heating and ventilation system using a diagnostic tool.
Central ventilation nozzles with horizontal movement of the air flow adjustment handle can be installed in the car interior.
The vehicle may be equipped with a cabin air recirculation system. If a recirculation system is not installed, the car is equipped with a filter for cleaning the air entering the interior ventilation and heating system.
Replacing the air purification filter entering the interior ventilation and heating system
- Without disconnecting the washer hose, remove the wind window trim (see Removing the wind window trim and trim) and move it to the side (for clarity, the car hood has been removed).
- Using a Phillips screwdriver, unscrew the four screws...
- Drain the coolant (see Replacing the coolant).
- We remove the wind window trim (see Removing the wind window trim and trim), the right side of the soundproofing trim (see Removing the wind window trim and trim) and the throttle assembly (see Removing the throttle assembly).
- We loosen the fastening of the inlet pipeline: we unscrew the cap nuts of the upper fastening completely, and we do not unscrew the two bolts and three nuts of the lower fastening completely.
- We loosen the tightening of the self-tapping screw securing the guide tube of the oil level indicator and lift the tube so that its fastening bracket disengages from the self-tapping screw.
- Remove the ignition coil of the first cylinder.
- We disconnect (can be cut) the clamp securing the block of the heater motor power wires and the additional resistor wires.
- Disconnect the heater motor power supply wire block.
- Disconnect the wire block from the additional resistor connector.
- Use a Phillips screwdriver to loosen the clamp...
...and disconnect the supply hose from the upper pipe of the heater radiator.
- Use the same tool to loosen the clamp...
...and disconnect the outlet hose from the lower pipe (it has a smaller diameter than the inlet).
We do not disconnect the steam exhaust hose from the heater radiator, since its fastening clamp is difficult to access. It is easier to disconnect this hose from the expansion tank branch pipe (see Removing the expansion tank) and remove the heater housing along with the hose.
- We remove the steam removal hose from the clamp on the windshield wiper rod.
- Disconnect the power supply block from the micromotor-gearbox of the damper drive.
- Disconnect the wiring harness from the throttle position sensor.
- Using a 10mm socket with an extension, unscrew the nut of the upper fastening of the heater housing to the body on the right side of the engine compartment.
- Using a socket or an 8-point wrench, unscrew the self-tapping screw of the upper fastening of the heater housing, located next to the fastening of the windshield wiper drive rod.
- Unscrew the nut of the upper fastening of the heat shield of the steering rack cover.
Repair
If you are planning a major overhaul of the stove, especially if you still have an outdated system, start by purchasing a new stove radiator (it is better to buy a copper one, it heats much better), and this will only improve the performance of the heater.
But the design of the VAZ injector stove is practically no different from carburetor cars.
The following is a breakdown of the following points:
- The engine block has a plug from which antifreeze is drained into some container;
- The frill is moved forward a little (a lengthy operation), the windshield wipers and everything that gets in the way are removed;
- The heater housing is removed. You should know that the body is divided into two parts. The front one is removed along with the fan;
- Next comes the cabin filter housing. It can be changed at the same time;
- The other part of the fan housing is removed;
- The clamps are loosened, the hoses are removed;
- Then, with some effort, the radiator is removed.
Assembly, as they say, is in reverse order. Just one more nuance: if you have an outdated stove, then pay attention to two points:
- When installing the plastic case, make sure that the pedal fits into the desired groove;
- Knowing the structure of all components, be sure to double-check their tightness.
Before adding antifreeze, do not forget to make sure that the engine block has a well-tightened plug. Be sure to make sure that the entire system is running smoothly and more efficiently than before.
Typical faults
Below are the main malfunctions of heating systems:
- When the heating is turned on, hot air blows. In this case, there may be many reasons. It is necessary to diagnose the heater motor, gear motor, temperature controller on the ceiling, and the ACS controller. In some cases, the problem lies in the radiator, which, due to incorrect operation, cannot warm up the air flow that passes through it.
- Often the cause of incorrect operation of the heating system is dampers that are unable to open or close well. Since the damper is made of plastic, it tends to deform over time; in this case, installing a metal damper will solve the problem. To understand the condition of this element, you simply need to dismantle the deflector. Turn on the heating and try turning the controls - if the damper does not respond to your actions at all, then you need to look for the problem further.
- Fan failure can be determined by the absence of characteristic noise. But if there is no noise, the problem may be a failed fuse or oxidized wiring contacts. In order to get to the fan, you need to dismantle the so-called apron.
- In the engine compartment there is a radiator for the heating system, next to the fan. To remove the radiator, the fan will also need to be removed. If the radiator begins to leak, you will be able to see puddles of coolant under the floor mats; sometimes this problem is caused by bad clamps. One way or another, it is necessary to determine the location of the leak and solve the problem to restore the system's functionality.
- Many owners of "ten" are faced with such a problem as the lack of backlight on the heater control panel. Car enthusiasts associate the lack of lighting with stove malfunctions, but this is completely wrong. If there is no backlight, this may only be due to the wiring (video author - Aleks B).
The device of the stove on the VAZ 2110
Today we will get acquainted with the stove and its structure on a VAZ 2110 car.
As you know, the heating system has a direct impact on the level of comfort. If in summer there is no special need for interior heating, then in autumn and winter it is problematic to imagine traveling without it. Theoretically, you can drive, but lower temperatures are unlikely to benefit your health.
Dismantling the heater
Diagram and explanations for it
Below is a diagram of the parts that make up the heater system of a VAZ 2110 car.
Detailed diagram of the VAZ 2110 stove design
It is worth saying that recirculation operates in the “tens” heater system, as the diagram tells us. In simple words: air circulates inside the VAZ 2110, and is not taken from the street. The main advantage is that dust and unpleasant odors do not enter the cabin from the street. There are more disadvantages to such a stove system - the glass quickly fogs up. It is recommended to open windows more often if the outside temperature allows it. Air stagnation negatively affects the health of the driver and his companions. The heater gear motor can rarely be repaired, so it should be replaced immediately.
The diagram shows how automatic heating control occurs
For VAZ 2110 owners who want to modify the heater system or carry out electrical repairs, an automatic control circuit will be useful.
https://youtube.com/watch?v=videoseries
https://youtube.com/watch?v=videoseries
Device
Periodic malfunctions in the operation of the heating system for the VAZ 2110 are an ordinary and common thing. Therefore, the owners of this model from the Russian automaker have to dig around in their own garage every now and then or send the car for repairs to specialists from service stations.
Heater circuit diagram
To understand exactly how to carry out repair and preventative measures, you first need to familiarize yourself with the diagram of the stove and its components.
| Element | Peculiarities |
| Electric motor | A fan is mounted on it. Both elements contribute to the injection of heated air into the cabin |
| Radiator | The entire operation of the heating system is based on this component. Remove the radiator and the heater will not work. Interestingly, the new model stove does not have a valve that shut off the flow of coolant through the radiator. Older devices have a faucet. The faucet was removed in order to avoid leaks, which were common on old stoves. Plus, they got rid of the tap for faster and more efficient heating of the interior. Although many owners of new tens do not agree with this decision, therefore, during repairs, they install a faucet on the stove |
| Dampers | In total, the stove has three of them. The first is responsible for air intake recirculation, the second is for opening and closing the heater duct, and the third is intended for control and is considered the most important |
| Resistor | This element is responsible for the speed of blowing hot air into the cabin. |
All elements, including additional valves, shields, fittings, are combined into a single unit. It, enclosed in a housing, is located in the engine compartment near the dashboard.
Air ducts
Air ducts are another block of the heating system. They come from the stove and perform several different functions at once:
- The interior is ventilated through central nozzles;
- Distribute the air through an appropriate distributor that supplies heat or air for ventilation;
- Another pair of air ducts serve to heat the rear row of seats;
- The system, which includes five nozzles at once, warms the feet;
- A pair of side air ducts take over the functions of heating the glass and partially heat the interior. This makes heating more efficient;
- A pair of nozzles are used for ventilation.
Electronic stove control
This electronic control unit operates directly from the passenger compartment. It consists of two main elements.
- Pen. Using the controller knob, the user sets the required temperature, which the stove then generates. Control is carried out by turning the knob in one direction or another, depending on what degree of heating you require at the moment.
- Temperature sensor. It is responsible for activating the stove when the temperature drops by more than 2 degrees compared to the value set on the controller. The sensor is equipped with a micro motor. When the handle is in position A, the micromotor in the stove block turns on, the damper is activated, thereby causing proper heating.
Control block
Before starting repairs of the entire stove, it is strongly recommended to check the condition of the sensor. You can find it near the heater lamp on the ceiling of the car. The device cannot be repaired. Replacement only.
The main reasons for poor operation of an electric furnace
VAZ 2110 stove diagram
Before you can directly begin to find a solution to a problem, you need to be able to identify it quickly and effectively. First, it is advisable to consider the general structure of the furnace. So, the heater furnace consists of the following components:
- mounting block fuse;
- incendiary lock;
- ignition switch together with its unloading relay;
- a special switch that regulates the operating mode of the furnace electric motor;
- additionally built-in resistor;
- stove motor;
- heated rear window of the car, which contains a heater adjustment button with a light indicator;
- a special functional element for heating glass.
VAZ 2110 stove wiring diagram
One of the reasons for the malfunction of the electronic circuit of the furnace may be the lack of functional activity of the heater electric motor at both low and high speeds. In this situation, you must proceed as follows:
- First you should make sure that the fuse has not accidentally blown;
- If a blown fuse is detected, it will urgently need to be replaced with a new one.
Note. Before proceeding directly to replacing the old fuse with a new one, it is necessary to first and without fail establish the cause of the burnout. If this is not done, the service life of the new fuse will most likely be short.
- There may also be a break or damage to the wiring at the point of its connection;
- to eliminate the above reason, it is necessary to check the electrical circuit according to the furnace diagram;
- after which, it is necessary to eliminate the impulse, if it took place;
- if the heating switch does not function, then the most likely cause is a stuck pusher or burnt contacts;
- to accurately diagnose a switch malfunction, you need to check the voltage level at the side terminals while changing the position of the switch in space (to do this, it is enough to apply current to the main terminal);
- if during diagnostics a change in voltage is not detected when changing the position of the switch knob, then it must be urgently replaced;
- there are a huge number of possible reasons for the electric motor to fail to operate: broken electrical connections or armature winding, immobilized cleaning brush, oxidation and/or contamination of the armature commutator;
VAZ 2110 heater radiator diagram
- It’s not difficult to revive the movements of the brush again; just disassemble it and then clean it;
- restoring the wires will also not be difficult, because the main thing is to find the location of the defect;
- if several of the above provisions do not produce results, then there is only one way out - a complete replacement of the heater electric motor;
VAZ 2110 stove electrical diagram
- sometimes, which is extremely rare, the cause of the malfunction may be the mounting block;
- There are many reasons for the faulty state of the mounting block, but the main ones are: at the soldering site, a complete or partial break in the electrical circuit, fire of current-carrying paths;
- The circuit should be checked according to the furnace diagram, otherwise it will simply be impossible to detect breaks and faults;
- the final practically probable cause may be an internal break in the circuit of the auxiliary (additional) resistor (see How to replace the heater resistor on a VAZ 2110);
VAZ 2110 stove wiring diagram
To eliminate a malfunction associated with the operation of the resistor, it is necessary to check its circuits.
A decrease in armature rotation in the electric motor is one of the reasons for the malfunction in the general circuit of the furnace. In this case, it is necessary to be able to find and eliminate micro-causes, and in particular:
- in case of clogging or oxidation of the collector system armature, the number of rotations of the electric motor will also be reduced;
- to eliminate the above problem, you will need to perform a general cleaning of the collector system;
- sometimes a short circuit may occur in the area between the turns of the armature winding, and to eliminate this cause, it is necessary to check the amount of incoming current;
- everything is very simple, if there is a short circuit of the turns, then the input current will exceed 4.5A;
Note. It is necessary to measure the incoming current only after a preliminary check of the objectivity of the ammeter readings.
Design Features
For the VAZ 2110, it is possible to install two types of stoves - new and old. Regardless of the engine used (injection or carburetor), there are no fundamental differences in the designs of the stoves.
But what is the difference between the new and old type stoves? Let's try to figure it out.
- Radiator design. This is the main difference between the devices. Therefore, when replacing a radiator from an old one to a new one, be sure to take into account the installation nuances;
- The controller knob on stoves is slightly different. Old-style heaters have a main problem - they have been discontinued. They cannot be an analogue for 4 and 5 position controllers, which began to be equipped with dozens of them in the fall of 2003;
- The micro-gear motors for the stoves are different, starting in September of the same 2003. The difference lies in the shaft position sensors (resistors). Therefore, when making repairs, make sure that the devices are truly interchangeable and that you bought old-style resistors for your old stove, not new ones. Otherwise the gearmotor will not work.
Problem solving
Now let's talk about how to troubleshoot problems that arise, troubleshoot problems, and return the heater to normal operation.
Each breakdown requires separate consideration.
Temperature not regulated
If it is not possible to regulate the temperature of the air flow, the problem lies in the control unit or damper, or the temperature sensor on the ceiling inside the cabin does not work.
To check, turn the control all the way to the right and place your hand under the air stream. If hot air only flows when the control is in the maximum heating position, replace the sensor. If this does not help, replace the regulator. When heat is transferred to other places on the controller, the sensor should not be at fault.
Be sure to check that the shock is not blocked. You can get to it through the engine compartment. If replacement is required, replace the standard plastic curtain with an aluminum one. It's more durable.
Blowing cold
If the heater on your VAZ 2110 starts blowing cold air, then you need to look for the reasons. The reason for the failure lies in the gear motor. A similar situation occurs in 9 out of 10 cases, so it is unlikely that you will have to look for alternative culprits.
The gear motor must be replaced. This is done as follows:
- The fringe and windshield wipers are back in place. Job is done.
- Wipers removed;
- Unscrew the three screws holding the gear motor;
- The ruffle is dismantled;
- Disconnect the wiring;
- A new one is installed in place of the failed device. Ask an assistant to change the position modes of the regulator and at this time you will install the gear motor;
But there is 1 case out of 10 that will force you to change the heater due to wear and tear of the old one. As the practice of VAZ 2110 owners shows, the heater from 2112 is more suitable for replacement. In addition, you can choose between two stove options: 2112-01 or 2112-02. The first option is without an air filter, and the second option is without it.
The windows fog up, the feet are not heated
VAZ models often have a problem when the air comes out of the stove normally, but does not warm the feet and does not go into the glass.
The problem can be solved by updating the air ducts and eliminating existing cracks in the cabin and hot air ducts. This is a rather complicated procedure, the implementation of which will allow you to forget for a long time about the problem with the stove, which does not heat the legs and does not blow up the side windows.
It would not be superfluous to mount a pre-heater. Due to this, the interior heats up faster.
Repair
As we have already noted, the design of stoves on dozens with carburetor and injection engines has practically no differences. Therefore, the repair instructions below are suitable for owners of a VAZ 2110 with both types of power units.
If you are planning to overhaul your old-style stove, we recommend starting with the purchase of a radiator. Use copper as it is more efficient and helps the heater work better.
To carry out repairs correctly, strictly follow the points presented in our instructions and rely on video materials.
- There is a plug on the engine block through which coolant is drained into any container. If you plan to use the same antifreeze or antifreeze again, choose clean containers.
- Next you need to move the frill forward. This process will take quite a long time, so be patient.
- Next, you need to remove the windshield wipers and get rid of as much as possible of everything that could interfere with the repair process.
- Remove the body of your stove. It is divided into two parts, which is important to know in advance. The front part of the stove body is removed directly along with the fan.
- After this comes the stage of dismantling the cabin filter. Check its current status. If the filter is dirty, this is an excellent reason to replace it.
- The next stage involves removing the second part of the housing.
- Loosen the clamps used on the hoses a little. This will allow you to easily remove the hoses.
- Having applied some effort, you can now finally remove the radiator from its seat.
Reassembly
In fact, reassembling the unit only involves following the opposite sequence of operations. By disassembling the stove, you have the opportunity to simultaneously inspect other elements of your car to make sure they are working.
Get used to the fact that during complex repairs you need to check components along the way that are not related to the current problem you are solving. Even if the part is suitable for use, but has already worn out enough, it is easier to change it now than to carry out heavy dismantling work again in a couple of months.
The only nuance that you should pay attention to when reassembling is the type of stove. If you have an old-style heater, then it is important to pay attention to a couple of issues.
- When the plastic housing is mounted in place, make sure that the pedal fits neatly into the groove intended for it.
- Check how tightly all the nodes fit into their seats. Otherwise, unpleasant consequences may arise that will force you to dismantle the entire assembly again. And this, as you already understand, is not an easy process.
That's it, now all that remains is to return the coolant back into the system and tighten the plug securely. Test your vehicle in a garage before driving it on public roads.
Heater prevention
To prevent damage to the heating unit, it is necessary to follow the preventive measures of the system:
- The refrigerant level in the expansion tank is periodically checked. If there is a shortage, antifreeze is added, the causes of the leak must be eliminated.
- To ensure high-quality operation of the cooling system, only high-quality antifreeze is used.
- The engine temperature must not be allowed to increase. You can monitor this parameter using a sensor located on the instrument panel.
- Water is not used instead of refrigerant, since this liquid has a lower boiling point compared to antifreeze. Using tap water will cause rust and rapid wear of system components. Filling with water is allowed only as a last resort - if a leak occurs, the problem is discovered on the road, and there are no car shops nearby.
Block responsible for temperature
The central unit in the stove system is the heating unit. Its main function is to directly heat the interior. This block is arranged as follows. An electric motor with fan blades pumps hot air, three dampers perform the function of recirculation and closing/opening the channels. There is also a heater core. On modern new generation systems, heat exchangers are not equipped with a tap.
