Brake fluid level in the master cylinder reservoir - check
Read the safety rules when working with brake fluid.
The brake fluid level is checked periodically: during the operation of the vehicle, during each maintenance, after bleeding the brake system hydraulic drive and replacing the brake fluid, when a warning lamp lights up on the instrument panel, indicating an insufficient level of brake fluid in the master cylinder reservoir.
1. We prepare the car for work.
2. Use a rag to remove dirt from the master cylinder reservoir.
3. Visually check the brake fluid level in the reservoir. It should be located between the MIN and MAX marks on the tank body.
4. We check the degree of wear of the brake pad linings of the front and rear brake mechanisms.
5. If the wear of the brake pads is within normal limits, and the fluid level in the reservoir is below the MIN mark, then disconnect the tip of the wiring harness of the emergency brake fluid level sensor, unscrew and remove the reservoir cap.
To fill the hydraulic brake system, use only new fluid.
6. Add new brake fluid to the reservoir up to the MAX mark (when installing the reservoir cap, the sensor float will be immersed in the liquid and its level will increase).
If brake fluid has to be added to the reservoir frequently, then it is necessary to check the tightness of the brake system (check visually to ensure that there are no traces of brake fluid leaking from the cylinders and joints of system elements).
7. Close the tank lid tightly.
8. We connect the wiring harness block to the sensor connector.
9. We check the operation of the emergency brake fluid level sensor: with the ignition on, press the rubber lining of the reservoir lid from above. If the sensor is working properly, the warning lamp on the instrument panel will light up.
VACUUM BRAKE BOOSER. EXAMINATION
1. We prepare the car for work.
2. With the engine off, press the brake pedal several times until the hissing noise from the brake booster stops.
3. Press the brake pedal and hold it down.
4. Without releasing the pedal, we start the engine.
5. If immediately after starting the engine the pedal moves down a little, the brake booster is working properly.
Otherwise, we check the integrity of the vacuum supply hose to the vacuum booster, the tightness of its connection to the inlet receiver and the booster check valve branch pipe. If the hose is intact and connected tightly, the vacuum booster is faulty.
PARKING BRAKE - CHECKING LEVER TRAVEL
During the operation of the vehicle, due to wear of the rear brake pads and pulling of the drive cables, it periodically becomes necessary to adjust the travel of the parking brake lever.
The parking brake lever travel should be 2-4 clicks. In this case, the braking system must reliably hold the equipped vehicle on a slope of 23%. If this is not the case, we check the condition of the parking brake system and, if necessary, adjust it (see “Parking brake adjustment”) and replace worn or damaged parts, and then repeat the check.
BRAKE PEDAL - CHECKING FREE ROLL
Free play of the brake pedal is the travel of the pedal from its top position until the brake mechanisms begin to operate. It should be 3-5 mm.
To complete the work you will need a ruler or tape measure.
1. We prepare the car for work.
2. Place a ruler or tape measure near the pedal and measure the distance from the floor to the outer surface of the brake pedal. Pressing the pedal with your hand, lower it until we feel an increase in resistance to the movement of the pedal. We repeat the measurements. Based on the difference between the obtained values, we determine the free play.
If the pedal stroke is greater or less than the required value, we adjust the pedal stroke.
BRAKE PADS - CHECKING WEAR
We check the degree of wear of the brake pads of the front brake mechanisms in the following sequence.
1. We place the car on the inspection ditch.
2. Remove the front wheels.
3. When checking the pads of the left brake mechanism, turn the steering wheel completely to the left, and when checking the pads of the right brake mechanism, turn it to the right.
4. Through the inspection hole in the movable caliper bracket, we visually determine the thickness of the brake pads.
If the thickness of the lining of at least one pad is less than 1.5 mm, we change all the brake pads of the brake mechanisms of the right and left wheels.
5. At the same time, we check the mobility of the brake cylinder pistons. If the piston becomes sour, replace the cylinder.
You will need a flashlight to check the wear of the rear brake pads.
1. We prepare the car for work.
2. Using a slotted screwdriver, remove the rubber plug for the inspection hole in the support shield of the rear wheel brake mechanism.
3. We illuminate the inspection hole with a flashlight.
If the thickness of the brake pad A is less than 1.5 mm, change all the brake pads of the brake mechanisms of the right and left wheels.
Source
If the brake cylinders fail, depending on the type of defect, the rear wheels may lock when released or, conversely, continue to rotate freely when the brake pedal is pressed. In any case, you shouldn’t wait for this moment, especially since replacing the rear brake cylinders can easily be done with your own hands.
Operating principle of the rear brake cylinder
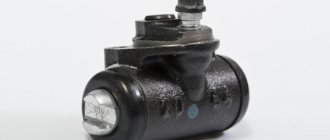
Rear brake cylinders are elements of the brake system that are directly responsible for acting on the pads, pressing them against the inner surface of the drum.
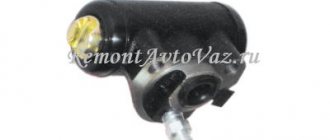
The main working parts of the rear brake cylinder are a body, two pistons, and two rings - a sealing ring and a thrust (adjusting) ring. When you press the brake pedal, the pistons move out of the housing, pressing the pads against the surface of the drum. They return back under the action of the tension spring of the pads. The purpose of the thrust ring is to limit this movement, so that the gap between the friction linings and the drum is maintained at the same level. The O-ring, in turn, prevents brake fluid from leaking through the cavities in which the pistons are located.
1 — block stop; 2 — protective cap; 3 - cylinder body; 4 - piston; 5 - seal; 6 - support plate; - 7 - spring; 8 - crackers; 9 — thrust ring; 10 - thrust screw; 11 - fitting; A - slot on the thrust ring
Thus, it is the rear brake cylinder that is responsible for transmitting braking force to the pads and for maintaining the distance between the surface of the drum and the friction linings as the latter wear out. Below you will learn how to check the rear brake cylinder.
Symptoms of rear brake cylinder failure and checking them
To check the operation of the rear brake cylinder, you need to identify the symptoms. Symptoms of rear brake cylinder failure can vary. Indirect reasons for concern may be:
- a slight but stable drop in the level of brake fluid in the reservoir;
- insufficient braking force on the rear axle or uneven braking of the left and right rear wheels.
However, the above may also be caused by other problems. The “well-being” of the cylinders can certainly only be assessed by visual inspection. This is usually done when replacing rear brake pads.
Damage to the sealing ring may be indicated by leaks of brake fluid on their surface. A fairly serious reason for concern about the condition of the cylinders may be their excessively oxidized surface. In this case, the pistons may no longer move so quickly in the housing. You can check this with an assistant, who should smoothly press the brake pedal or monitor the stroke of the pistons and hold the pads while you do this. You need to “brake” very carefully, otherwise the pistons may come out of the cylinder completely.
Source
Device
Modern cars use a disc brake system. However, on budget class cars, it is installed only at the front. The rear wheels are driven by drums. To actuate the pads, the rear brake cylinder is used. The VAZ-2110 is also equipped with it.
The brake system of this car itself includes the following elements:
- Front calipers.
- Hoses and tubes.
- Rear brake slave and master cylinder.
2110 and other VAZ models include a vacuum booster. It is controlled using the brake pedal. Pressure is created from the cylinder pistons, which acts on the pads.
Principle of operation
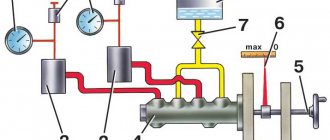
The brake fluid coming from the main one under pressure acts on both pistons in the working cylinder, which, in turn, compress or expand the brake pads, which leads to braking. The front brake circuit is disc, while the rear brake circuit in many cars is drum type.
- Front calipers.
- Pipe supplying hydraulic fluid to the front wheels.
- Rear pipeline.
- Rear wheel rollers.
- Tank.
- Main roller
- One of the pistons.
- Stock.
- Pedal.
Characteristics and manufacturers
On VAZ cars, the rear brake cylinder is a device containing 2 pistons inside. The body itself is made of metal. But sometimes it cracks. Most often due to marriage. Today there are several original manufacturers of these elements:
Among foreign ones it is necessary to note:
How much do VAZ rear brake cylinders cost? The price of a new element ranges from 300 to 500 rubles. The most expensive is a vacuum booster. Its cost varies from 1.5 to 2 thousand rubles for domestic cars.
Messages 20
1 Topic by AntKuv 2014-12-20 16:29:17
- AntKuv
- Lada2111.rf fan
- Inactive
- From: Tambov
- Registration: 2013-09-01
- Messages: 815 Thanks : 369
- Car: VAZ-2110
Topic: Which rear brake cylinders are better?
Guys, the problem is this: two and a half months ago I changed the rear brake cylinders. I installed Fenox at 180 rubles apiece. And now they are flowing safely for me. Tomorrow I will buy new ones and change them again. Tell me which cylinders are best to install, from which company? Who installed which ones?
2 Reply from roman8785 2014-12-20 16:42:23
- roman8785
- Experienced
- Inactive
- From: Volgograd region.
- Registration: 2012-10-12
- Messages: 199 Thanks : 75
- Car: VAZ 2111 2001 1.5 8kl. I 5.1.1 Aquamarine
Re: Which rear brake cylinders are better to choose?
I've had my Phenox for almost three years now and not a single one has leaked. And the front ones too, Phenox, are not leaking yet.
3 Reply from OlegD 2014-12-20 23:34:19 (2014-12-20 23:36:27 edited by OlegD)
- OlegD
- Connoisseur
- Inactive
- From: Moscow
- Registration: 2014-01-15
- Messages: 511 Thanks : 115
- Car: 21114, door 21124 1.6 l., 2007 onwards
Re: Which rear brake cylinders are better to choose?
I wrote here one summer that my rear ones were Phenox and they closed up almost simultaneously. I don’t know how long they left. I installed factory ones instead. They are still walking, but no time has passed at all. I think Phoenix, if original, should also be not bad. I trust Belarusians for quality.
In general, I decided for myself that I would try to buy factory spare parts in trusted places.
4 Reply from AntKuv 2014-12-20 23:39:20
- AntKuv
- Lada2111.rf fan
- Inactive
- From: Tambov
- Registration: 2013-09-01
- Messages: 815 Thanks : 369
- Car: VAZ-2110
Re: Which rear brake cylinders are better to choose?
I also had Fenox before these ones and they lasted about two years. Here, as luck would have it, I already understood. Just been unlucky lately for some reason)
5 Reply from iliaBkmz 2014-12-21 01:02:01
- iliaBkmz
- Forum legend
- Inactive
- Registration: 2012-11-12
- Posts: 2,042 Thanks : 584
- Car: outlander and 2104
Re: Which rear brake cylinders are better to choose?
The originals are good - but there are a lot of fakes. As an option Trw or peling.
Added: 2014-12-21 01:02:01
At least they aren't faked.
6 Reply from AntKuv 2014-12-21 22:32:28
- AntKuv
- Lada2111.rf fan
- Inactive
- From: Tambov
- Registration: 2013-09-01
- Messages: 815 Thanks : 369
- Car: VAZ-2110
Re: Which rear brake cylinders are better to choose?
Thanks to all. Today I bought Nippon Allied cylinders for 280 rubles apiece. The choice fell on them because of the wide range presented in our stores. Namely, there were Nippon and Fenox. There weren't even AvtoVAZ cars.
7 Reply from iliaBkmz 2014-12-21 23:24:10
- iliaBkmz
- Forum legend
- Inactive
- Registration: 2012-11-12
- Posts: 2,042 Thanks : 584
- Car: outlander and 2104
Re: Which rear brake cylinders are better to choose?
Nippon more or less) Actively capturing the market
Symptoms of a problem
How to determine that an element requires replacement? First of all, a breakdown can be detected by the level of hydraulic fluid, which has begun to disappear in the master cylinder reservoir. The latter is located under the hood, near the vacuum brake booster. It is worth noting that when the pedal is operated, the liquid always decreases from the reservoir. But as soon as you release it, the pistons will return to their original position and the level will resume. If this does not happen, look for the problem.
Leaks can also come from the cylinder itself. In this case, the rear drum will be wet. Well, the last sign is the behavior of the car when braking. The pedal begins to “grab” at the very end, sometimes you have to press several times to create the required pressure. These signs indicate that the car needs to replace the rear brake cylinder. Don't put off repairs until later - it's for your safety.
Diagnostics
The following signs will tell the motorist that repair of the brake wheel cylinder is approaching:
- Uneven operation of the wheels when braking, which can result in the car skidding. This is a sign of a stuck piston, which can cause the use of low-quality fluid or air entering the system.
- The indicator light is triggered when the fluid in the tank is critically low, or this is detected during a visual inspection, which indicates a possible leak of hydraulic fluid from worn cuffs or leaky pipes.
- The pedal is pressed with great effort, this can happen for all the reasons described above.
A stuck piston and a stiff pedal are not yet indicators for repairing and replacing working cylinders. You should pay attention to the thickness of the pads; if their wear has reached its maximum, this can cause the pistons to jam, since they practically do not work.
Initially, completely replacing the hydraulic fluid or bleeding the brake system may also help correct these problems. If these actions do not lead to a positive result, it is necessary to repair the working brake cylinder; fortunately, there is a repair kit for the working brake cylinder on sale, the set of which, depending on the make of the car, includes: cuffs, piston, boot and other components.
Why is this happening?
In most cases, failure of this element occurs due to natural wear and tear. The rear brake cylinder is a very reliable part, and its service life is about 200 thousand kilometers. If the car has not yet reached this mileage, the cuffs are most likely damaged. This happens when you neglect to replace the brake fluid or mix it with other brands. It absorbs moisture well, which makes it ineffective. And the water begins to corrode all metal parts. Therefore, the fluid must be changed every two years, regardless of the mileage of the car. Also, the rear brake cylinder fails due to squeezed out pistons. This happens when the rear pads are not replaced in a timely manner. Sometimes the pistons simply jam, causing the car to constantly slow down while driving or slow down a little. At the same time, the drum begins to get very hot.
The next thing you need to pay attention to is brake bleeding technology. When performing this work, do not break off the fitting on the cylinder. If it gets stuck (which often happens), purchase a repair kit so that in case of deformation you can replace the damaged element. Some motorists tap the body around the fitting with light blows of a hammer and spray WD-40. In some cases this helps. Next, we will look at how to remove the old rear brake cylinder and install a new one in its place.
Replacing a faulty brake cylinder
The replacement scheme in the VAZ family is almost the same for cylinders of both circuits with minor differences.
Initially, you need to prepare the necessary keys and plugs suitable for the size of the pipes. After removing the wheel and unscrewing the pipes, we put plugs on them to prevent fluid leakage. Having unscrewed the corresponding nuts, we dismantle the old cylinder and put a new one in its place, reassembling it in the reverse order. If, after replacement, wheel assembly is hindered by pads that are too far apart, you can file the ends of the pads, just don’t overdo it, as this may affect the operation of the handbrake.
After any manipulations with the brake system, it must be bled according to the diagram.
Replacement
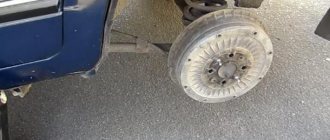
To do this, we need a jack, a balloon, a hammer and a set of wrenches (if it’s a VAZ, then two for 10 and 12). First we put the car in gear. The handbrake cannot be used as it uses our cylinders. Next we remove the bolts on the rear wheel. Raise the car on a jack. Remove the wheel and unscrew the bolts on the drum using a 12mm wrench. We take the last one out. If it has become stuck, you can “stir” it with blows of a hammer. In order not to damage the drum (since such actions can crack it), we use a wooden block as a lining. After that, remove the pads and use a 10mm wrench to unscrew the brake hoses.
Be careful - when dismantling, liquid will flow from them. Wear rubber gloves. To prevent the liquid from splashing on the floor, prepare a container (for example, a plastic bottle). To remove the rear cylinder, use the same wrench to unscrew the two mounting bolts. At this stage, dismantling is complete. Now we fasten the new part into place. Installation is in the reverse order. After assembling the system, be sure to bleed the brakes. This operation is also performed when replacing pads and any elements of the system, be it a tube or a vacuum booster.
How to replace a brake cylinder?
To replace the brake cylinder we will need a jack, wheel wrench, keys, some brake fluid, wd-40.
- First of all, put the car in 1st gear and remove the handbrake.
- We use a balloon to loosen the rear wheel and support the front brakes with “shoes” so that the car does not roll away.
- Place the jack and remove the wheel.
- Unscrew the guide bolts as shown in the figure.
- We try to turn the drum by hand. If this doesn’t work, then take a small sledgehammer and a wooden block and apply the block to the surface of the drum and hit the handle with the sledgehammer. We carry out this operation on the entire surface of the “rim” of the drum until we use our hands to move the drum from its place.
- After turning it 30-40 degrees, screw the guide bolts back into the drum. The purpose of this procedure is to remove the drum.
- After removing the drum, pull the handbrake all the way.
- Then remove the cap of the brake cylinder fitting and use an “8” spanner to unscrew the fitting.
- We carefully treat the brake pipe fitting with wd-40.
- We take the key to “10” and loosen the fitting, after first clamping the tube so that it does not rotate.
- We completely turn out the fitting with the key “10”.
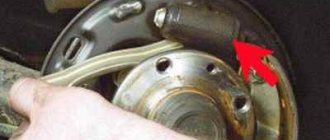
- Using the same key, we unscrew both brake cylinder fasteners.
- We put a rubber cap on the brake fluid pipe.
- We take out the cylinder.
How to upgrade
To completely remove air from the system, you will need an assistant. The latter must press the brake pedal on command. You will also need a container into which the airy liquid will be released. It is best for it to be transparent. A regular mineral water bottle will do. You will also need a hose through which the liquid will flow from the fitting into the container. This can be any rubber or silicone tube. It is desirable that it is also transparent.
So, how to properly bleed the brakes after replacing the rear cylinder? First, add fluid to the plastic reservoir of the master cylinder to the required level. Then we connect the hose with one end to the unscrewed fitting, and lower the other into the bottle. The assistant should press the brake pedal 4-5 times and press it “to the floor” at the last time. As you press, hydraulic fluid will begin to exit the system. The first time it contains many small air bubbles. It would seem that it was possible not to pump. But they are the ones that interfere with effective braking. The compressive force of air is much lighter than that of liquid, which results in greater heating.
When to finish the procedure? After each pumping step, the amount of air, namely bubbles, will decrease. This is done until they completely disappear from the liquid. To determine this, use only clear tubes and a container. After this, screw the fitting back and check the fluid level in the master cylinder reservoir. It should decrease. Top up again to the maximum level. Remember that the brand of the substance used for topping up must be the same as what is currently used in the car.
Adviсe
After this work, it is necessary to check the serviceability of the new element. To do this, press the brake pedal and lock it in this position (it is advisable to have an assistant). Next you need to spin the wheel. It must be in hanging condition. The drum should not rotate. If this happens, or when you press the pedal, liquid flows out of the fittings, check that the part is installed correctly.
How does the GTZ function?
The unit consists of the following parts:
- metal housing with holes for supplying brake fluid, pedal rod and connecting the expansion tank;
- 2 pistons with rubber seals;
- 2 return springs;
- guide bushings;
- end plug with gasket.
An expansion tank is attached to the top of the main distributor body, where excess fluid goes through compensation holes. Inside, the element is divided into 2 cylinders with separate pistons standing on the same axis.
The blind end of the housing is closed with a threaded plug; on the other side there is a flange for attaching to the vacuum booster. The brake pedal rod is attached to the first piston. The brake circuit pipes are connected to the lower holes - separately for the front and rear wheels.
The operating principle of the master brake cylinder looks like this:
- When you press the pedal, both pistons simultaneously move forward and push fluid into the circuit tubes. Under its pressure, the wheel cylinders are activated, compressing the pads on the discs.
- Part of the liquid that does not have time to pass into the tubes flows into the expansion tank through special bypass holes.
- When the driver releases the pedal, the springs push the pistons back, returning them to their original position. Liquid from the tubes and reservoir refills the cylinders.
- To compensate for the expansion of the liquid (for example, from heating), another pair of holes is provided leading to the expansion tank.
Note. The GTZ acts in conjunction with a vacuum booster (not shown in the diagram), which helps put pressure on the pistons. This allows the system to respond faster and make the driver's actions easier.
Symptoms of problems
The fluid brake system consists of many parts that can become unusable: pipes, wheel cylinders, calipers, drums and pads. Typical signs of a faulty master cylinder:
- After pressing the pedal, the car stops slowly. The reason is that the cuffs of one or two pistons have lost their tightness - they have cracked or “floated”.
- To slow down, you need to press the brake pedal hard. The phenomenon occurs due to swelling of the rubber of the piston seals.
- The brake pedal travel is too short. The fluid inside the cylinder has nowhere to go because the compensation hole is clogged. Another option is that the passage is blocked by a swollen rubber seal.
- A common symptom is pedal failure, the brakes coming on at the end of the stroke. This indicates complete wear of the cuffs; as a result, liquid penetrates behind the piston and rushes into the expansion tank - the cylinder “bypasses.”
- The pads do not release the brake discs and drums and get very hot when driving. Options: one of the pistons is jammed or the bypass hole is clogged.
The listed symptoms of a GTZ malfunction are similar to malfunctions of other elements. Pedal failure also occurs when a large amount of air enters the tubes or loss of fluid in one of the working cylinders. Sluggish deceleration and increased force on the pedal are often caused by a breakdown of the vacuum booster - a cracked membrane or a lack of tightness at the joints of the hose that takes off engine vacuum.
There are signs that clearly indicate the performance of the main hydraulic cylinder and the malfunction of other elements:
- during braking, the car pulls to the side - the problem lies in a certain circuit or wheel;
- jamming of the brake mechanisms of one wheel;
- creaking and squeaking when braking;
- heating the discs and pads on one wheel.
If you eliminate these symptoms, it will become easier to check the brake master cylinder in a garage. This also includes obvious brake fluid leaks and the knocking sound of worn calipers.
Repair work
Disassembling, repairing and replacing the brake cylinder of a VAZ car is not particularly difficult. Having purchased the necessary repair kit for the working brake cylinder, unscrew the wheel and, having disconnected the pipes, remove the faulty cylinder (the dismantling diagram will be described in more detail below).
For convenience, by holding the body in a vice and removing the boot, we gain access to the retaining ring that secures the piston, after removing which we remove all the working parts.
After disassembling the housing, you need to rinse everything with brake fluid and inspect the housing mirror for mechanical damage.
If no damage is found, then open the repair kit for the working brake cylinder and replace the faulty parts.
A prerequisite, regardless of their condition, is the replacement of all rubber parts included in the repair kit for the working brake cylinder. This list includes: boot, cuff, etc.
