Why is the nozzle not spraying?
The washer pump fuse has blown. You can find out the location of the fuse link that protects the electric motor circuit from the repair and operation manual. Very often, on the plug covering the mounting fuse block, the manufacturer, using graphic symbols, indicates the number of the fuse link and the consumer whose circuit it breaks in the event of a short circuit. If you have to change the fuse frequently to operate the washer, there is a short circuit in the circuit.
Instead of a burnt-out insert, install only a fuse of the appropriate rating. Installing fuses designed for high current can result in a vehicle fire.
- The pump has failed. A breakdown can be caused by blocking the rotation of the impeller wheel with dirt or corrosion. The power of the electric motor is not enough to rotate the armature shaft of the electric motor. In some types of construction, corrosion and dirt block the rotation of the motor armature.
- The washer nozzle sprays poorly or does not spray at all, as the nozzle channel is clogged. The cause of the malfunction is corrosion of the channels inside the nozzle and debris entering the tank.
- Motor circuit malfunction. Failure of the steering column switch, an open circuit due to damaged wires, or the formation of oxides on the terminals are the most likely reasons why the windshield washer does not work.
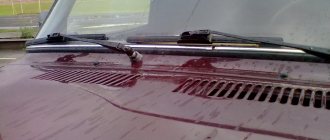
- The hose has torn, broken, or jumped off the pump fitting. Carefully inspect the transition of the hose from the engine compartment to the hood, the secure fit of the hoses to the fittings of the injectors and washer pump.
- The washer fluid in the reservoir has frozen.
Principle of operation
The windshield and rear window cleaning system is based on an electrically driven pump. The armature shaft of the motor is connected to a paddle wheel, which, when rotated, supplies washer fluid through hoses to the windshield washer nozzles. The sealing collar prevents washer fluid from entering the electric motor. It is the leakage that becomes the main reason why the windshield washer pump does not work. Water and glass washer fluid getting inside start the corrosion process, deteriorating the quality of the contacts and increasing the resistance to rotation of the pump armature.
A DC motor is used as a motor. There are at least 2 types of design:
- the pump body is also the body of the electric motor, so permanent magnets are attached to it;
- A separate motor is used, which is assembled and installed in the windshield washer housing.
In most systems, separate pumps are installed for different circuits. But in some cars, one electric motor can wash both the rear window and the windshield. In this case, the direction of fluid supply depends on the polarity of the voltage supplied to the electric motor. For variable supply of liquid in different directions, a check valve is used in the design.
Finding the cause of the breakdown
To determine the breakdown due to which the glass washer has stopped working, use the method of elimination.
- Turn on the windshield washer (there is no need to start the engine, just turn on the ignition). Listen for a buzzing sound coming from where the tank is installed, indicating that the electric motor is turning on. If the motor hums, look for the cause of the failure in the hoses and injectors.
- The electric motor does not turn on. Disconnect the pump connector. If there is enough space around the reservoir, the pump can be checked without removal. To check why the motor is not working, it is enough to directly supply power to its contacts from the battery. To do this, you will need two pieces of wire, one end of which is attached to the positive and negative terminals of the battery. Using the mating parts of the wires, briefly touch the terminals of the windshield washer motor. If there is no immediate reaction, apply voltage in a mirror manner (you can avoid this error if you first study the circuit diagram for turning on the pump on your car). If the motor works, the washer does not work due to problems in the control circuit. Otherwise, the reason is in the pump itself.
Pinout of wires by sections
A pinout, in other words, a pinout, is an overview of each pin of an electrical connection on a diagram. The general wiring diagram is difficult for an inexperienced car enthusiast to understand, so pinout of individual sections is suggested.
List of elements located on the graphic representation of the front harness connection
1, 2, 3, 4 — blocks of the front wiring harness to the tidy wiring harness; 5 — left head optics; 6 — reverse gear locking element solenoid; 7 — reverse lamp breaker; 8 — starter; 9 — chip for connecting to the battery; 10 - generator; 11 — blocks of battery wire bundles, starter and front “pigtail” of wires; 12 — right head optics; 13 — electric motor for washer (hatchback); 14 — air temperature sensor; 15 — horn; 16 — rear window washer electric motor.
List of elements on the electrical wiring diagram of the instrument panel harness
The pinout of the console harness is one of the most complex; it contains the outputs from the most important components and assemblies of the vehicle
1, 3, 4, 5 — blocks of the tidy wire bundle to the front harness; 2, 8 - the same for the rear “pigtail” of wires; 6, 7, 9, 10 - continuation of the direction to the assembly unit; 11 — power supply for the lighting control device; 12 — set of instruments; 13 — toggle switch for the electric motor of the stove; 14 — power supply to the air supply box; 15 — ignition switch; 16 — immobilizer block; 17 — block of the dashboard wiring harness to the ignition system wire bundle; 18 — cigarette lighter power supply; 19 — alarm switch; 20 — rear window heating switch; 21 — brake light switch; 22 — alarm light breaker; 23 — adjustment of computer modes ; 24 — windshield wiper control; 25 — horn switch ; 26, 27 — heating and ventilation control lighting lamps; 28 — glove box lighting; 29 — power supply to the on/off button in the glove compartment; 30, 31 — pinout for the standard radio; 32 — power supply to the electric motor of the stove; 33 — heater resistor network; 34 - electric amplifier control unit.
Pictogram of elements on the electrical circuit of the rear harness
1 — connection of the rear harness to the wiring harness of the rear right door; 2 — right rear optics; 3 - similar to 1 only for the left rear door; 4 — handbrake warning switch; 5, 7 — connection of the rear harness with the console wiring harness; 6 — connection of the rear “pigtail” with the wire harness of the left driver’s door; 8 — interior lamp; 9 — direction indicator on the left side; 10 — gas tank pump with fuel level sensor; 11 — reverse lock solenoid breaker; 12 — connection of the rear harness with the wiring harness of the front passenger door; 13 — connection of the rear harness with the rear right speaker wire; 14 — cargo compartment lamp; 15 - auxiliary braking signal; 16 — alarm control unit; 17 — connection of the rear harness with the wire of the left rear speaker; 18 — direction indicator on the right side; 19 — left rear optics; 20 — connection of the rear harness with the luggage compartment wiring harness; 21 — heated rear window.
Graphic representation of engine management system wiring harness connections
1 - ECU controller; 2 — connecting the ECU wiring harness to the instrument panel; 3 - fuse block; 4 — sensor, speed control; 5 — off-road sensor; 6 - sensor of the lamp signaling a drop in oil pressure; 7 — conclusions from the TPS; 8 — antifreeze temperature sensor; 9 — antifreeze temperature indicator sensor; 10 — outputs of the mass air flow sensor; 11 — idle speed reducer; 12 — gasoline pump relay; 13 - fuel pump fuse; 14 — ignition relay; 15 - ignition relay fuse; 16 — fuse for the power supply circuit of the electronic control unit; 17 — crankshaft sensor leads; 18 — regulating oxygen sensor; 19 — phase sensor; 20 — knock sensor; 21 — adsorber purge valve; 22 — oxygen sensor; 23 — output from the ignition coil; 24 — spark plugs; 25 — injection nozzles; 26 — connecting the ignition wires to the ECU wires; 27 — connecting the ECM wiring harness to the “pigtail” of the ignition coil rods; 28 — connecting the ECM harness to the bundle of wires of the injection injectors; 29 — connection of the injector wire bundle to the ECM cable harness; A - to the battery terminal with a + sign; B1, B2, B3 - grounding points of the ignition system harness; C1 is the grounding point for the ignition coil cable bundle.
Pump repair or replacement?
The feasibility of repair is determined by the cost of a new pump. A large number of pumps are non-separable, so for repairs you will have to cut them and then glue the plastic case together. To repair it yourself, it is enough to completely disassemble the motor, clean its insides from dirt, corrosion and growths.
Of course, you won’t find spare parts for the washer pump, so the sealing lip will remain old. If it was this that caused the jamming, then within a year the windshield washer will most likely not work again.
How to remove and wash injectors
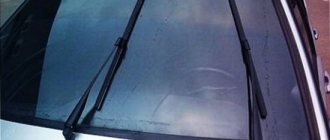
The windshield washer nozzles are held in place by plastic clips. To remove the injector without damaging the body, check its number in the original spare parts catalog. By finding a photo of the injector by number, you will see exactly where the latches are located. You can remove the nozzle with a thin slotted screwdriver.
For cleaning, you can use a needle smaller than the diameter of the sprayer hole. We recommend that you first leave clogged injectors in a citric acid solution for some time. After soaking, the deposit can be removed using carburetor cleaner or compressed air.
Good day.
The rear window washer does not work. It’s like a janitor cleaning glass, but without the liquid. What could be the reason?
Comments 10
Will AIRBAG not work when disassembling the casing? And what kind of cladding fastenings are there? I'm afraid I'll tear it off and then not deliver it
I think it’s the hose under the casing, how to disassemble xs
Will AIRBAG not work when dismantling the trim to check the rear wiper hoses? And what kind of cladding fastenings are there? I'm afraid I'll tear it off and then not install it.
I have the same problem)
Perhaps the hose that goes to the back door has fallen off. This happens often.
It turns out that there is a hose somewhere under the casing?
Every car has a windshield washer. In other models it is not even present in a single copy. For example, a washer can moisten not only the windshield, but also the rear window, and even the headlights.
It is foolish to underestimate the importance of this mechanism. After all, clean glass is the key to confident and safe driving in comfortable conditions for the driver.
Unfortunately, due to frequent use, the washer may break, which will present a very unpleasant surprise to the car owner. Problems with this device can be caused by various reasons. And in any case, they should be eliminated as soon as possible.
Why do the wipers turn on automatically when you turn on the ignition?
Why do the wipers go off when you turn on the ignition?
Don't know why the wipers turn on when you turn on the ignition, and you can't stop it? You can, of course, turn off the fuse and drive without wipers for a while, but the problem must be solved completely.
The classic way to solve the problem usually comes down to two options: disassemble the steering column switch and clean the inside, or install a toggle switch responsible for separately turning on the wipers. But in fact, there are much more effective solutions to this problem.
Reasons for the wipers to operate when the SZ is turned on
Whatever solution is chosen, you first need to find the reason for this “behavior” of the wipers. There are several of them. Let's look at the most common ones.
Closure
The first thing any motorist with any level of enlightenment will doubt is the wiring. There must be a short somewhere, he will think. Why does such a malfunction actually occur?
When the ignition is turned on, the wipers turn on
Short-term or long-term operation of the wipers when the ignition is turned on occurs in most cases due to a poor ground connection. To solve the problem, it is recommended to disconnect all points where the wiring comes into contact with ground and clean the terminals from oxidation and deposits. The terminals must then be tightened securely to avoid a recurrence of the situation in the future.
Mode switch
If the windshield wipers do not turn off during zero and intermittent operating modes, but function normally in accelerated mode, then this type of malfunction usually points to the switch. What can be done? Find the relay responsible for the wipers. For example, on some Toyota modifications the relay is installed directly inside the wiper switch. The device is collapsible, you can open it and see what the problem is. As a last resort, replace the relay.
When the ignition is turned on, the wipers turn on
You can completely disable the mode switch and remove it from the circuit. This will help disable the wipers, but after that they will only work in accelerated mode.
Wiper relay
One of the common reasons for the wipers to work. As mentioned above, it is replacing the relay that helps solve the problem in most cases.
Note. A common symptom of a relay related problem. When you turn on the windshield washer for a short time, the wipers make not two strokes, as they should be, but three - the last stroke is superfluous, since the water has already been removed from the glass and the cleaning is carried out dry.
The new relay must match the markings. For example, for the domestic “nine” this option is 526.3747. However, depending on the manufacturer, relay devices may have other markings, but they are quite suitable for replacement. You just need to ask the sellers for a specific car model.
When the ignition is turned on, the wipers work
If for some reason the relay does not fit, you can replace the resistor R4 inside the relay. The native one has a nominal value of 130 kOhm, and for stable operation of the wipers it is recommended to set it within 40-70 kOhm. You can buy the part at a radio parts store or ask radio amateurs on the forums in your hometown.
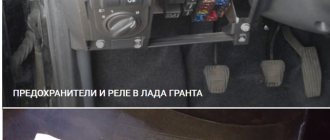
The relay itself is located in a block that car enthusiasts call a “black box”.
Car black box
And this is a diagram of the “nine” wiper relay
Wiper relay diagram
As for the internal design of the wiper relay, it can be different. However, the resistor we need is always connected inside the relay to the fourth leg of the microchip.
Note. The problem with the resistor is solved in a similar way for almost all VAZ models: “tens”, “tags”, Lada Grant and Priora, etc.
You should be aware that in some cases the wiper relay may not be removable. Then the resistor cannot be removed and replaced. You'll have to find a new relay with a classic VAZ design.
Another option is that water got inside the “black box”. Obviously, you need to disassemble the block, but you need to do this at your own peril and risk, since in half the cases everything falls apart during disassembly and you have to replace the mounting block with a new one (costs 3-4 thousand rubles).
The “black box” is disassembled like this:
- Unscrew the six screws of the block (two screws directly inside the platform, the rest on the sides);
- Carefully remove all relays, fuses and jumpers (remember their positions);
- Use a screwdriver to halve the block;
- Clear the oxides in the diagram.
How does the washer work?
To talk about what can break in this device and how to fix it, you need to figure out what parts this device consists of. I must admit that it is quite simple to put together.
Tank
The first link in the glass wetting process chain is the plastic tank. In most cars it is located under the hood. However, there are also cars in which, to get to the water tank, you have to climb under the wing.
There are tanks of different capacities. The most common ones are those whose volume reaches 2.5–5 liters. It seems that this is not much, but this amount of liquid will last the driver for a long time. Water is poured into the tank. That's where it is stored.
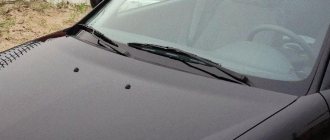
Injectors
A thin branched tube is attached to the tank, which stretches to the nozzles. The nozzles or sprayers are installed opposite the glass. Water splashes out of them in small doses, from where it is rubbed over the surface with brushes.
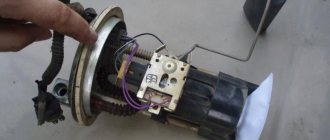
Pump
How does water flow from the tank to the nozzles? A small electric pump is responsible for this. It is powered by a battery and uses an impeller to pump liquid from the tank to the outside.
The windshield washer motor is perhaps the most important element of the washer system and its failure leaves the glass without the ability to wet.
How to turn on the heated glass Lada Kalina
Welcome. Today we will look at the heated glass on a Lada Kalina car. Experienced drivers will not have any difficulty finding the button to turn on the heated rear window. But if a person is just getting acquainted with the car, then such a person probably has a question about how to turn the heated glass on and off on Kalina.
How does heated glass work on Kalina?
The rear window heating device is very simple and the heating principle is elementary. The rear glass has threads through which current passes, and accordingly the threads heat up and warm the glass. During normal operation, the threads heat up to 70 degrees, and this is enough to freeze the glass and remove fogging.
How does the heated rear window work?
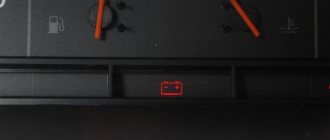
The rear window threads are turned on using relay K10, it is located in the fuse box. To prevent the battery from draining when the filament heating is turned on, the heating is turned on only when the ignition is on. This is done using an additional relay K4. It is activated when the ignition is turned on. Power is supplied to the heating element through fuse F8.
How to turn the heated glass on and off on a Lada Kalina
The heated rear window button is indicated by a square inside with three arrows going up. To turn it on, press the button, remember that the ignition must be on. After turning on, the orange indicator lights up, which means that the threads have begun to heat up. Turn it off, press this button again and the indicator should go out. The heating will also turn off when the ignition is turned off.
Heated glass does not work
It is very unpleasant when this element fails. After all, a heating malfunction greatly interferes with comfortable driving, especially in rain or cold weather. Therefore, it is necessary to eliminate this breakdown as quickly as possible.
The first thing you need to do is check fuse F8(20A) and if it is blown, you need to replace it with a new one, being sure to observe the amperage. You can also check fuse F4.
— Next, we check relays K4 and K10 and, if necessary, change them.
— The next thing we do is check the conductive threads for damage.
— Then we check the contacts, perhaps they have become sour.
— And lastly, we check the power wires for breaks.
What in the washer can break?
If the windshield washers do not work, it means that a failure has occurred in one of the sections of the system described above. Let's look at what problems with the glass washer may be associated with.
Pump
The pump motor is the part of the washer system that wears out very quickly due to frequent operation.
Unfortunately, you can understand that something is wrong with this device only when water stops flowing to the nozzles. Otherwise, it does not show its malfunctions in any way.
Pump repair method:
Two common ailments can affect the motor:
If corrosion of this device is your case, do not worry. Experienced motorists can easily cope with it with a simple eraser.
But if this mechanism is erased or broken, it will have to be pulled out and replaced with a new one.
You can understand that the pump is the cause of the problem by the absence of a characteristic sound. If you press the washer lever and do not hear the usual buzzing sound, it means that the pump motor is not working.
Often windshield washer malfunctions are associated with the breakdown of this particular part. We'll tell you how to replace it a little later.
Blockage
Also, water may stop flowing to the nozzles due to blockage. The fact is that the tubes through which the liquid flows are very thin and the debris that accumulates in them can cause obstruction. To combat this defect, the system will have to be flushed and possibly purged.
Torn hoses
Another reason could be that the hoses have lost their integrity. If the tubes become leaky, water will not get from point A to point B, just like if it is clogged.
No current
And another common reason is lack of nutrition. Check that the pump and accumulator shafts are securely fastened. Perhaps the motor is simply not receiving energy.
Rear window washer
The rear window washer stopped working (there were no prerequisites). The nozzle is clean (from the outside, at least), the fluid is not frozen (it works through the front ones, and the temperature is not the same yet), the rear washer motor is also humming. What can be wrong? If anyone knows how to carefully remove the upper decorative panel of the rear door in order to carefully remove the injector and clean it. The panel is attached to two rivets, which you cannot get to from the outside. Toyota Corolla Spacio 2001 1NZ
There are 14 replies to this topic
The rear window washer stopped working (there were no prerequisites). The nozzle is clean (from the outside, at least), the fluid is not frozen (it works through the front ones, and the temperature is not the same yet), the rear washer motor is also humming. What can be wrong? If anyone knows how to carefully remove the upper decorative panel of the rear door in order to carefully remove the injector and clean it. The panel is attached to two rivets, which you cannot get to from the outside. Toyota Corolla Spacio 2001 1NZ
You may feel like it's not working. Usually you need to wait 10 seconds until the water reaches the nozzle. And this is in the summer. I have anti-freeze in now, and in my opinion it lasts longer than in the summer. Try to wait. Or maybe the remaining clean water froze. Then you need to try pumping in jerks.
My water comes in a second, maybe two - no more. Yesterday morning everything was OK, and in the evening there was a klyazmus (the ambient temperature was about 0, and the liquid was filled in three weeks ago and at lower temperatures everything was fine). I also don’t want to torture the motor too much - if it burns out while idling, the cost of the issue will increase significantly. I tried to wait longer and jerkily - it didn’t help.
Then try reverse cleaning. Remove the hose from the motor, cut off a small 1 cm piece of rubber hose (can be gas), take a pump, preferably a foot pump (it has more pressure), place a piece of hose as a seal to the nozzle and pump with sharp jerks. And by the way, this way you can determine what the problem is. If the tube is blowing and the motor is humming, it means the impeller in the motor has flown off or broken.
Thanks, that's an idea! I'll try to blow it this weekend. The only thing is that you will have to remove the bumper - they placed this tank so poorly that it’s not even convenient to pour into it, let alone the motor. I was thinking of removing the upper trim of the rear door (there is such a 10cm wide strip), disconnecting the connector and injecting water under pressure into the tube towards the motor. Then it would become clear: the hose is clogged (water does not get into the tank)/the motor is not working (if when you turn on the motor, water does not flow from the disconnected hose) or the nozzle is clogged. But I don’t understand how to remove the socket: on the sides it has latches, and in the middle there are two clips that you can’t get to by hand, and only people know how to remove it carefully. Why the impeller could have broken is not clear - I don’t use it that often.
In principle, you don’t even have to pick up the phone. Just ask someone to look into the tank when you blow it out. If it bubbles, then the tube and nozzle are clean.
. Both the motor and the impeller are fine. There is ONE centrifugal pump with reverse. It rotates in one direction - water is supplied to the windshield, in the other - to the rear window. In the new Spas, this washer is a little weak, somehow weak. Antifreeze is much thicker than water and it takes longer to supply it to the nozzles. Condensation could form in the tube and freeze. There is no need to remove the bumper. The right wheel is removed. Several pins snap off, securing the front of the plastic wing protection (fender liner), you don’t have to remove everything, although I did it in the summer, the plastic is more plastic than in the cold, you bend (or remove) the fender liner. The motor is in front of you. It is attached to the tank thanks to a rubber seal, you can safely pull it towards you - and the motor is in your hands. There are two tubes connected to it, which one goes to the front and which one goes to the back, you’ll figure it out. I took a car compressor, inserted an adapter (which comes with it for inflating mattresses, balls, air circles) and blew out both lines. Good luck!
I did it, but on my Spaska in the summer the nozzle was also clogged, I removed the rear casing and pumped it through with a pump, now everything works fine.
It's a pity that there was no Internet access over the weekend. I blew it through the nozzle, although I’m not sure of the quality. Therefore, next weekend I will try to get to the motor and blow it out. The only question is how the fender liner pistons snap off. They have a flat cap, you don’t want to break it, obviously they snap off somehow cleverly - not just by prying it off?
Reanimating the washer system
How to replace the motor?
Unfortunately, this part is quite difficult to repair. And often replacing a windshield washer pump is even cheaper than fixing an old one. Therefore, it is better to immediately order a new part and not have to worry about repairs.
Replacing the washer pump:
Replacing the device is easy:
- Before you begin replacing, remove all remaining fluid from the reservoir.
- Locate the contact connecting the pump to the battery. Carefully disconnect the power.
- The next point is optional. You can disconnect the tank by unscrewing the bolts that secure it. However, if manual dexterity allows you to manipulate the fixed tank, you can do without dismantling it.
- Remove the electric pump from the tank and unscrew the tubes.
Attention! Remember where and which hose was screwed on. In the future, they will have to be placed clearly in their places.
- So, now we take out a new pump and connect it to the system.
- Screw the tubes back into place.
- If the tank has been dismantled, put it in place and tighten the bolts.
- We connect the contact from the battery so that the motor has something to power from.
- Fill the water back.
Then press the washer lever. If there is a buzzing sound, it means the motor is running.
How to clean injectors?
For washing, prepare a special caustic solution. To do this, take purified water without chlorine and add vinegar. The ingredients must be mixed in a one to one ratio. Stir the resulting liquid well.
Pour the solution into the tank. Press the washer lever. It's okay if no water gets on the glass. The main thing is that the liquid reaches the blockage. Leave the system in this state for two hours. After that, try pressing the lever again. If water appears, drain the caustic solution and rinse the tubes with distilled water.
If water does not flow, but you are sure that the cause of the problem lies in a blockage, press the lever again and leave the acidic liquid for another two hours, then check again.
How to detect and fix problems in the windshield wiper system of a Lada Kalina car
The design of the windshield wiper system is a fairly simple diagram. If desired, any car owner is able to understand the cause of the malfunction and fix it independently.
If the wipers stop working, the first thing you need to do is check the integrity of the fuse. This is the most common cause of malfunction and can be easily eliminated without resorting to complex technological processes.
Possible causes of the malfunction and ways to eliminate them:
When the windshield wiper is on, the electric drive does not work:
Fuse blown:
- remove the cover located to the left of the driver, under the steering column, under it there is a mounting block;
- on the cover of the mounting block there is a diagram of the location of the relays and fuses of the car, we find the required fuse and change it if necessary;
Relay fault:
If the wipers on the Lada Kalina do not work
in intermittent mode, it is necessary to change the relay located in the mounting block, next to the fuses.
Wiper motor malfunction:
- we check the ground terminal of the electric motor, screwed to the car body next to the rack;
- we clean it and the attachment point;
- install in place;
VAZ 1117
Using a tester or any other continuity test, we check whether power is coming to the connector. If power comes in, then it is necessary to change the wiper motor.
Disconnect the terminals from the battery. Remove the decorative caps from the leashes. Unscrew the nuts securing the leads and remove them. Remove the plastic grille under the windshield frame by unscrewing the bolts that secure it. Having unscrewed the trapezoid fastening (two bolts and one nut), remove the electric motor from the box and disconnect it from the trapezoid. We install a new one, repeating the procedure in reverse order.
If power does not come to the connector
, the steering column switch needs to be replaced. Disconnect the battery terminals. Remove the plastic steering column cover. Disconnect the switch block and, pressing the latches on both sides, remove the steering column wiper switch. Install a new one by repeating the process in reverse order. Assembling the casing.
When turned on, the wipers on Kalina do not work, but the electric drive rotates
It is necessary to check the condition of the gearbox and wiper trapezoid.
Unscrew the plastic grill under the windshield frame. First remove the wiper arms and unscrew the nuts that secure them. We check whether the gearbox axis of the electric windshield wiper drive rotates.
If the axis rotates and the trapezoid is stationary
, check the spline connection of the gearbox and trapezoid, if necessary, tighten the fastening nut. If the connection is severely worn, it is necessary to replace this unit.
If your windshield wipers do not work on your Lada Kalina
, this is not a reason to despair. As a rule, the cause is a minor malfunction. Such as a blown fuse or a loose nut on the spline connection between the gearbox and the windshield wiper drive, which can simply be tightened.
The windshield wiper electric drive system is quite reliable and does not require special maintenance. It is enough to follow basic operating rules. If during the winter period the wipers are frozen to the windshield, then before turning on the windshield wiper, it is necessary to free them from ice. And they will serve you without causing any problems.
Cleaning injectors
If you notice that the stream of fluid has become weak, it means that the washer nozzles are most likely clogged and it’s time for you to clean them. You can do this yourself; for cleaning you will need: something thin (string, wire, needle or pin), a twenty-cc large syringe, water, soap and a compressor.
We recommend: Traffic regulations requirements for the installation and seasonal change of tires on a car
You definitely need to check if they are really the problem. To do this, you need to check that there is water in the washer reservoir, then you need to disconnect the hoses that supply fluid and turn on the suction. If there is a good stream from the tubes, this means that you really need to clean them.
- After disconnecting the water supply hoses, rinse the nozzle thoroughly with soapy water, and then attach the hose from the compressor back and blow it out.
- Fill the syringe with water and thoroughly, in the opposite direction, rinse the nozzle. Carefully clean the nozzle hole with a thin object (for example, a needle, etc.), and then rinse it with water using a syringe.
- If your car has a dismountable one, you disassemble it, clean it, and then put it back together and install it.
- After installing it back on the car, it is worth flushing the entire system.
If clogging of the elements begins to occur frequently, then the washer barrel itself may be clogged, so check it for debris.