January 28, 2016 Lada.Online 252 446 6
Often, owners of a VAZ 2121 or 2131 SUV encounter problems with starting the engine. For example, when you turn the ignition key, the starter does not turn. Let's look at possible problems with the Lada 4×4 starter and ways to solve them.
VAZ 2121 starter does not turn
For starter malfunctions , see the section Diagnosing engine malfunctions: “The crankshaft does not turn with the starter”, “Loud noise when the starter is running”
How to check the functionality of the starter circuit
If the starter does not crank the engine when the ignition key is turned to the appropriate position, then there are four possible reasons:
1. the battery is discharged;
2. the electrical connections between the starting relay, battery and starter are broken, i.e. current from the battery is not supplied to the starter;
3. the starting (traction) relay is faulty;
4. the starter is stuck or its electrical part is faulty.
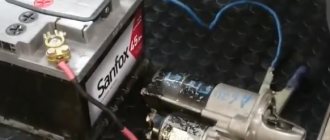
• To check the battery, turn on the headlights. If they go out after a few seconds, the battery is discharged or damaged. If the headlights are bright, turn on the starter and see what happens to the headlights. If the headlights dim, voltage is supplied to the starter, but it does not rotate. The starter needs to be removed for inspection. If the starter rotates very slowly, proceed to the next test.
• If the headlights still shine brightly when you turn on the starter, then there is no voltage reaching it. Check all connections from the battery to the start relay and starter for tightness and cleanliness. If the car has a good battery, then the most likely cause is a malfunction of the starter itself. Check that the flexible ground wire between the engine and the body is tightly screwed - this sometimes helps eliminate an apparent malfunction.
• If no results are achieved, turn off the headlights to avoid draining the battery. You may hear a clicking sound each time you turn the ignition key to the starter position. These are the sounds of the solenoid (traction relay) operating, but this does not mean that the main contact is operating properly. (If you do not hear a click from the relay, it may be faulty.) The solenoid contact can be checked by connecting a voltmeter or test light to the main wire connection (battery to starter) on the "starter" side of the relay and to ground. When you turn the ignition key, the voltmeter should show voltage, or the light should light up. If this does not happen, then the traction relay is faulty. (Do not connect a light bulb to the two relay contacts. If the starter is working, the light will light up.) If, in the end, it is determined that the relay is working properly, and voltage from the battery is supplied to the starter, then most likely the starter itself is faulty.
Video
When the lock is turned on, the starter relay activates, clicks, but the starter does not work. The battery is new, the starter is good, the entire chain has been checked. What else could it be?
- Niva 2121 won’t start – 11 answers
- The starter, when starting, is disconnected from the flywheel - 3 answers
- The starter does not turn the flywheel of VAZ 2121 - 2 answers
- Removing the starter on a Niva - 1 answer
- Niva starter does not turn over - 1 answer
The contacts on the solenoid relay are probably burnt out.
There may be a problem with the retractor, contacts. In any case, remove it and at the same time clean all contacts and clean the starter from excess dirt and dust. When installing, tighten the wire fastenings well. Good luck.
Tapping the starter with a wooden hammer handle (gently) should help.
Subscribe
to our channel in
Index.Zen
Even more useful tips in a convenient format
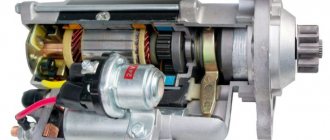
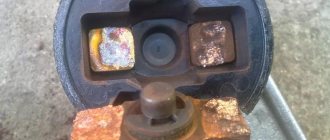
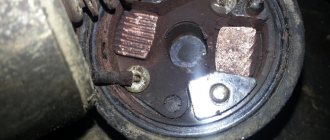
The Niva 21213 and 21214 cars have a starter with mixed-type excitation, with an electromagnetic-type traction relay and two independent windings. Four poles are fixed in the housing, one of which is connected in parallel, and the rest in series. The casing and cover are tightened using a pair of bolts. Inside there is an armature with a collector (the latter is of the end type). The armature rotates on metal-ceramic bushings pressed into the covers.
Despite the apparent design complexity, starter repair is accessible even to beginners. The main thing is to have the necessary tools on hand, diagnose the problem in a timely manner and follow the manufacturer’s instructions. Below we will look at what starter malfunctions exist and how to fix the problems.
During operation, the following problems are possible: 1. After turning the key in the ignition switch, the Niva car does not start, the starter does not turn. Causes of the problem:
- The machine's power supply has run out. The terminals on the battery or the terminals of the connected wires are oxidized. The terminals are poorly stretched. Interturn short circuit or damage to the traction relay winding. The switching starter relay has failed or there is a break in the power supply wire of the device. Lack of closure between the “thirtieth” and “fiftieth” contacts.
In the cases described above, the faulty element is replaced or repaired, and the contacts are cleaned.
2. When the key is turned in the ignition switch, the relay works, but the starter does not turn (hot or cold). Causes:
- The battery is discharged or damaged. The fastening of the lugs of the wire connecting the engine with the body part has been loosened. The “plus” and (or) “minus” on the power source is oxidized, poor traction. The commutator was burnt and the brushes were worn out. The positive terminal of the brush holder was at ground. There is a break in the armature and (or) stator windings.
Depending on the malfunction, the faulty part is replaced or repaired, the contacts are cleaned, or the short circuit is repaired.
3. Upon supplying voltage to the starter, the relay is activated repeatedly and then switched off. The engine does not turn over (the problem occurs when it is hot or cold).
- Short circuit or break in the relay winding. Battery discharge. Reduced voltage at relay contacts (occurs when wires oxidize).
4. After voltage is applied, the starter armature rotates, but the engine flywheel does not. Causes:
- The clutch engagement lever has failed. Clutch slippage.
5. A strange sound appears when the armature is turned:
- The starter fasteners are loose or the device is mounted askew. The integrity of the flywheel gears or drive gear is damaged. Bearing bushings are worn out. The starter fastener is loose.
6. The gear hangs in fixation with the flywheel:
- The lever, traction relay or splined coupling is stuck. The ignition switch is broken (at the junction of the contacts). The springs of the traction relay are weakened or damaged.
Video repair:
Regardless of whether the engine turns or not, each of the above cases requires repair or replacement of damaged components .
Let's look at how to do this work below. Algorithm of action: Use the key set to “thirteen” to loosen the fastening of the conductor connected to the traction relay. Discard the tip.
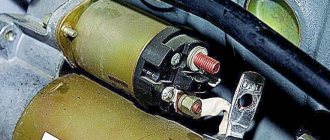
To check the VAZ-2121 relay, apply a voltage of 12 volts to the relay output, and apply “-” to the body. Connect a resistance meter to the contacts. If the relay is intact, then the armature pushes out the overrunning clutch, and the contacts close. If a part is found to be faulty, replace it.
- To remove the traction relay, remove the three screws using a slotted screwdriver. Pull the rod with the spring out of the device casing, and install the new traction relay using the reverse algorithm.
If the problem persists, continue repairs:
- Take a Phillips screwdriver and tighten a couple of screws, then remove the casing. To check the integrity of the brushes, twist the fastening screw of the contact conductor, and then use a screwdriver to press out the spring. Next, it remains to remove the brush. In a similar way, remove the remaining three brushes and inspect them. If at least one of the brushes is up to 1.2 centimeters high, then it must be replaced (further use of the part is not recommended).
- Connect a multimeter to the starter windings (one at a time) and check them for a short circuit. The task is to make sure that there is no short circuit between the turns and on the housing. Using a screwdriver, lift the locking ring, remove the washer from the shaft and, using a ten-socket wrench, tighten a pair of tightening bolts. Separate the starter elements and remove the insulating tubes. Inspect the appearance of the windings and commutator. Remove burn marks from the collector using sandpaper. If this part is severely worn or charred, then repair is useless - the device is replaced. Remove burrs using fine-grained sandpaper, then polish the product. Use a multimeter to check the armature for a short circuit. If a problem is found, replace the unit. Remove the rubber seal from the drive cover and remove the washer to adjust the armature. Remove the cotter pin of the lever axle and select the last one. Next you need to remove the armature along with the drive.
- Pry up the drive lever of the screwdriver and remove it. Check the car's gear - it should turn easily left and right. Also inspect for nicks and chips. If the gear is worn out or the clutch is out of order, then it is useless to carry out repairs - replace the assembly. Support the shaft on a wooden block and knock out the limiting ring. Use a screwdriver to pry up the ring and remove it. Remove the restrictor ring and the overrunning clutch together with the gear. Assemble the starter using the reverse algorithm.
14.15. It won’t start - useful tips
Your technical equipment must be impeccable - after all, the time you have is the same money that, we hope, you also have. Don't lose either one or the other. If a missing tie out of nowhere or a pant leg burnt by an iron can cause a business meeting to be disrupted, what can we say about a car that doesn’t want to start an hour before the scheduled negotiations.
... Early in the morning, freshly shaved and full of great plans (child - to school, wife - to the hairdresser, and yourself - to forge a penny), you jump into the car, “key to start” and ... What the hell ... One more time. More... Nervous manipulations with the key and pedals do not bring success. The day is ruined from the very beginning. Plans and mood are down the drain.
Calm down. There is no need to rush under the hood in an English suit and, smearing the oily dirt with a tie, try to make a diagnosis. You probably won't be able to cure it in 5 minutes. Take another car, and leave the treatment of your sick friend until the evening. And it’s better to entrust it to doctors with a good reputation, especially if you have an expensive car and you are not a specialist. It will be cheaper this way. Well, if your friend is well known to you and you consider yourself a healer, well, try it yourself, if you’re not too lazy to get dirty or there’s no other way out.
The diagnosis must be made calmly
Mentally examine the symptoms. First, does the starter turn? And if so, how cheerful? You already know the answer - remember what happened the first time you tried to start the car. If you don't remember, try again.
If the starter does not turn at all and does not even click the traction relay when the ignition is turned on, then it is either faulty (you can close the hood and follow the advice given above: “Take another car..”), or there is a problem with the battery - it has turned off or died. Only in rare models can the starter power circuit be protected by a fuse - about 300 amperes - it is not difficult to find, especially if you know in advance where it is located. If the battery is to blame, then, as a rule, all electrical equipment does not work. The simplest and easiest case is that one of the terminals has come off or is dirty, but the battery is fine. Tighten the terminals on it and on the starter (if equipped). If it turns out that the battery is completely dead (forgot to turn off the headlights at night), you can still leave. But with outside help. Here, as they say, options are possible. You can try to start from a push, from a hill or from a tow. Don’t try to get around the pitfalls: a car with an automatic transmission or electronic fuel injection (if it has an electric fuel pump) will not be able to start using these methods. I'll have to light a cigarette at my neighbor's. However, for some machines this can lead to damage to the computer (read the instructions for the machine). If the starter turns on, but is sluggish (this happens in the summer, in winter this is a subject for a separate discussion), most likely the battery is almost completely discharged. This will be visible by weak headlights or weak signal. In this case, the above options for outside assistance come into play.
If the starter turns briskly, but the engine does not respond to attempts to start it, feel free to exclude everything related to the battery from further considerations. Blame the ignition or fuel supply system, you can’t go wrong. When diagnosing and treating each of them, a systematic approach is required. It’s better to start with the ignition - problems occur there more often. Especially in wet weather.
A spark will ignite...
So, we need to look for a spark. Your car may be equipped with a classic (simple) contact ignition system, a rather complex electronic contactless one, or some combination. In any case, the system consists of three parts. Part one is low-voltage (breaker contacts in a classic system or a special sensor in an electronic one, plus a box with electronic filling that forms a spark). Part two is a step-up transformer, called an ignition coil in the world. Part three is high voltage (mechanical or electronic distributor and wires through which high voltage current is supplied to the spark plugs). And of course, the candles themselves. The inspection of this entire enterprise must be carried out in stages and it is better to start from the end.
Stage one. High voltage part of the system. Check to see if there is a spark on the center wire - this is the one that connects the coil to the distributor. The tip of the wire must be removed from the distributor cap, brought closer to any part that has good contact with the body of the car (it doesn’t matter whether it is painted or not), and secured so that there is a gap of 5–7 mm between the tip and the selected part.
If your car has an electronic ignition, the wire must be fastened especially securely - if it falls on ground, the electronics will instantly die for a long time. For the same reason, you should not scratch the wire across the body. We also do not recommend holding it with your hand, not even with your own - it will give you a serious electric shock.
Stage two. Crank the engine with the starter. At the same time, watch what happens at the tip of the wire. There are two options. More favorable - there is a spark. Powerful, accompanied by a loud click. This significantly narrows the field of further searches.
The first step is to remove the distributor cap. It may be damp and dirty underneath. Along such a “conductor” the spark readily jumps anywhere, just not where it needs to be. Wipe, clean and dry. At the same time, it is not harmful to clean the distributor contacts, for example, with fine sandpaper. Inspect the so-called “runner”. If you find a dark trace of electrical breakdown on it or on the distributor cap, the part will have to be replaced.
Carefully check the wires going from the distributor to the spark plugs. Wires and their tips must be dry and clean. If, in your opinion, everything is in order with them, you can put the cover back in place, restore the connections and try to start the engine. If the malfunction was hidden under the cover, the engine will start or, in the worst case, at least start sneezing. The symptom is also favorable - you are on the right track. True, you will have to turn out, clean and dry the spark plugs - in an attempt to start the engine, you filled them with gasoline. If the engine does not even sneeze, the spark plugs will still have to be turned out, cleaned and checked. It's easier if you have a spare set.
If you have already reached the stage of turning out the spark plugs, you can quite effectively (and impressively) check the entire ignition system as a whole. Having connected high-voltage wires to the turned-out candles, collect the candles in a bunch, like carrots, and wrap the bare soft wire directly along their threaded part. Make sure the wire makes contact with each spark plug but does not touch the center electrodes. Connect the free end of the wire to ground. Having placed the bunch of candles in a place convenient for observation from the passenger compartment, turn the engine with the starter. In this case, cheerful sparks should jump between the electrodes of the spark plugs in turn (in accordance with the order of operation of the cylinders). If so, then the entire ignition system is fine. The sound of the engine will be very unusual - do not be alarmed, because it is spinning with the spark plugs turned out. Don't twist for too long. It’s worse if at the second stage of testing there is another option: there is no spark between the central wire and the “housing”. This means that the problem is not in high-voltage circuits. Further searches will be more difficult, evaluate your time and desire. If both are available, proceed to the third stage. Check if voltage is supplied to the ignition coil. This is easy to do with a tester, and if you don’t have one, you can use an under-hood light bulb. True, you will need a couple of wires to connect it to the coil. In a classic ignition system, you need to connect a light bulb between ground and the input of the primary winding.
At the third stage, as usual, two options are also possible: voltage is either supplied to the coil or not. If it is supplied, the coil is to blame - a breakdown or short circuit, which, however, happens extremely rarely. The coil will have to be changed. More often there is poor contact in the attachment of the wires to the coil. Or the same wet mud, through which the spark flows to an unknown destination. Sometimes the coil is polished to a shine, but underneath there remains an invisible, very narrow strip of dirt - a good conductor.
If at the third stage you are convinced that voltage is not supplied to the coil, the electronics or contacts and unreliable connections in the low-voltage part of the ignition system are to blame. You can’t handle electronics (the switch and, less often, the sensor in the distributor housing) - you need special equipment to diagnose them. You can only tug on the sensor connector on the distributor body - maybe it will help. If you have a car with a classic contact ignition system, you can look further.
Remove the cover from the distributor and inspect the contacts of the breaker - they may oxidize, especially if the car has been standing still for some time. The contacts must be carefully cleaned with fine sandpaper or a special needle file.
Twitch the cleaned contacts so that they either close or open. The voltage on them is only 12 volts, so you can pull without fear. If cleaning does not help and voltage is still not supplied to the coil, we once again advise you to stop trying to resuscitate the car for a while, since further difficulties will begin.
If voltage appears (the light blinks when the contacts are pulled), restore everything that was loosened and disassembled, start the car and, perhaps, it will still have time to go about its business. If it doesn’t start, but is at least sneezing, turn out the spark plugs and...
Don't press to the floor - it won't help
It may also happen that the entire ignition system has been checked, everything is fine, but the engine, even if you crack it, still won’t start. This means that there are problems with another of the previously mentioned systems - the power system, i.e., the supply of fuel to the engine.
If you have a car with fuel injection (injection supply system), do not touch it (the system). You can only come to the conclusion that it was she who broke: there is a spark, the fuel is suitable - that means it’s her, my dear. Treatment only in a hospital. At home and among artisans, repairing it is useless and even harmful.
In a conventional carburetor engine, the fuel system is simpler - a tank, a fuel pump, a set of pipelines and a carburetor. Here you can dig deeper yourself. The first step is to make sure that gasoline is entering the carburetor. Disconnect the hose from the carburetor and press the manual fuel pump lever. If a fairly powerful stream of gasoline starts flowing, everything is fine, it’s time to move on to the carburetor. It happens that gasoline is supplied to the carburetor regularly, but for some reason it does not flow into it. If you have the time and desire, remove the air filter, then ask someone to press the accelerator pedal sharply. Or you can sharply pull the throttle cable yourself. At the same time, look into the carburetor from above (the air damper is open, otherwise you won’t see anything): if a trickle of gasoline does not appear in the first diffuser, it means that there is no gasoline in the float chamber. It is not there because the valve needle is stuck or (this happens not very often) the fuel filter in the carburetor is completely clogged - it is located in front of the float chamber. Or the jets are clogged. The filter is cleaned by blowing, however, if you do not have the necessary skills, it is better not to mess with the carburetor internals at all, deal with a stuck needle valve, clogged jets and other subtleties - let the specialists do this.
If there is a stream in the diffuser, pay attention to the carburetor starting device - it quite often fails. On foreign cars, starting around the 70s, automatic air damper control is used. The device, without your participation, depending on the engine temperature, closes or opens the damper as needed, enriching the mixture when starting the engine. If this automation works, you can try manual manipulation of the air damper, but there are a lot of options and there are no universal tips. Before starting any manipulations, connect and secure the previously disconnected fuel hose. You don't have to install the air filter yet. If it starts, let the engine warm up and God bless you (after returning the air filter to its place).. If, when checking the fuel supply with a fuel pump, it turns out that gasoline does not come out of the hose or the stream is very thin, the cause must be sought in clogged pipelines, a fine fuel filter or the gas tank itself - you can easily demonstrate your skill by pumping the gas line with a tire pump in the direction opposite to the movement of gasoline, i.e. from the carburetor to the tank. Booming, gurgling sounds should be heard in the tank.
With a fine fuel filter everything is simple. Although on almost all modern models it is made in a transparent case, the degree of its contamination cannot be visually determined. A dirty filter will allow the engine to start, but will not allow it to drive normally. If it's completely clogged, you won't be able to start the engine. The most effective check: remove the filter and, if you don’t have a new one, temporarily replace it with a suitable tube, for example, the housing of a ballpoint pen, preferably transparent - you can see how gasoline flows. Do not try to clean the filter - the sealed (or sealed) housing cannot be disassembled.
If you come to the conclusion that your car’s fuel pump is not working, and you don’t have a spare one at hand – “Take another car...”.
We left a rare, but most unpleasant diagnosis for last. If the starter is working normally, you have already spent a lot of time and made sure that the ignition and power are in perfect order, but the car, nevertheless, does not start - it is worth inspecting the camshaft drive belt. However, decide for yourself, this check can be carried out at the beginning, especially if the engine has already passed more than 60 thousand. The difficulty is that you will have to remove or at least partially bend the upper part of the plastic casing covering the belt. Perhaps the teeth of the belt were cut off - belts, like people, lose teeth from old age. In this case, the camshaft does not rotate and the engine will not work. It is clear that a toothless belt requires replacement (those who have a car with a chain camshaft drive do not face this problem). The procedure for replacing the belt is not complicated, but it is troublesome. Carried out in a hospital. It’s good if everything is limited to replacing only the belt, and not bent valves or the entire cylinder head - this also happens.
About the causes of atherosclerosis
Let's try to explain why the circulatory system of a car is sometimes affected by “atherosclerosis”. Gasoline is the lifeblood of the car. And the blood must be clean and flow through clean vessels. And the fact that “cholesterol” accumulates in blood vessels beyond the permissible limit is, as a rule, our own fault. Do you often use a canister to add gasoline to your tank? If so, then the chances of clogging the fuel line and filters increase, especially if your funnel does not have a mesh. Debris, rust, sand usually accumulate in the canister, and if the inside of the canister is painted, then paint particles. It is clear that the smaller the amount of intermediate containers used on the way of gasoline from the dispenser to the tank, the better. Oddly enough, even at the most seedy gas station there is less dirt in the tanks in specific terms than in a “home” canister. The scourge of our gas stations is not so much dirt as water. But here we are powerless. In our memory, only one swindler was burned by diluting gasoline, and even then not with water, but with donkey urine, and not in life, but in the movies (see “Gentlemen of Fortune”). So you'll have to put up with it. However, in order not to add water to domestic diluted gasoline yourself, try to always keep the tank full. Condensation accumulates in an incomplete tank, especially in the off-season, when sudden temperature changes occur.
Fewer parasites
It is worth saying a few words about the battery. Since it is maintenance-free on most modern cars, there is no point in providing operating instructions here. We will give just a few additional tips on how to keep your battery viable longer. Don't get carried away with stuffing your car with additional energy consumers. The fact that a certain reserve is provided in the energy balance of the car, allowing two or three “freeloaders” to connect, does not mean that you can hang six horns and ten fog lights on the car - have a sense of proportion. In addition, if you connect unintended connections yourself, there is a high probability of damage to the insulation. And in general, as practice shows, any, even the most qualified, surgical intervention in the electrical wiring of a car sooner or later makes itself felt. Troubles.
If your battery is dying, try not to rev the engine during numerous stops in the city. Nothing abuses the battery more than frequent use of the starter.
And lastly (this applies not only to the battery, but to all electrical equipment in general). Remember: all terminals, contacts, wire tips must be dry and clean and fit well to their “destination points”. Dirty, oily insulation breaks through sooner or later, and burning and oxidation of any contact surface can serve as the only (and sufficient) reason for the failure of the ignition system. Or a fire.
We can stop here. Meticulous car enthusiasts have undoubtedly noticed some of the superficiality of our advice. We admit that we deliberately do not want to go deeper into the jungle. Not to provoke you into self-medication - it does not lead to good. Understanding the nature of pain in the lower abdomen on the right does not mean that you yourself should remove your appendix. But you must accurately describe the symptoms of appendicitis to your doctor. Helps the treatment a lot.
What is the reason? (unexpectedly the starter failed)
I was driving myself. went to a roadside store. I sit down and the starter doesn’t turn. at all. went. I looked at the contacts. kicked the wheel. doesn't spin. Pushed started. I drove 100 m. For the sake of experiment, I tried to crank the starter. works. as if nothing had happened. There were no problems before this. the starter is new. The ignition switch is new. The battery is in very good condition.
where to dig? Otherwise, I don’t smile at the parking lot to carry the car in my hands in case of a sign of failure.
Check the starter relay There is a relay block under the steering column on the left under the upholstery. find the starter relay (No. 30) orange-orange-blue-black-double-margin and try to replace it with another one, for example, heated rear window (No. 25) orange-black-gray-green-orange-black if it works, that’s it.
The relay could burn out - sometimes there is contact and sometimes there is no contact, throw away the old one, buy a new one
If the starter was old, then it’s quite possible that one branch of the rotor burns out and if it stands up in such a way that the brush hits this “dead” plate of the rotor commutator, then the starter just clicks. But if you click many times (about 5-10) or start the car in any way, then the vibrations, as a rule, start it with a bang. In addition, there can be a lot of these “dead” spots (I used to have 3 of them on the 412)
But this is most likely not your case because... your starter is new.
This is how we started the ZIL in the army: one turns on the starter, and the other pulls it “crookedly”.
Then the starter turns on its own.
Re: This is how we started the ZIL in the army: one turns on the starter, and the other pulls it “crookedly”. > > Then the launcher turns on its own. > > :o)
+++ And the crooked one knocks out teeth and tears off hands :-))
Source
Fuel rail
On the ramp next to regulator 5 there is a control fitting 3
It is closed with a cap, which is unscrewed, and then carefully pressed on the spool
Ramp drawing
If fuel flows, it means it is entering the ramp. But perhaps the necessary pressure is not created. Reasons: clogged filter cylinder, pump malfunction, etc.
If fuel does not flow, notice whether the pump turns on when the key is turned to the “I” mark. When the ignition is turned on “cold”, the pump should run for 10 seconds.
Additional mounting block
Know that fuse F2 and relay P4 are responsible for turning on the pump. There is also a main relay P5, and all these elements are located in a block mounted on the same bracket with the ECM (see photo).
Case from practice
What happens if water gets into gasoline? In the summer - nothing. And in winter, the power supply system can become clogged with ice. All elements are at risk, from the pump to the injector valves!
Fuel supply line filter
A small amount of water is always present in fuel. If this number is increased, this is what happens:
- The first start always goes without problems;
- Then, after leaving the car in the parking lot, after 2-3 hours the owner will no longer be able to start the engine without repairs.
All of the above applies to any injection internal combustion engine, including the VAZ-2123. And the “first candidate for failure” will be the fuel filter. It is located under the bottom of the Chevrolet Niva and is encased in aluminum (see photo). However, this is done on many cars.
Pumping up excess air
One smart book says that the engine may not start due to the fact that the intake manifold draws in too much air. This means you need to check the fastening of all pipes. But not only.
Vacuum brake booster
The source of “excess air” may be a faulty VUT. The starter turns, the engine on the Chevrolet Niva does not start, and the reason, it turns out, must be sought in the brake system!
We won't look for anything. Let's do it simpler:
- The vacuum supply hose is removed from the amplifier side (see drawing);
- The hole in the hose is closed with a finger and one test run is performed;
- The engine starts, which means the cause has been found.
That's the whole trick. We wish you success!
Removing and installing the starter
The starter on a Niva rarely has to be changed, but if you have a need for this, the instructions below will be very useful. First, it’s worth considering the necessary list of tools with which doing all this will be very simple and will not take much time.
Detailed guide to replacing the starter on Niva VAZ 2121
- First of all, open the hood of the car and disconnect all the power wires from the starter structure. To do this, you will need to unscrew the nuts that secure the terminals with a 10mm head. It is impossible to get there with a regular wrench, so a ratchet with a head and an extension would be an ideal option. We feel for the terminal nuts with our hands and, using the ratchet handle, unscrew them one by one.
- To show everything clearly, look at the photo below; the key is inserted just under the Niva’s exhaust manifold:
- And after that, you can freely disconnect the power wires, which are not attached to anything else:
- Next, take a 13mm wrench, it’s more convenient to use a spanner, and unscrew the 2 bolts securing the starter housing to the engine. But there may be three of them; personally, in my example there were only 2.
- And then you can shoot it to the right, as clearly shown in the photo below:
- And turning it a little to the side, we take it out without any problems:
As you have seen for yourself, there is nothing complicated in this repair, the main thing is that you have all the necessary tools at hand and then any work on your Niva will be done quickly and without unnecessary nerves.
We install the VAZ 2121 starter in the reverse order of removal. If necessary, we replace it with a new part.
Loading ..
So I immediately unscrewed it. Now you can unscrew the starter. The bottom bolt is fairly easily accessible from below. I unscrewed it with a small ratchet. I unscrewed the remaining two bolts from above. This is what the starter looks like from above. Here I already used a spanner.
The key part of the key is slightly bent, otherwise it would be impossible to get to these bolts. The middle bolt is also more or less accessible.
The power wires that are connected can be cleaned; perhaps the reason that the engine starts unstably lies in poor contact. After it has been removed, you can carry out diagnostics and subsequent repairs. How to make repairs yourself. When the starter is removed, you can try to make repairs yourself or take it to a specialized service center.
If you have experience and an idea of how everything works and you, for example, are sure that the cause of the breakdown, for example, lies in a malfunction of the solenoid relay, then you can start repairing it yourself. Before dismantling the starter, it must be removed completely or, by unscrewing the lower mounting bolt, moved to the side. The starter mount consists of three bolts, by unscrewing which you can remove the Chevrolet Niva starter from the bottom of the engine.
The lower fastening bolt is unscrewed from below using a ratchet wrench. Access to it is simple and does not require much effort.
The remaining two bolts are unscrewed from above using spanners with a bent head or heads with an extension with a cardan. The most problematic is the top bolt, which requires a special approach with a curved key. The key fits onto it quite easily, but to unscrew it the lever travel is small, so you have to turn it for quite a long time.
After unscrewing all three fastening nuts, it is necessary to dismantle or bend its thermal protection. From the side of the box, it will be enough to simply bend the tin, and from the bottom you will need to unscrew the bolt securing it. However, you won’t be able to see it, since it is covered with a heat-protective casing on top. It is also impossible to see it from below, since the crankcase protection covers it there.
Possible malfunctions if the starter does not turn
| Possible malfunction | Diagnostics | Solution |
| Battery is discharged | The starter clicks but does not turn. The voltage at the battery terminals with consumers turned on is less than 12 V | Charge or replace the battery |
| Oxidation of battery terminals or poor connection | The starter clicks but does not turn. When the starter is turned on, the voltage at its terminals drops much more than at the battery terminals | Clean the contacts, lubricate with Vaseline and tighten well |
| There are problems in the wiring of the starter traction (retractor) relay, ignition contacts 30 and 50 do not close. | When turning the key there is no click under the hood (the relay does not work). Check the presence of voltage at the control contact of the solenoid relay | Clean the contacts, lubricate with Vaseline and tighten well. Replace the ignition switch |
| The starter solenoid relay is faulty. | When you turn the key, there is no click under the hood (the relay does not work), but there is +12 V at the control contact of the solenoid relay. The starter spins when closed with a screwdriver. The starter does not turn only when it is hot (when the engine is warm) | Replace starter relay |
| Solenoid relay contacts are oxidized, poor ground contact | When you turn the key there is a click under the hood, but the starter does not turn. Using an ohmmeter, check the resistance of the “battery - starter” circuit, as well as the ground wire. If the circuits are OK, remove the starter and check the operation of its relay | Clean the contacts, lubricate with Vaseline and tighten well. Replace the solenoid relay |
| Open or short circuit in the holding coil of the solenoid relay | When the starter is turned on, a cracking noise is heard from under the hood. The battery voltage is within normal limits. The relay is checked with an ohmmeter or by its excessive heating | Replace starter relay |
| Burnt starter commutator, stuck brushes or severe wear | The starter does not turn or turns slowly. With the starter removed, check the pressing force of the brushes to the commutator, their residual height, and wear of the commutator | Repair the starter. If the commutator is very worn, replace the starter. |
| Open or short circuit in the starter armature winding | The starter does not turn or turns slowly. The serviceability of the winding is checked with an ohmmeter or by darkening of the insulation | Replace starter |
| Freewheel slipping | The starter spins, but the flywheel is stationary | Replace clutch or starter |
| The ring gear rotates on the flywheel | The starter spins, but the flywheel and crankshaft are stationary. There is a squeal, a howl from the clutch housing | Replace flywheel |
| The engine or attachments are jammed | Check the rotation of the crankshaft, alternator pulleys, coolant pump and power steering pump | Repair the engine or its attachments |
| The starter drive gear or flywheel ring teeth are damaged | Visual inspection after removing the starter | Repair or replace starter, replace flywheel |
Have you encountered the problem of starting the engine when the starter does not turn? What was the cause of your problem? Let us remind you that other instructions for repair and operation of Lada 4×4 can be found in this category or by content.
Keywords: 4x4 starter | 4x4 engine | 4x4 ignition system | 4x4 power system | ECM 4x4
Share on social networks:
Found an error? Select it and press Ctrl+Enter..
No fuel supply
Often the engine does not start if the fuel supply system . Attempts to start such an engine are usually accompanied by popping noises, shots in the muffler, the appearance of black smoky smoke and a strong smell of gasoline from the exhaust pipe. A malfunction in a carburetor engine is usually determined visually.
It is enough to shine a flashlight into the primary and secondary chambers. If there are traces of gasoline on the walls, and fuel does not spray out of the accelerator pump nozzle, but flows out in a thin stream, it is necessary to urgently identify and eliminate the malfunction. To accurately determine a malfunction in an injection engine, you need special equipment connected to the vehicle’s diagnostic connector, capable of reading error codes and faults .
To determine the serviceability of the injectors, you should disconnect them from the ramp, and then ask an assistant to crank the engine with the starter. If gasoline flows out of the injector nozzle in a thick stream or does not flow out at all, the injector should be washed in an ultrasonic bath or replaced.
To avoid various surprises along the way, it is recommended that you always check all engine systems before leaving, eliminating minor faults. For example, loose contact, friction of wires and hoses on various protrusions, leaks of oil and other liquids, etc.
In this case, you can not only eliminate minor breakdowns, but also identify and prevent more serious ones, which can lead to significant expenditure of effort and money. Always stay mobile. Good luck on the roads!
( 1 rating, average 5 out of 5 )
Modification: heat protection casing
As a rule, the starting device on the Niva and other domestic cars begins to deteriorate like this. At first it is difficult to start the engine, then a whistle appears. When parked for a long time, the car does not start at all, and the battery quickly runs out. If the device is not diagnosed in such a situation, the problem will get worse. There are usually two reasons why the starter is not checked immediately:
- battery - if replaced, the battery will withstand a faulty starter for some time, and the engine will start properly;
- wires and terminals are cleaned of rust, which improves the current supply and plant, but also for a short time.
Broken bendix teeth or flywheel ring
This problem usually appears on cars with high mileage, especially after a recent flywheel replacement or repair of the starting mechanism. When you turn the key, the starter makes strenuous attempts to start the engine: it clicks, buzzes (sometimes with a squeal), but the internal combustion engine does not start. The problem here is the engagement.
Broken bendix teeth
The flywheel teeth (on most cars) are beveled to help the Bendix gear engage more smoothly. If there is significant wear, jamming of the traction relay fork, wedging or wear of the gear itself, it does not reach the point of reliable contact and does not fit along the relief of the teeth. Slipping leads to more wear and, since the part is not repaired, to unscheduled replacement.
If, when starting the internal combustion engine of a car, any extraneous sounds arise from the starter, this is a reason to check it as soon as possible. Otherwise, he will “remind himself” on the road.
What kind of starter can be installed
- Motorherz STB0373RB. This company is a large supplier of auto parts that has its own production. It sells hydraulic power steering pumps, turbochargers, starters, generators, steering racks, repair kits, etc. The cost of a starter unit for a VAZ 2131 is 3,940 rubles.
- ATE is a plant located in the Moscow region, engaged in the creation of electrical equipment for domestic cars. The ATE-1 starter unit is an inexpensive product that fully justifies its cost. The price of a starter for a VAZ 2131 car is 3250 rubles.
- The production of a starter for this vehicle is also carried out by the Stary Oskol Automotive Equipment Plant. The history of the enterprise goes back more than 55 years. The cost of a starter unit for a VAZ 2131 is 3,400 rubles.
In some cases, the car will not start because there is a malfunction in the power plant. The main reasons may be: thick oil that does not match the season, as well as jamming of the power unit shafts. In most cases, the starter relay fails.
The solenoid relay is replaced if:
- There is a break in the relay winding. It is worth considering that the solenoid relay is equipped with two windings: a starting winding (from the control contact to the output power terminal) and a holding winding (from the control contact to the relay body). It is also possible that an interturn short circuit may occur in the windings. The main symptom of this malfunction is the appearance of a strong smell of burnt insulation. The windings are checked on the table by applying voltage from the battery: the “negative” contact is connected to the housing and the output power terminal, and the “positive” contact to the control contact.
- If the voltage drop across the solenoid relay is more than 0.3-0.5 volts. This phenomenon indicates that the power contacts have burnt out.
- If an external inspection indicates the presence of burnt areas on the plastic cover, near the power contacts.
Selection of components
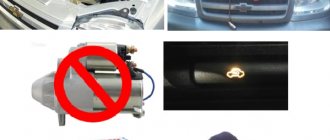
The original starter is produced by LADA and comes in the original blue packaging. It is marked with article number 21214-3708010-01. The cost of this part is from four to five thousand rubles, depending on the store.
To avoid stumbling upon a fake, carefully examine the box. The presence of extraneous logos, absence of an article number on the box, or color mismatch is unacceptable. The low price should alert you.
Alternative options are produced by companies such as Fenox, Krauf, Valeo. The listed brands are distinguished by high quality products and fairly affordable prices. The price for starters varies from 2200 to 4700 rubles.
What original or analogue can I supply?
If the starter does not turn, you can simply replace it. Typically, in a store, the buyer has a choice between two options:
- original;
- analogue
They differ not only in their quality, but also in their durability. The easiest way to study visual differences is in the photo.
But the cost of the original starter is usually at least 3.5 thousand rubles. That’s why many people opt for analogues. There are many other manufacturers on the Russian market that are not certified by AvtoVAZ. If possible, you should choose well-established brands.
It is important to remember: all starters have different resources and may differ in size. It is advisable to arm yourself with a ruler and tape measure before going to the store.
This will allow you to avoid purchasing a device that is not suitable in size. Some manufacturers produce equipment that can be installed on various vehicle models. The price depends significantly on the manufacturer.
Before purchasing an analogue, you need to familiarize yourself with the brand. For example, Bosch has proven itself to be good. The equipment he produces is durable and does not cause difficulties in repair. There is a list of manufacturing companies recommended by AvtoVAZ itself. It is advisable to familiarize yourself with all the nuances and subtleties of installation in advance. This will allow you to select it at the start and install it later yourself.
This is interesting: High input voltage of the IAT sensor - error P0113 VAZ
How to remove the starter thermal cover on a Chevrolet Niva
Based on the experience of Chevrolet Niva owners, it turns out that there are two ways to dismantle the ill-fated casing - pick it out with a pry bar and dispose of it, but then the starter will be left without protection, or spend several hours dismantling it.
The starter is more expensive, so we proceed to dismantling using this technology:
- It is imperative to de-energize the car by disconnecting the negative terminal of the battery or turning off the mains switch.
- Remove the engine protection. To do this, you need to install the car on a viewing hole or a lift.
Now that we have the casing in our hands, we assess the degree of damage - if the eyes are simply broken off, we can either weld them well to the casing or put them on bolts, this is more reliable.
Some recommend laying a layer of asbestos between the starter and the shield, but if there is a gap in this place, you can count on some kind of cooling. Before putting the starter protection in place, you need to make sure that you have new exhaust pipe gaskets (on the manifold side and on the muffler side) and new bolts and nuts on hand. Only now you can put everything back together in reverse order.
Option without air conditioning
In some cases (if the car does not have air conditioning), you can do without dismantling the exhaust pipe. To do this, you need to unscrew the engine mount and jack it up, resting one end of a wooden block on the exhaust manifold closer to the cylinder block, and the other on the jack.
So you can try to bring the heat shield back, besides this there is another way - dismantling the exhaust manifold. Without a collector, the shield can be easily removed.
Good luck to everyone and enjoy your travels!
How to remove the heat shield without removing the starter?
How to remove the heat shield without removing the starter?
Post by Niva867 » 08 Jun 2012, 16:52
There is a problem. You need to get to the wires to the starter, remove them, and clean the contacts in order for it to start. I don't need to remove the starter at all, I just need to remove the heat shield. The heat shield is secured with 3 bolts, 2 at the top, 1 at the bottom. I unscrewed them. But the heat shield cannot be pulled out. I tried it in front, and back, and up and down. Then he turned it around and went to drink beer.
Post by Anton » Jun 08, 2012, 04:57 pm
Re: How to remove the heat shield without removing the starter?
Post by Niva867 » 08 Jun 2012, 20:18
If you move the shield forward, it will rest against the hose. (the size of the hose is the same as from the expansion tank to the radiator) Does this hose need to be removed?
Re: How to remove the heat shield without removing the starter?
Post by Captain » 09 Jun 2012, 02:32
Re: How to remove the heat shield without removing the starter?
Post by Niva867 » June 14, 2012, 07:07 pm
Why didn’t anyone tell me that the battery needs to be turned off? There was a firestorm there today.
In short, I removed the starter, the bottom bolt was the easiest, the middle one the most difficult. He unplugged it and pulled it out. Then, using pliers, I bent and broke the screen, took it out and threw it away.
Now if something happens to the starter, it will be easy to loosen the wires!
Ignition
If the previous steps did not help, proceed to checking the ignition. The most common problem occurs due to moisture accumulation in the distribution cap. Do the following:
- Remove the cover and inspect for condensation.
- If there is one, wipe with a dry cloth. Before wiping, check the lid for cracks - if there are any, just throw it away and buy a new one.
If everything is fine with the cover, check the wires for electrical conductivity. Bring the tester to the insulation and wait for a successful outcome. It will be so if you do not detect current: with normal wires, the insulation will not allow it to pass through.
Starter on Niva Chevrolet
VAZ 2107 starter: device, fault diagnosis, repair and replacement
It happens that the car starts intermittently or does not start at all. One of the common reasons for this may be a faulty starter on a Chevrolet Niva. To accurately understand whether there is a problem or not, you need to dismantle it and carry out diagnostics.
This part is a direct current electric motor and is activated by a permanent magnet combined with a planetary gearbox and relay. Before dismantling, it is advisable to understand whether this is the reason why the power unit does not want to start. This can be understood both by its appearance by conducting diagnostics and by replacing the battery with a new one.
Diagnostics
- All connections between the battery and the starter should be checked, as if there is poor contact there may not be enough power to crank the crankshaft. This problem can be solved by cleaning the contacts.
- It is necessary to check the battery, and if it is faulty, replace it
Replacement
If you are wondering how to remove the starter on a Chevrolet Niva, then you will find the answer to this question below:
- First of all, to prevent a short circuit, disconnect the battery
- The crankcase has a protection that needs to be removed
- Unscrew several bolts that secure the starter.
- Removing thermal protection
- Pull the part to be replaced towards you and disconnect the wires from it
- We clean the power wires since they could be the cause of unstable operation
When the part has been removed, you can diagnose it and try to repair it.
If you decide to try to make repairs, first of all pay attention to the planetary mechanism; you can understand the condition of the parts of this unit by disassembling it; just unscrew a few bolts. Most craftsmen claim that this mechanism cannot be repaired and in case of breakdown it is better to immediately replace it with a new one.
Most craftsmen claim that this mechanism cannot be repaired and in case of breakdown it is better to immediately replace it with a new one.
Retractor
To ensure that the starter does not experience additional loads, a special Niva Chevrolet starter relay is installed, it is also called a solenoid relay, consisting of:
When power begins to flow, the armature, under the influence of an electromagnetic field, begins to compress the spring, which leads to the rotation of the bendix. When the engine starts, the power is turned off and the spring relaxes.
Silence when trying to start the engine
The Niva crankshaft cannot be turned by the starter.
There may be several reasons:
- Blown fuse.
- Poor contact between battery terminals.
- The battery is completely discharged.
- Failure of the starter solenoid relay.
- Failure of the intermediate relay that switches the starter circuit.
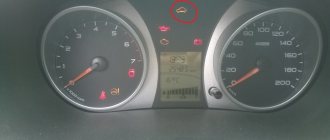
First of all, you should pay attention to the dashboard. When you turn on the ignition or the main electrical circuit in the engine, the lamps should light up on the dashboard or information should appear on the on-board computer, if we are talking about the Chevrolet Niva.
If this does not happen, the cause should be sought in the fuse box and in the battery contacts. During operation, oxides may form on these contacts, increasing the resistance. Loose contact connections can lead to sparking and burning.
If no blown fuses are found, you should check the reliability of the “+” contacts of the battery with the central wire and the “-” contacts with the vehicle ground.
To eliminate the malfunction, be sure to replace the fuses and clean the contacts. It would be a good idea to acquire even the cheapest tester in order to quickly check the presence of voltage in the electrical circuits of the car.
Main block with fuses and relays
This block is located to the left of the steering column and is closed from below with a lid. To get to it, you need to tighten 2 screws, then press the top edge of the cover and gradually free it from all fasteners. The block that appears will be held on a special bracket. The fuse diagram itself and the number of elements on it may vary depending on the configuration and year of manufacture.
photo of the fuse box in a Chevrolet Niva
Scheme - option 1
Scheme - option 2
- Explanation of fuses
- F1 (5 A) - license plate lamps, instrument panel lamps, indicator light on the dashboard, engine compartment lamp, additional brake light lamp, left side marker lamps.
- If any of the listed lamps do not work, check this fuse and the lamps themselves, their connectors and wiring.
F2 (7.5 A) - low beam in the left headlight. Similar to relay K4.
F3 (10 A) - high beam in the left headlight, indicator lamp for turning on the high beam headlights on the dashboard. Similar to relay K5.
F4 (10 A) - backup fuse.
F5 (30 A) - front door electric windows and their relays. If, when operating the power window, the window goes down but not up (or vice versa), check the button on the door.
When lowering and raising, the polarity and direction of rotation of the motor are different. It could also be a problem with the window lift mechanism. To get to it, you need to remove the door trim. Check that the mechanism does not bite anywhere and that the gears are intact, without broken teeth.
If there are problems, you can replace the entire power window drive with a new one.
F6 (15 A) - door lock control unit. If one or more doors stop opening, check this fuse. The issue may be in the central locking, control unit, as well as the mechanisms themselves, rods and door locks. If you have no experience, it is better to contact a car service.
F7 (20 A) - sound signal and its relay, cigarette lighter. If the horn does not work, check this fuse, the steering column contacts and the wiring; the contacts may have oxidized and the wiring may have become frayed.
Bushings
Bushings (aka bearings) are located in front and behind the starter. They are responsible for rotating the device shaft. If these elements are worn out, the starter will start clicking, but will not turn. Problems with bushings can also be caused by the fact that the starter is installed incorrectly, that is, it does not occupy the desired position along the axis. Or the winding could short-circuit. In this case, see the previous paragraph.
Healthy! Also, problems with the bushings will be indicated by “heavy” cranking of the starter, even if the engine is well warmed up.
Although many do not consider bearing failure to be a serious failure, they need to be replaced. Otherwise, the starter shaft will jam, which in turn can cause a fire.
Read news about the new Niva
- Chevrolet Niva starter relay where is it located
- Purpose of fuses, relays and their replacement Niva VAZ 21213, 21214, 2131 lada 4×4
- Diagram and location of the fuse box Niva VAZ-21213 and 21214
- Diagram and location of the fuse box Niva VAZ-21213 and 21214
- About engines for VAZ 2121 Niva
- Where is the starter relay located in the field?
- Fuses and relays (location and purpose of fuses and relays) Niva Chevrolet
- Chevrolet Niva fan does not turn on